Topics on Routing a Web Page

Topics on Routing a Web Page
Details on Routing
A Template File as Target
We already know that if you want to display a simple/short line of text or just a couple of lines of text, you can specify that text as the value of a template property of the object passed to a when() method of a $routeProvider provider. Here is an example:
var app = angular.module('webPageRouting', ['ngRoute']);

app.controller('HistoryController', [function () {
    this.title = 'Historical Events';
    this.content = 'A short review of the history of this country.'
}]);

app.config(function ($routeProvider) {
    $routeProvider.
        when('/Geography', {
            template: '<h1>Geography</h1><p>Here is a review of moutains and valleys.</p>'
    })
});
If you are planning to display a few or many lines of text, it is recommended that you create a separate HTML file for such text.
![]() Practical Learning: Introducing Routing
Practical Learning: Introducing Routing

body {
    background-color: #FFFFFF;
}

.bold              { font-weight:    600;     }
.maroon            { color:          #800000; }
.topic-title       { color:          maroon;
                     padding-bottom: 0.25em;
                     border-bottom:  1px solid gray; }
.left-right-border { border-left:    1px solid gray;
                     border-right:   1px solid gray; }
.common-font { font-family: Georgia, Garamond, 'Times New Roman', serif; }var appTicketSystem = angular.module('trafficTicketSystem', []);
appTicketSystem.directive('mainTitle', function () {
var ticket = {
restrict: "E",
template: "<h2 class='topic-title maroon common-font text-center bold'>Traffic Tickets Management</h2>"
};
return ticket;
});
appTicketSystem.directive('camerasSummary', function () {
return {
restrict: "E",
template: "<p>This is a description of the cameras used by our traffic system and where they are located.</p>"
}
});
appTicketSystem.directive('vehiclesOperators', function () {
return {
restrict: "E",
template: "<p>Here is a general introduction and information that vehicle operators should know.</p>"
}
});
appTicketSystem.directive('trafficViolations', function () {
return {
restrict: "E",
template: "<p>This section gives all types of information for the current traffic violations in our system.</p>"
}
});using System.Web.Optimization;
namespace TrafficTicketsManagement3
{
public class BundleConfig
{
// For more information on bundling, visit https://go.microsoft.com/fwlink/?LinkId=301862
public static void RegisterBundles(BundleCollection bundles)
{
bundles.Add(new ScriptBundle("~/bundles/jquery").Include(
"~/Scripts/jquery-{version}.js",
"~/Scripts/angular.js",
"~/Scripts/PresentationManagement.js"));
bundles.Add(new ScriptBundle("~/bundles/jqueryval").Include(
"~/Scripts/jquery.validate*"));
// Use the development version of Modernizr to develop with and learn from. Then, when you're
// ready for production, use the build tool at https://modernizr.com to pick only the tests you need.
bundles.Add(new ScriptBundle("~/bundles/modernizr").Include(
"~/Scripts/modernizr-*"));
bundles.Add(new ScriptBundle("~/bundles/bootstrap").Include(
"~/Scripts/bootstrap.js"));
bundles.Add(new StyleBundle("~/Content/css").Include(
"~/Content/bootstrap.css",
"~/Content/site.css",
"~/Content/TrafficTicketsManagement.css"));
}
}
}using System.Web.Mvc;
namespace TrafficTicketsManagement3.Controllers
{
public class HomeController : Controller
{
public ActionResult Index()
{
return View();
}
public ActionResult About()
{
ViewBag.Message = "Your application description page.";
return View();
}
public ActionResult Contact()
{
ViewBag.Message = "Your contact page.";
return View();
}
public ActionResult PresentationsManagement() => View();
}
}@{
ViewBag.Title = "Tickets Management";
}
@Scripts.Render("~/bundles/jquery")
<div ng-app="trafficTicketSystem">
<main-title></main-title>
<div class="row common-font">
<div class="col-md-4">
<cameras-summary></cameras-summary>
</div>
<div class="col-md-4 left-right-border">
<vehicles-operators></vehicles-operators>
</div>
<div class="col-md-4">
<traffic-violations></traffic-violations>
</div>
</div>
</div>
An HTML File for Routing
To use a webpage that can display a significant content, create an HTML file.
![]() Practical Learning: Creating HTML Files
Practical Learning: Creating HTML Files
<!DOCTYPE html>
<html>
<head>
<meta charset="utf-8" />
<title></title>
</head>
<body>
<p>We use the fastest, the most accurate, and the most reliable traffic cameras on the market. Our machines go through thorough and regular inspections approved by both the government and the private industries.</p>
</body>
</html><!DOCTYPE html>
<html>
<head>
<meta charset="utf-8" />
<title></title>
</head>
<body>
<p>Our database includes a detailed list of the drivers and vehicle owners of our county. This thorough planned and well-designed system makes it easy to search and find the necessary information.</p>
</body>
</html><!DOCTYPE html>
<html>
<head>
<meta charset="utf-8" />
<title></title>
</head>
<body>
<p>Our traffic system is primarily concerned with the safety of our citizens and guests. To achieve these goals, we issue tickets only when necessary and whether the well-being of our constituents is at stake.</p>
</body>
</html>Setting an HTML Template File for Routing
To display the content of a file in a section of a webpage, create a $routeProvider and call its when() method as seen with custom directives and Component. Add a templateUrl property to the object of the $routeProvider.when() method. Set the value of that property as the name or path of the file. If the file is in the same folder as the main document, specify its name and extension. Here is an example:
<!DOCTYPE html>
<html>
<head>
<meta charset="utf-8" />
<title>Country's Review</title>
<script src="angular.js"></script>
<script src="angular-route.js"></script>
</head>
<body ng-app="webPageRouting">
    <h1>:: Country's Review ::</h1>
    <p><a href="#!History">Historical Events</a></p>

    <ng-view></ng-view>

<script type="text/javascript">
    var app = angular.module('webPageRouting', ['ngRoute']);

    app.config(function ($routeProvider) {
        $routeProvider.when('/History', { templateUrl: 'History.html' })
    });
</script>
</body>
</html>
If a webpage is in a sub-folder of the folder that contains the central page, provide its relative path. Here are examples:
<!DOCTYPE html>
<html>
<head>
<meta charset="utf-8" />
<title>Country's Review</title>
<script src="../Scripts/angular.js"></script>
<script src="../Scripts/angular-route.js"></script>
</head>
<body ng-app="webPageRouting">
    <h1>:: Country's Review ::</h1>
    <div class="navbar-collapse collapse">
        <ul class="nav navbar-nav">
            <li><a href="#!History">Historical Events</a></li>
            <li><a href="#!Geography">Geographical Studies</a></li>
            <li><a href="#!State">State</a></li>
            <li><a href="#!Province/">Province</a></li>
            <li><a href="#!County/">County</a></li>
        </ul>
        <hr color="red" />

        <div ng-view></div>
    </div>

<script type="text/javascript">
    var app = angular.module('webPageRouting', ['ngRoute']);

    app.config(function ($routeProvider) {
        $routeProvider.
            when('/History', {
                templateUrl: 'History.html'
            }).
            when('/Geography', {
                templateUrl: 'Geography.html'
            }).
            when('/State', {
                templateUrl: 'State/Government.html'
            }).
            when('/Province', {
                templateUrl: 'Province/Government.html'
            }).
            when('/County', {
                templateUrl: 'State/County/Parks.html'
            })
    });
</script>
</body>
</html>
If the document is in a different folder, use HTML techniques to provide its path. Here is an example:
<!DOCTYPE html>
<html>
<head>
<meta charset="utf-8" />
<title>Country's Review</title>
<script src="../Scripts/angular.js"></script>
<script src="../Scripts/angular-route.js"></script>
</head>
<body ng-app="webPageRouting">
    <h1>:: Country's Review ::</h1>
    <div class="navbar-collapse collapse">
        <ul class="nav navbar-nav">
            <li><a href="#!History">Historical Events</a></li>
            <li><a href="#!Geography">Geographical Studies</a></li>
            <li><a href="#!State">State</a></li>
            <li><a href="#!Province">Province</a></li>
            <li><a href="#!County">County</a></li>
            <li><a href="#!Contact">Contact Us</a></li>
        </ul>
        <hr color="red" />

        <ng-view></ng-view>
    </div>

<script type="text/javascript">
    var app = angular.module('webPageRouting', ['ngRoute']);

    app.config(function ($routeProvider) {
        $routeProvider.
            when('/History', {
                templateUrl: 'History.html'
            }).
            when('/Geography', {
                templateUrl: 'Geography.html'
            }).
            when('/State', {
                templateUrl: 'State/Government.html'
            }).
            when('/Province', {
                templateUrl: 'Province/Government.html'
            }).
            when('/County', {
                templateUrl: 'State/County/Parks.html'
            }).
            when('/Contact', {
                templateUrl: '../ContactInfo/Forms/ContactUs.html'
        })
    });
</script>
</body>
</html>
Of course, you can also create and add a file for the otherwise() method. It would be specified as follows:
. . .

<script type="text/javascript">
    var app = angular.module('webPageRouting', ['ngRoute']);

    app.config(function ($routeProvider) {
        $routeProvider.
            when('/History', {
                template: '<h1>History</h1><p>The first part of this document provides a short review of the history of this country.</p>'
            }).
            when('/Geography', {
                template: '<h1>Geography</h1><p>Here is a review of moutains, valleys, rivers, and national parks of the country.</p>'
            }).
            otherwise({
                templateUrl: 'UnderConstruction.html'
            })
    });
</script>
</body>
</html>
![]() Practical Learning: Setting Up Files for Routing
Practical Learning: Setting Up Files for Routing
var appTicketSystem = angular.module('trafficTicketSystem', []);

appTicketSystem.directive('mainTitle', function () {
    var ticket = {
        restrict: "E",
        template: "<h2 class='topic-title maroon common-font text-center bold'>Traffic Tickets Management</h2>"
    };

    return ticket;
});

appTicketSystem.directive('camerasSummary', function () {
    return {
        restrict: "E",
        templateUrl: "/Presentations/Cameras.html"
    }
});

appTicketSystem.directive('vehiclesOperators', function () {
    return {
        restrict: "E",
        templateUrl: "/Presentations/Drivers.html"
    }
});

appTicketSystem.directive('trafficViolations', function () {
    return {
        restrict: "E",
        templateUrl: "/Presentations/TrafficViolations.html"
    }
});<!DOCTYPE html>
<html>
<head>
<meta charset="utf-8" />
<meta name="viewport" content="width=device-width, initial-scale=1.0">
<title>Traffic Ticket System :: @ViewBag.Title</title>
@Styles.Render("~/Content/css")
@Scripts.Render("~/bundles/modernizr")
</head>
<body>
<div class="navbar navbar-inverse navbar-fixed-top">
<div class="container">
<div class="navbar-header">
<button type="button" class="navbar-toggle" data-toggle="collapse" data-target=".navbar-collapse">
<span class="icon-bar"></span>
<span class="icon-bar"></span>
<span class="icon-bar"></span>
</button>
@Html.ActionLink("Traffic Ticket System", "Index", "Home", new { area = "" }, new { @class = "navbar-brand" })
</div>
<div class="navbar-collapse collapse">
<ul class="nav navbar-nav">
<li>@Html.ActionLink("Traffic Tickets Topics", "PresentationsManagement", "Home")</li>
<li>@Html.ActionLink("About Us", "About", "Home")</li>
<li>@Html.ActionLink("Contact TTS", "Contact", "Home")</li>
</ul>
</div>
</div>
</div>
<div class="container body-content">
@RenderBody()
<hr />
<footer>
<p class="text-center common-font">© @DateTime.Now.Year - Traffic Ticket System</p>
</footer>
</div>
@Scripts.Render("~/bundles/jquery")
@Scripts.Render("~/bundles/bootstrap")
@RenderSection("scripts", required: false)
</body>
</html>
body {
    background-color: #FFFFFF;
}

.bold               { font-weight:      600;     }
.blue               { color:            #0d3bcf; }
.maroon             { color:            #800000; }
.topic-title        { color:            maroon;
                      padding-bottom:   0.05em;  }
.left-border        { border-left:      1px solid gray;    }
.top-border         { padding-top:      1.05em;
                      border-top:       1px solid #0d3bcf; }
.right-border       { border-right:     1px solid gray;    }
.bottom-border      { border-bottom:    1px solid gray;    }
.tm-contents        { margin:           auto;
                      width:            600px;
                      height:           2.75em;
                      background-color: #084a90;
                      border:           1px solid black;   }
.menu-holder        { margin:           auto;
                      width:            550px;             }
.details-holder     { margin:           auto;
                      width:            400px;             }
.tm-list            { list-style:       none;              }
.tm-list li         { float:            left;              }
.tm-list li a       { padding:          8px;
                      display:          block;
                      text-align:       center;
                      color:            azure;
                      text-decoration:  none;
                      border-left:      1px solid #084a90;
                      border-right:     1px solid #084a90; }
.tm-list li a:hover { background-color: #1f88cf;
                      border-left:      1px solid white;
                      border-right:     1px solid white;   }
.common-font { font-family: Georgia, Garamond, 'Times New Roman', serif; }<h2 class="bold sub-title common-font blue">Traffic Cameras</h2> <p><span class="bold">Overview:</span> Our traffic ticket system uses the most precise and accurate cameras on the markets with the latest technologies and image development in terms of speed and resolution.</p> <p><span class="bold">Cameras Features:</span> Our cameras take their pictures and videos in the fractional time it takes regular cameras to act. For all red light and Stop Sign violations, we provide pictures and videos to meet the highest demanding requirements.</p> <p><span class="bold">Demonstrations:</span> We have various demonstrations of our cameras on our Web site. We also regularly conduct public demonstrations for various stakeholders. If you are interested in taking part of one of our demonstrations, please contact us to set up an appointment. The demonstration can be performed for an individual's interest or for a group.</p>
<h2 class="bold sub-title common-font blue">Drivers - Cars Owners</h2>

<p><span class="bold">Description:</span> Our primary goal in this county is to have safe, concerned, comfortable, but especially responsible drivers. We have street signs everywhere to keep our citizens alert. While our roads provide you with convenient ways to move around the county, we also urge our drivers and multiple vehicle operators to be considerate not only of their environment and surrounding but also of other people whether they are pedestrians or are driving. Consider that the roads are yours to share.</p>

<p><span class="bold">Contact Us:</span> If you have any issue or concerns about our traffic cameras or the traffic ticketing system, please don't hesitate to contact us. You can contact us individually, as a group, as an organization, or by an authority of your choice, by phone, email, a form on our Web site, or a mailed letter.</p>
<h2 class="bold sub-title common-font blue">Cars - Vehicles</h2>

<p><span class="bold">Sharing a Road:</span> The roads of our county are filled with many cars varying in categories of size, weight, speed, technologies, and type of use, etc. Probably the most important aspect to understand is that, on the road, a vehicle is renting, or rather sharing, a road with fellow drivers and sometimes non-attentive pedestrians.</p>

<p><span class="bold">Road Features:</span> The roads within our county are in different categories, including streets, roads, courts, avenues, boulevards, state highways, and interstates, etc. Of course, some roads are in better shapes than others. These aspects and other situations create interesting bonds among the cars that travel them, the people who visit them, and the environment.</p>

<p>We invite our residents and guests to make better use of their vehicles and roads.</p>
<h2 class="bold sub-title common-font blue">Violations Types</h2>

<p><span class="bold">A Violation by Category:</span> Our county legislation recognizes various types of violations that depend on steady or moving vehicles, a vehicle's relationship with pedestrians and other vehicles, etc.</p>

<p><span class="bold">Stop Sign:</span> When coming to a Stop Sign, a vehicle operator is required to stop completely regardless of anything else going on.</p>

<p><span class="bold">Speed:</span> In most streets and roads of our county, speed limit signs are clearing posted. Except for emergency vehicles, every car is required to obey those speed limits.</p>

<p><span class="bold">Red Light:</span> A red light is probably the highest signal of a dangerous situation. In fact, there are various types of infractions related to a red light. The most classic rule is that, when coming to a traffic signal that has a red light, whether steady or blinking, the vehicle must completely stop.</p>
<h2 class="bold sub-title common-font blue">Traffic Violations</h2>

<p><span class="bold">A Violation:</span> A violation is the act of breaking the law against one or more of the rules that regulate the circulation of cars on our roads. One example is a car that doesn't completely stop at a clearly posted Stop Sign. Another violation occurs when a vehicle drives through a flashing red light.</p>

<p><span class="bold">An Infraction:</span> The Traffic Tickets System (TTS) relies of sensitive and accurate traffic cameras positioned on certain roads of our county to monitor roads traffic. When a vehicle violates a certain rule, a traffic camera may take a steady photo and/or shoot a short video. At one time, a TTS panel (a group of people) reviews the photo(s) and/or video(s) to validate, approve, or reject the image(s).</p>

<p><span class="bold">A Citation:</span> Upon reviewing the results of a traffic violation (photo(s) and/video(s)), a panel of TTS technicians makes a decision. If there is conclusive evidence of a violation, a citation is sent to the home address of the vehicle.</p>
var appTicketSystem = angular.module('trafficTicketSystem', ['ngRoute']);

appTicketSystem.directive('mainTitle', function () {
    var ticket = {
        restrict: "E",
        template: "<h2 class='topic-title maroon common-font text-center bold bottom-border'>Traffic Tickets Management</h2>"
    };

    return ticket;
});

appTicketSystem.directive('camerasSummary', function () {
    return {
        restrict: "E",
        templateUrl: "/Presentations/Cameras.html"
    };
});

appTicketSystem.directive('driversTopics', function () {
    return {
        restrict: "E",
        templateUrl: "/Presentations/Drivers.html"
    };
});

appTicketSystem.directive('vehiclesOperators', function () {
    return {
        restrict: "E",
        templateUrl: "/Presentations/Vehicles.html"
    };
});

appTicketSystem.directive('violationsTypes', function () {
    return {
        restrict: "E",
        templateUrl: "/Presentations/ViolationsTypes.html"
    };
});

appTicketSystem.directive('trafficViolations', function () {
    return {
        restrict: "E",
        templateUrl: "/Presentations/TrafficViolations.html"
    };
});using System.Web.Mvc;
namespace TrafficTicketsManagement4.Controllers
{
public class HomeController : Controller
{
public ActionResult Index()
{
return View();
}
public ActionResult About()
{
ViewBag.Message = "Your application description page.";
return View();
}
public ActionResult Contact()
{
ViewBag.Message = "Your contact page.";
return View();
}
public ActionResult PresentationsManagement()
{
return View();
}
}
}@{
ViewBag.Title = "Traffic Management Topics";
}
@Scripts.Render("~/bundles/jquery")
<div ng-app="trafficTicketSystem">
<main-title></main-title>
<div class="right-border">
<div class="row common-font">
<div class="col-md-4 left-border">
<cameras-summary></cameras-summary>
</div>
<div class="col-md-4 left-border">
<drivers-topics></drivers-topics>
</div>
<div class="col-md-4 left-border ">
<vehicles-operators></vehicles-operators>
</div>
</div>
<div class="bottom-border"></div>
<div class="row common-font">
<div class="col-md-6 left-border">
<violations-types></violations-types>
</div>
<div class="col-md-6 left-border">
<traffic-violations></traffic-violations>
</div>
</div>
</div>
</div>
var owners = [ { drvLicNumber: '296 840 681',   firstName: 'Simon',    lastName: 'Havers',    address: '1884 Stewart Ln',       city: 'Kittanning',   county: 'Armstrong',  state: 'PA', zipCode: '15638' },
               { drvLicNumber: '273-79-4157',   firstName: 'Terence',  lastName: 'McConnell', address: '8304 Polland Str',      city: 'Meadowview',   county: 'Washington', state: 'VA', zipCode: '24361' },
               { drvLicNumber: 'A402-630-468',  firstName: 'Patrick',  lastName: 'Atherton',  address: '10744 Quincy Blvd',     city: 'Cumberland',   county: 'Allegany',   state: 'MD', zipCode: '21502' },
               { drvLicNumber: 'C-684-394-527', firstName: 'Sarah',    lastName: 'Cuchchran', address: '10804 Euton Rd',        city: 'Shawnee Land', county: '',           state: 'VA', zipCode: '24450' },
               { drvLicNumber: '928-37-4950',   firstName: 'Michael',  lastName: 'Atherton',  address: '663 Vernon Drv, NW',    city: 'Washington',   county: '',           state: 'DC', zipCode: '20012' },
               { drvLicNumber: '2938468',       firstName: 'Victoria', lastName: 'Huband',    address: '3958 Lubber Court',     city: 'Middletown',   county: 'New Castle', state: 'DE', zipCode: '19709' },
               { drvLicNumber: '851608526',     firstName: 'Patrick',  lastName: 'Whalley',   address: '10227 Woodrow Rd',      city: 'Shelbyville',  county: 'Bedford',    state: 'TN', zipCode: '38561' },
               { drvLicNumber: 'W639-285-940',  firstName: 'David',    lastName: 'Woodbank',  address: '9703 Abington Ave',     city: 'Hurlock',      county: 'Dorchester', state: 'MD', zipCode: '21643' },
               { drvLicNumber: 'S-283-942-646', firstName: 'Emilie',   lastName: 'Sainsbury', address: '4048 Utah Rd',          city: 'Denville',     county: 'Morris',     state: 'NJ', zipCode: '07961' },
               { drvLicNumber: '860586175',     firstName: 'Kelley',   lastName: 'Murray',    address: '8622 Rutger Farms Str', city: 'Rutger Farms', county: 'Macon',      state: 'TN', zipCode: '37122' } ];

var cars = [ { tagNumber: '8DE9275', drvLicNumber: '296 840 681',   make: 'Ford',     model: 'Focus',     year: 2000, color: 'Gray'   },
             { tagNumber: 'KLT4805', drvLicNumber: '2938468',       make: 'Toyota',   model: 'Corolla',   year: 2016, color: 'Red'    },
             { tagNumber: 'KAS9314', drvLicNumber: 'W639-285-940',  make: 'Cadillac', model: 'Escalade',  year: 2008, color: 'Black'  },
             { tagNumber: 'HAK3936', drvLicNumber: 'S-283-942-646', make: 'Chrysler', model: 'Crossfire', year: 2006, color: 'Red'    },
             { tagNumber: 'PER2849', drvLicNumber: '296 840 681',   make: 'Buick',    model: 'LeSabre',   year: 2012, color: 'Silver' },
             { tagNumber: 'MWH4685', drvLicNumber: '851608526',     make: 'Honda',    model: 'Accord',    year: 1998, color: 'Blue'   },
             { tagNumber: '971384',  drvLicNumber: '928-37-4950',   make: 'BMW',      model: '325i',      year: 2015, color: 'White'  },
             { tagNumber: '394815',  drvLicNumber: '273-79-4157',   make: 'Jeeep',    model: 'Wrangler',  year: 1996, color: 'Black'  } ];

var violationsTypes = [ { violationName: 'Speed',                description: 'Drivers are required to drive under posted speed limit.' },
                        { violationName: 'Stop Sign',            description: 'A driver is required to come to a complete stop at the Stop sign, even there is no other vehicle on the other street(s).' },
                        { violationName: 'Red Light Steady',     description: 'A vehicle must completely stop when the light is red.' },
                        { violationName: 'Red Light Flashing',   description: 'If a vehicle comes to an intersection that has a flashing red light, the vehicle must first stop completely, before proceeding.' },
                        { violationName: 'Red Light Right Turn', description: 'If a vehicle must make a right turn where the red light is steady, the vehicle must first completely stop before proceeding.' }];

var viewers = [ { cameraNumber: 'DGH-38460', make: 'Ashton Digital',        model: 'MPH-6000', location: 'Eastern Ave and Ashburry Drv'      },
                { cameraNumber: 'ELQ-79284', make: 'Seaside International', model: 'BL5',      location: 'Monroe Str and Westview Rd'        },
                { cameraNumber: 'MSR-59575', make: 'Ashton Digital',        model: 'MPH-6000', location: 'Concordia Blvd and Sunset Way'     },
                { cameraNumber: 'DHT-29417', make: 'Woodson and Sons',      model: 'NG200',    location: 'Temple Ave and Barclay Rd'         },
                { cameraNumber: 'AHR-41518', make: 'Seaside International', model: '442i',     location: 'Chesterwood Rd and Old Dutler Str' },
                { cameraNumber: 'HTR-93847', make: 'Ashton Digital',        model: '366d',     location: 'Monrovia Str at Moon Springs'      } ];

/* This function takes a violation type as argument and produces a simple violation name.
   The main purpose is to reduce the long names of some violations. */
function getViolationName(type) {
    if( (type === "Red Light Steady")   ||
        (type === "Red Light Flashing") ||
        (type === "Red Light Right Turn") ) {
        return "Red Light";
    }
    else {
        return type;
    }
}

// This function takes a violation type and creates some text that will display an explanation/description of the traffic violation to the driver.
function describeViolation(type) {
    if (type === "Red Light Steady")
        return "The vehicle drove through a steady red light. The law in our state requires that when a vehicle approaches a steady red light, it must completely stop and wait for the light to change to green";
    else if (type === "Red Light Flashing")
        return "The vehicle drove through a red light that was flashing (or blinking). The law in our state requires that if a vehicle comes to a flashing red light, whether it is at an intersection or not, the vechicle must first stop complete, the drive must observe around for pedestrians, animals, and other cars, and then cautiously";
    else if (type === "Red Light Right Turn")
        return "The vehicle turns to the right without stopping. The law in our state requires that, when a vehicle reaches a traffic light and wants to make a right turn, if the light is red, regardless of any presence or not of another vehicle or pedestrian, the vehicle must first stop completely, and then make the right turn";
    else if (type === 'Stop Sign')
        return "The vehicle did not stop at the Stop sign. The law in our state requires every non-emergency vehicle to completely stop at every Stop sign, regardless of the presence or absence of incoming or adjacent vehicles"
    else if (type === 'Speed')
        return "The vehicle drove at a speed significantly above the speed limit. The law requires that every non-emergency and non-utility vehicle drives at or below the posted speed limit (or at or below the default speed regulation where the speed is not clearly posted)";
    else
        return "The vehicle committed some type of infraction";
}

/* This function takes a tag number as argument.
   It returns a combination of the make model, year, and color of the car. */
function identifyVehicle(tagNumber) {
    for (var i = 0; i < cars.length; i++) {
        if (cars[i].tagNumber === tagNumber) {
            return cars[i].make + " " + cars[i].model + " (" + cars[i].year + ", " + cars[i].color + ")";
        }
    }
}

/* This function takes a tag number as argument.
   It returns the name of the driver/owner. */
function getDriverName(tagNumber) {
    var dln = "";

    for (var i = 0; i < cars.length; i++) {
        if (cars[i].tagNumber === tagNumber) {
            dln = cars[i].drvLicNumber;
            break;
        }
    }
    for (var j = 0; j < owners.length; j++) {
        if (owners[j].drvLicNumber === dln) {
            return owners[j].firstName + " " + owners[j].lastName;
        }
    }
}

/* This function takes a tag number as argument.
   It returns the complete address of the driver/owner. */
function getDriverAddress(tagNumber) {
    var dln = "";

    for (var i = 0; i < cars.length; i++) {
        if (cars[i].tagNumber === tagNumber) {
            dln = cars[i].drvLicNumber;
            break;
        }
    }
    for (var j = 0; j < owners.length; j++) {
        if (owners[j].drvLicNumber === dln) {
            return owners[j].address + " " + owners[j].city + " " + owners[j].state + " " + owners[j].zipCode;
        }
    }
}

/* This function takes a camera number as argument.
   This is the camera located where the violation took place.
   The function returns the location and the camera number. */
function identifyCamera(cameraNumber) {
    for (var i = 0; i < viewers.length; i++) {
        if (viewers[i].cameraNumber === cameraNumber) {
            return viewers[i].location + " (" + viewers[i].cameraNumber + ")";
        }
    }
}

/* This function takes the available status of a photo and video takens during the traffic violation.
   The function returns a sentence that will instructs the driver about how to view the photo or video or the violation. */
function getPhotoVideoOptions(p, v) {
    var sentence = "";
    var pvAvailable = false;

    if (p === true) {
        if (v === true) {
            pvAvailable = true;
            sentence = "To view the photo and/or video";
        }
        else {
            pvAvailable = true;
            sentence = "To see a photo";
        }
    }
    else { // if (p === false)
        if (v === true) {
            pvAvailable = true;
            sentence = "To review a video";
        }
        else {
            pvAvailable = false;
        }
    }

    if (pvAvailable === false)
        return "There is no photo or video available of this infraction but the violation was committed.";
    else
        return sentence + " of this violation, please access http://www.trafficviolationsmedia.com. In the form, enter the citation number and click Submit.";
}

var infractions = [ { violationNumber:  1, cameraNumber: 'MSR-59575', tagNumber: 'KLT4805', violationName: 'Stop Sign',            violationDate: '01/18/2018', violationTime: '09:12:35',    photoAvailable: false, videoAvailable: true,  paymentDueDate: '02/28/2018', paymentAmount:  75, vName: getViolationName('Stop Sign'),            violationDescription: describeViolation('Stop Sign'),            vehicle: identifyVehicle('KLT4805'), driverName: getDriverName('KLT4805'), driverAddress: getDriverAddress('KLT4805'), violationLocation: identifyCamera('MSR-59575'), photoVideo: getPhotoVideoOptions(false, true) },
                    { violationNumber:  2, cameraNumber: 'DHT-29417', tagNumber: '971384',  violationName: 'Speed',                violationDate: '02/06/2018', violationTime: '11:58:06',    photoAvailable: false, videoAvailable: true,  paymentDueDate: '04/05/2018', paymentAmount:  85, vName: getViolationName('Speed'),                violationDescription: describeViolation('Speed'),                vehicle: identifyVehicle('971384'),  driverName: getDriverName('971384'), driverAddress: getDriverAddress('971384'), violationLocation: identifyCamera('DHT-29417'), photoVideo: getPhotoVideoOptions(false, true) },
                    { violationNumber:  3, cameraNumber: 'DGH-38460', tagNumber: 'PER2849', violationName: 'Red Light Steady',     violationDate: '01/31/2018', violationTime: '05:15:18 AM', photoAvailable: true,  videoAvailable: false, paymentDueDate: '03/10/2018', paymentAmount: 125, vName: getViolationName('Red Light Steady'),     violationDescription: describeViolation('Red Light Steady'),     vehicle: identifyVehicle('PER2849'), driverName: getDriverName('PER2849'), driverAddress: getDriverAddress('PER2849'), violationLocation: identifyCamera('DGH-38460'), photoVideo: getPhotoVideoOptions(true, false) },
                    { violationNumber:  4, cameraNumber: 'DHT-29417', tagNumber: 'MWH4685', violationName: 'Speed',                violationDate: '03/05/2018', violationTime: '16:07:15',    photoAvailable: true,  videoAvailable: true,  paymentDueDate: '04/22/2018', paymentAmount:  85, vName: getViolationName('Speed'),                violationDescription: describeViolation('Speed'),                vehicle: identifyVehicle('MWH4685'), driverName: getDriverName('MWH4685'), driverAddress: getDriverAddress('MWH4685'), violationLocation: identifyCamera('DHT-29417'), photoVideo: getPhotoVideoOptions(true, true) },
                    { violationNumber:  5, cameraNumber: 'MSR-59575', tagNumber: '8DE9275', violationName: 'Stop Sign',            violationDate: '01/18/2018', violationTime: '14:22:48',    photoAvailable: false, videoAvailable: true,  paymentDueDate: '03/10/2018', paymentAmount:  60, vName: getViolationName('Stop Sign'),            violationDescription: describeViolation('Stop Sign'),            vehicle: identifyVehicle('8DE9275'), driverName: getDriverName('8DE9275'), driverAddress: getDriverAddress('8DE9275'), violationLocation: identifyCamera('MSR-59575'), photoVideo: getPhotoVideoOptions(false, true) },
                    { violationNumber:  6, cameraNumber: 'ELQ-79284', tagNumber: 'KLT4805', violationName: 'Speed',                violationDate: '04/12/2018', violationTime: '08:16:22',    photoAvailable: false, videoAvailable: true,  paymentDueDate: '06/08/2018', paymentAmount: 100, vName: getViolationName('Speed'),                violationDescription: describeViolation('Speed'),                vehicle: identifyVehicle('KLT4805'), driverName: getDriverName('KLT4805'), driverAddress: getDriverAddress('KLT4805'), violationLocation: identifyCamera('ELQ-79284'), photoVideo: getPhotoVideoOptions(false, true) },
                    { violationNumber:  7, cameraNumber: 'HTR-93847', tagNumber: 'PER2849', violationName: 'Red Light Flashing',   violationDate: '01/28/2018', violationTime: '10:14:53 PM', photoAvailable: false, videoAvailable: false, paymentDueDate: '03/02/2018', paymentAmount:  45, vName: getViolationName('Red Light Flashing'),   violationDescription: describeViolation('Red Light Flashing'),   vehicle: identifyVehicle('PER2849'), driverName: getDriverName('PER2849'), driverAddress: getDriverAddress('PER2849'), violationLocation: identifyCamera('HTR-93847'), photoVideo: getPhotoVideoOptions(false, false) },
                    { violationNumber:  8, cameraNumber: 'AHR-41518', tagNumber: 'MWH4685', violationName: 'Speed',                violationDate: '03/31/2018', violationTime: '22:07:31',    photoAvailable: true,  videoAvailable: false, paymentDueDate: '05/15/2018', paymentAmount:  75, vName: getViolationName('Speed'),                violationDescription: describeViolation('Speed'),                vehicle: identifyVehicle('MWH4685'), driverName: getDriverName('MWH4685'), driverAddress: getDriverAddress('MWH4685'), violationLocation: identifyCamera('AHR-41518'), photoVideo: getPhotoVideoOptions(true, false) },
                    { violationNumber:  9, cameraNumber: 'DGH-38460', tagNumber: 'KAS9314', violationName: 'Red Light Right Turn', violationDate: '01/31/2018', violationTime: '12:30:11',    photoAvailable: true,  videoAvailable: false, paymentDueDate: '02/28/2018', paymentAmount:  60, vName: getViolationName('Red Light Right Turn'), violationDescription: describeViolation('Red Light Right Turn'), vehicle: identifyVehicle('KAS9314'), driverName: getDriverName('KAS9314'), driverAddress: getDriverAddress('KAS9314'), violationLocation: identifyCamera('DGH-38460'), photoVideo: getPhotoVideoOptions(true, false) },
                    { violationNumber: 10, cameraNumber: 'DHT-29417', tagNumber: '971384',  violationName: 'Speed',                violationDate: '02/06/2018', violationTime: '19:04:47',    photoAvailable: true,  videoAvailable: true,  paymentDueDate: '04/05/2018', paymentAmount:  85, vName: getViolationName('Speed'),                violationDescription: describeViolation('Speed'),                vehicle: identifyVehicle('971384'),  driverName: getDriverName('971384'), driverAddress: getDriverAddress('971384'), violationLocation: identifyCamera('DHT-29417'), photoVideo: getPhotoVideoOptions(true, true) },
{ violationNumber: 11, cameraNumber: 'ELQ-79284', tagNumber: '8DE9275', violationName: 'Speed', violationDate: '04/15/2018', violationTime: '03:25:53 PM', photoAvailable: true, videoAvailable: false, paymentDueDate: '06/02/2018', paymentAmount: 40, vName: getViolationName('Speed'), violationDescription: describeViolation('Speed'), vehicle: identifyVehicle('8DE9275'), driverName: getDriverName('8DE9275'), driverAddress: getDriverAddress('8DE9275'), violationLocation: identifyCamera('ELQ-79284'), photoVideo: getPhotoVideoOptions(true, false) }];appTicketSystem.controller('CamerasController', ['$scope', function ($scope) {
$scope.camerasTitle = "Traffic Cameras";
$scope.cameras = viewers;
}]);appTicketSystem.controller('DriversController', ['$scope', function ($scope) {
$scope.driversTitle = "Vehicles Owners/Drivers";
$scope.driversInfo = "Here is information about vehicles owners/drivers.";
$scope.drivers = owners;
}]);appTicketSystem.controller('VehiclesController', ['$scope', function ($scope) {
$scope.vehiclesTitle = "Motor Vehicles";
$scope.vehiclesDescriptions = "This is a database of vehicles that have committed infractions on our roads.";
$scope.vehicles = cars;
}]);appTicketSystem.controller('ViolationsTypesController', ['$scope', function ($scope) {
$scope.violationsTypesTitle = "Violations Types";
$scope.introduction = "The following violations and their definition/explanation are based on the regulations in our county and our state.";
$scope.categories = violationsTypes;
}]);appTicketSystem.controller('TrafficViolationsController', ['$scope', function ($scope) {
$scope.trafficViolationsTitle = "Traffic Violations";
$scope.trafficViolationsDetails = "Our review process gives you great details about each infraction, including where it occurred and how.";
$scope.trafficViolations = infractions;
}]);<div ng-controller="CamerasController">
<h2 class="text-center maroon bold common-font">{{camerasTitle}}</h2>
<table class="table table-striped common-font">
<tr>
<td class="bold">Camera #</td>
<td class="bold">Make</td>
<td class="bold">Model</td>
<td class="bold">Location</td>
</tr>
<tr ng-repeat="cmr in cameras">
<td><span ng-bind="cmr.cameraNumber"></span></td>
<td><span ng-bind="cmr.make"></span></td>
<td><span ng-bind="cmr.model"></span></td>
<td><span ng-bind="cmr.location"></span></td>
</tr>
</table>
</div><div ng-controller="DriversController">
<h2 class="text-center maroon bold common-font">{{driversTitle}}</h2>
<p class="common-font text-center">{{driversInfo}}</p>
<table class="table table-striped common-font">
<tr>
<td class="bold">Drv. Lic. #</td>
<td class="bold">First Name</td>
<td class="bold">Last Name</td>
<td class="bold">Address</td>
<td class="bold">City</td>
<td class="bold">County</td>
<td class="bold">State</td>
<td class="bold">ZIP Code</td>
</tr>
<tr ng-repeat="person in drivers">
<td><span ng-bind="person.drvLicNumber"></span></td>
<td><span ng-bind="person.firstName"></span></td>
<td><span ng-bind="person.lastName"></span></td>
<td><span ng-bind="person.address"></span></td>
<td><span ng-bind="person.city"></span></td>
<td><span ng-bind="person.county"></span></td>
<td><span ng-bind="person.state"></span></td>
<td><span ng-bind="person.zipCode"></span></td>
</tr>
</table>
</div><div ng-controller="VehiclesController">
<h2 class="text-center maroon bold common-font">{{vehiclesTitle}}</h2>
<p class="common-font text-center">{{vehiclesDescriptions}}</p>
<table class="table table-striped common-font">
<tr>
<td class="bold">Tag #</td>
<td class="bold">Owner's Drv. Lic. #</td>
<td class="bold">Make</td>
<td class="bold">Model</td>
<td class="bold">Year</td>
<td class="bold">Color</td>
</tr>
<tr ng-repeat="car in vehicles">
<td><span ng-bind="car.tagNumber"></span></td>
<td><span ng-bind="car.drvLicNumber"></span></td>
<td><span ng-bind="car.make"></span></td>
<td><span ng-bind="car.model"></span></td>
<td><span ng-bind="car.year"></span></td>
<td><span ng-bind="car.color"></span></td>
</tr>
</table>
</div><div ng-controller="ViolationsTypesController">
<h2 class="text-center maroon bold common-font">{{violationsTypesTitle}}</h2>
<table class="table table-striped common-font">
<tr>
<td class="bold">Violation Name</td>
<td class="bold">Description</td>
</tr>
<tr ng-repeat="category in categories">
<td><span ng-bind="category.violationName"></span></td>
<td><span ng-bind="category.description"></span></td>
</tr>
</table>
</div><div ng-controller="TrafficViolationsController">
<h2 class="text-center maroon bold common-font">{{trafficViolationsTitle}}</h2>
<p class="common-font text-center">{{trafficViolationsDetails}}</p>
<table class="table table-striped common-font">
<tr>
<td class="bold text-center">Violation #</td>
<td class="bold">Camera #</td>
<td class="bold">Tag #</td>
<td class="bold">Violation</td>
<td class="bold text-center">Violation Date</td>
<td class="bold">Violation Time</td>
<td class="bold">Photo Available</td>
<td class="bold">Video Available</td>
<td class="bold text-center">Payment Due Date</td>
<td class="bold text-right">Payment Amt</td>
</tr>
<tr ng-repeat="infraction in trafficViolations">
<td class="text-center"><span ng-bind="infraction.violationNumber"></span></td>
<td><span ng-bind="infraction.cameraNumber"></span></td>
<td><span ng-bind="infraction.tagNumber"></span></td>
<td><span ng-bind="infraction.violationName"></span></td>
<td class="text-center"><span ng-bind="infraction.violationDate"></span></td>
<td><span ng-bind="infraction.violationTime"></span></td>
<td><span ng-bind="infraction.photoAvailable"></span></td>
<td><span ng-bind="infraction.videoAvailable"></span></td>
<td class="text-center"><span ng-bind="infraction.paymentDueDate"></span></td>
<td class="text-right"><span ng-bind="infraction.paymentAmount"></span></td>
</tr>
</table>
</div><div ng-app="trafficTicketSystem">
<main-title></main-title>
<div class="right-border">
<div class="row common-font">
<div class="col-md-4 left-border">
<cameras-summary></cameras-summary>
</div>
<div class="col-md-4 left-border">
<drivers-topics></drivers-topics>
</div>
<div class="col-md-4 left-border ">
<vehicles-operators></vehicles-operators>
</div>
</div>
<div class="bottom-border"></div>
<div class="row common-font">
<div class="col-md-6 left-border">
<violations-types></violations-types>
</div>
<div class="col-md-6 left-border">
<traffic-violations></traffic-violations>
</div>
</div>
</div>
</div>using System.Web.Optimization;
namespace TrafficTicketsManagement4
{
public class BundleConfig
{
// For more information on bundling, visit https://go.microsoft.com/fwlink/?LinkId=301862
public static void RegisterBundles(BundleCollection bundles)
{
bundles.Add(new ScriptBundle("~/bundles/jquery").Include(
"~/Scripts/jquery-{version}.js",
"~/Scripts/angular.js",
"~/Scripts/angular-route.js",
"~/Presentations/Management.js",
"~/TicketsManagement/DataRepository.js",
"~/TicketsManagement/Cameras.js",
"~/TicketsManagement/Drivers.js",
"~/TicketsManagement/Vehicles.js",
"~/TicketsManagement/ViolationsTypes.js",
"~/TicketsManagement/TrafficViolations.js",
"~/TicketsManagement/Distribution.js"));
bundles.Add(new ScriptBundle("~/bundles/jqueryval").Include(
"~/Scripts/jquery.validate*"));
// Use the development version of Modernizr to develop with and learn from. Then, when you're
// ready for production, use the build tool at https://modernizr.com to pick only the tests you need.
bundles.Add(new ScriptBundle("~/bundles/modernizr").Include(
"~/Scripts/modernizr-*"));
bundles.Add(new ScriptBundle("~/bundles/bootstrap").Include(
"~/Scripts/bootstrap.js"));
bundles.Add(new StyleBundle("~/Content/css").Include(
"~/Content/bootstrap.css",
"~/Content/site.css",
"~/Content/TrafficTicketsManagement.css"));
}
}
}using System.Web.Mvc;
namespace TrafficTicketsManagement4.Controllers
{
public class HomeController : Controller
{
public ActionResult Index()
{
return View();
}
public ActionResult About()
{
ViewBag.Message = "Your application description page.";
return View();
}
public ActionResult Contact()
{
ViewBag.Message = "Your contact page.";
return View();
}
public ActionResult PresentationsManagement()
{
return View();
}
public ActionResult TicketsManagement()
{
return View();
}
}
}@{
ViewBag.Title = "Traffic Tickets Management";
}
@Scripts.Render("~/bundles/jquery")
<div ng-app="trafficTicketSystem">
<h2 class="text-center blue common-font bold">Traffic Tickets Management</h2>
<div class="tm-contents">
<ul class="tm-list menu-holder">
<li><a href="#!Home">Home</a></li>
<li><a href="#!Cameras">Cameras</a></li>
<li><a href="#!Drivers">Drivers</a></li>
<li><a href="#!Vehicles">Vehicles</a></li>
<li><a href="#!ViolationsTypes">Violations Types</a></li>
<li><a href="#!TrafficViolations">Traffic Violations</a></li>
</ul>
</div>
<div class="top-border">
<ng-view></ng-view>
</div>
</div>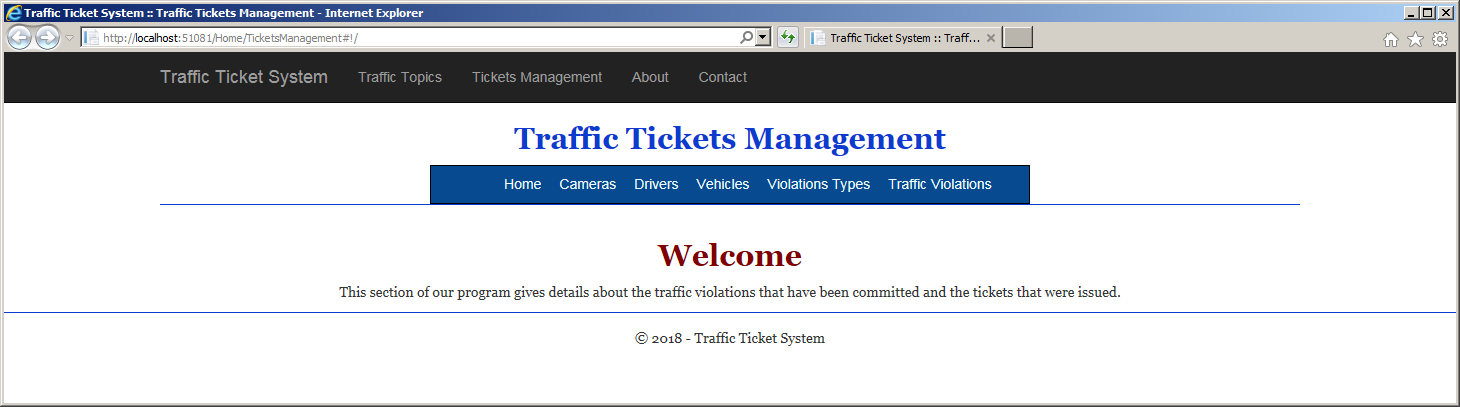


The Location of a Web Page
As you may know already, the HTML DOM provides the Location interface to let you get various pieces of information about a webpage such as its address (URL), its Web host, the protocol it's using, etc. As an alternative adapted to its library, AngularJS provides the $location service. This service is equipped with various properties like those of the location object of the DOM. Here are examples of some of its properties:
<!DOCTYPE html>
<html>
<head>
<meta charset="utf-8" />
<title>Country</title>
<script src="../../../../Scripts/angular.js"></script>
<script src="../../../../Scripts/angular-route.js"></script>
</head>
<body ng-app="country">
    <div ng-controller="RoutingController as rc">
        <p>Page's URL: {{rc.adrs}}</p>
        <p>Page's Path: {{rc.way}}</p>
        <p>Protocol Used: {{rc.protocole}}</p>
        <p>Current Port: {{rc.port}}</p>
        <p>Website Host: {{rc.hosting}}</p>
        <p>Complete Address: {{rc.absolute}}</p>

        <h1>:: Country's Review ::</h1>
        <ul>
            <li><a href="#!History">Historical Events</a></li>
            <li><a href="#!Geography">Geographical Studies</a></li>
            <li><a href="/Country/Province/Index.html">Province</a></li>
            <li><a href="/Country/State/Index.html">State</a></li>
        </ul>

        <hr color="red" />

        <ng-view></ng-view>
    </div>

<script type="text/javascript">
    var app = angular.module('country', ['ngRoute']).
        controller('RoutingController', ['$location', function ($location) {
            this.adrs      = $location.url();
            this.hosting   = $location.host();
            this.port      = $location.port();
            this.way       = $location.path();
            this.absolute  = $location.absUrl();
            this.protocole = $location.protocol();
        }]).config(function ($routeProvider) {
            $routeProvider.when('/Country', {
                templateUrl: '/State/County/Parks.html',
                controller: 'RoutingController'
            }).
                when('/History', {
                    template: '<h1>History</h1><p>The first part of this document provides a short review of the history of this country.</p>'
                }).
                when('/Geography', {
                    template: '<h1>Geography</h1><p>Here is a review of moutains, valleys, rivers, and national parks of the country.</p>'
                }).
                otherwise({
                    template: '<p>Sorry for the inconvenience, the content is under development...</p>'
                });
        });
</script>
</body>
</html>
Route Parameters
Introduction
Routing is the process of creating links that lead to either or both regular webpages and files other than webpages. As you may know already, a regular link opens a physical webpage whose content is already created. Another category of a link is one for which either a physical webpage is not primarily created or the page exists but its content is not known in advance. In other words, the content is created "on-the-fly", which is, when the content is requested. As one example, you can present a webpage that contains hundreds or thousands of records to a visitor and expect the user to click a link on a record to see more information about that record. It would be tedious to create a separate webpage for each of the hundreds or thousands of records. Instead, you can create a mechanism that uses a central webpage that can display a record based on what the user had clicked. This is one scenario for routing but there are other possibilities. In most cases, you must get a value from a piece of information provided by the visitor or as the result of the user clicking a link.
A route parameter is a piece of information you can use to prepare a content of a webpage to display to a visitor. AngularJS provides various options.
A Collection of Route Parameters
Imagine you have a list of records and the list is stored in a variable named violations. Here is an example of such a list of records displaying in a webpage:

We saw earlier how such a list is created. One way you can use such a list is to locate and display a particular record in a webpage. You know already (from ASP.NET MVC modeling and its Details method) that you can pass a parameter to the URL of a webpage. You may know already that, to do that manually, the user can click at the end of the address of a webpage (in the address bar of the browser) and provide the value. When it comes to a routing scenario, since you would already have created a routing link using #! followed by a name, to select a record, the user can click at the end of the address of a webpage that displays records, type a forward slash, /, followed by the index of the record. Such an expression is referred to as a route parameter.
To support the parameters of a route, AngularJS provides a service named $routeParams. The $routeParams object has a property for each part (called a column) of a record. To start, the route parameter has the record index that we mentioned. This means that, for our example, the route parameter has a property named violationNumber, which represents a record from the list of objects. Remember that an expression such as $scope.traffiViolations represents, or holds, an array of records, and remember that arrays are zero-based. This means that one typical of our records is at $routeParams.violationNumber - 1.
![]() Practical Learning: Accessing Route Paramemeters
Practical Learning: Accessing Route Paramemeters
appTicketSystem.controller('TrafficViolationsController', ['$scope', '$routeParams', function ($scope, $routeParams) {
    $scope.trafficViolationsTitle = "Traffic Violations";
    $scope.trafficViolationsDetails = "Our review process gives you great details about each infraction, including where it occurred and how.";

    $scope.params = $routeParams;
    $scope.trafficViolations = infractions;
    $scope.ticket = $scope.trafficViolations[$routeParams.violationNumber - 1];
}]);<div class="common-font" ng-controller="TrafficViolationsController">
<h2 class="text-center common-font maroon bold">Traffic Violation Details</h2>
<p class="text-center">Params: {{params}}</p>
<table class="table table-striped details-holder">
<tr>
<td class="bold">Violation #:</td>
<td><span ng-bind="ticket.violationNumber"></span></td>
</tr>
<tr>
<td class="bold">Camera Information:</td>
<td><span ng-bind="ticket.cameraNumber"></span></td>
</tr>
<tr>
<td class="bold">Vehicle Tag #:</td>
<td><span ng-bind="ticket.tagNumber"></span></td>
</tr>
<tr>
<td class="bold">Violation Type:</td>
<td><span ng-bind="ticket.vName"></span></td>
</tr>
<tr>
<td class="bold">Violation Date</td>
<td><span ng-bind="ticket.violationDate"></span></td>
</tr>
<tr>
<td class="bold">Violation Time</td>
<td><span ng-bind="ticket.violationTime"></span></td>
</tr>
<tr>
<td class="bold">Photo Available</td>
<td><span ng-bind="ticket.photoAvailable"></span></td>
</tr>
<tr>
<td class="bold">Video Available</td>
<td><span ng-bind="ticket.videoAvailable"></span></td>
</tr>
<tr>
<td class="bold">Payment Due Date</td>
<td><span ng-bind="ticket.paymentDueDate"></span></td>
</tr>
<tr>
<td class="bold">Payment Amount</td>
<td><span ng-bind="ticket.paymentAmount"></span></td>
</tr>
</table>
</div>Route Patterns
A route pattern is a scheme you use to identify a record. AngularJS provides various options. A route pattern is specified in a when() method of a $routeProvider object. In the first argument of the method, start with the path of the webpage that will display a record. For our example, this would be /TrafficViolations. As you may know already, the sections of a Web address are separated by a forward slash as in /TrafficViolations/.
A route pattern can start with a colon as in /TrafficViolations/:. This can be followed by a property of an object that represents a record (which is equivalent to the column of a record of a database table). If you plan to locate a record based on a column that holds the index, use the name of that column. For the value of the templateUrl property, specify the path to the webpage that will display the record.
![]() Practical Learning: Creating a Route Pattern
Practical Learning: Creating a Route Pattern
appTicketSystem.config(function ($routeProvider) {
    $routeProvider.
        when('/', {
            template: "<h2 class='text-center common-font maroon bold'>Welcome</h2>" +
                      "<p class='common-font text-center'>This section of our program gives details about the traffic violations that have been committed and the tickets that were issued.</p>"
        }).
        when('/Home', {
            templateUrl: "/TicketsManagement/Home.html"
        }).
        when('/Cameras', {
            controller: "CamerasController",
            templateUrl: "/TicketsManagement/Cameras.html"
        }).
        when('/Drivers', {
            controller: "DriversController",
            templateUrl: "/TicketsManagement/Drivers.html"
        }).
        when('/Vehicles', {
            controller: "VehiclesController",
            templateUrl: "/TicketsManagement/Vehicles.html"
        }).
        when('/ViolationsTypes', {
            controller: "ViolationsTypesController",
            templateUrl: "/TicketsManagement/ViolationsTypes.html"
        }).
        when('/TrafficViolations', {
            controller: "TrafficViolationsController",
            templateUrl: "/TicketsManagement/TrafficViolations.html"
        }).
        when('/TrafficViolations/:violationNumber', {
            controller: "TrafficViolationsController",
            templateUrl: "/TicketsManagement/ViolationDetails.html"
        }).
        otherwise({
            template: "<p>This section is under construction...</p>"
        });
});<!DOCTYPE html> <html> <head> <meta charset="utf-8" /> <meta name="viewport" content="width=device-width, initial-scale=1.0"> <title>Traffic Ticket System :: @ViewBag.Title</title> @Styles.Render("~/Content/css") @Scripts.Render("~/bundles/modernizr") </head> <body> <div class="navbar navbar-inverse navbar-fixed-top"> <div class="container"> <div class="navbar-header"> <button type="button" class="navbar-toggle" data-toggle="collapse" data-target=".navbar-collapse"> <span class="icon-bar"></span> <span class="icon-bar"></span> <span class="icon-bar"></span> </button> @Html.ActionLink("Traffic Ticket System", "Index", "Home", new { area = "" }, new { @class = "navbar-brand" }) </div> <div class="navbar-collapse collapse"> <ul class="nav navbar-nav"> <li>@Html.ActionLink("Traffic Topics", "PresentationsManagement", "Home")</li> <li>@Html.ActionLink("Tickets Management", "TicketsManagement", "Home")</li> <li>@Html.ActionLink("About", "About", "Home")</li> <li>@Html.ActionLink("Contact", "Contact", "Home")</li> </ul> </div> </div> </div> <div class="container body-content"> @RenderBody() </div> <footer> <p class="text-center common-font top-border">© @DateTime.Now.Year - Traffic Ticket System</p> </footer> @Scripts.Render("~/bundles/jquery") @Scripts.Render("~/bundles/bootstrap") @RenderSection("scripts", required: false) </body> </html>


A Link for a Route Parameter
The $routeParams service has a property for each of the columns of a record. For our example, it has a record for the following properties/columns: violationNumber, cameraNumber, tagNumber, violationName, violationDate, violationTime, photoAvailable, videoAvailable, paymentDueDate, and paymentAmount.
The $routeParams service makes it possible to create a link for each record and expect the user to click that link. You can then find out what record the user had clicked. To create such a link, you can use a piece of information that uniquely identifies each record, such as an index. The information that identifies a record is referred to as a parameter of a route. Start the link as we saw already. An example is <a href="#!/TrafficViolations">View Record</a>. After the name of the link, which in our example is TrafficViolations, add a forward slash and a {{}} placeholder. In that placeholder, provide a way to identify a record.
![]() Practical Learning: Creating a Link for a Route Parameter
Practical Learning: Creating a Link for a Route Parameter
<div ng-controller="TrafficViolationsController">
<h2 class="text-center maroon bold common-font">{{trafficViolationsTitle}}</h2>
<p class="common-font text-center">{{trafficViolationsDetails}}</p>
<table class="table table-striped common-font">
<tr>
<td class="bold text-center">Violation #</td>
<td class="bold">Camera #</td>
<td class="bold">Tag #</td>
<td class="bold">Violation</td>
<td class="bold text-center">Violation Date</td>
<td class="bold">Violation Time</td>
<td class="bold">Photo Available</td>
<td class="bold">Video Available</td>
<td class="bold text-center">Payment Due Date</td>
<td class="bold text-right">Payment Amt</td>
<td> </td>
</tr>
<tr ng-repeat="infraction in trafficViolations">
<td class="text-center"><span ng-bind="infraction.violationNumber"></span></td>
<td><span ng-bind="infraction.cameraNumber"></span></td>
<td><span ng-bind="infraction.tagNumber"></span></td>
<td><span ng-bind="infraction.violationName"></span></td>
<td class="text-center"><span ng-bind="infraction.violationDate"></span></td>
<td><span ng-bind="infraction.violationTime"></span></td>
<td><span ng-bind="infraction.photoAvailable"></span></td>
<td><span ng-bind="infraction.videoAvailable"></span></td>
<td class="text-center"><span ng-bind="infraction.paymentDueDate"></span></td>
<td class="text-right"><span ng-bind="infraction.paymentAmount"></span></td>
<td><a href="#!/TrafficViolations/{{infraction.violationNumber}}">Details</a></td>
</tr>
</table>
</div>using System.Web.Mvc;
namespace TrafficTicketsManagement4.Controllers
{
public class HomeController : Controller
{
public ActionResult Index()
{
return View();
}
public ActionResult About()
{
ViewBag.Message = "Your application description page.";
return View();
}
public ActionResult Contact()
{
ViewBag.Message = "Your contact page.";
return View();
}
public ActionResult PresentationsManagement() => View();
public ActionResult TicketsManagement() => View();
}
}


<div ng-controller="TrafficViolationsController">
    <h3 class="text-center common-font bold">City of Jamies Town</h3>
    <h5 class="text-center common-font bold">6824 Cochran Ave, Ste 318<br />Jamies Town, MD 20540</h5>

    <div class="row common-font" ng-controller="TrafficViolationsController">
        <div class="col-md-8">
            <h4 class="common-font bold">Citation #: <span ng-bind="ticket.violationNumber"></span></h4>
            <h4 class="common-font bold">Violation Type: <span ng-bind="ticket.violationName"></span> Violation</h4>
            <hr />
            <h4 class="common-font bold"><span ng-bind="ticket.driverName"></span></h4>
            <h5 class="common-font bold"><span ng-bind="ticket.driverAddress"></span></h5>
            <h5 class="common-font bold">Vehicle: <span ng-bind="ticket.vehicle"></span></h5>
            <hr />
            <h5 class="common-font bold">To <span ng-bind="ticket.driverName"></span></h5>
            <p>Our records indicate that on <span ng-bind="ticket.violationDate"></span> at <span ng-bind="ticket.violationTime"></span>, at <span ng-bind="ticket.violationLocation"></span>, the above mentioned vehicle committed a <span ng-bind="ticket.violationName"></span> violation. <span ng-bind="ticket.violationDescription"></span>.</p>
            <p>If you recognize the traffic violation, please pay {{ticket.paymentAmount | currency}} by <span ng-bind="ticket.paymentDueDate"></span>. Failure to pay the amount by that date will result in an increase of the fine and could result in the suspension of your driving priviledges. If you dispute the violation, to eventually appear in court, please fill out the form on the back of this document and send it back to us.</p>
        </div>
        <div class="col-md-4">
            <p><span ng-bind="ticket.photoVideo"></span></p>
        </div>
    </div>
</div><div ng-controller="TrafficViolationsController">
<h2 class="text-center maroon bold common-font">{{trafficViolationsTitle}}</h2>
<p class="common-font text-center">{{trafficViolationsDetails}}</p>
<table class="table table-striped common-font">
<tr>
<td class="bold text-center">Violation #</td>
<td class="bold">Camera #</td>
<td class="bold">Tag #</td>
<td class="bold">Violation</td>
<td class="bold text-center">Violation Date</td>
<td class="bold">Violation Time</td>
<td class="bold">Photo Available</td>
<td class="bold">Video Available</td>
<td class="bold text-center">Payment Due Date</td>
<td class="bold text-right">Payment Amt</td>
<td> </td>
</tr>
<tr ng-repeat="infraction in trafficViolations">
<td class="text-center"><span ng-bind="infraction.violationNumber"></span></td>
<td><span ng-bind="infraction.cameraNumber"></span></td>
<td><span ng-bind="infraction.tagNumber"></span></td>
<td><span ng-bind="infraction.violationName"></span></td>
<td class="text-center"><span ng-bind="infraction.violationDate"></span></td>
<td><span ng-bind="infraction.violationTime"></span></td>
<td><span ng-bind="infraction.photoAvailable"></span></td>
<td><span ng-bind="infraction.videoAvailable"></span></td>
<td class="text-center"><span ng-bind="infraction.paymentDueDate"></span></td>
<td class="text-right"><span ng-bind="infraction.paymentAmount"></span></td>
<td><a href="#!/TrafficViolations/{{infraction.violationNumber}}">Citation</a></td>
</tr>
</table>
</div>appTicketSystem.config(function ($routeProvider) {
$routeProvider.
when('/', {
template: "<h2 class='text-center common-font maroon bold'>Welcome</h2>" +
"<p class='common-font text-center'>This section of our program gives details about the traffic violations that have been committed and the tickets that were issued.</p>"
}).
when('/Home', {
templateUrl: "/TicketsManagement/Home.html"
}).
when('/Cameras', {
controller: "CamerasController",
templateUrl: "/TicketsManagement/Cameras.html"
}).
when('/Drivers', {
controller: "DriversController",
templateUrl: "/TicketsManagement/Drivers.html"
}).
when('/Vehicles', {
controller: "VehiclesController",
templateUrl: "/TicketsManagement/Vehicles.html"
}).
when('/ViolationsTypes', {
controller: "ViolationsTypesController",
templateUrl: "/TicketsManagement/ViolationsTypes.html"
}).
when('/TrafficViolations', {
controller: "TrafficViolationsController",
templateUrl: "/TicketsManagement/TrafficViolations.html"
}).
when('/TrafficViolations/:violationNumber', {
controller: "TrafficViolationsController",
templateUrl: "/TicketsManagement/Citation.html"
}).
otherwise({
template: "<p>This section is under construction...</p>"
});
});


|
|
||
| Previous | Copyright © 2018-2022, FunctionX | Next |
|
|
||