
Database Examples: The Associates

|
Database Examples: The Associates |
Introduction
In some parts of the world and some communities, people have a weird way of saving money without using a bank. A group of 4, 6, 12, or more people get together (less than 6 is not very realistic and more than 20 may be too many, although it depends on how frequent they "meet", as we will see).
Practical Learning: Introducing The Associates
The Number of Participants
The first time this group of people get together, they make a few decisions. The first action consists of evaluating the number of people who are going to participate and they register them (sometimes the registration is mental because everyone knows the other people).
Practical Learning: Registering the Participants
| Field Name | Data Type | Caption | Additional Properties |
| ParticipantID | AutoNumber | Participant ID | Primary Key: True |
| AccountNumber | Text | Account # | Field Size: 10 Indexed: Yes (No Duplicates) |
| AccountDate | Text | Account Date | |
| FullName | Text | Full Name | |
| HomePhone | Text | Home Phone | |
| CellPhone | Text | Cell Phone | |
| EmailAddress | Text | Email Address | |
| Notes | Memo |
The Leader
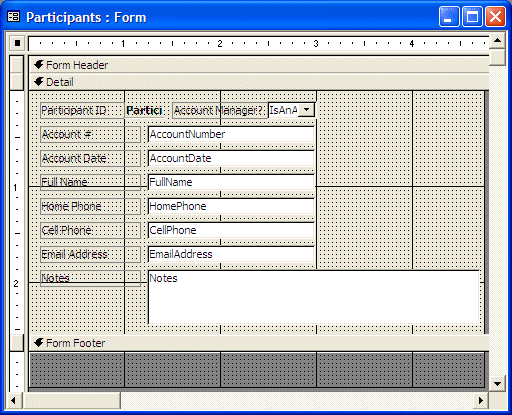
To centralize the management of this organization, somebody has to be in charge. It doesn't have to be the person who initiated the organization. When people get together for the first time, they also designate who would be the leader. A leader is in charge of coordinating the transactions (we will see what types of transactions, when and how), "animating" the members, keeping the group informed, applying the service charges, etc. For this exercise, we will refer to this leader as an account manager. Therefore, this person will be in charge of creating and keeping accounts, like a bank.
A leader can have an assistant who can be reached if/when the leader is not available.
Practical Learning: Designating a Leader
| Field Name | Data Type | Caption | Additional Properties |
| ParticipantID | AutoNumber | Participant ID | Primary Key: True |
| AccountNumber | Text | Account # | Field Size: 10 Indexed: Yes (No Duplicates) |
| AccountDate | Text | Account Date | |
| FullName | Text | Full Name | |
| HomePhone | Text | Home Phone | |
| CellPhone | Text | Cell Phone | |
| EmailAddress | Text | Email Address | |
| IsAnAccountManager | Yes/No | Account Manager? | Display Control: Combo Box |
| Notes | Memo |
| ParticipantID | Account # | Account Date | Full Name | Email Address | Account Manager? |
|---|---|---|---|---|---|
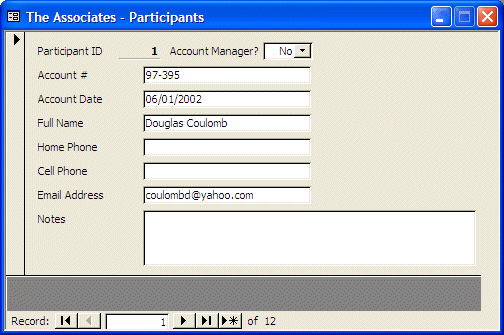
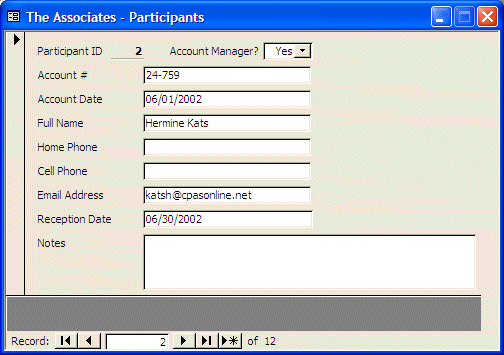
| 1 | 97-395 | 06/01/2002 | Douglas Coulomb | coulomd@yahoo.com | No |
| 2 | 24-759 | 06/01/2002 | Hermine Kats | katsh@cpasonline.net | Yes |
| 3 | 29-375 | 06/01/2002 | Tony Peres | perestroika@netscape.net | No |
| 4 | 74-929 | 06/01/2002 | Françoise Nguyen | nguyenf@monitorsystems.com | No |
| 5 | 99-275 | 06/01/2002 | Helene Mafany | mafanyh@emailcity.com | No |
| 6 | 85-487 | 06/01/2002 | Juanita Klebers | klebersj@usantabas.edu | No |
| 7 | 77-597 | 06/01/2002 | Alexander Wayne | waynea@hotmail.com | Yes |
| 8 | 79-437 | 06/02/2002 | Jeannine Monay | monayj@yahoo.com | No |
| 9 | 38-685 | 06/02/2002 | Kelley Graham | No | |
| 10 | 93-457 | 06/02/2002 | John Simms | No | |
| 11 | 38-508 | 06/03/2002 | Gabrielle Kumar | No | |
| 12 | 35-798 | 06/05/2002 | Jeffrey Lamm | No |
 |
 |
Contributions
The reason people get together in this organization is to save money. To do that, they decide on the frequency they will meet. Different factors influence this aspect, based on the number of participants, a pledge amount and the common financial means. We have covered the number of participants.
Probably the next decision would be on the frequency of meetings. These people typically meet (they usually don't have to physically meet but this issue must be decided upon, then taken care of one way or another) every week, every two weeks, or every month. Meeting every day is not realistic. Meeting every couple of months, every three months, every four months, or every semester is not useful either. This frequency should be practical to everyone because at every frequency, each member should be able to come up with the amount of money of the next section.
The next decision may be with regards to a certain factor of an amount of money. When people meet (once again, remember that they don't necessarily physically meet), each one brings a certain amount of money (if they don't physically meet, each one gives this money to the person in charge or the assistant to this person). This amount should be neither too low nor too high but it must be affordable to every participant. If the group is made of struggling workers who make around $1600 to $3000 a month and they meet every two weeks, an amount between 100 and $200 should be fine. If the group is made of successful small business owners who meet every two weeks, an amount of $300, $500, $750 should be enough. If the group is made of big company executives who meet every two weeks, the amount can be higher. If the same groups mentioned meet every week, the amount can be divided by half. If the people in the same groups we mentioned prefer to meet once a month, the amount of money can be either doubled or taken at 1.50 of that of the two-week frequency mentioned above.
The Calendar of Money Remittance
In case you are not familiar with this system, when the people meet, the money each one brings is handed to one of the participants. The next time they meet, the money brought by the participants is given to another person. This continues until each participant has received the money at least once. Based on this, the participants create a calendar that specifies each one's turn. Two people can also decide to switch turns. They would have to notify everybody and definitely the person who is in charge of the organization.
We mentioned above that the participants don't have to physically meet to perform the transactions. When the frequency (as every week, every two weeks, or every month) is up, each participant can give his or her money to a person in charge (remember that this organization is made of people who know each other and trust is extremely important here). This person is in charge of reaching the right recipient and giving the pledged money.
Practical Learning: Creating a Calendar
| Field Name | Data Type | Caption | Additional Properties |
| ParticipantID | AutoNumber | Participant ID | Primary Key: True |
| AccountNumber | Text | Account # | Field Size: 10 Indexed: Yes (No Duplicates) |
| AccountDate | Text | Account Date | |
| FullName | Text | Full Name | |
| HomePhone | Text | Home Phone | |
| CellPhone | Text | Cell Phone | |
| EmailAddress | Text | Email Address | |
| IsAnAccountManager | Yes/No | Account Manager? | Display Control: Combo Box |
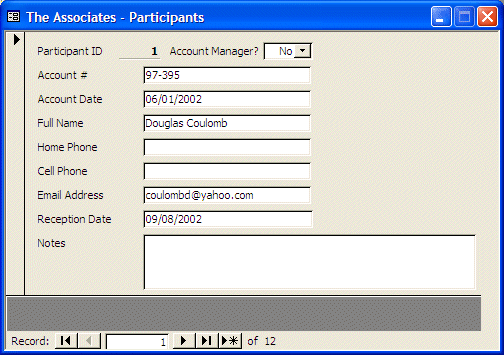
| ReceptionDate | Text | Reception Date | |
| Notes | Memo |
| Full Name | Reception Date |
| Douglas Coulomb | 09/08/2002 |
| Hermine Kats | 06/30/2002 |
| Tony Peres | 10/20/2002 |
| Françoise Nguyen | 07/14/2002 |
| Helene Mafany | 11/17/2002 |
| Juanita Klebers | 08/11/2002 |
| Alexander Wayne | 10/06/2002 |
| Jeannine Monay | 06/16/2002 |
| Kelley Graham | 11/03/2002 |
| John Simms | 08/25/2002 |
| Gabrielle Kumar | 07/28/2002 |
| Jeffrey Lamm | 09/22/2002 |
Transaction Types
When a participant brings his or her money, the money is registered (sometimes the registration is simply mental since people know each other) to keep track of who has pledged. There can be variances. For example, suppose that the members have decided that the regular amount to pledge is $250 every two weeks. Some time to time, some people in the group would "fall short", that is, they would not have the full pledged amount. In this case, they can still contribute with the amount they have. The person receiving the money would be notified to pledge the same amount when the other person's turn comes up. In some cases, somebody P can ask a recipient R if he or she needs more money. If the recipient R agrees, the participant P could pledge more than the required amount. When the participant P's turn to receive money comes up, the other recipient R must remember to pledge the same amount that participant P had pledged for him or her.
To keep people disciplined, the organization can also decide that, if people are supposed to bring their money on a certain day such as Saturday, people could be given a grace period until the next day, such as Sunday. Anyone who brings money later than that could be charged a penalty fee. In fact, somebody who is showing a lack of discipline, such as somebody who is always bringing his or her money late could be asked to "leave" before it gets worse. In this case, such a delinquent would receive money only from those who had gotten his or her money in the past.
We mentioned earlier that two people can switch turns. This happens if a person whose turn is not up suddenly needs money (funeral, marriage, kid school fee, etc) and would not like to wait. As another variance, some groups allow people to borrow money. This is left to the participants understanding.
It is important to know that, inevitably, there can be problems of any kind but we can't get into them...
Practical Learning: Specifying Transaction Types
| Field Name | Data Type | Caption | Additional Properties |
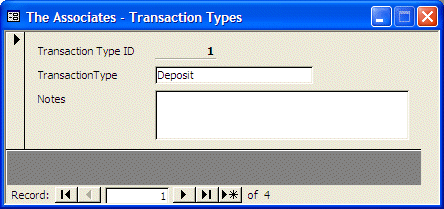
| TransactionTypeID | AutoNumber | Transaction Type ID | Primary Key: True |
| TransactionType | Transaction Type | ||
| Notes | Memo |
| TransactionTypeID | TransactionType | Notes |
|---|---|---|
| 1 | Deposit | |
| 2 | Reception | |
| 3 | Service Charge | |
| 4 | Loan |
 |
 |
Transactions Setup
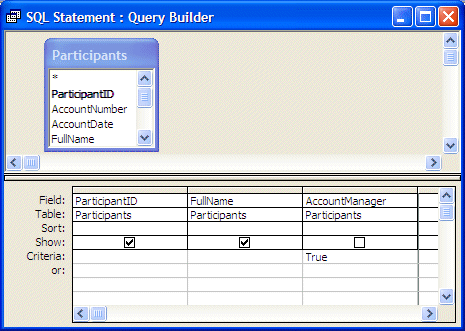
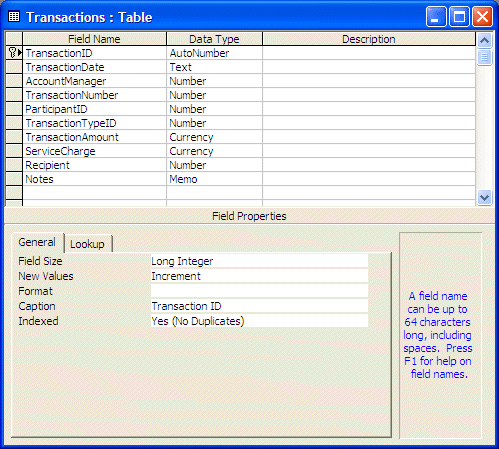
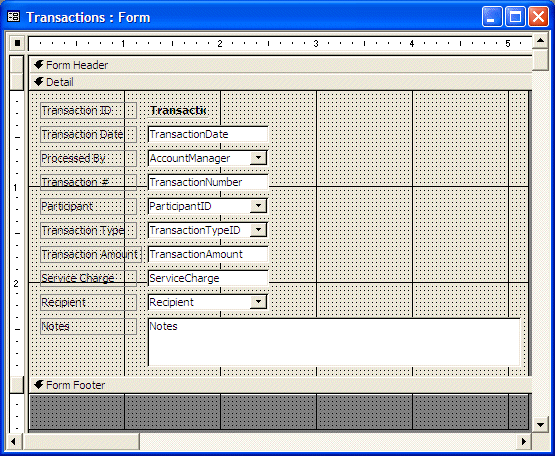
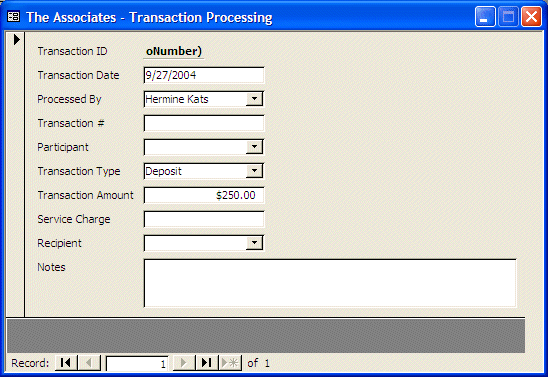
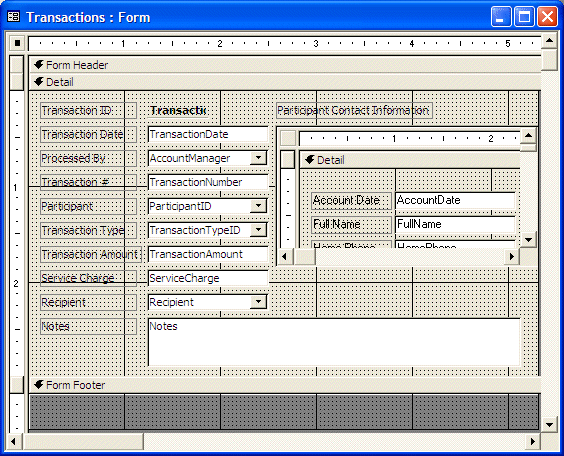
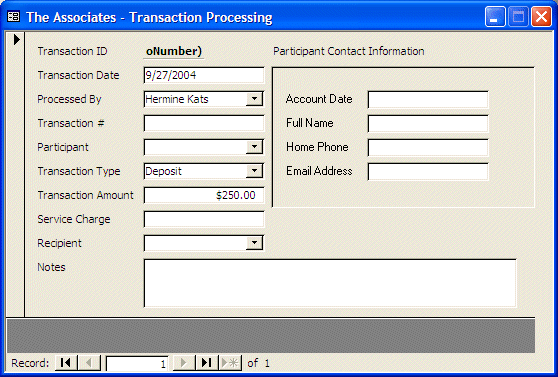
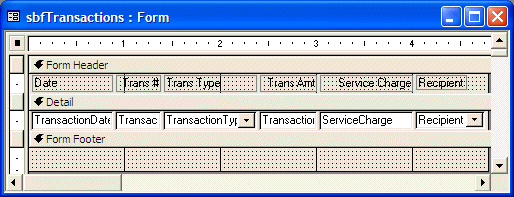
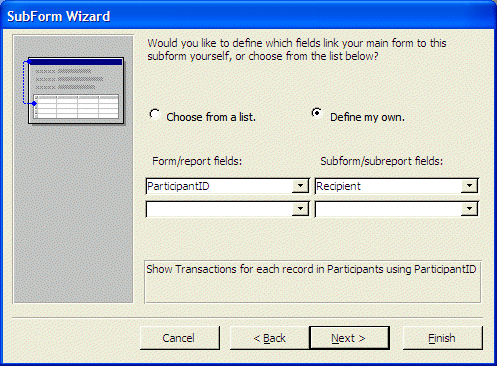
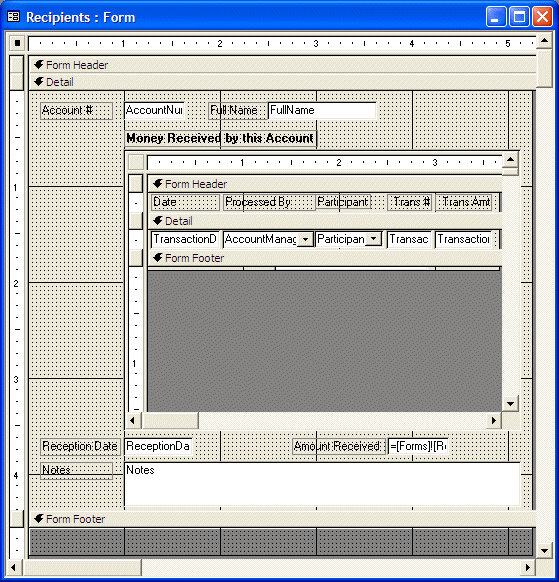
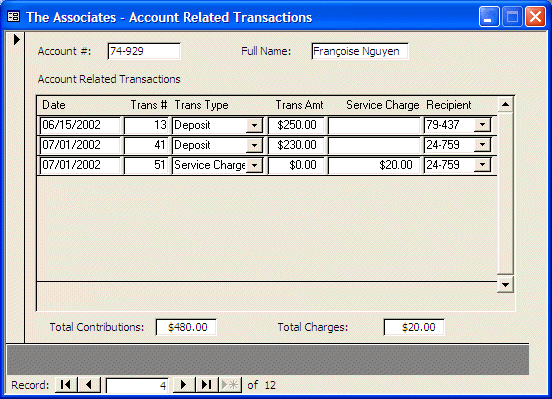
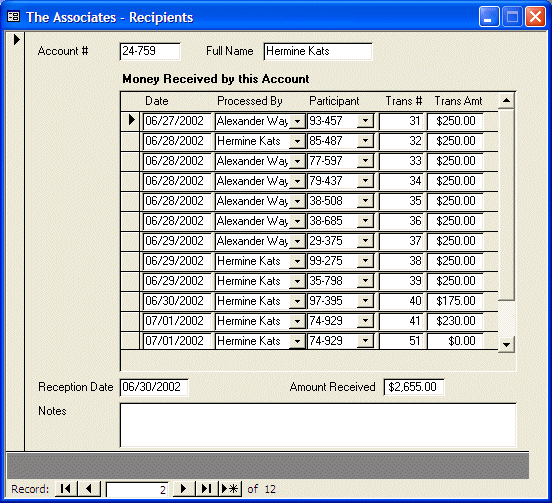
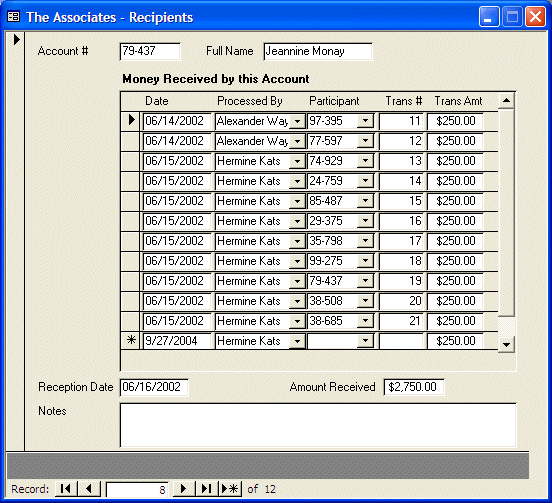
There are two regular transactions that occur in this organization. As mentioned already, people in this organization don't always physically meet, although this is the routine. A person can simply bring the money to the person in charge. The person in charge must register the transaction by noting who brought the money and how much. As the second most regular transaction, once the money is ready, it is handed to the person whose turn this is. Also, if a person brings the money late, the account manager must specify whether a penalty is applied or not. Normally, there is a certain time decided when the recipient should receive the money. The people in the group decide on this. For our example, we will consider that all the money should have been collected by Sunday at 6PM and the account manager will give the money to the appropriate recipient by 10PM. Therefore, anybody who brings the money after that period will suffer a penalty of $20.
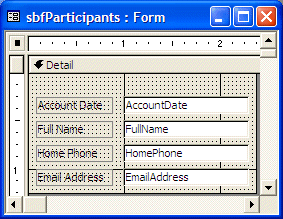
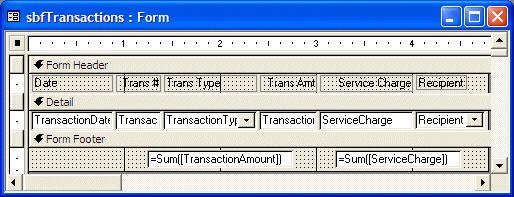
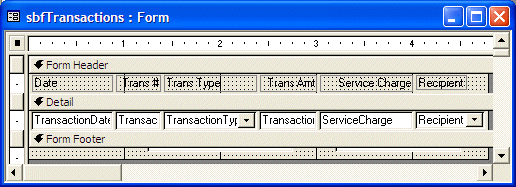
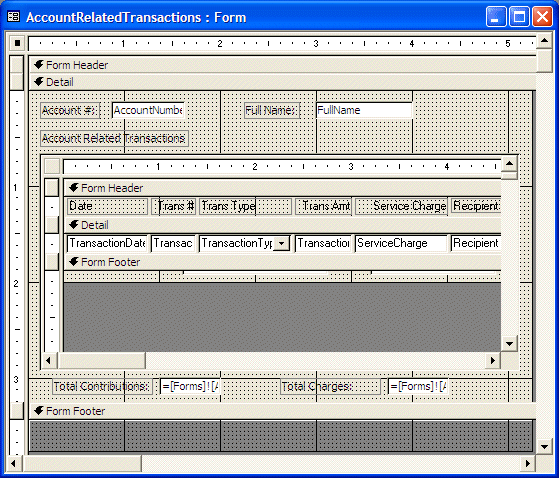
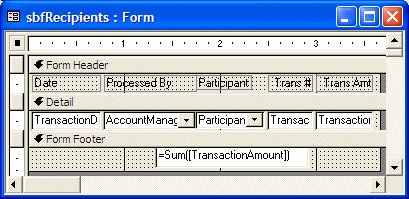
Practical Learning: Setting Up Transactions
 |
 |
 |
 |
 |
| Transaction ID | Date | Processed By | Trans # | Participant | Trans Type | Trans Amt | Service Charge | Recipient |
|---|---|---|---|---|---|---|---|---|
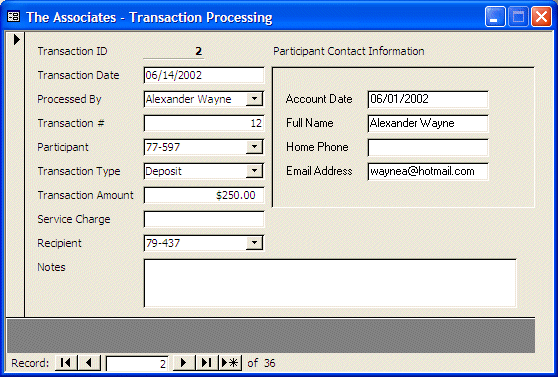
| 1 | 06/14/2002 | Alexander Wayne | 11 | 97-395 | Deposit | $250.00 | 79-437 | |
| 2 | 06/14/2002 | Alexander Wayne | 12 | 77-597 | Deposit | $250.00 | 79-437 | |
| 3 | 06/15/2002 | Hermine Kats | 13 | 74-929 | Deposit | $250.00 | 79-437 | |
| 4 | 06/15/2002 | Hermine Kats | 14 | 24-759 | Deposit | $250.00 | 79-437 | |
| 5 | 06/15/2002 | Hermine Kats | 15 | 85-487 | Deposit | $250.00 | 79-437 | |
| 6 | 06/15/2002 | Hermine Kats | 16 | 29-375 | Deposit | $250.00 | 79-437 | |
| 7 | 06/15/2002 | Hermine Kats | 17 | 35-798 | Deposit | $250.00 | 79-437 | |
| 8 | 06/15/2002 | Hermine Kats | 18 | 99-275 | Deposit | $250.00 | 79-437 | |
| 9 | 06/15/2002 | Hermine Kats | 19 | 79-437 | Deposit | $250.00 | 79-437 | |
| 10 | 06/15/2002 | Hermine Kats | 20 | 38-508 | Deposit | $250.00 | 79-437 | |
| 11 | 06/15/2002 | Hermine Kats | 21 | 38-685 | Deposit | $250.00 | 79-437 | |
| 12 | 06/27/2002 | Alexander Wayne | 31 | 93-457 | Deposit | $250.00 | 24-759 | |
| 13 | 06/28/2002 | Hermine Kats | 32 | 85-487 | Deposit | $250.00 | 24-759 | |
| 14 | 06/28/2002 | Alexander Wayne | 33 | 77-597 | Deposit | $250.00 | 24-759 | |
| 15 | 06/28/2002 | Alexander Wayne | 34 | 79-437 | Deposit | $250.00 | 24-759 | |
| 16 | 06/28/2002 | Alexander Wayne | 35 | 38-508 | Deposit | $250.00 | 24-759 | |
| 17 | 06/28/2002 | Alexander Wayne | 36 | 38-685 | Deposit | $250.00 | 24-759 | |
| 18 | 06/29/2002 | Alexander Wayne | 37 | 29-375 | Deposit | $250.00 | 24-759 | |
| 19 | 06/29/2002 | Hermine Kats | 38 | 99-275 | Deposit | $250.00 | 24-759 | |
| 20 | 06/29/2002 | Hermine Kats | 39 | 35-798 | Deposit | $250.00 | 24-759 | |
| 21 | 06/30/2002 | Hermine Kats | 40 | 97-395 | Deposit | $175.00 | 24-759 | |
| 22 | 07/01/2002 | Hermine Kats | 41 | 74-929 | Deposit | $230.00 | 24-759 | |
| 23 | 07/01/2002 | Hermine Kats | 51 | 74-929 | Service Charge | $0.00 | $20.00 | 24-759 |
| 24 | 07/12/2002 | Hermine Kats | 52 | 97-395 | Deposit | $250.00 | 74-929 | |
| 25 | 07/12/2002 | Hermine Kats | 53 | 99-275 | Deposit | $250.00 | 74-929 | |
| 26 | 07/12/2002 | Hermine Kats | 54 | 85-487 | Deposit | $250.00 | 74-929 | |
| 27 | 07/12/2002 | Hermine Kats | 55 | 29-375 | Deposit | $250.00 | 74-929 | |
| 28 | 07/13/2002 | Hermine Kats | 56 | 79-437 | Deposit | $200.00 | 74-929 | |
| 29 | 07/14/2002 | Hermine Kats | 57 | 24-759 | Deposit | $250.00 | 74-929 | |
| 30 | 07/14/2002 | Hermine Kats | 58 | 38-508 | Deposit | $250.00 | 74-929 | |
| 31 | 07/14/2002 | Hermine Kats | 59 | 35-798 | Deposit | $225.00 | 74-929 | |
| 32 | 07/14/2002 | Hermine Kats | 60 | 77-597 | Deposit | $250.00 | 74-929 | |
| 33 | 07/15/2002 | Hermine Kats | 61 | 38-685 | Deposit | $230.00 | 74-929 | |
| 34 | 07/15/2002 | Hermine Kats | 62 | 38-685 | Service Charge | $0.00 | $20.00 | 74-929 |
| 35 | 07/15/2002 | Hermine Kats | 63 | 93-457 | Deposit | $230.00 | 74-929 | |
| 36 | 07/15/2002 | Hermine Kats | 64 | 93-457 | Service Charge | $0.00 | $20.00 | 74-929 |
 |
 |
 |
 |
 |
|
|
||
| Home | Copyright © 2004-2019, FunctionX | |
|
|
||