
Tables Fundamentals
 |
Tables Fundamentals |
Introduction to Tables
Single-Dimensional Lists
A list is a series of items that share a certain criterion. Such items can be people names, book titles, budgets of commercial companies, etc. Such a list is also referred to as single-dimensional because all of its items belong to one particular category or series.
Suppose you have a business and you want to create a list of your customers. You can start with their names: Alex Cooks, John Hoover, Mimosette Oakley, Yitzah Shiloh, Robert McLain, Helene Brecht. The list can be visually set horizontally or vertically as follows:
| Customer Name |
| Alex Cooks |
| John Hoover |
| Mimosette Oakley |
| Yitzah Shiloh |
| Robert McLain |
| Helene Brecht |
Two-Dimensional Lists
As seen in the above list of customers, if you are dealing with just a simple list, it would be complete. In your business, you certainly would like to have more information than that about each customer. For example, if your business is a bank, you certainly would need to create an account for each customer. The account numbers may appear as follows: 91-205-8, 60-137-2, 44-996-4, 99-846-7, 35-702-5, 76-868-5. The list of these account numbers also can be displayed horizontally or vertically as done above:
| Account Number |
| 91-205-8 |
| 60-137-2 |
| 44-996-4 |
| 99-846-7 |
| 35-702-5 |
| 76-868-5 |
As you can see, this new list is made of insignificant numbers when the list is considered by itself. To make it useful, the list can be added to the earlier list vertically as follows:
| Customer Name | Account Number |
| Alex Cooks | 91-205-8 |
| John Hoover | 60-137-2 |
| Mimosette Oakley | 44-996-4 |
| Yitzah Shiloh | 99-846-7 |
| Robert McLain | 35-702-5 |
| Helene Brecht | 76-868-5 |
A two-dimensional list of made of a series of items such that the series itself belongs to another series. The concept of a two-dimensional list is at the heart of a table: A database table is a two-dimensional list made of columns and rows. A column is a one-dimensional list whose items make up a single category of values. In our example, one category is labeled Customer Name and another category is designated as Account Number. The series of values of each category but belonging to the same row is called a record. For example, the values John Hoover and 60-137-2 belong to the same record.
Database Tables
Before creating a table, you should plan it: figure out what values you want to include in the table. In our example, you may want one category used for the names of customers. Another category would contain the account number for each customer. As your business becomes significant, you may need to keep a better list of your customers. For example, you can add another category for the customers' addresses. Another category could specify their work phone.
Once you have decided what the category would be made of, you can create it. In Microsoft Access, there are six main techniques you can use to either create or make a table available to your database.
![]() Practical Learning: Introducing Tables
Practical Learning: Introducing Tables
Creating a Microsoft Access Table
The Datasheet View
Creating a table in Datasheet View consists of displaying it like a spreadsheet and either entering data or changing the names of columns. To do this, if you are using Microsoft Access >= 2000, from the Tables section of the Database window, you can double-click Create Table By Entering Data. This would present you with a spreadsheet-like window.
Alternatively, and regardless of your version of MS Access, you can first display the New Table dialog box. You can get it from the main menu where you would click Insert -> Table. Y can also click the New button on the Database window while in the Tables section. Any of these two actions would display the New Table dialog box. From the New Table dialog box, you can click Datasheet View and click OK or you can double-click Datasheet View:
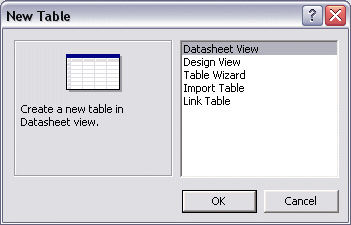
Once in the Datasheet View, to change the string that displays on a column header, you can double-click Field1, Field2, or any field you want, type the desired string, and press Enter. You can also right-click a column header, click Rename Column, type a string and press Enter. Alternatively, while a column has focus, on the main menu, you can click Format -> Rename Column, type a name and press Enter
![]() Practical Learning: Creating a Table in Datasheet View
Practical Learning: Creating a Table in Datasheet View
The Table Wizard
The Table Wizard is one of the most flexible means of creating a table. It presents a series of already configured columns that you can simply select from sample tables.
To start the wizard, you can display the New Table dialog box that you can get from the main menu at Insert -> Table or by clicking the New button on the Database window while in the Tables section. Any of these two actions would display the New Table dialog box
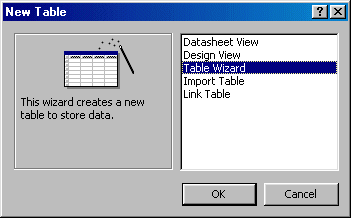
From the New Table dialog box, you can click Table Wizard and click OK or you can double-click Table Wizard.
If you are using Microsoft Access >= 2000, from the Tables section of the Database window, you can double-click Create Table By Using Wizard.
On the first page of the Table Wizard, you can first select a category either as Business or as Personal using one of the radio buttons. Once you locate the type of table that is close to the type of list you are trying to create, you can click it in the Sample Tables list box. This would display its types of items in the Sample Fields list box. From there, if you see a field you like, you can double-click it.
When creating the list, the items are added in the order they are double-clicked and you cannot change their positions using the wizard. Instead, you can insert an item under another. For example, if you click EmployeeNumber in the Fields In My New Table list and then double-click DateHired in the Sample Fields, the new field, in this case DateHired, would be added just under the one that was highlighted, in this case EmployeeNumber.
If you have added a field but don't like its name, you can change it. To do this, you can select the field in the Fields In My New Table list, click Rename Field, type the new name and press Enter.
![]() Practical Learning: Creating a Table Using the Wizard
Practical Learning: Creating a Table Using the Wizard
Table Design View
Probably the best way to exercise as much control over the creation or configuration of a table is in a window called the Design View. It presents all types of options for each fields and any thing that can be done on a field.
To display the table in Design View, you can first call the New Table dialog box and then double-click Design View. If you are using Microsoft Access >= 2000, from the Tables section of the Database window, you can double-click Create Table In Design View:
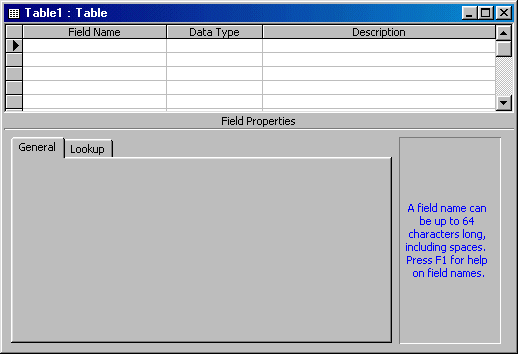
While in Design View, to create a column, you can click a field under the Field Name column, type a name and press Enter. After setting the name of a field, you should specify the type of data that the cells in that column would accept or should reject. This is done by specifying its data type. The data type is selected from the Data Type column in the cell corresponding to the field name. The types available are:
Text: A Text data type allows the user to type any kind of characters or group of characters. This field can hold up to 255 characters
Memo: The Memo data type functions like the Text except that it can hold a longer text up to 64000 characters
Number: The Number data type will allow a combination of digits using 0 to 9. As you will see shortly, there are various forms of numbers. You will get to specify further number formats you need for your database
Date/Time: The Date/Time data type allows you to control data entry to some fields for recognizable date or time values. There are various formats used
Currency: The Currency data type will accept only a number in its field. That number is then converted to represent money value
AutoNumber: You use the AutoNumber data type to ask Microsoft Access to complete that field with automatically generated numbers for a field whose number you don't need to control
OLE Object: An OLE Object field allows you to include pictures, graphics, other application files (for example Microsoft Word documents or Microsoft Excel spreadsheets, etc)
Hyperlink: With the Hyperlink, you can provide a link to a file in your computer or to a web page on the Internet
The lower section of the table presents many more options for each field.
![]() Practical Learning: Creating a Table Design View
Practical Learning: Creating a Table Design View
Table Importing
The last technique, probably the least flexible, consists of importing either a table from another application or only data you can use to create a new table. You can also import data and insert it in an existing table.
To import a table, you can first display the New Table dialog box, click Import Table and click OK, or you can double-click Import Table. Alternatively, on the main menu of Microsoft Access, you can click File -> Get External Data -> Import... Either of these actions would call the Import dialog box from where you can select the application or the database that is holding the table you want to import. After selecting the application or the database, the Import Objects dialog box would come up:
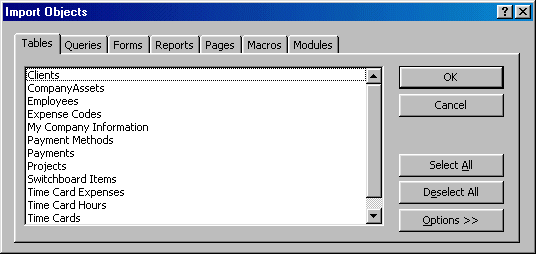 |
From there, you can select the category and the objects you want to import, then click OK.
After importing data, you can switch the table to Design View and change some characteristics of the fields as you see fit and as possible.
![]() Practical Learning: Importing Data
Practical Learning: Importing Data
| "TypeOfLoan","Notes" "Personal","This is loan given as a cashier check to a customer who wants a cash loan" "Car","This loan will be processed by our partners as car dealers" "Boat", "Furniture", "Musical Instrument","Loan through for a customer who wants to buy (studio) equipment" |
Table Linking
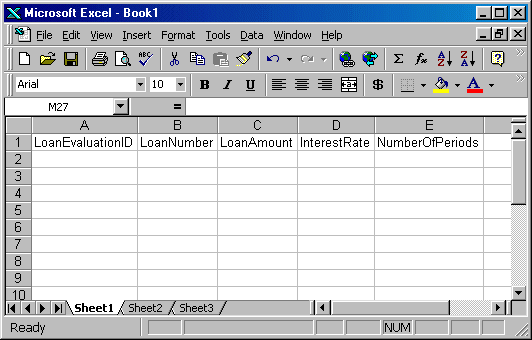
Another technique used to use external data consists of linking to it instead of importing. This allows the original application to preserve its data and only make it available to your database.
To link to external data, you can first call the New Table dialog box. From there, you can click Link Table and click OK or you can double-click Link Table. Alternatively, on the main menu, you can click File -> Get External Data -> Link Tables... This would call the Link dialog box. You can then select the application that holds the data you want and click Link. You would be presented with a Link Tables dialog box:
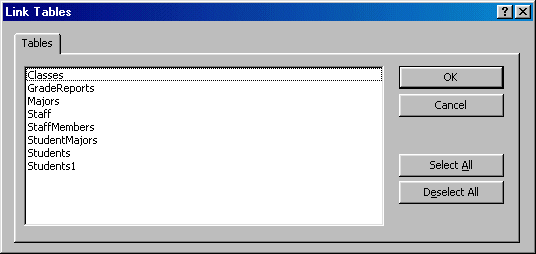 |
This gives you the opportunity to select the table(s) and click OK.
When linking to an external table, since the table actually belongs to another application, file, or database, you should not change characteristics of its fields
![]() Practical Learning: Linking to External Data
Practical Learning: Linking to External Data
A Table From a SQL Statement
You can also create a table using a SQL statement. To do this, you must first start a query as if you were creating a query. This is because Microsoft Access doesn't provide a native environment to write SQL code or put it another way, to write a SQL statement, you must open a query window.
The syntax of creating a table is
CREATE TABLE TAbleName;
The CREATE and TABLE keywords are required to indicate that you want to create a table.
Tables Relationships
Overview
Relationships allow data to flow from one table or object to another. To create such a relationship, you need two tables. The first table, referred to as the parent, must have a column that can uniquely identify each record. Such a column is created as, and is called the primary key. The other table, referred to as a child, must have a column that will allow it to be related to the primary key of the parent table. Such a column is referred to as a foreign key because it acts as an "ambassador". Although it is created in the child table, it is only a representative of the records of the parent table.
To create a relationship between two tables, both must have a column that will be used as the link. both columns must have the same data type. Although they don't have to have the same name, it makes it convenient to use the same name.
It is particularly easy to create a relationship between two tables
![]() Practical Learning: Creating Relationships
Practical Learning: Creating Relationships
| Field Name | Data Type |
| LoanProcessingID | AutoNumber |
| ProcessingDate | DateTime |
| CustomerID | Number |
| LoanNumber | Text |
| TypeOfLoanID | Number |
| LoanAmount | Currency |
| Notes | Memo |
Overview
Tables relationships are prepared in the table but they are managed in the Relationships window. In the Relationships window, you can connect a foreign key of a child table to the primary key of the parent table
![]() Practical Learning: Managing Relationships
Practical Learning: Managing Relationships
|
|
||
| Home | ||
|
|
||