
Data Controls
 |
Data Controls |
|
A Label |
|
Introduction |
|
A label is a control that serves as a guide to the user. It provides a static text that the user cannot change but can read to get information about another control on the form or report. You can also use it to display simple information to the user.
|
Most controls on the form or the report are not explicit at first glance and the user would not know what they are. Therefore, you can assign a label to the control as a help to the user.
To add a label to a form or report, in the Controls section of the
Ribbon, click Label |
Properties of a Label
Probably the most important and the most obvious characteristic of a label is the text it is displaying. The text is the label's caption. If you click the Label control on the Ribbon and click the form or report, you must first define its caption. If a label already has a caption, there are various ways you can edit it. For example, you can double-click it to access its Properties window and edit the string in the Caption field. On the other hand, to edit the caption of a label, on the form or report, click inside the label. That would put it into edit mode and you can edit it as you wish.
The appearance of a label is visibly controlled by its font characteristics. The Font name, also called its face, is the name of the font as defined by the operating system. We saw that there are various ways you can define the font characteristics of a control like the label.
The size of a label control its Width and its Height. Although the dimensions are closely related to the font characteristics, they can be independently defined. There are two main ways you can resize a label, which is equivalent to changing its size. To set your own size, in the Format tab of the Properties window of the label, change the values of the Width and Height properties. Unless you plan to show the background color of a label, probably the best way to resize a label is to make it adjust to the dimensions depending on the font size and the total characters width. To do this, position the mouse on one of the label's handle and double-click. The label's width and height would be set to accommodate its caption.
The position of a label is controlled by its Top and Left properties. The Top property defines the measure from the top left corner of the section where the label is positioned, to the top left corner of the label itself.
![]() Practical Learning: Designing Labels
Practical Learning: Designing Labels

|
A Title |
Introduction
In our introduction to the label control, we learned to add a string to a form. To make it act as the title of the form, we had put it in the header section. We also had to remember the name of the form to apply it to the label. Microsoft Access provides a faster means of creating a title. This is done using the Title control. When you do, Microsoft Access retrieves the name of the form, creates a label, and uses the name of the form as caption.
Creating a Title
Instead of going through the label to get a title, to
formally create a title, in the Controls section of the Ribbon, click the Title
control ![]() and click the
form. When you click the form, if it did not have a form header section, that
section would added to the form. If it had the section, that section would be
used. Then, a new label with the name of the form as caption would be added to
the form header section. When creating this label, Microsoft Access would use
some default characteristics, such as the font name and size, and applied them
to the label. Of course, you can change any of the characteristics, including
the caption of the title.
and click the
form. When you click the form, if it did not have a form header section, that
section would added to the form. If it had the section, that section would be
used. Then, a new label with the name of the form as caption would be added to
the form header section. When creating this label, Microsoft Access would use
some default characteristics, such as the font name and size, and applied them
to the label. Of course, you can change any of the characteristics, including
the caption of the title.
![]() Practical Learning: Adding
a Title
Practical Learning: Adding
a Title
Introduction
A hyperlink is a label that can be clicked to open an object of the data, an application on computer, a file from the network, or a web site (or web page). Before using it, the user can position the mouse on the label, which would change the cursor to a pointing finger. The user can click. As stated already, a hyperlink can be made to open almost any type of file or document. When creating it, you will decide what object or file would be opened or accessed.
Creating a Hyperlink
To create a hyperlink, display a form or a report in Design View:
A dialog box made of various sections would come up. In the left section, you can click Existing File or Web Page:
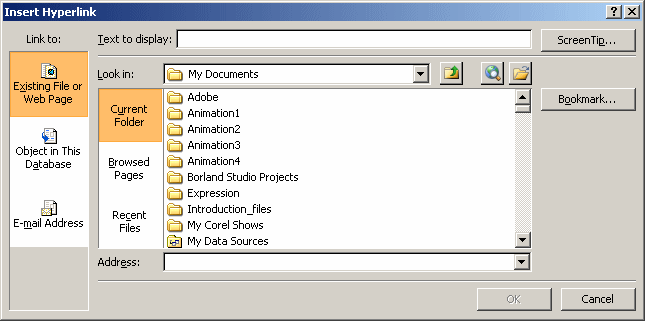
In this case, if you want to open a file, click Current Folder and use the Look In combo box to specify the folder where the file is located. Once you have specified the folder, in the large list box in the middle-center of the dialog box, locate the file, click it and click OK.
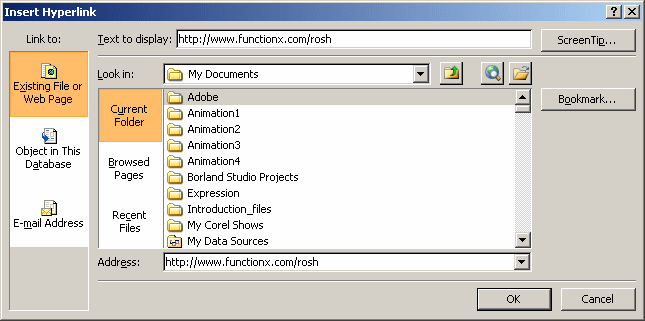
If you want to open a web page, you can choose one of the pages you had previously visited. To do this, in the second column from left, click the Browsed Pages button. All the files that the dialog box can "remember" would display in the list in the middle-center. You can then select the file. You can also click the arrow of the Address combo box to find out if the web site or web page you want is in the list. If you know the web site or the web page you want the link to eventually open, type it in the Address combo box. Once you have specified the file, click OK. This description also applies if you click the Recent Files button.
If you want the link to open an object of the same database, such as a form or a report, in the left column, click Object in This Database. The middle-center of the dialog box would display a tree view:
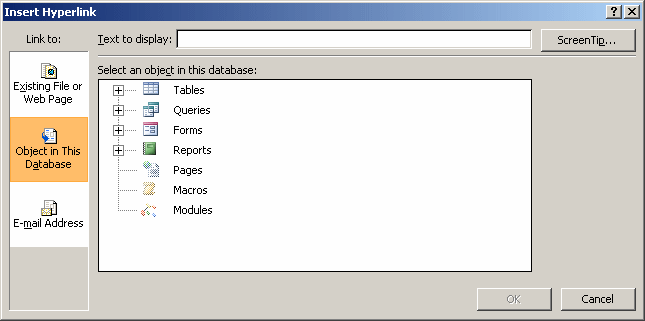
Before selecting an object, expand its node, then select the object, and click OK.
A hyperlink is primarily a label. As such, there are some characteristics you can change for it but you should make sure it would always be obvious to the user that it represents a hyperlink. To change the caption of the hyperlink, you can click it once and click it again to put it into edit mode, and edit its caption. You can also use the Properties window of the hyperlink to manage the label.
![]() Practical Learning: Adding
a Hyperlink
Practical Learning: Adding
a Hyperlink
|
Other Labels |
The Page Number
In a report meant to display various records on its many pages, you may want to display the page number. To assist you with this, Microsoft Access provides a special label. To get it, display the report in Design View. In the Control section of the Ribbon, click Page Numbers and click the report. The Page Numbers dialog box would come up:
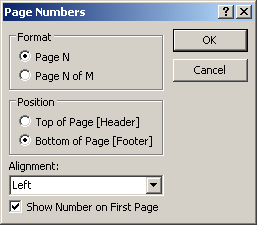
Use the Page Numbers dialog box to specify what sentence would be used, and where, to display the page number. Once you are ready, click OK. The new label would be added to the Page Footer section of the report.
The Date and Time
When displaying a form, if you want to show the current and/or time, Microsoft Access can assist you with a label. Before creating the label, display the form or report in Design View. To add the label, in the Controls section of the Ribbon, click Date and Time and click the form. The Date and Time dialog box would come up:
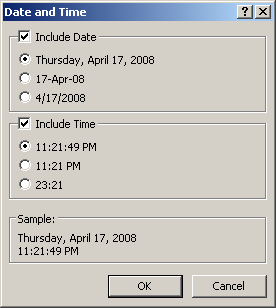
Use the dialog box to specify what of the date or the time, including the formats, would display. Once you are ready, click OK. If the form or report did not have the appropriate header and footer section (the Form Header section for the form and the Report Header section for the report), the section would be created. If the section existed already, it would be used to host the label. When the label is created, by default, it is added to the header section (the Form Header section for the form and the Report Header section for the report). If you do not like those positions, you can move the label(s). To do this, simply click and drag it(them) to the desired section.
|
The Text Box |
Introduction
A text box is a Windows control used to get or display text for the userís interaction. At its most regular use, a text box serves as a place to fill out and provide information. You can also use it only to display text without allowing the user to change its content.
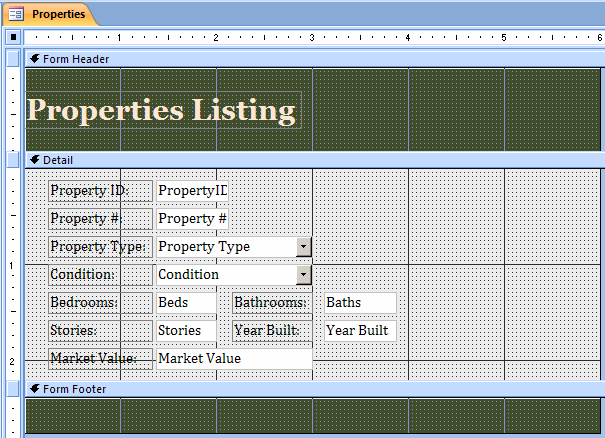
Like most other controls, the role of a text box is not obvious at first glance; that is why it should be accompanied by a label that defines its purpose. From the userís standpoint, a text box is named after the label closer to it. Such a label is usually on the left or the top side of the corresponding text box.
There are two main ways you can add a text box to a form or report:
Properties of a Text Box
Like every control on a form or report, the size of a text box is controlled by its Width and Height properties. The position of a text box is controlled by its Top and Left properties.
To make a text box read-only, that is, if you do not want the user to enter text in a text box, there are various alternatives. If you change the Enabled property from Yes to No, the text box would have a gray background and cannot receive focus. If you set the Locked property from No to Yes, the control would appear with a normal (white) background.
The Special Effects properties of the text box are expanded as compared to those available on a label. Besides the ability to raise or sink a text box, you can give it a thick, etched, or shadow border.
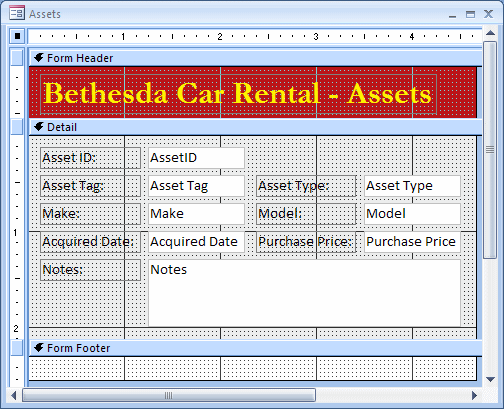
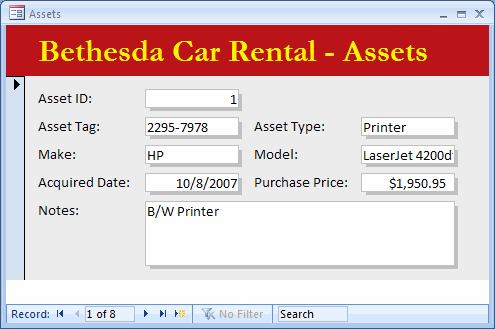
After adding a text box to a form or report, you can configure it to receive its data from an existing table. This can be done after the Record Source of a form or report has been defined. To link a text box to the object that is the Record Source of a form or report, click the arrow of its Record Source combo box and select the desired field.
![]() Practical Learning: Adding Text Boxes
Practical Learning: Adding Text Boxes
Introduction
A picture is a graphical object that can be used either as the background of a form or report or can be positioned on top of a database object. Before using such a picture, you should prepare it or at least have it handy.
In Lesson 8, we saw that, to use a picture as the background of a form or report, in Design View, you could open the Properties window of the form or report. Then, in the Format tab, you could click the Picture field to reveal its ellipsis button, use that button to locate and retrieve the picture. Once added to the form or report, you could use some other properties to specify how the picture would be displayed.
Instead of an object whose data is linked to a field of the database, you can have an object on your form or report to simply complete the design of the parent object. That is the case for logos or fine prints on forms and reports. On a form or report, an object whose data is not linked to a specific record is referred to as unbound.
To add an unbound
object, display the form or report in Design View. In the Controls
section of the Ribbon, click the Unbound Object Frame button
![]() and click on the form or report. If the Control Wizard button is clicked
on the Ribbon, a wizard will help you select the object you want to add
to your form or report.
and click on the form or report. If the Control Wizard button is clicked
on the Ribbon, a wizard will help you select the object you want to add
to your form or report.
|
|
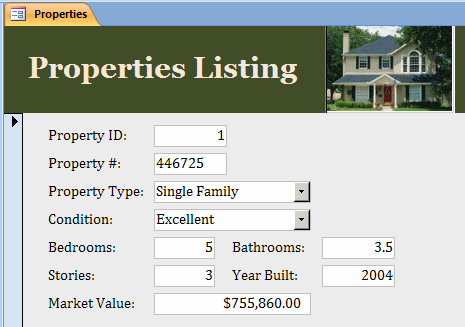
When reviewing data types, we saw that a bound
object is one that is tied to an existing field on a table. To add such
a bound object to a form or report, in the Controls section of the Ribbon,
you can click Bound
Object Frame ![]() and click the desired area of the form or report:
and click the desired area of the form or report:

You can then design the size and position of the frame as you see fit:
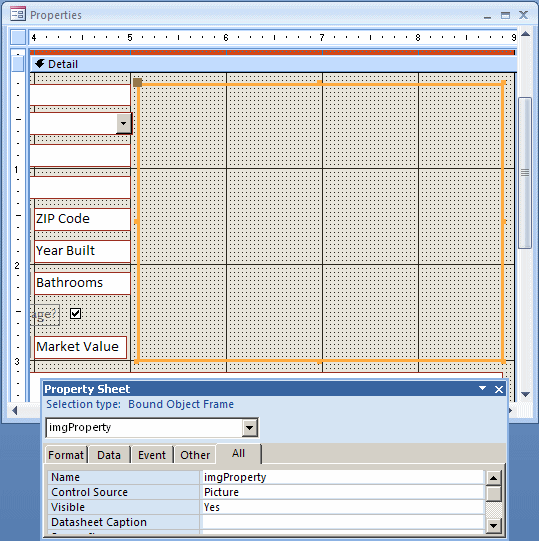
Since the object is (supposed to be) bound to a field on the source table (or the source report), the most important piece of information you should provide is the table's field that holds the bound data. This is specified in the Record Source property. After doing this, the records would show the value of the bound object (you should have associated the objects to each record, using the Insert Object dialog box):

A Logo
A logo is a picture that represents or symbolizes a company. You can use such a picture on a form or report to make it cute. In our discussion of unbound pictures, we learned that we could add a picture independent of any record. We also had to decide where to position the picture. If we wanted it to act a as a logo, we had to put it in the form header section. To formally add a logo to a form a report, Microsoft Access can assist you.
Before using a logo in your database, you must create it,
design it, and save it as a picture file. To add the logo, display the form or
report in Design View. In the Controls section of the Ribbon, click Logo ![]() . This would open the Insert Logo dialog box where
you can select a picture.
. This would open the Insert Logo dialog box where
you can select a picture.
![]() Practical Learning: Adding
a Logo
Practical Learning: Adding
a Logo

|
The Line and the Rectangle |
|
The Line |
To enhance the appearance of sections or controls on forms and reports, Microsoft Access provides a line object. You can use it to trace horizontal, vertical, or diagonal lines of various preset widths. The use, position, and orientation of a line only depend on your goal.
To add a line, display the form or report in Design
View. In the Controls section of the Ribbon, click the Line object ![]() and click the form or report.
and click the form or report.
![]() Practical Learning: Adding
Lines
Practical Learning: Adding
Lines
 and select 2 pt
To enhance the appearance of sections or controls on forms and reports, Microsoft Access provides a rectangle object. It is not a control (for example, it does not "own" of fire events; in other words, it does not programmatically communicate with the operating system, it does not store or receive data nor does it provide data). It is a graphical object primarily intended for aesthetic purposes. There is no formal directive on how to use the rectangle.
There are various reasons you would use a rectangle
on a form or a report. You can use it to "hold" other controls. For
example, if you want to isolate a group of controls, you can
include them inside of a rectangle. To add a rectangle, display the form
or report in Design View. In the Controls section of the Ribbon, click
the Rectangle object ![]() and click the form or report. To exploit the aesthetic role of a
rectangle, you can change such as aspects as the back color, the
borders, or the special effects, etc.
and click the form or report. To exploit the aesthetic role of a
rectangle, you can change such as aspects as the back color, the
borders, or the special effects, etc.
![]() Practical Learning: Adding
a Rectangle
Practical Learning: Adding
a Rectangle

|
Lessons Summary |
MCAS: Using Microsoft Office Access 2007 Topics
| C7 | Modify the design of reports and forms |
|
|
||
| Previous | Copyright © 2008-2016, FunctionX, Inc. | Next |
|
|
||