|
|
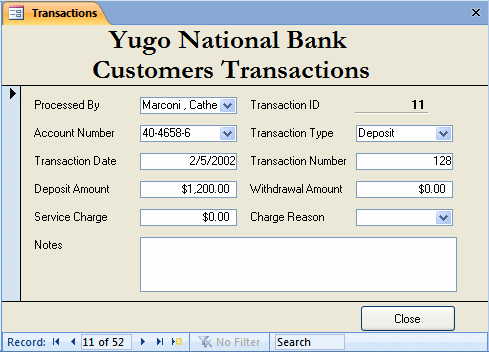
Tabbed Documents or Overlapped Windows?
|
|
If you want, you can make the form appear with its own title
bar and the system buttons. To do this, click the Office
Button and click Access Options. In the left frame, click Current
Database and, in the right frame, in the Document Window Options sections, click
the Overlapping Windows radio button:
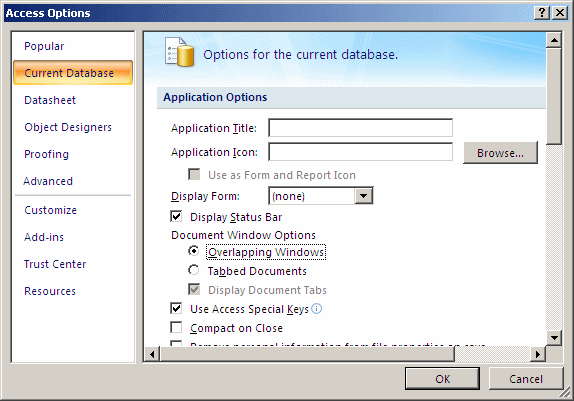
After making the selection, you can click OK. You will be
asked to close and reopen the database:

Which you should do.
There are various ways you can create a form. To
automatically generate a form, in the
Navigation Pane, select the table. On the ribbon, click Create. In the Forms
section, click Form.
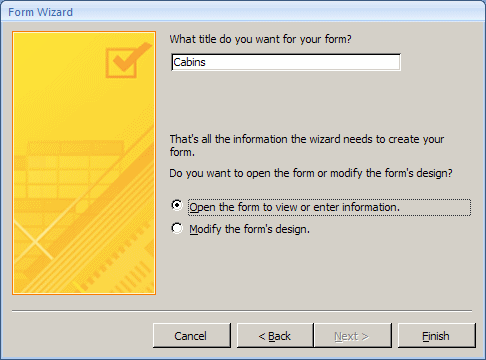
You can also create a form using a wizard. To launch the Form Wizard, on the Ribbon, click
Create. In the Forms section, click More Forms, and click Form
Wizard. On the first page, select the table or query that holds the desired fields:

On the 2nd page of the wizard, select the layout of the
form:

On the 3rd page, select a design:

On the 4th page, name the form:
Data entry of a database is mainly performed on forms as they
provide a friendlier display of information than tables. Data entry on a form is performed
using various types of Windows controls. On text boxes, the user enters
data by typing it. On a combo box, depending on how the object was configured by
the database developer, the user may have to only select an item from the list.
In some other cases, the user may be allowed to enter new data.
After entering or changing data on a control, to move from
one field to the next, the surest way is to press Tab. On most occasions, the
user can also press Enter. The Enter key may not move the focus from a text box
that allows multiple lines of text. If the user
is simply reviewing data without performing data entry, the keyboard’s arrow
keys can also be used to move among fields.
There are various ways you can make a form appear: Columnar,
Datasheet, Tabular, Justified:
- A columnar form is used to display data one record at a time:

- A tabular form displays its data in a series of
cells with continuous sets of records:
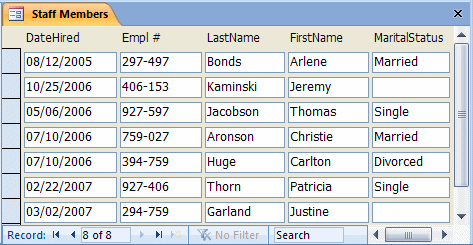
To create a tabular form, use the Form Wizard and select its option.
Otherwise, you can design a from from scratch. Then, in the Format or the
All tabs of the Properties window, set its Default View to Continuous
Form
- A Datasheet form looks and behaves like a table,
displaying all possible records at the same time instead of one record at a
time
- A Justified form provides a consistent look with borders added to labels
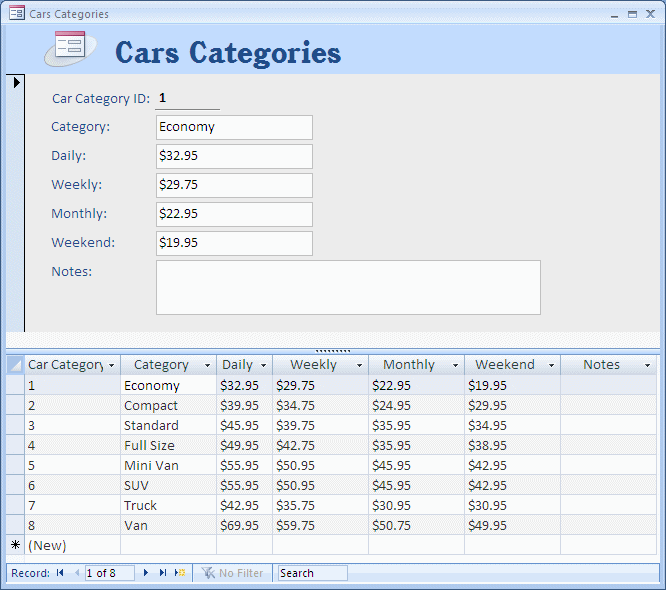
- A split form is made of two sections:
A form can display one to three different sections when in
Design View.
To add the sections,
you can:
- Right-click the middle of the form and click Form Header/Footer
- On the ribbon, you can click Arrange and, in the Show/Hide section, click
the Form Header/Footer button

A form can also be equipped with two other sections. To get
them, you can:
- Right-click the middle of the form and click Page Header/Footer
- In the Show/Hide section of the Arrange tab of the ribbon, you can click
the Page Header/Footer button

A form is equipped with special horizontal lines used to
visually separate sections of a form. To equip a form with dividing lines, add a header and a footer sections.
In the bottom section, a form is equipped with navigation buttons
used to perform a
specific role each:
|
Button |
Name |
Role |
 |
First Record |
Allows moving to the first record of the table |
 |
Previous Record |
Allows you to move one record back (if there is one) from the current record |
 |
Current Record |
Displays the number representing the current record out of the total number
of records |
 |
Next Record |
Allows moving you one record ahead |
 |
Last Record |
Allows moving you to the last record of the table |
 |
New (Blank) Record |
Used to enter a new record on the table |
|
The Background Color of a Section
|
|
In all forms we have created so far, unless using the Form
Wizard or occupying it with a picture, the body of the form was painted with a
white color. If you do not enjoy white forms, you can set the background to a
color of your choice. Unlike the picture, the form (fortunately) does not
control its background color. This aspect is left to each section to manage.
Before specifying the color of a form, first click or select
the intended section. To change the background color of a section:
- On the ribbon, click Home and, in the Font section, select a color from
the Fill/Back Color button

- Right-click a section, position the mouse on Fill/Back Color and click the
desired color
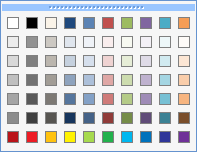
- On the ribbon, click Design and, in the Font section, select a color from
the Fill/Back Color button

- Access the Properties window of the section. In the Format or the All tab,
click the Back Color field. If you click the arrow of the property,
you can select a familiar color from the list. Otherwise, you can click the
browse button. This would display a list of colors similar to that of the Font/Fore
Color window
Unlike the Fill/Back Color (and the Font Color) of
the Font sections of the Home and the Design categories of the ribbon, when you
right-click a section of a form and position the mouse on Fill/Back Color,
the colors that display do not show their tool tip, which would indicate their
names. Because the layout of colors is the same as the Fill/Back Color
and the Font Color windows of the Font sections of the Home and the Design
categories of he ribbon, we will use their names.
Microsoft Access provides some special visual effects used
to raise or sink, etc a section of a form or report, a label or a field. These
effects can be controlled by using the Special Effect field in the
Properties window.
|
|

