
ADO Fundamentals
 |
ADO Fundamentals |
Microsoft ActiveX Data Objects
The .NET Framework is a library, developed by Microsoft, that can be used to create different types of applications, including databases, using a low-level common language that is translated from a known, and somewhat easier or regular language such as Microsoft Visual Basic. The .NET Framework comes with a technique of creating and managing databases known ADO.NET. Although ADO is a true library, ADO.NET is not a library: it is only a technique of dealing with databases. The ADO part suggests that it uses concepts similar to the ADO approach of solving database operations. The .NET part of the name means that it uses the .NET Framework.
Using ADO in the .NET Framework
If you want to create an ADO database application in Microsoft Visual Basic, the .NET Framework provides a namespace named ADODB that is equipped with various classes. To access the ADODB namespace if your project, you can first create a reference to its library. To do this, in the Solution Explorer, right-click the name of the project and click Add Reference... In the COM tab of the Add Reference dialog box, locate the Microsoft ActiveX Data Objects version Library
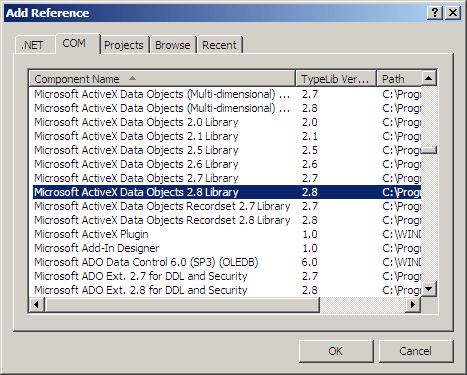
Click OK. In the .NET Framework, ADO is represented by the ADODB namespace. The classes used to create and manage tables are stored in the ADODB namespace.
The Data Source of an Application
Introduction
A database is a project that holds one or more lists of items. There can be other issues involved such as how the data would be made available to the users, what computer(s) would access the data, what types of users would access the database. The database could reside in one computer and used by one person. A database can also be stored in one computer but accessed by different computers in a network. Another database can be created and stored in a server to be accessed through the Internet. These and other related scenarios should be dealt with to create and distribute the database.
A Data Source
You may plan to create a database that would be used by one person using one computer. As your job becomes more effective, you could be asked to create another database that would be accessed by different people. Regardless of why and how, after creating a database, you should have a way of making it available to those who would use it. To do this, you can create a data source.
A database is created as a computer file and it has a path, that is, where the database file is located. The path to a file is also known as its location. The path to a database, including its name, is also called the data source. In some of your database operations, you will be asked to provide a data source for your database. In this case, provide the complete path followed by the name of the database.
If you plan to access your database from another programming environment, then you should create an ODBC data source. To do this, in the Control Panel or the Administrative Tools, double-click Data Source (ODBC) to open the ODBC Data Source Administrator:
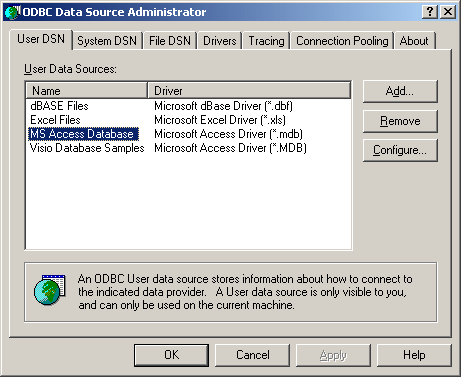
To proceed, click the Add button. This would launch a wizard. In the first page of the Create New Data Source wizard, click Microsoft Access Driver (*.mdb):
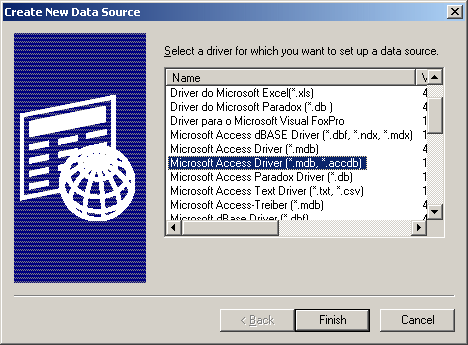
Click Finish. In the following screen, you would be asked to enter a name for the data source. You can enter the name in one or more words. The name would be used by the applications that need to access the database. This means that you should pay attention to the name you give. In the Description text box, you can enter a short sentence anyway you like. To specify the database that would be used, click Select and select an mdb database. Here is an example:
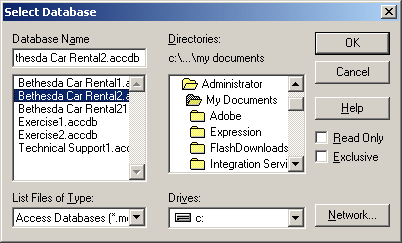
After selecting the necessary database, if you need to be authenticated in order to use the database (if the database is protected), click the Advanced button. By default, a database is meant to allow anybody to use it. In this case, you can leave the Login Name and the Password empty. Otherwise, type the necessary credentials:
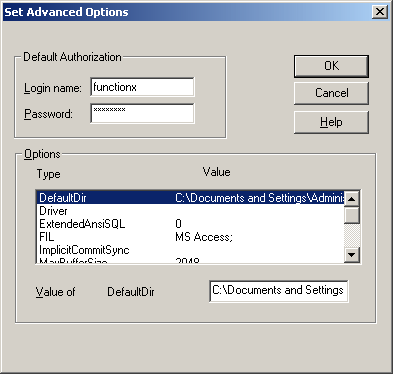
After using the Set Advanced Options dialog box, click OK (or Cancel to keep it the way it previously was).
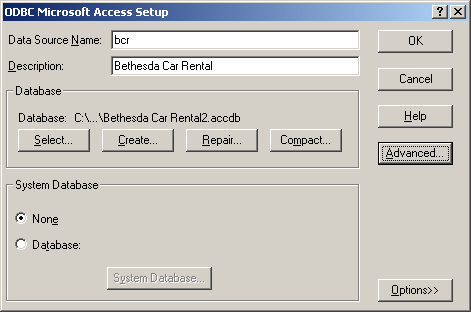
After entering the necessary information and selecting the desired database, you can click OK twice.
|
|
||
| Previous | Copyright © 2005-2019, FunctionX | Next |
|
|
||