Code of an
application is written in plain English and readable to
human eyes. For a C++ application, you can use any text editor to write
your code but one of Visual Studio's main strengths is the code editor that it
has always brought. It is very intuitive.
The Code Editor is a
window specially designed for code writing.
 |
Although all languages of the Visual Studio .NET
programming environment share the Code Editor, once you have started a
type of application, the Code Editor is adapted to the language you are
using. Its parser (a program used internally to analyze your code) behaves
according to the language you are using. The features and behaviors of
the Code Editor are also different, depending on the language. |
To display the code editor, if you
created an empty project, you can click Project on the main menu and select one
of the options that would lead either to a blank text file or a file that
contains primary code.
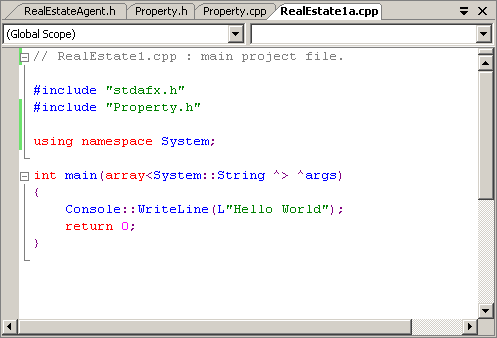
The Code Editor of Visual C++ is divided in 4
sections:

The top section of the Code Editor displays tabs of
property pages. Each tab represents a file. To add a
new file to the project, on the main menu, you can click
- File -> Add New Item...
- Project -> Add New Item...
Once in the Add New Item dialog box, in the Templates
section, click the type of file you want to create, type a name in the Name text box, and press
Enter. After the file has been created, it is represented by a tab in the
top section of the Code Editor. In the same way, you can add as many files
as you judge them necessary. Because there can be different types of
files, each has an extension that allows you to know the type of file the
tab is holding.
To access
one of theses files, you can click its corresponding tab. By default, the
tabs display in the order their files were created or added to the
project, from left to right. If you don't like that arrangement, click and
drag its tab either left or right beyond the next tab.
The top-left section of the Code Editor displays a
combo box. If you position the mouse on it, a tool tip that starts with Scopes
in would appear. The Scope combo box holds a
list of the types as classes and structures that are used in the current
project. You can display the list if you click the arrow of the combo box.
Each item of the Scope combo box displays the name of
its type associated with its parent as implemented in the code.
The top-right section of the Code Editor displays a
combo box named Members. If you position the mouse on it, a tool tip that
starts with Functions would appear. The Functions combo box holds a list of the members
of a class. The content of the Functions combo box depends on the item that
is currently selected in the Scopes combo box. This means that, before
accessing the members of a particular class, you must first select that
class in the Scopes combo box. Then, when you click the arrow of the
Functions combo box, the members of only that class display.
If you select an item from the Functions combo box, the
Code Editor jumps to that member in the header file and positions the cursor to the left of
the member.
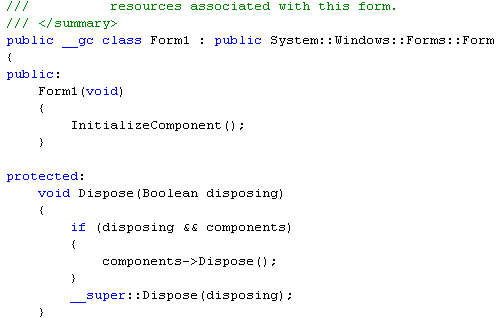
Code is written in a wide area with a white background. This is the area you use the
keyboard to insert code with common readable characters. The Code Editor uses some
colors to differentiate categories of words or lines
of text:

The colors used are highly customizable. To change the
colors, on the main menu, you can click Tools -> Options... In the Options
dialog box, in the Environment section, click Fonts and Colors. To set the color
of a category, in the Display
Items section, click the category. In the Item Foreground combo box, select the
desired color. If you want the words of the category to have a colored
background, click the arrow of the Item Background combo box and select one:

In both cases, the combo boxes display a fixed list of
colors. If you want more colors, you can click a Custom button to display the
Color dialog box that allows you to "create" a color.

