Introduction to Microsoft Visual Studio

Introduction to Microsoft Visual Studio
Introduction to Our Lessons
Introduction to C# as a Computer Language
A language is a list of words and the techniques of using those words to help two systems, such as two people, to communicate. A computer programming language is a list of words and the techniques of using those words to help two systems, such as a human being and a machine, or two machines, to communicate. cate with a machine, also referred to as a computer, a person writes instructions using a human language. Those instructions are submitted to a system that will translate them in a language the computer can understand. The computer will then attempt to product the result the human being is expecting.
C#, pronounced c sharp, is a computer programming language, or a computer language that provides the list of words and techniques that a person can use to write or create instructions that would produce a certain result. The instructions can be written using a regular text editor such as Notepad. Another way is to use a programming environment that is equipped with many tools that make it easy to work on projects, to create the necessary files, and to distribute a complete product.
A product created from a computer language is called a computer application, or an application, or an app. As stated previously, you can use a programming environment or programming studio or studio to create an application. Many programming environments are available.
Introduction to Microsoft Visual Studio
One of the programming environments you can use to write C# instructions is Microsoft Visual Studio. Microsoft provides a free programming studio you can use: Microsoft Visual Studio Community. You can download it from the Microsoft website.
A C# Project
A computer project is a group of files and objects that contain the necessary instructions for the intended application to produce the desired results. A C# project is made of one or more files that contain the instructions of the project. A simple C# project can contain one file that holds all the necessairy instructions. An advanced project would contain more than that.
When you start Microsoft Visual Studio, it displays a dialog box titled Visual Studio 2022:
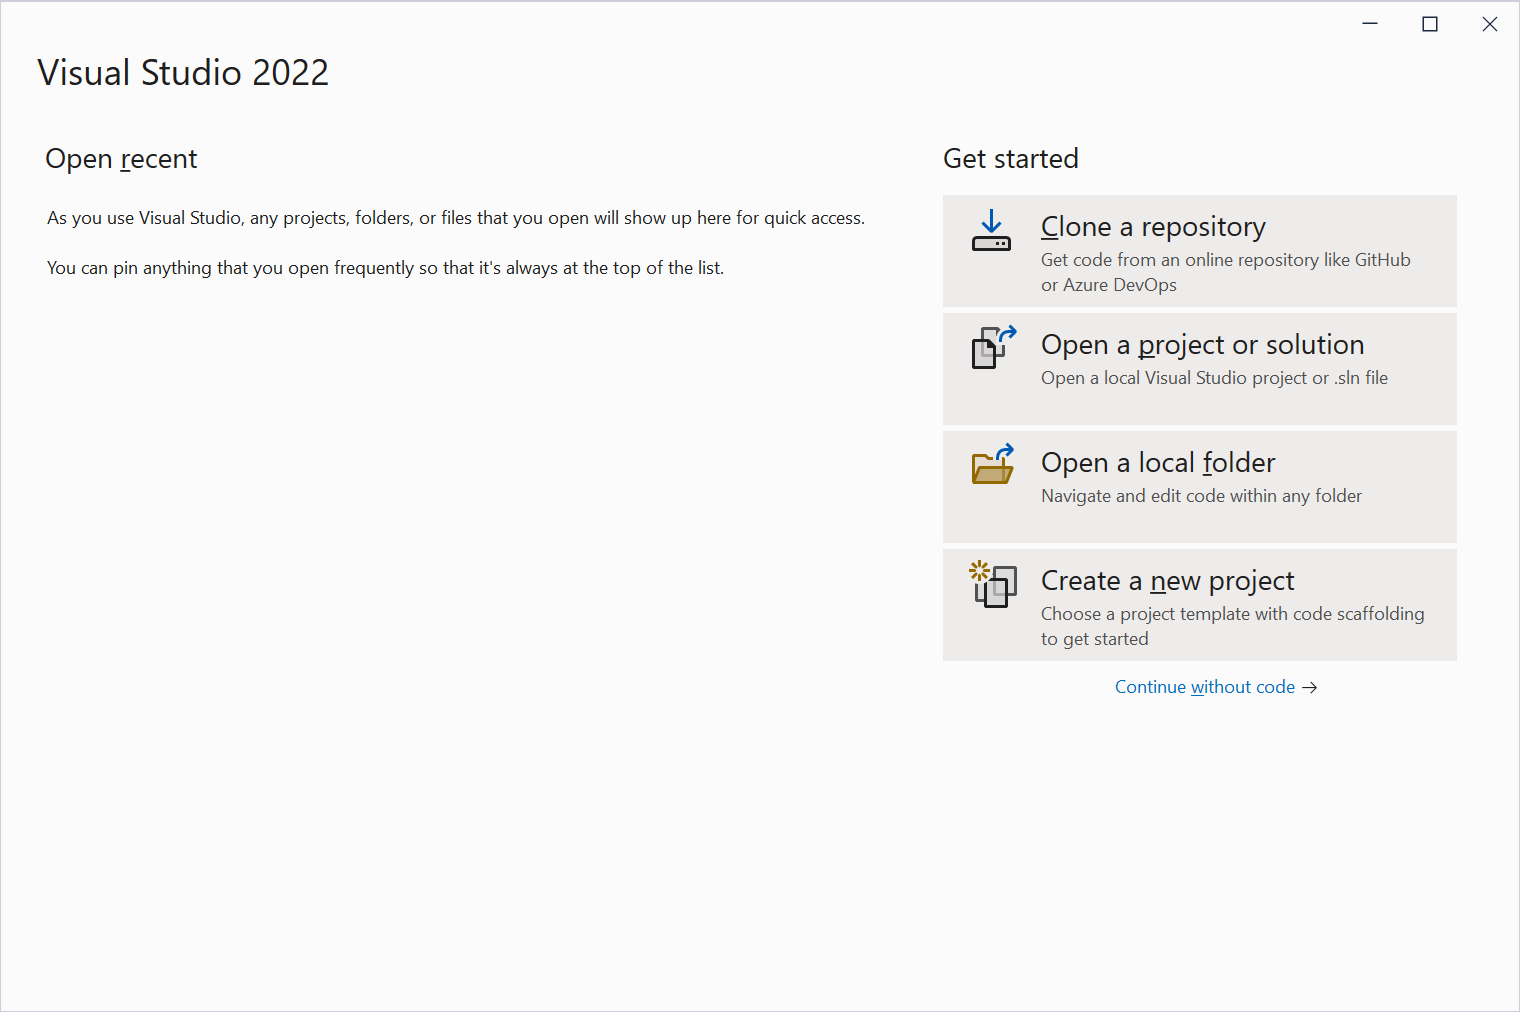
From that dialog box, to start a project, click Create a New Project.
The Main Menu
The top section of Microsoft Visual Studio displays the main menu divided in categories such as File or Edit. The main menu is used like the menu of a normal application.
Under the main menu, there is a toolbar. Normally, when the studio is launched, it displays the Standard toolbar as its default. Some additional toolbars will display in response to an action from you. Still, you can display other toolbars if you want.
You can customize any toolbar and any menu category.
Introduction to C# Projects
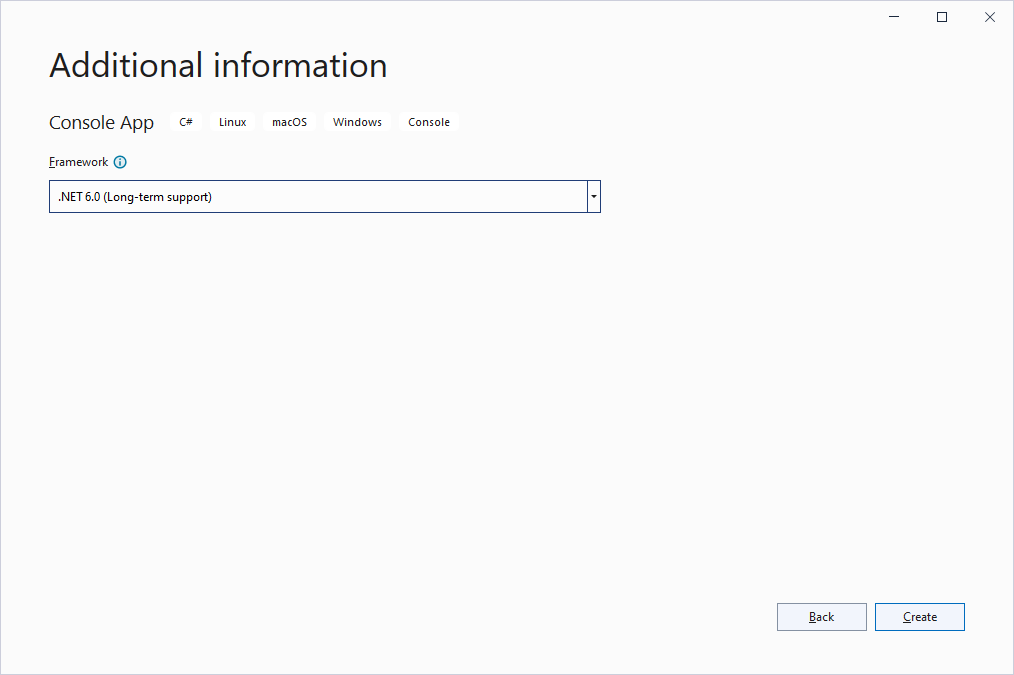
Introduction to Console Applications
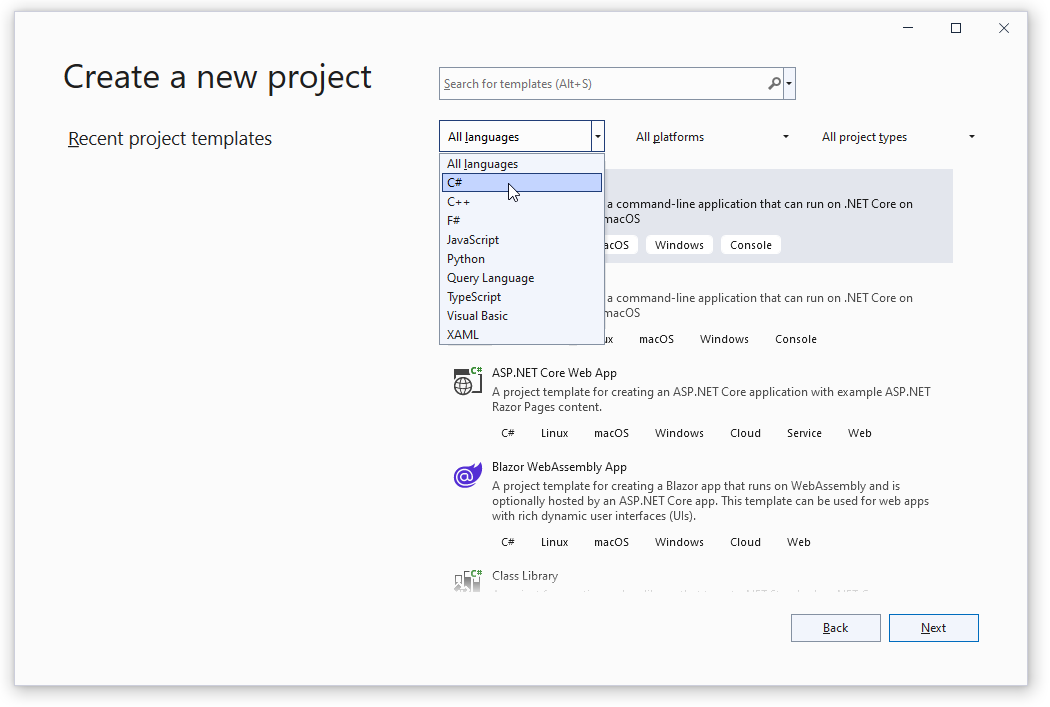
The C# language is used to create various types of applications. One category of applications display their result in a black window referred to as the DOS prompt or DOS window. To start such an application, you can write the instructions in a normal text editor such as Notepad or you can use a programming environment such as Microsoft Visual Studio.
To launch Microsot Visual Studio in a Microsoft Windows computer, you can click the Start/Windows button and click Visual Studio 2022. To start a project, if you had just launched Microsoft Visual Studio, it would display a Visual Studio 2022 dialog box. From there, under Get Started, click Create A New Project. If Microsoft Visual Studio was already opened, on the main menu, you can click File -> New -≥ Project...
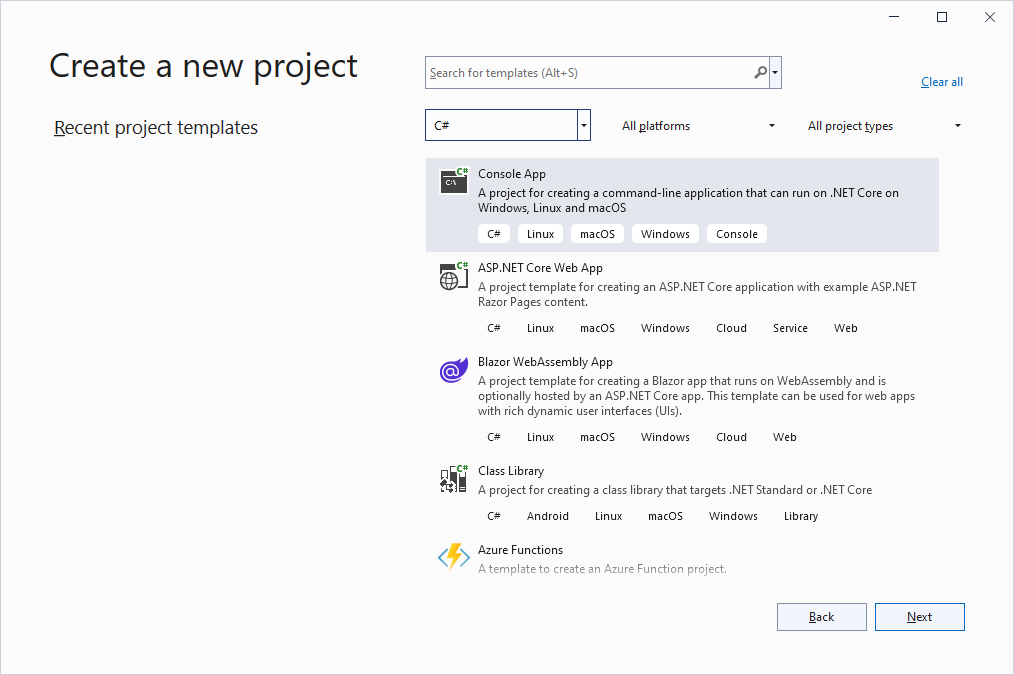
![]() Practical Learning: Starting a Project
Practical Learning: Starting a Project

The Projects of a Solution
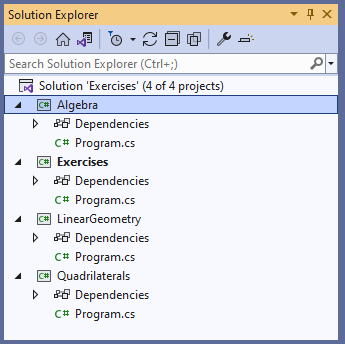
In Microsoft Visual Studio, you can create a solution that includes many projects. The projects are represented under the name of the solution in the Solution Explorer. Here is an example:
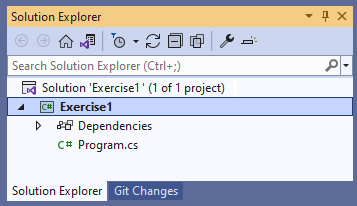
To select a project, click its name in the Solution Explorer.
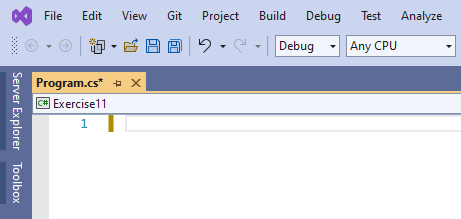
When you are working in the Code Editor, the top-left section of the Code Editor displays a combo box. The Project combo box displays the name of the current project.
The programs we will write are meant to give instructions to the computer. You write these instructions in easy to understand English words. This means that a regular instruction uses normal text with alphabetic characters, numbers, and non-readable symbols.
You can write your instructions using any text editor such as Notepad, WordPad, Microsoft Word, etc. When writing your instructions, there are rules your must follow and suggestions you should observe. The group of instructions used by your program is also referred to as code.
To assist you with writing code, if you use Microsoft Visual Studio, it includes a text editor referred to as the Code Editor. If you start your program as an empty project, you must explicitly add a file to it. To do that:
Any of these actions would display the Add New Item dialog box. From there, in the middle list, click Code File. Accept the name or change it. When you click OK, a blank document would display. In the same way, you can add as many files as you need for your project.
Introduction to the Code Editor
You can write your code using any text editor, such as Notepad. As a good solution, Microsoft Visual Studio provides a convenient place named the Code Editor, or the Editor. There are various ways you can open or display the Code Editor, sometimes depending on your (type of) project. As seen above, if you start an empty project, from the Add New Item dialog box, you can select a type of file that would require code. When you click Add, Microsoft Visual Studio would automatically display the Code Editor. In it, you can write your code. If you create a Console Application as we did earlier, the studio creates a project with a default document that contains the primary code you need. Eventually, you will modify that code as you see fit.
The Code Editor is a window specially designed for code writing.
|
|
Although all languages of the Microsoft Visual Studio programming environment share the Code Editor, once you have started a type of application, the Code Editor is adapted to the language you are using. Its parser (a program used internally to analyze your code) behaves according to the language of your choice. The features and behaviors of the Code Editor are also different, depending on your language. |
The Primary C# Code
To create the most basic application in C#, there is a very basic code you must write. This code looks as follows:
using static System.Console;

WriteLine();
Here, we have two lines of code that contains a few words and symbols. We will not explain all those words and symbols at this time. We rather wait for appropriate sections in later lessons. Unfortunately, each one of the items in this code is necessary for our early start:
We kept this code to a minimum. Every word and every operator in this code is required but there are various ways that each of these words and operators can be used. For now, just use this code "as is".
![]() Practical Learning: Writing Primary Code
Practical Learning: Writing Primary Code
using static System.Console;

WriteLine();
Introduction
A comment is a line or paragraph of text that will not be considered as part of your code. There are two types of comments recognized by C#.
A One-Line Comment
To display a comment on a line of text, start the line with two forward-slashes //. Anything on the right side of // would be ignored. Here is an example:
// This line will be ignored. I can write in it anything I want
A Multi-Line Comment
The above type of comment is used on only one line. You can also start a comment with /*. This type of comment ends with */. Anything between the combination of /* and */ would not be read. Therefore, you can use this technique to span a comment on more than one line.
While you can manually create comments, Microsoft Visual Studio provides a tool that can assist you. To add a comment on a line, click anything on that line. Then, on the Standard toolbar, click the Comment Out the Selected Lines button ![]() . To add comments to many adjacent lines, select text on those lines and click the Comment Out the Selected Lines button
. To add comments to many adjacent lines, select text on those lines and click the Comment Out the Selected Lines button ![]() . To remove the comments, click the line or select text on the lines. Then, on the Standard toolbar, click the Uncomment the Selected Lines button
. To remove the comments, click the line or select text on the lines. Then, on the Standard toolbar, click the Uncomment the Selected Lines button ![]() .
.
![]() Practical Learning: Creating Comments
Practical Learning: Creating Comments
using static System.Console;

// Application Name: Georgetown Dry Cleaning Services

// This application is used to perform processing orders for this business


/* Always greet the customers before processing an order.
   Check the types of clothes a customer has brought.
   Find out the type of cleaning (starch, etc) the customer wants.
   If there are special needs the customer has, make a note. */

WriteLine();
Managing Files
The Headers Bar
In Microsoft Visual Studio, when a project is made of various files, each file is represented by a label or tab in the top section of the Code Editor. Here are examples:
Each file is also represented in the main menu under Windows.
To add a new file to the project:
Once in the Add New Item dialog box, in the middle list, click the type of file you want to create, type a name in the Name text box, and press Enter or click Add. After the file has been created, it is represented by a labeled header in the top section of the Code Editor. In the same way, you can add as many files as you judge them necessary. To access a file:
By default, the header section displays the files in the order they were created or added to the project. If you don't like that arrangement, click and drag a header either left or right beyond the next header.
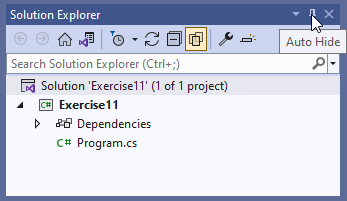
The Solution Explorer
The Solution Explorer is a window that displays a list of the files that make up a project. To access the Solution Explorer:
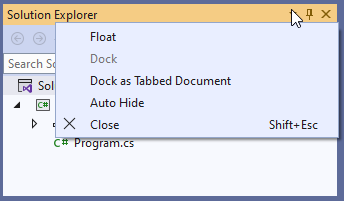
The Solution Explorer is made of four sections. Like every regular window, the Solution Explorer is equipped with a title bar that displays its name on the left side and three buttons on the right side:
The Window Position button displays a menu when you click it:
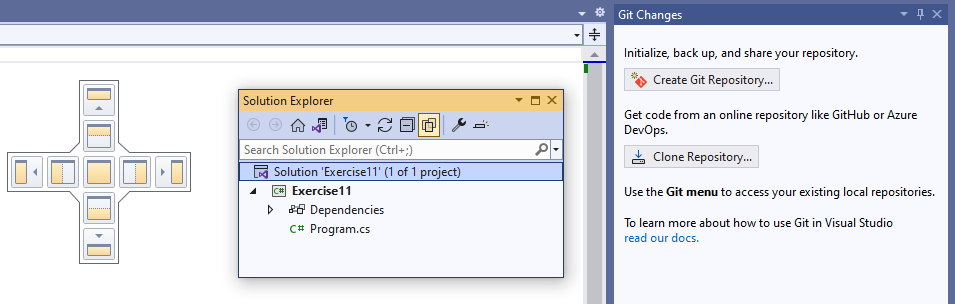
To dock a floating window, drag its title bar:
The Float option is enabled if the window is docked to a side of the screen. The Float option is disabled if the window is already floating. If the window is docked and you click Float, it would be moved from its docked position and would float. As an alternative to float a docked window, drag its title bar away from its docked position.
Under its title bar, the second section of the Solution Explorer is a toolbar:
The third part of the Solution Explorer is its body. It shows the folders, files, and resources that are part of the current project. To expand a node, you can either click its button or double-click its name. To collapse a node, either click its button or double-click it.
The root of the list is the name of the solution. Under the root is the name of the current project. If the solution contains more than one project, the name of each project is represented under the solution. Inside of the project are its folders, files, and resources. The first item under a project name is References. After the References node, there are the names of the classes that are part of the project.
The fourth part of the Solution Explorer is its tab.
The Properties Window
The Properties window shows the Windows operating system's details of the files or resources used in a project. To display it:
The display and rectangular behavior of the Properties window follows the description we had for the Solution Explorer.
To show the operating system's characteristics of a project or a file, in the Solution Explorer, click the object:
The Properties window displays different fields depending on the item selected in the Solution Explorer. You can change some things in the Properties window. When a field is disabled, it means you cannot modify it.
Accessing or Opening a File
If you are using Microsoft Visual Studio, to open a file:
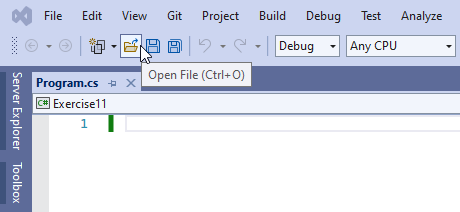
Any of these actions would display the Open File dialog box. From there, locate the file from its folder and click it.
Besides the Code Editor, the integrated development interface (IDE) of the Microsoft Visual Studio is made of various parts, which we will review when necessary.
Solution and Project Management
Introduction
Microsoft Visual Studio allows you to create various types of applications. This is why you should first display the Create a New Project dialog box to select your option.
Code Snippets
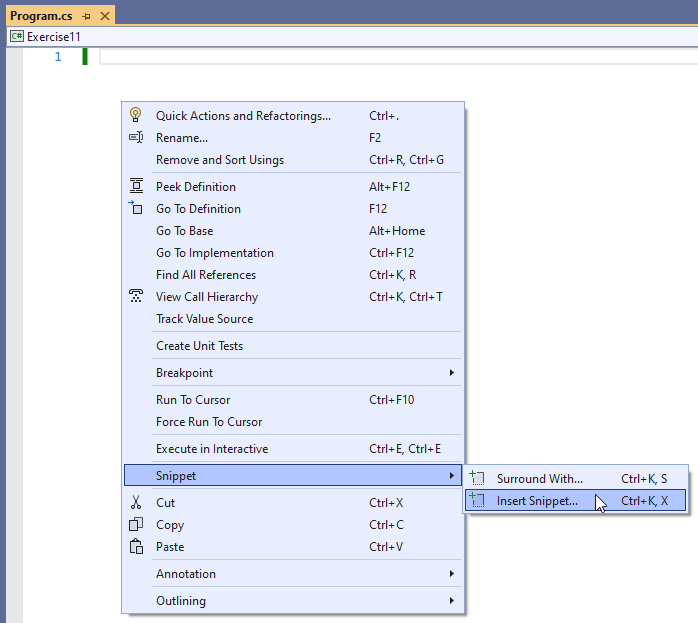
Microsoft Visual Studio ships with many skeleton codes you can use and customize. The studio can write the primary code for you and add some of the necessary default behaviors. Once it has done this, you can change or remove any section. To access these code skeletons, in the section of the file where you want to add it, right-click the section, position the mouse on Snippet, and click Insert Snippet...:
In the menu that comes up, double-click Visual C#:
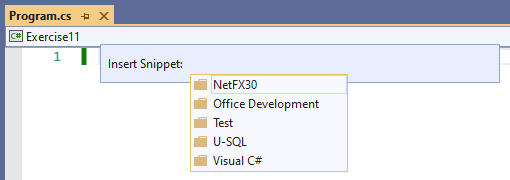
This would display a list of codes:
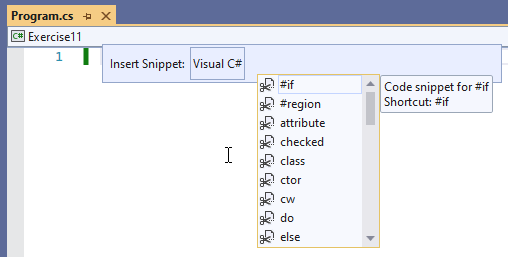
If you see the type of code you want to use, double-click it.
In some cases, if you have already written some code, you may want to change it or rather add some code to it. The Code Editor provides some skeleton codes you can use. To use this approach, right-click the code you want to modify and click Surround With... In the list that appears, double-click the desired option.
Code Colors
Code is written in a wide area with a white background. This is the area you use the keyboard to insert code with common readable characters. The Code Editor uses some colors to differentiate categories of words or lines of text.
The colors used are customizable. To change the colors, on the main menu, you can click Tools -> Options... In the left list of the Options dialog box, under Environment section, click Fonts and Colors. To set the color of a category, in the Display Items section, click a category. In the Item Foreground combo box, select the desired color. If you want the words of the category to have a colored background, click the arrow of the Item Background combo box and select one:
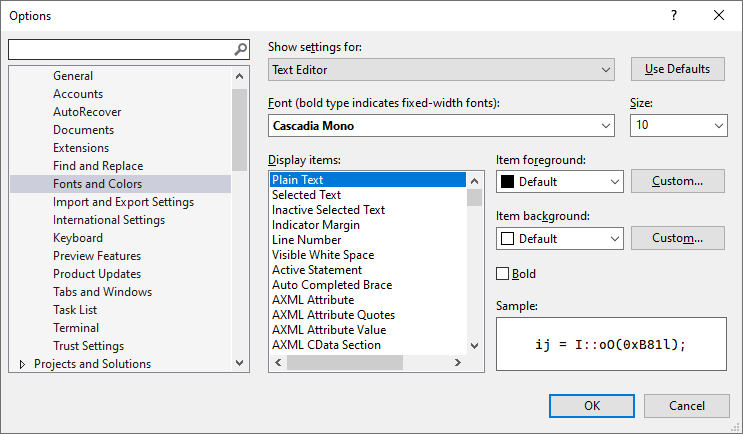
In both cases, the combo boxes display a fixed list of colors. If you want more colors, you can click a Custom button to display the Color dialog box that allows you to "create" a color.
Indentation is another feature that makes your program easy to read. Indentation is a technique of grouping lines of code by category. To delimit the items of your code, you should indent them by two empty spaces or one tab. Indentation should be incremental. That is, when a line of code appears to be a child of the previous line, the new line should be indented.
To control the indentation of your code, on the main menu, click Tools -> Options... In the left list, expand Text Editor, followed by C#, and click Tabs. Then change the value in Tab Size:
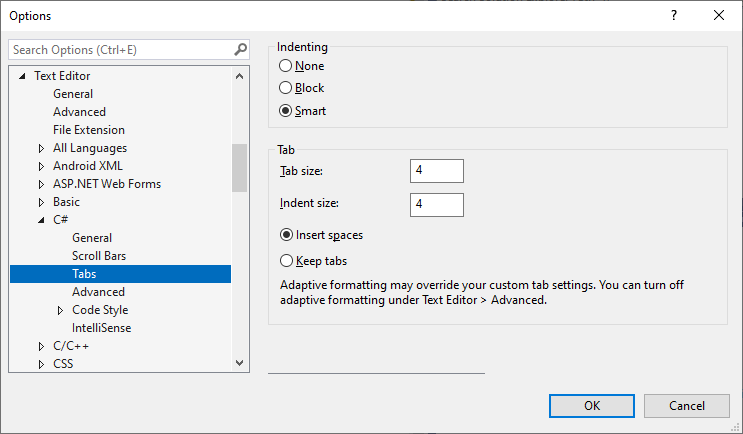
After making the changes, click OK to validate or Cancel to ignore.
Saving a Project
If you are creating your application using a text editor, you must save your file(s) in a folder you will create. Saving a project allows you to keep it on a medium so you can refer to it later.
To save a project, on the Standard toolbar, you can click the Save All button ![]() . Alternatively, on the main menu, you can click File -> Save All. If the project had already been saved but you want to save it under a different name, on the main menu, you can click File -> Save project name As...
. Alternatively, on the main menu, you can click File -> Save All. If the project had already been saved but you want to save it under a different name, on the main menu, you can click File -> Save project name As...
Opening a Project
As mentioned earlier, Microsoft Visual Studio starts with the Visual Studio 2019 dialog box:
As another way to get another version of that dialog box, if Microsoft Visual Studio is already opened, on the Standard toolbar, click the Start Window button 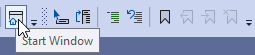 . Clicking that button would display a dialog box titled What Would You Like to Do?:
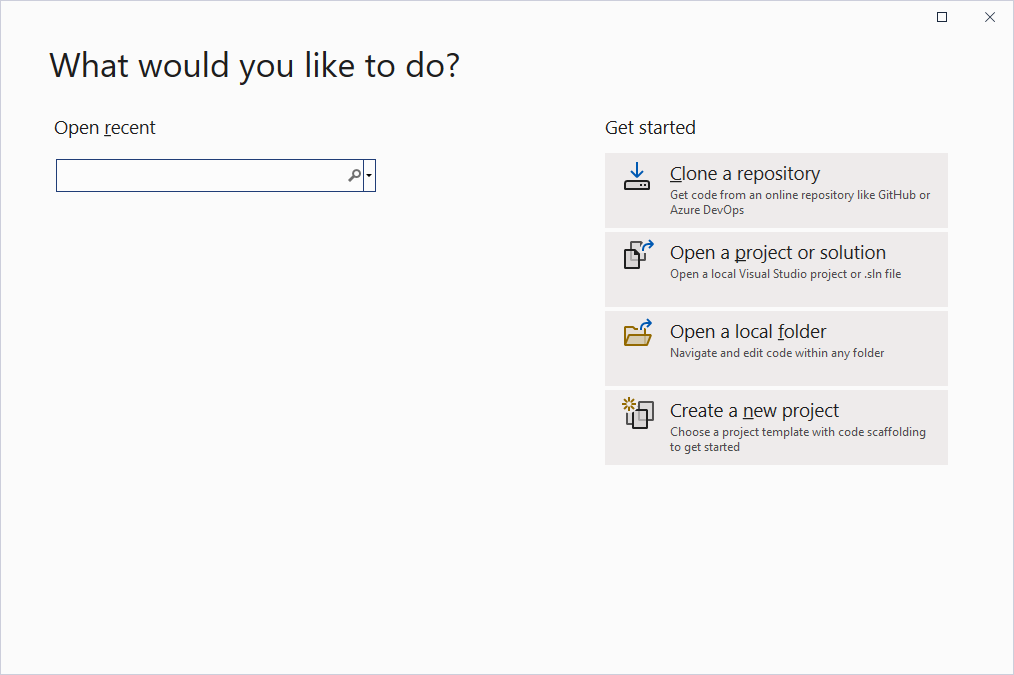
As a result, there are a various ways to open a project:
A Solution
A solution is used to coordinate the different aspects of an application that is being created. When you create a project, it represents one detail of the application you have in mind. When creating a project, the solution holds the same name as the project. You can see their names in the Solution Explorer:
The solution and a project can have different names. While working on a project, to rename the solution, in the Solution Explorer, you can click the first node, which is the name of the solution starting with Solution. Then, in the Properties window, click (Name) and type the name of your choice.
This name is temporary, especially if you have not yet saved the project. If you want to permanently save a solution for later use, there are two techniques you can use.
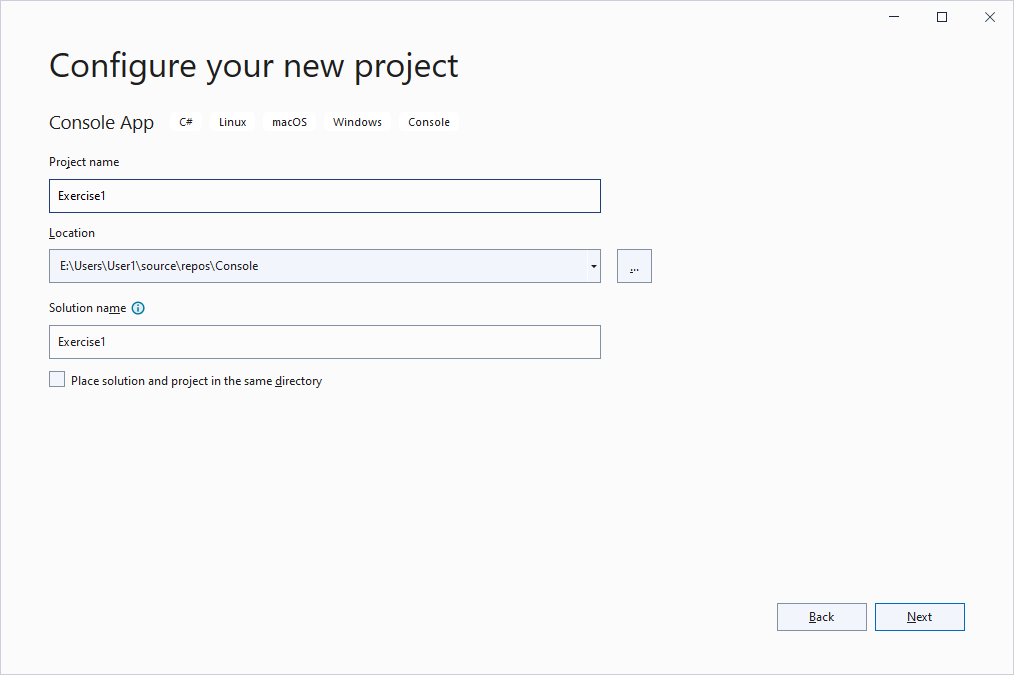
If you start saving a project for the first time, it would bring the Save Project dialog box. The solution must have, or must be stored, in its own folder. As mentioned earlier, Microsoft Visual Studio uses the name of the project as the name of the solution. To rename the solution, you can change the string in the Solution Name text box. Remember that you can enter the name of the project in the Name text box.
When you save a project (for the first time), by default, Microsoft Visual Studio uses the name of the solution to name the folder. It creates some files and stores them in that new folder. Then, it creates a sub-folder, using the name of the project, inside of the folder of the solution. Besides the sub-folder with the name as the project, it creates another folder named obj. It also creates another folder named bin in the sub-folder of the name of the project. In each folder and some other folders, it creates some files that we will not pay attention to for now.
If the project had already been saved but you want to change the name of the solution, on the main menu, you can click File -> Save solution-name.sln As... This would bring the Save File As dialog box where you can specify the name of the solution and click Save.
Building a Project
After creating a project and writing code, you may want to see the result. To do this, you must first build the application. This would create an executable.
A Compiler
To allow you to create programs, a computer language such as C# is equipped with an application named a compiler. A compiler is a computer program made of internal other sub-programs. One of the sub-programs, in fact probably the first, of a compiler is called a parser. A parser "scans" a file that contains (part of) the program. It checks the syntax, keywords, unknown words, and some other routines.
If the parser finds a problem, which could be anything, either it stops or it continues making a list of the mistakes it finds. Then it displays this list to you to fix. Sometimes it would point to the exact line where the/a problem was found. Sometimes it would point to the line where the problem showed its impact although the problem may be found somewhere else. With experience, you will know how to fix the programs or troubleshoot the problems.
If the parser doesn't find any problem, or after you have fixed the problems, it (the parser) passes its result(s) to the compiler. The compiler calls another program called a linker. If the program contains just one file, the linker considers it.
If the program contains more than one file, the linker considers them. The linker gathers some of the files that the C# compiler shipped with (those files that your program needs in order to work, since your program doesn't need all possible files that the .NET Framework provides), puts them together ("links" them) with your file(s) to get your instructions in a manner that can produce a suitable result. If there is no significant problem, the compiler creates the program. This doesn't mean that everything is alright; it only means that the compiler thinks that everything is alright: it is still possible that the result may not be what you would expect.
To make your life easier, all of the sub-programs (parser, linker, debugger, etc) that ship with C# are grouped in one large program: the compiler. Therefore, from now on, we will use the word "compiler" to refer to the program you use to "translate" your English instructions into a computer-based language.
The compiler that Microsoft created, and that we will use, that is, the compiler of the Microsoft .NET Framework is called csc (C Sharp Compiler). Like most other programs, it has the extension .exe. This csc name is not standard. This means that another C# compiler may have another name; csc.exe is just the name of the compiler we will use.
Building a Project
When the compiler uses its internal sub-programs to make sure your project may work as intended, the compiler is said to build a project. There are two primary ways you will use this approach. In some or for some projects, you will have to (first) build the project before performing other operations (some projects, such as libraries, require that you only and first build them, before creating the application that will use such a library). In some other cases, you can optionnally first build a project just to make sure it is alright, then proceed as in the next section.
To build a project, on the main menu, click Build and click Build Solution.
Executing a Project
After building a project, you and your users can execute it. To execute an application, on the main menu, you can click Debug -> Start Withougt Debugging. To create a button that would allow you to quickly build and execute a project:
When you have executed a project, a file produced from this operation has the extension .exe. By default, it holds same name as the file you had used.
![]() Practical Learning: Executing an Application
Practical Learning: Executing an Application
|
|
|||
| Home | Copyright © 2001-2024, FunctionX | Wednesday 15 September 2021 | Next |
|
|
|||