Home

Introduction to GUI Applications


Introduction

Graphical user interfaces are quite easy to create in Java, using Swing. We will review the steps to create a GUI application using NetBeans.


Practical LearningPractical Learning: Starting the Application

  1. Start NetBeans
  2. To create a new application, on the main menu, click File -> New Project...
  3. In the first page of the wizard, click Next
  4. In the second page of the wizard, change the Project Name to GUI101
  5. Click Finish

Creating a Frame

Probably the first thing you need on a graphical application is called a form. In Swing, this is represented by a class named JFrame.

To create a frame, you can derive a class from JFrame. You can then instantiate the class when necessary. To display the frame to the user, you can call the setVisible() method of the JFrame class. You can use the other methods to manage the frame.

Practical LearningPractical Learning: Creating a Frame

  1. To indicate that our main class is derived from JFrame, change the code as follows:
    package gui101;
    import javax.swing.*;
    
    public class Main extends JFrame {
        public static void main(String[] args) {
            Main GUI = new Main();
    
            GUI.setVisible(true);
        }
    }
  2. Execute the application (you can press F6)
     
    Frame
  3. Close the form and return to your programming environment
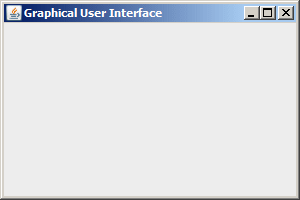
  4. To show a title and to specify the size of the frame, change the code as follows:
    package gui101;
    import javax.swing.*;
    
    public class Main extends JFrame {
        public static void main(String[] args) {
            Main GUI = new Main();
    
            GUI.setTitle("Graphical User Interface");
            GUI.setSize(300, 200);
            GUI.setDefaultCloseOperation(JFrame.EXIT_ON_CLOSE);
            GUI.setVisible(true);
        }
    }
  5. Execute the application (you can press F6)
     
    Frame
  6. Close the form and return to your programming environment

Using Windows Controls

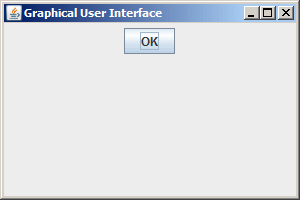
A graphical application is made useful by equipping it with Windows controls, and there are many of them. You can create each control individually. Once they are ready, you can add them to a panel (an object based on the JPanel class). Once the panel is ready, add it to the frame variable.

Practical LearningPractical Learning: Adding Controls to a Frame

  1. To add a button to the frame, change the code as follows:
    package gui101;
    import javax.swing.*;
    
    public class Main extends JFrame {
        JButton btnOK;
        JPanel pnlHolder;
    
        public Main() {
            pnlHolder = new JPanel();
            btnOK = new JButton("OK");
    
            pnlHolder.add(btnOK);
            this.add(pnlHolder);
        }
    
        public static void main(String[] args) {
            Main GUI = new Main();
    
            GUI.setTitle("Graphical User Interface");
            GUI.setSize(300, 200);
            GUI.setDefaultCloseOperation(JFrame.EXIT_ON_CLOSE);
            GUI.setVisible(true);
        }
    }
  2. Execute the application
     
    Frame
  3. Close the form and return to your programming environment


Events and Windows Controls

A Windows control is meant to perform some actions and either produce or show a result. A control does this through some events. To assist with events, the java.awt package provides the ActionListener interface.

To use the ActionListener interface, you can create a class that implements it. In the body of the class, define the actionPerformed() method that will carry the action.  You will then need to connect the event class to the control that will use it. To support this, the control's class should have an addControlListener() method that takes the event class variable as argument.

Practical LearningPractical Learning: Adding Controls to a Frame

  1. To handle an event on a button, change the code as follows:
    package gui101;
    import javax.swing.*;
    import java.awt.event.*;
    
    class ButtonOKListener implements ActionListener {
        public void actionPerformed(ActionEvent e) {
            JOptionPane.showMessageDialog(null, "OK Button Clicked");
        }
    }
        
    public class Main extends JFrame {
        JButton btnOK;
        JPanel pnlHolder;
        ButtonOKListener btnOKListener;
    
        public Main() {
            pnlHolder = new JPanel();
            btnOKListener = new ButtonOKListener();
            
            btnOK = new JButton("OK");
            btnOK.addActionListener(btnOKListener);
    
            pnlHolder.add(btnOK);
            this.add(pnlHolder);
        }
    
        public static void main(String[] args) {
            Main GUI = new Main();
    
            GUI.setTitle("Graphical User Interface");
            GUI.setSize(300, 200);
            GUI.setDefaultCloseOperation(JFrame.EXIT_ON_CLOSE);
            GUI.setVisible(true);
        }
    }
  2. Execute the application
     
    Frame
     
    Frame
  3. Close the form and return to your programming environment
  4. To perform actions on other controls on the form from an event, change the code as follows:
    package gui101;
    import javax.swing.*;
    import java.awt.event.*;
    
        
    public class Main extends JFrame {
        class ButtonOKListener implements ActionListener {
            public void actionPerformed(ActionEvent e) {
                lblMessage.setText("The OK button was clicked");
            }
        }
    
        class ButtonCancelListener implements ActionListener {
            public void actionPerformed(ActionEvent e) {
                lblMessage.setText("The Cancel button was clicked");
            }
        }
    
        JButton btnOK;
        JButton btnCancel;
        JLabel lblMessage;
        JPanel pnlHolder;
        ButtonOKListener btnOKListener;
        ButtonCancelListener btnCancelListener;
    
        public Main() {
            pnlHolder = new JPanel();
            btnOKListener = new ButtonOKListener();
            btnCancelListener = new ButtonCancelListener();
            
            btnOK = new JButton("OK");
            btnOK.addActionListener(btnOKListener);
            btnCancel = new JButton("Cancel");
            btnCancel.addActionListener(btnCancelListener);
            
            lblMessage = new JLabel();
    
            pnlHolder.add(btnOK);
            pnlHolder.add(btnCancel);
            pnlHolder.add(lblMessage);
            
            this.add(pnlHolder);
        }
    
        public static void main(String[] args) {
            Main GUI = new Main();
    
            GUI.setTitle("Graphical User Interface");
            GUI.setSize(300, 200);
            GUI.setDefaultCloseOperation(JFrame.EXIT_ON_CLOSE);
            GUI.setVisible(true);
        }
    }
  5. Execute the application
     
    Frame
     
    Frame
     
    Frame
  6. Close the form and return to your programming environment


Home Copyright © 2009 FunctionX, Inc.