|
 Practical Learning: Changing the Background Color of a
Shape
|
|
- Start Microsoft PowerPoint and open the Structure of the
Human Body4 on which you were working in the previous lesson. If
you don't have it, open the Human Body Structure4 presentation.
If necessary, in the lower-left side of the screen, click the Normal
View button
If the Drawing toolbar is not visible, on the main menu, click View
-> Toolbars -> Drawing
- Navigate to slide9: The Reproductive System
- Click the (green) Cross shape
- On the Drawing toolbar, click Draw -> Change AutoShape ->
Basic Shapes -> Change Shape to Parallelogram
- Again, on the Drawing toolbar, click Draw -> Order -> Send To
Back
- Save the presentation
By default, when you add an object to a slide, the
object's body is painted with a white color. This is also referred to as
its background color. To change the background color of an object, first
select it. Then, on the Drawing toolbar, locate the Fill Color button. If
it is already displaying the desired color, you can click it. If not, you
can click the arrow of the Fill Color button. It displays a list of preset
colors. You can click one of these. If none of the colors is to your
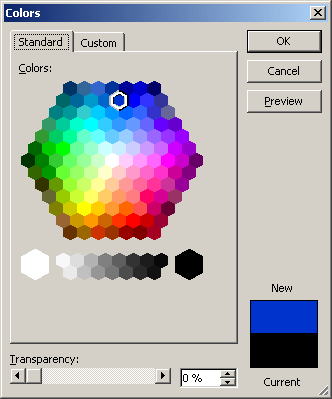
liking, you can click the More Fill Colors option. This would open the
Colors dialog box that allows you to compose a color of your choice from
over 16 million possible combinations. After creating the color, you can
click OK.
|
 Practical Learning: Changing the Background Color of a
Shape
|
|
- In the Outline view of the left frame, click anywhere on the second slide
- On the Drawing Toolbar, click the Rectangle button
- On the slide, draw a rectangle that completely covers the bottom
text (Support ...)
- While the rectangle is still selected, on the Drawing toolbar, click
the arrow of the Fill Color button and click the orange color (6th
button)
- On the slide, right-click the new rectangle, position the mouse on
Order and click Send To Back

- Scroll down to Slide 8: The Reproductive System
- Click the parallelogram shape
- On the Drawing toolbar, click the arrow of the Fill Color button and
click More Fill Colors
- In the Colors dialog box, click the Custom property page. Change the
color values to Red=160, Green=210, and Blue=255
- Click OK
- Save the presentation
Besides the color that covers its body, a shape is
also characterized by its border which is represented with a line either
around the shape or on all sides. By default, a shape is drawn with a
continuous but transparent color. You can change many characteristics of a
line such as its color or its style.
|
 Practical Learning: Formatting the Line of a Shape
|
|
- Still in Slide 8: The Reproductive system, click the parallelogram shape if
necessary. In the Drawing toolbar, click the arrow of the Line
Color button and select More Line Colors...
- In the Colors dialog box, click a dark blue color and click OK

- Now you can move the text box and position it inside the
parallelogram:

- Save the presentation
A picture is an external graphical object you add to a
slide to illustrate a point. Microsoft PowerPoint is very flexible with
the types of pictures it allows on slides. To support pictures, there are
two main ways you can get them to a slide. In a presentation, some slides provide a place
holder for a picture.
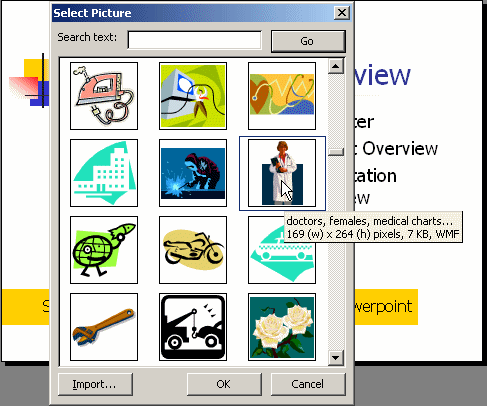
Microsoft Office ships with various pictures grouped
in a collection called the Microsoft Clip Gallery. To use one of those
pictures, you can double-click the picture of a slide. If you don't have a placeholder for a
picture, you can still click Insert -> Picture -> Clip Art... Either
way, this would open the Insert ClipArt window that allows you to select a
picture from a categorized collection.
|
 Practical Learning: Using a ClipArt
|
|
- With the Structure of the Human Body4 presentation still
opened, navigate to slide 2
- Right-click in the slide and click Slide Layout
- In the Apply Slide Layout window, click the Title, Clip Art and Text button

- Double-click the placeholder above Double Click To Add Clip Art
- In the list, click a picture

- Click OK and resize the picture if necessary
 |
| If you don't have enough clip arts, access the
Microsoft web site (http://www.microsoft.com/office) and look
for the section that has clip arts to download them). |
- Save the presentation
You may realize that the pictures provided in the
Microsoft Clip Gallery are somewhat limited. Besides the pictures that ship with Microsoft
PowerPoint or Microsoft Office, you can use any of the regular pictures on
a slide. To do this, from any slide, on the main menu, you can click Insert ->
Picture -> From File... Locate the picture and click Insert. After the
picture has been added to a slide, you can move it and even resize it
until you are satisfied with its location and its size
|
 Practical Learning: Using a Picture
|
|
- Navigate to slide 4 (The Respiratory System)
- Right-click in the slide and click Slide Layout
- In the Apply Slide Layout window, click the Title, Text and Clip Art
button
- On the main menu, click Insert -> Picture -> From File...
- From the exercises made for these lessons, click respiratory1 and
click Insert
- Reposition the picture to cover the right area

- Save the presentation
A word art is a letter or a group of letters with a
preset design. Microsoft Office ships with WordArt, which is a series of
pre-designed formats in which you can type anything such as a title or
name and insert it to a slide.
To use WordArt, on the Drawing toolbar, you can click
the Insert WordArt button  . Alternatively, on the main menu, you can click
Insert -> Picture -> WordArt... This would bring the WordArt Gallery
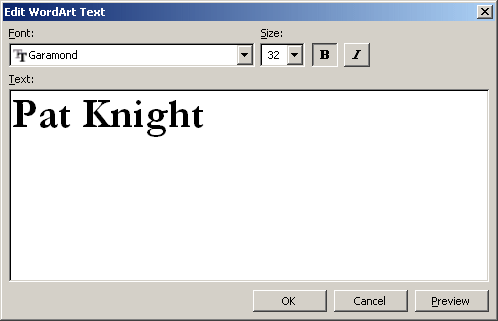
window. You can then click a design and click OK. In the Edit WordArt Text
dialog box, type the text of your choice. You can also change the font
name, size, and style before clicking OK. Like the shapes and pictures we
have reviewed so far, you can move and resize a WordArt to your liking. If
you find out that you selected the wrong design, to change it, you can
right-click the WordArt on the slide and click Format WordArt. . Alternatively, on the main menu, you can click
Insert -> Picture -> WordArt... This would bring the WordArt Gallery
window. You can then click a design and click OK. In the Edit WordArt Text
dialog box, type the text of your choice. You can also change the font
name, size, and style before clicking OK. Like the shapes and pictures we
have reviewed so far, you can move and resize a WordArt to your liking. If
you find out that you selected the wrong design, to change it, you can
right-click the WordArt on the slide and click Format WordArt.
When the WordArt is selected on the slide, it displays
the WordArt toolbar. This provides a series of buttons that allow you to
add a new WordArt by clicking Insert WordArt, to change the text by
clicking Edit Text..., to change the design by clicking WordArt Gallery,
etc.
|
 Practical Learning: Using WordArt
|
|
- Navigate to slide 2: Introduction and Overview
- On the Drawing toolbar, click the Insert WordArt button

- In the WordArt Gallery window, click the design in 4th column - 2nd
row and click OK
- Type Human Body and click OK
- Move the WordArt object to the lower-right section of the slide
- To change its text, while it is still selected, on the WordArt
toolbar, click the Edit Text... button
- Change the Font to Garamond
- Change the font Size to 32 and click the Bold button

- Select the text and type Pat Knight to replace it

- Click OK
- To change the design, while the WordArt is still selected, on the
WordArt toolbar, click the WordArt Gallery button
- Click the WordArt on 5th column, 2nd row

- Click OK
- Position the WordArt to the lower-right side of the picture

- Save the presentation
- Close Microsoft PowerPoint
|
|

