Introduction to Polymorphism and Abstraction
Introduction to Polymorphism and Abstraction
Polymorphic Behaviors
Introduction
When you are creating a class, if you anticipate that a certain member should be redefined in a derived class, you can indicate this in your code. On the other hand, while creating a class that is based on another, if you find out that you are customizing a member that already exists in the base class, you should indicate, in your code, that you are providing a new version. In both cases, the common member should be created as virtual.
![]() Practical Learning: Introcing Abstraction
Practical Learning: Introcing Abstraction
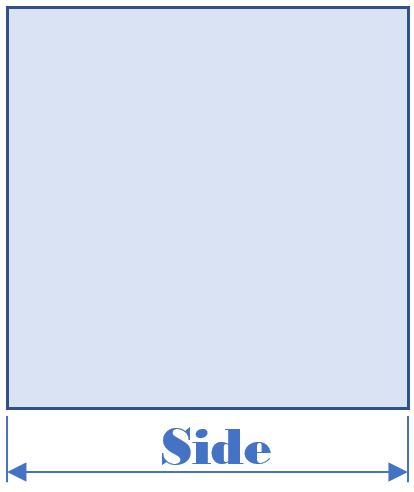
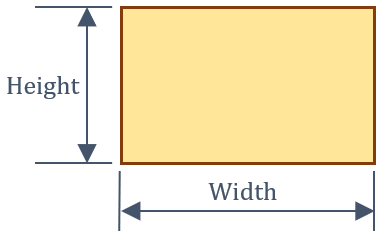
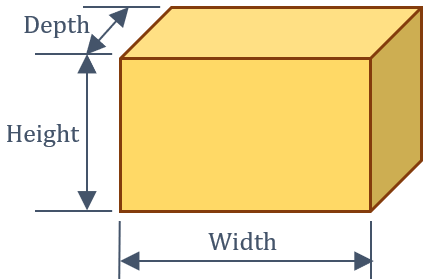
body {
}

.bold        { font-weight:      bold;  }
.text-right  { text-align:       right  }
.delimiter   { margin:           auto;
               width:            650px; }
.top-bar     { border-bottom:    6px solid blue;
               background-color: #800000 !important; }
.common-font { font-family:      Georgia, Garamond, 'Times New Roman', serif; }
.navbar-light .navbar-brand       { color:       white;  }
.navbar-light .navbar-brand:hover { color:       yellow; }
.navbar-light .navbar-brand:focus { color:       khaki;  }
.navbar-light .navbar-brand       { font-family: Georgia, Garamond, 'Times New Roman', serif; }
.nav-link { font-family: Georgia, Garamond, 'Times New Roman', serif; }<!DOCTYPE html>
<html lang="en">
<head>
<meta charset="utf-8" />
<meta name="viewport" content="width=device-width, initial-scale=1.0" />
<title>@ViewData["Title"] - Geometry</title>
<link rel="stylesheet" href="~/lib/bootstrap/dist/css/bootstrap.min.css" />
<link rel="stylesheet" href="~/css/site.css" asp-append-version="true" />
<link rel="stylesheet" href="~/css/Geometry.css" asp-append-version="true" />
</head>
<body>
<header>
<nav class="navbar navbar-expand-sm navbar-toggleable-sm navbar-light bg-white border-bottom box-shadow mb-3 top-bar">
<div class="container">
<a class="navbar-brand" asp-area="" asp-page="/Index">Geometry</a>
<button class="navbar-toggler" type="button" data-bs-toggle="collapse" data-bs-target=".navbar-collapse" aria-controls="navbarSupportedContent"
aria-expanded="false" aria-label="Toggle navigation">
<span class="navbar-toggler-icon"></span>
</button>
<div class="navbar-collapse collapse d-sm-inline-flex justify-content-between">
<ul class="navbar-nav flex-grow-1">
<li class="nav-item">
<a class="nav-link text-white" asp-area="" asp-page="/Index">Home</a>
</li>
<li class="nav-item">
<a class="nav-link text-white" asp-area="" asp-page="/Privacy">Privacy</a>
</li>
</ul>
</div>
</div>
</nav>
</header>
<div class="container">
<main role="main" class="pb-3">
@RenderBody()
</main>
</div>
<footer class="border-top footer text-muted">
<div class="container">
<p class="text-center common-font">© 2022 - Geometry - <a asp-area="" asp-page="/Privacy">Privacy</a></p>
</div>
</footer>
<script src="~/lib/jquery/dist/jquery.min.js"></script>
<script src="~/lib/bootstrap/dist/js/bootstrap.bundle.min.js"></script>
<script src="~/js/site.js" asp-append-version="true"></script>
@await RenderSectionAsync("Scripts", required: false)
</body>
</html>namespace Quadrilaterals4.Models
{
public class Square
{
public double Side { get; set; }
public Square(double side)
{
Side = side;
}
public double Perimeter
{
get
{
return Side * 4.00;
}
}
}
}A method is said to be virtual if it is anticipated to have different versions or implementations in classes that derive from it. To create a virtual method, you use a keyword named virtual. Therefore, to create a virtual method, in the base class, type the virtual keyword to the left of the return type of the method. If the method has an access level (private, public, or internal), the virtual keyword can appear before or after the access level.
![]() Practical Learning: Creating Virtual Methods
Practical Learning: Creating Virtual Methods
namespace Quadrilaterals4.Models
{
    public class Square
    {
        public double Side { get; set; }

        public Square(double side)
        {
            Side = side;
        }

        public double Perimeter
        {
            get
            {
                return Side * 4.00;
            }
        }

        public virtual double CalculateInradius()
        {
            return Side / 2.00;
        }
    }
}
Virtual Properties
A property of a class is virtual if it may be implemented in a derived class. This means that the property should primarily be created in its original class.
To get a virtual property, when creating the class, add the virtual keyword before the return type of the property.
![]() Practical Learning: Creating a Virtual Property
Practical Learning: Creating a Virtual Property
namespace Quadrilaterals4.Models
{
    public class Square
    {
        public double Side { get; set; }

        public Square(double side)
        {
            Side = side;
        }

        public double Perimeter
        {
            get
            {
                return Side * 4.00;
            }
        }

        public virtual double Area
        {
            get
            {
                return Side * Side;
            }
        }

        public virtual double CalculateInradius()
        {
            return Side / 2.00;
	}
    }
}@page
@model IndexModel
@using Quadrilaterals4.Models
@{
double length = 0.00;
string? strMessage = null;
Square sqr = new Square(0.00);
if (Request.HasFormContentType)
{
try
{
length = double.Parse(Request.Form["txtSide"])!;
}
catch(FormatException fexc)
{
strMessage = "You must provide a valid value for the side." +
Environment.NewLine + "The error produced is: " +
fexc.Message;
}
sqr = new Square(length);
}
}
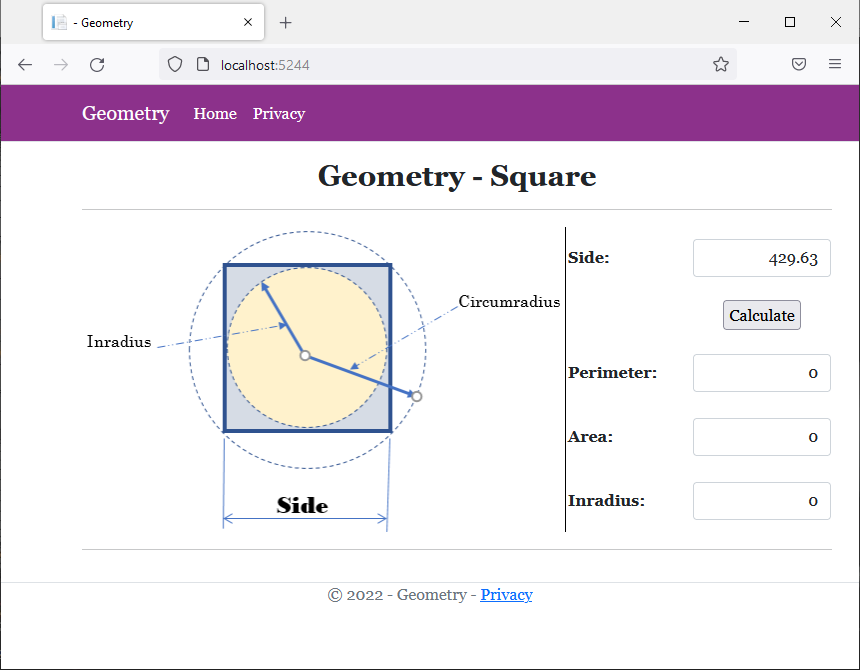
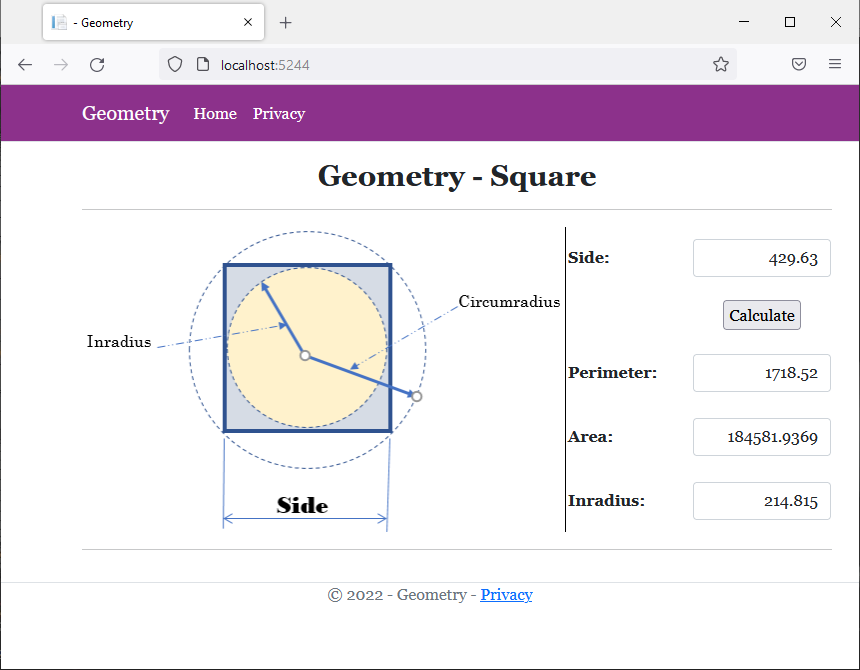
<div class="delimiter common-font">
<h2 class="text-center bold">Geometry - Square</h2>
<hr />
<form name="frmGeometry" method="post">
<table>
<tr>
<td style="width: 300px" rowspan="5">
<img src="~/images/Square2.png" width="483" height="305" alt="Geometry - Square" style="border-right: 1px black solid">
</td>
<td style="width: 125px" class="bold">Side:</td>
<td>@Html.TextBox("txtSide", @sqr.Side, new { @class = "form-control text-right" })</td>
</tr>
<tr>
<td> </td>
<td style="text-align: center"><input type="submit" name="btnSubmit" value="Calculate" /></td>
</tr>
<tr>
<td class="bold">Perimeter:</td>
<td>@Html.TextBox("txtPerimeter", @sqr.Perimeter, new { @class = "form-control text-right" })</td>
</tr>
<tr>
<td class="bold">Area:</td>
<td>@Html.TextBox("txtArea", @sqr.Area, new { @class = "form-control text-right" })</td>
</tr>
<tr>
<td class="bold">Inradius:</td>
<td>@Html.TextBox("txtInradius", @sqr.CalculateInradius(), new { @class = "form-control text-right" })</td>
</tr>
</table>
</form>
<hr />
<p class="text-center">@strMessage</p>
</div>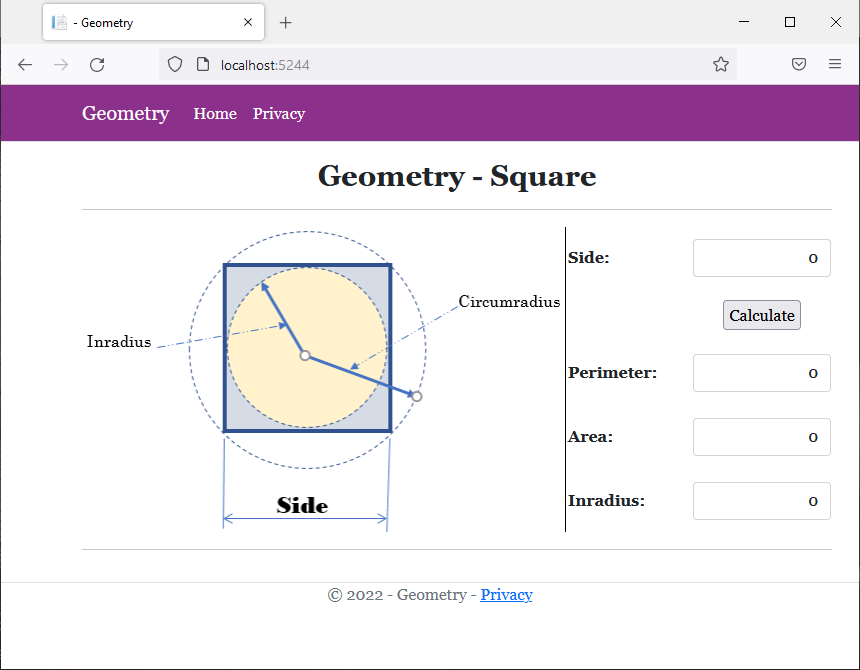
namespace Volumetrics4.Models
{
    public class Rectangle
    {
        public double Width  { get; set; }
        public double Height { get; set; }

        public Rectangle(double width, double height)
        {
            Width = width;
            Height = height;
        }
    }
}namespace Volumetrics4.Models
{
public class Box : Rectangle
{
public Box(double width, double height, double depth)
: base(width, height)
{
Depth = depth;
}
public double Depth { get; set; }
}
}Overriding a Member in a Derived Class
As seen in previous sections, you can create a virtual method or property in a class and use it like any other method or property of its class. As mentioned in our introduction, the essence of creating a virtual method or property is to provide a different implementation of that member in its own and in classes that derive from that class. Providing a different version of a member or property in a derived class is referred to as overriding the method or property.
To override a method, in a derived class, create a method with the same syntax (same return type, same name, and same parameter(s) if any) as the method in the parent class. This time, replace the virtual keyword with the override keyword. In the same way, to override a propertty, create one of the same return type and name in the derived class but use the override keyword instead of the the virtual keyword.
![]() Practical Learning: Overriding a Method in a Derived Class
Practical Learning: Overriding a Method in a Derived Class
namespace Volumetrics4.Models
{
    public class Rectangle
    {
        public double Width  { get; set; }
        public double Height { get; set; }

        public Rectangle(double width, double height)
        {
            Width  = width;
            Height = height;
        }

        public virtual double CalculateArea()
        {
            return Width * Height;
        }
    }
}namespace Volumetrics4.Models
{
public class Box : Rectangle
{
public Box(double width, double height, double length)
: base(width, height)
{
Length = length;
}
public double Length { get; set; }
public override double CalculateArea()
{
double face = base.CalculateArea();
double side = base.Height * this.Depth;
double top = base.Width * this.Depth;
return (face * 2) + (side * 2) + (top * 2);
}
}
}@page
@model IndexModel
@using Quadrilaterals4.Models
@{
string? strMessage = null;
Box bx = new Box(0.00, 0.00, 0.00);
double wid = 0.00, hgt = 0.00, dep = 0.00;
if (Request.HasFormContentType)
{
try
{
wid = double.Parse(Request.Form["txtWidth"])!;
}
catch(FormatException fexc)
{
strMessage = "You must provide a valid value for the width of the box." +
Environment.NewLine + "The error produced is: " +
fexc.Message;
}
try
{
hgt = double.Parse(Request.Form["txtHeight"])!;
}
catch(FormatException fexc)
{
strMessage = "You must provide a valid value for the height of the box." +
Environment.NewLine + "The error produced is: " +
fexc.Message;
}
try
{
dep = double.Parse(Request.Form["txtDepth"])!;
}
catch(FormatException fexc)
{
strMessage = "You must provide a valid value for the depth of the box." +
Environment.NewLine + "The error produced is: " +
fexc.Message;
}
bx = new Box(wid, hgt, dep);
}
}
<div class="delimiter common-font">
<h2 class="text-center bold">Geometry - Rectangular Box</h2>
<hr />
<form name="frmGeometry" method="post">
<table>
<tr>
<td style="width: 300px" rowspan="5">
<img src="~/images/Box1.png" width="431" height="279" alt="Geometry - Rectangular Box" style="border-right: 1px black solid">
</td>
<td style="width: 125px" class="bold">Width:</td>
<td>@Html.TextBox("txtWidth", @bx.Width, new { @class = "form-control text-right" })</td>
</tr>
<tr>
<td class="bold">Height:</td>
<td>@Html.TextBox("txtHeight", @bx.Height, new { @class = "form-control text-right" })</td>
</tr>
<tr>
<td class="bold">Depth:</td>
<td>@Html.TextBox("txtDepth", @bx.Depth, new { @class = "form-control text-right" })</td>
</tr>
<tr>
<td> </td>
<td style="text-align: center"><input type="submit" name="btnSubmit" value="Calculate" /></td>
</tr>
<tr>
<td class="bold">Area:</td>
<td>@Html.TextBox("txtArea", @bx.CalculateArea(), new { @class = "form-control text-right" })</td>
</tr>
</table>
</form>
<hr />
<p class="text-center">@strMessage</p>
</div>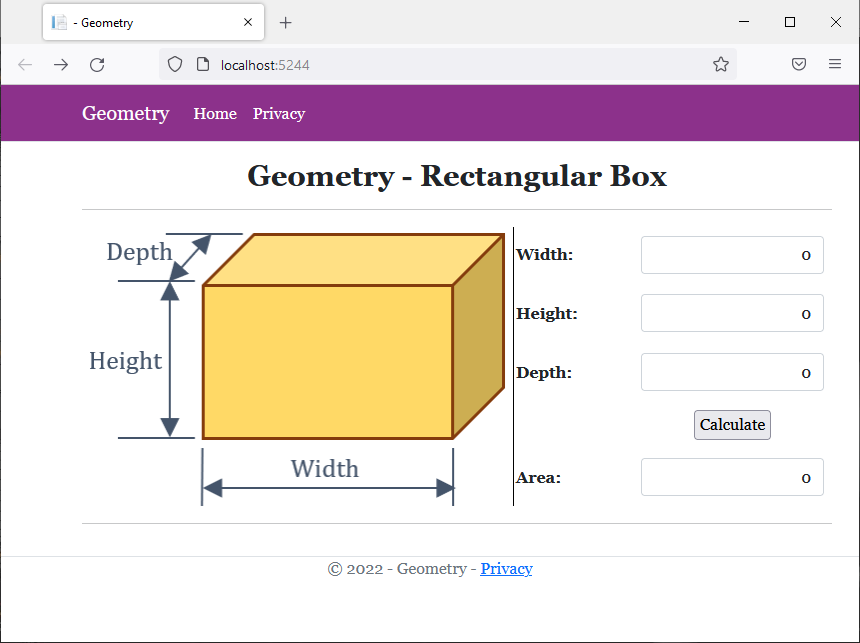
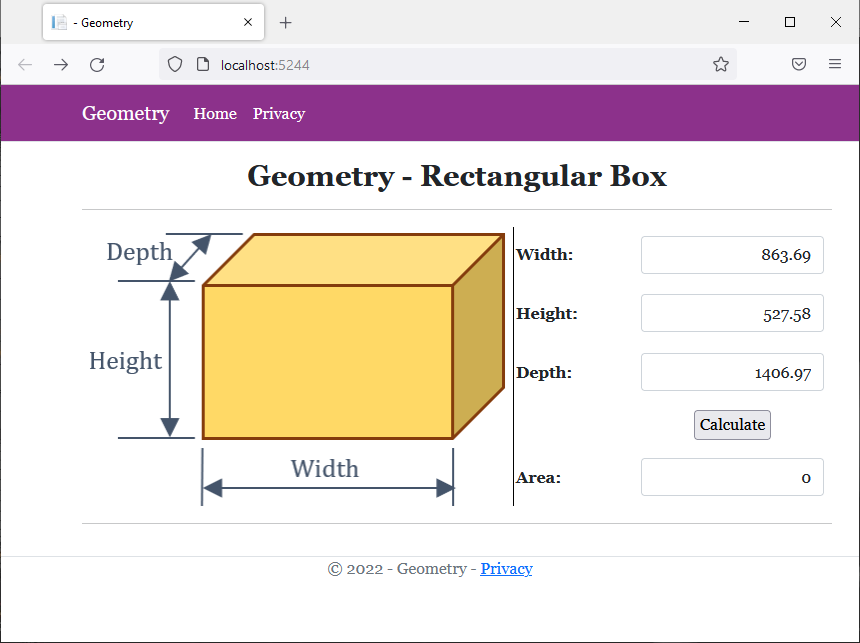
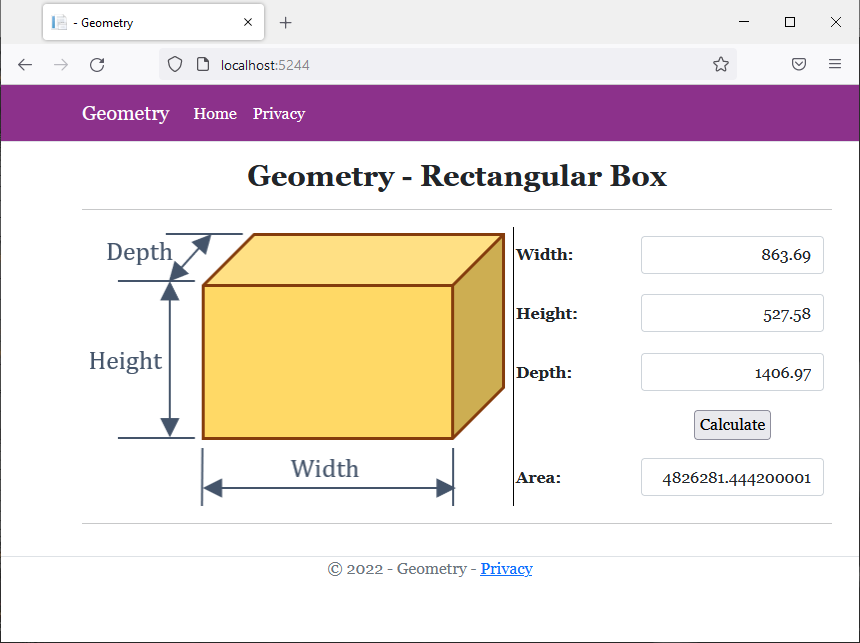
Width:  863.69
Height: 527.58
Depth:  1406.97
Foundations of Abstract Classes
Introduction
A class is said to be abstract if its primary role is to serve as parent for other classes. This means that another class must be derived from the abstract class. After that, the abstract class can be used somehow in an application.
![]() Practical Learning: Introducing Class Abstraction
Practical Learning: Introducing Class Abstraction
namespace GasUtilityCompany1.Models
{
    public class BillPreparation
    {
        public int InvoiceNumber          { get; set; }
        public double CounterReadingStart { get; set; }
        public double CounterReadingEnd   { get; set; }

        public double CCFTotal
        {
            get
            {
                return CounterReadingEnd - CounterReadingStart;
            }
        }

        public double TotalTherms
        {
            get
            {
                return CCFTotal * 1.0367;
            }
        }

        public double DistributionAdjustment
        {
            get
            {
                return TotalTherms * 0.13086;
            }
        }

        public double CalculateTransportationCharges()
        {
            if (TotalTherms <= 5000)
                return TotalTherms * 0.016289;
            else
                return TotalTherms * 0.009577;
        }

        public double CalculateDeliveryTotal()
        {
            double first50Therms = 0, over50Therms = 0;

            if (TotalTherms < 5000)
            {
                first50Therms = TotalTherms * 0.05269;
                over50Therms = 0;
            }
            else
            {
                first50Therms = 5000 * 0.5269;
                over50Therms = (TotalTherms - 5000) * 0.04995;
            }

            return CalculateTransportationCharges() + DistributionAdjustment + first50Therms + over50Therms;
        }

        public double EnvironmentalCharges
        {
            get
            {
                return CalculateDeliveryTotal() * 0.0045;
            }
        }

        public double AmountDue
        {
            get
            {
                return CalculateDeliveryTotal() + EnvironmentalCharges;
            }
	    }
    }
}body {
}
.bold { font-weight: bold; }
.text-right { text-align: right; }
.delimiter { margin: auto;
width: 450px; }
.top-bar { border-bottom: 6px solid blue;
background-color: #005CB9 !important; }
.navbar-light .navbar-brand { color: white;
font-weight: bold; }
.navbar-light .navbar-brand:hover { color: yellow;
font-weight: bold; }
.navbar-light .navbar-brand:focus { color: khaki;
font-weight: bold; }
.navbar-light .navbar-brand { font-family: Garamond, Georgia, 'Times New Roman', serif; }
.nav-link { font-weight: bold;
font-family: Garamond, Georgia, 'Times New Roman', serif; }
.common-font { font-family: Garamond, Georgia, 'Times New Roman', serif; }<!DOCTYPE html>
<html lang="en">
<head>
<meta charset="utf-8" />
<meta name="viewport" content="width=device-width, initial-scale=1.0" />
<title>@ViewData["Title"] - Gas Utility Company</title>
<link rel="stylesheet" href="~/lib/bootstrap/dist/css/bootstrap.min.css" />
<link rel="stylesheet" href="~/css/site.css" asp-append-version="true" />
<link rel="stylesheet" href="~/css/GasUtilityCompany.css" asp-append-version="true" />
</head>
<body>
<header>
<nav class="navbar navbar-expand-sm navbar-toggleable-sm navbar-light bg-white border-bottom box-shadow mb-3 top-bar">
<div class="container">
<a class="navbar-brand" asp-area="" asp-page="/Index">Gas Utility Company</a>
<button class="navbar-toggler" type="button" data-bs-toggle="collapse" data-bs-target=".navbar-collapse" aria-controls="navbarSupportedContent"
aria-expanded="false" aria-label="Toggle navigation">
<span class="navbar-toggler-icon"></span>
</button>
<div class="navbar-collapse collapse d-sm-inline-flex justify-content-between">
<ul class="navbar-nav flex-grow-1">
<li class="nav-item">
<a class="nav-link text-white" asp-area="" asp-page="/Index">Home</a>
</li>
<li class="nav-item">
<a class="nav-link text-white" asp-area="" asp-page="/Privacy">Privacy</a>
</li>
</ul>
</div>
</div>
</nav>
</header>
<div class="container">
<main role="main" class="pb-3">
@RenderBody()
</main>
</div>
<footer class="border-top footer text-muted">
<div class="container">
<p class="text-center common-font">© 2022 - Gas Utility Company - <a asp-area="" asp-page="/Privacy">Privacy</a></p>
</div>
</footer>
<script src="~/lib/jquery/dist/jquery.min.js"></script>
<script src="~/lib/bootstrap/dist/js/bootstrap.bundle.min.js"></script>
<script src="~/js/site.js" asp-append-version="true"></script>
@await RenderSectionAsync("Scripts", required: false)
</body>
</html>@page
@model IndexModel
@using GasUtilityCompany1.Models
@{
string? strMessage = null;
BillPreparation bp = new();
string strAmountDue = "0.00";
string strTotalTherms = "0.00";
string strDeliveryTotal = "0.00";
string strEnvironmentalCharges = "0.00";
string strTransportationCharges = "0.00";
string strDistributionAdjustment = "0.00";
if (Request.HasFormContentType)
{
Random rndNumber = new();
bp.InvoiceNumber = rndNumber.Next(100000, 999999);
try
{
bp.CounterReadingStart = double.Parse(Request.Form["txtCounterReadingStart"])!;
}
catch(FormatException fexc)
{
strMessage = "You must provide a valid value for the counter reading start value." +
Environment.NewLine + "The error produced is: " +
fexc.Message;
}
try
{
bp.CounterReadingEnd = double.Parse(Request.Form["txtCounterReadingEnd"])!;
}
catch(FormatException fexc)
{
strMessage = "You must provide a valid value for the counter reading end value." +
Environment.NewLine + "The error produced is: " +
fexc.Message;
}
strAmountDue = $"{bp.AmountDue:F}";
strTotalTherms = $"{bp.TotalTherms:F}";
strDeliveryTotal = $"{bp.CalculateDeliveryTotal():F}";
strEnvironmentalCharges = $"{bp.EnvironmentalCharges:F}";
strDistributionAdjustment = $"{bp.DistributionAdjustment:F}";
strTransportationCharges = $"{bp.CalculateTransportationCharges():F}";
}
}
<div class="delimiter common-font">
<h2 class="text-center bold">Gas Utility Company</h2>
<hr />
<h5 class="text-center bold">Customer Invoice Preparation</h5>
<hr />
<form name="frmGeometry" method="post">
<table>
<tr>
<td style="width: 250px" class="bold">Invoice Number:</td>
<td>@Html.TextBox("txtInvoiceNumber", @bp.InvoiceNumber, new { @class = "form-control text-right" })</td>
</tr>
<tr>
<td class="bold">Counter Reading Start:</td>
<td>@Html.TextBox("txtCounterReadingStart", @bp.CounterReadingStart, new { @class = "form-control text-right" })</td>
</tr>
<tr>
<td class="bold">Counter Reading End:</td>
<td>@Html.TextBox("txtCounterReadingEnd", @bp.CounterReadingEnd , new { @class = "form-control text-right" })</td>
</tr>
<tr>
<td> </td>
<td style="text-align: center"><input type="submit" name="btnSubmit" value="Calculate" /></td>
</tr>
</table>
</form>
<hr />
<h4 class="bold">Gas Meter Reading</h4>
<hr />
<table>
<tr>
<td class="bold" style="width: 250px">Invoice Number:</td>
<td>@Html.TextBox("txtInvoiceNumber", @bp.InvoiceNumber, new { @class = "form-control text-right" })</td>
</tr>
<tr>
<td class="bold">Counter Reading Start:</td>
<td>@Html.TextBox("txtCounterReadingStart", @bp.CounterReadingStart, new { @class = "form-control text-right" })</td>
</tr>
<tr>
<td class="bold">Counter Reading End:</td>
<td>@Html.TextBox("txtCounterReadingEnd", @bp.CounterReadingEnd, new { @class = "form-control text-right" })</td>
</tr>
<tr>
<td class="bold">CCF Total:</td>
<td>@Html.TextBox("txtCCFTotal", @bp.CCFTotal, new { @class = "form-control text-right" })</td>
</tr>
<tr>
<td class="bold">Total Therms:</td>
<td>@Html.TextBox("txtTotalTherms", @strTotalTherms, new { @class = "form-control text-right" })</td>
</tr>
<tr>
<td class="bold">Distribution Adjustment:</td>
<td>@Html.TextBox("txtDistributionAdjustment", @strDistributionAdjustment, new { @class = "form-control text-right" })</td>
</tr>
</table>
<hr />
<h5 class="bold">Bill Values</h5>
<hr />
<table>
<tr>
<td style="width: 250px" class="bold">Transportation Charges:</td>
<td>@Html.TextBox("txtTransportationCharges", @strTransportationCharges, new { @class = "form-control text-right" })</td>
</tr>
<tr>
<td class="bold">Delivery Total:</td>
<td>@Html.TextBox("txtDeliveryTotal", @strDeliveryTotal, new { @class = "form-control text-right" })</td>
</tr>
<tr>
<td class="bold">Environmental Charges:</td>
<td>@Html.TextBox("txtEnvironmentalCharges", @strEnvironmentalCharges, new { @class = "form-control text-right" })</td>
</tr>
</table>
<hr />
<table>
<tr>
<td class="bold" style="width: 250px">Amount Due:</td>
<td>@Html.TextBox("txtAmountDue", @strAmountDue, new { @class = "form-control text-right" })</td>
</tr>
</table>
<hr />
<p class="text-center">@strMessage</p>
</div>

namespace GasUtilityCompany1.Models
{
    public class CustomerInvoice
    {
    }
}To get an abstract class, you use a keyword named abstract. Therefore, to create an abstract class, type this keyword to the left of the class keyword. Here is an example:
abstract class Triangle
{
}
If you decide to apply an access level (public or internal) on the class creation, the abstract keyword can appear before or after the access level.
In the class, you can add any type of member, like any of the types of constructors, methods, or properties we have used so far.
![]() Practical Learning: Creating an Abstract Class
Practical Learning: Creating an Abstract Class
namespace GasUtilityCompany1.Models
{
    public abstract class BillPreparation
    {
        public int InvoiceNumber          { get; set; }
        public double CounterReadingStart { get; set; }
        public double CounterReadingEnd   { get; set; }

        public double CCFTotal
        {
            get => CounterReadingEnd - CounterReadingStart;
        }

        public double TotalTherms
        {
            get => CCFTotal * 1.0367;
        }

        public double DistributionAdjustment
        {
            get => TotalTherms * 0.13086;
        }

        public double CalculateTransportationCharges()
        {
            return (TotalTherms <= 5000) ? (TotalTherms * 0.016289) : (TotalTherms * 0.009577);
        }

        public double CalculateDeliveryTotal()
        {
            double first50Therms = 0, over50Therms = 0;

            if (TotalTherms < 5000)
            {
                first50Therms = TotalTherms * 0.05269;
                over50Therms = 0;
            }
            else
            {
                first50Therms = 5000 * 0.5269;
                over50Therms = (TotalTherms - 5000) * 0.04995;
            }

            return CalculateTransportationCharges() + DistributionAdjustment + first50Therms + over50Therms;
        }

        public double EnvironmentalCharges
        {
            get => CalculateDeliveryTotal() * 0.0045;
        }

        public double AmountDue
        {
            get => CalculateDeliveryTotal() + EnvironmentalCharges;
        }
    }
}Deriving from an Abstract Class
An abstract class cannot be directly used like any of the classes we have used so far. This means that you cannot use a constructor of an abstract class to instantiate an object. You have various solutions to solve this problem. The first thing you must do is to create a class derived from the abstract class. You can then create an object of that class.
![]() Practical Learning: Deriving from an Abstract Class
Practical Learning: Deriving from an Abstract Class
public class CustomerInvoice : BillPreparation
{
}
An Object of an Abstract Class
Although you must always derive a class from an abstract class in order to make the abstract class useful, you can declare a variable of an abstract class. Such a variable must be initialized with a constructor of a class derived from the abstract class.
![]() Practical Learning: Deriving from an Abstract Class
Practical Learning: Deriving from an Abstract Class
@page
@model IndexModel
@using GasUtilityCompany1.Models
@{
    string? strMessage = null;
    BillPreparation bp = new CustomerInvoice();
    string strAmountDue = "0.00";
    string strTotalTherms = "0.00";
    string strDeliveryTotal = "0.00";
    string strEnvironmentalCharges = "0.00";
    string strTransportationCharges = "0.00";
    string strDistributionAdjustment = "0.00";

    if (Request.HasFormContentType)
    {
        . . .
    }
}

<div class="delimiter common-font">
    <h2 class="text-center bold">Gas Utility Company</h2>
    <hr />
    <h5 class="text-center bold">Customer Invoice Preparation</h5>
    <hr />

    . . .

  <hr />
  <p class="text-center">@strMessage</p>
</div>
A Parameter of an Abstract Class
As done for any class, you can create a function or method that uses a parameter of an abstract class. In the body of the function or method, use the parameter like any other. In the body of the function or method, you can access only the members of the abstract class. Here is an example:
@page
@model Valuable.Pages.CreatureModel

@functions{
    public abstract class Appliance
    {
        public string? ItemNumber { get; set; }
        public string? Make       { get; set; }
        public string? Model      { get; set; }
        public double  Weight     { get; set; }
        public double  Price      { get; set; }
    }

    double ManageShipping(Appliance machine)
    {
        if (machine.Weight <= 25)
            return 14.95;
        else
            return 24.65;
    }
}
We already know that, to use an abstract class, you must create a class that is derived from it. When calling a function or method that uses a parameter of an abstract class, the argument you pass must hold an appropriate value, which should be an object of a class derived from the abstract class. Here is an example:
@page
@model Valuable.Pages.CreatureModel
@{
Microwave purchase = new();
purchase.ItemNumber = "NN-CD87KS";
purchase.Make = "Panasonic";
purchase.Model = "NN-CD87KS";
purchase.Weight = 19.1;
purchase.Price = 525.95;
}
@functions{
public abstract class Appliance
{
public string? ItemNumber { get; set; }
public string? Make { get; set; }
public string? Model { get; set; }
public double Weight { get; set; }
public double Price { get; set; }
}
public class Microwave : Appliance
{
}
public class Refrigerator : Appliance
{
public int Doors { get; set; }
public bool IceWater { get; set; }
}
double ManageShipping(Appliance machine)
{
if (machine.Weight <= 25)
return 14.95;
else
return 24.65;
}
}
<h1>Appliance Inventory</h1>
<hr />
<table style="width: 425px" class="table">
<tr>
<td style="width: 175px; font-weight: bold">Item #:</td>
<td>@purchase.ItemNumber</td>
</tr>
<tr>
<td style="font-weight: bold">Make:</td>
<td>@purchase.Make</td>
</tr>
<tr>
<td style="font-weight: bold">Model:</td>
<td>@purchase.Model</td>
</tr>
<tr>
<td style="font-weight: bold">Weight:</td>
<td>@purchase.Weight lbs</td>
</tr>
<tr>
<td style="font-weight: bold">Price:</td>
<td>@purchase.Price</td>
</tr>
<tr>
<td style="font-weight: bold">Shipping & Handling:</td>
<td>@ManageShipping(purchase)</td>
</tr>
</table>
This would produce:
Appliance Inventory
Item #: 	NN-CD87KS
Make: 	Panasonic
Model: 	NN-CD87KS
Weight: 	19.1 lbs
Price: 	525.95
Shipping & Handling: 	14.95
Returning an Object of Abstract Type
You can create a function or method that returns an object of an abstract class type. Make sure the function returns an object of that type. Outside the class, when calling the function, you can assign it to a variable of the abstract class. Here is an example:
@page
@model Valuable.Pages.CreatureModel
@{
    Appliance purchase = Create();
}

@functions{
    public abstract class Appliance
    {
        public string? ItemNumber { get; set; }
        public string? Make       { get; set; }
        public string? Model      { get; set; }
        public double  Weight     { get; set; }
        public double  Price      { get; set; }
    }

    public class Microwave : Appliance
    {

    }

    public class Refrigerator : Appliance
    {
        public int  Doors    { get; set; }
        public bool IceWater { get; set; }
    }

    Appliance Create()
    {
        Appliance frigo = new Refrigerator()
        {
            ItemNumber = "284083",
            Make       = "Samsung",
            Model      = "RF23R6201SR",
            Weight     = 279,
            Price      = 1996.85
        };

        return frigo;
    }
}

<h1>Appliance Inventory</h1>

<hr />

<table style="width: 425px" class="table">
    <tr>
        <td style="width: 175px; font-weight: bold">Item #:</td>
        <td>@purchase.ItemNumber</td>
    </tr>
    <tr>
        <td style="font-weight: bold">Make:</td>
        <td>@purchase.Make</td>
    </tr>
    <tr>
        <td style="font-weight: bold">Model:</td>
        <td>@purchase.Model</td>
    </tr>
    <tr>
        <td style="font-weight: bold">Weight:</td>
        <td>@purchase.Weight lbs</td>
    </tr>
    <tr>
        <td style="font-weight: bold">Price:</td>
        <td>@purchase.Price</td>
    </tr>
</table>
This would produce:
Appliance Inventory
Item #: 	284083
Make: 	Samsung
Model: 	RF23R6201SR
Weight: 	279 lbs
Price: 	1996.85
The Members of an Abstract Class
Introduction
Consider a class as follows:
public abstract class Triangle
{
    public double Base { get; set; }
    public virtual double Height { get; set; }

    public double Area
    {
        get
        {
            return Base * Height / 2.00;
        }
    }
}
Consider a derived class follows:
public class Equilateral : Triangle
{
    readonly double Angle;

    public Equilateral()
    {
        Angle = 60;
    }

    public double Side
    {
        get
        {
            return Base;
        }
    }
}
Like a normal class, an abstract class can contain virtual methods and properties. As seen for non-abstract classes, if you create a virtual member in an abstract class, an object of the derived class can directly use that member. On the other hand, if you want the derived class to provide a different version of the virtual member, you must override it in the child class. This is done exactly as seen for non-abstract classes.
An Abstract Method
A method is said to be abstract if its class doesn't implement that method but the derived class must implement it. An abstract method can only belong to an abstract class.
To create an abstract method, apply the following rules:
After creating an abstract method, every class that derives from that class must provide an implementation of (each of) the abstract method(s). To implement the method, you must apply the override keyword to it as we reviewed for virtual methods.
Remember that an abstract method must not have a body. If you want the method to have a body, you can mark it with the virtual keyword. Here is an example:
public abstract class Triangle
{
    public double Base { get; set; }
    public virtual double Height { get; set; }

    public double Area
    {
        get
        {
            return Base * Height / 2.00;
        }
    }

    public abstract double CalculatePerimeter();
}
Here is an example of overriding the abstract method
public class Equilateral : Triangle
{
    readonly double Angle;

    public Equilateral()
    {
        Angle = 60;
    }

    public double Side
    {
        get
        {
            return Base;
        }
    }

    public override double CalculatePerimeter()
    {
        return Side * 3.00;
    }
}
An Abstract Property
A property is abstract if its class doesn't include an implementation of that property. Any class based on the abstract class must implement the abstract property using the override keyword.
If you want to create an abstract property that has only a get accessor, the property must use the abstract keyword. Here is an example:
public abstract class GeometricFigure
{
    public abstract double Perimeter { get; }
}
If the property has both a get and a set accessors, it can use either the abstract or the virtual keyword. Here are examples:
public abstract class GeometricFigure
{
    public abstract double Median { get; set;  }
    public virtual double Perimeter { get; set;  }
}
Having Many Methods that Return the Same Type of Abstract Object
Consider an abstract class as follows::
public abstract class Triangle
{
    public double Angle1 { get; set;  }
    public double Angle2 { get; set;  }
    public double Side1 { get; set;  }
}
Imagine you have a method that returns an object of this abstract class. Here is an example:
public abstract class Triangle
{
    public double Angle1 { get; set;  }
    public double Angle2 { get; set;  }
    public double Side1 { get; set;  }
}

public class Oblique : Triangle
{
    public Triangle View()
    {
        Triangle ot = new Oblique();

        return ot;
    }
}
If you need to have one or more other methods that perform the same type(s) of operation(s) and/or return the same type of object, you don't need to declare a variable to call the first method. Here are examples:
public abstract class Triangle
{
    public double Angle1 { get; set;  }
    public double Angle2 { get; set;  }
    public double Side1 { get; set;  }
}

public class Oblique : Triangle
{
    public Triangle View()
    {
        Triangle ot = new Oblique();

        return ot;
    }

    public Triangle Calculate()
    {
        return View();
    }

    public Triangle Evaluate()
    {
        return View();
    }

    public Triangle Summarize()
    {
        return View();
    }
}
![]() Practical Learning: Ending the Lesson
Practical Learning: Ending the Lesson
|
|
|||
| Previous | Copyright © 2002-2022, FunctionX | Monday 07 February 2022 | Next |
|
|
|||