- On the taskbar, click Start -> Programs -> Administrative
Tools -> Data Sources (ODBC)
If you are using Microsoft Windows 98, click Start -> Settings
-> Control Panel. In Control Panel, double-click ODBC Data Source
(32bit)
If you are using Microsoft Windows XP, click Start -> Settings
-> Control Panel. In Control Panel, double-click Administrative
Tools and double ODBC Data Source
- In the ODBC Data Source Administrator property sheet, in the User
Data Sources list of the User DSN property page, click the Add button:

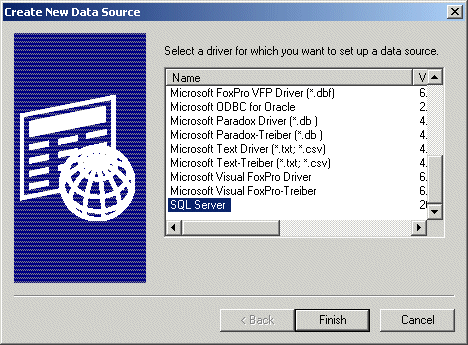
- In the Create New Data Source wizard, scroll down in the list box
and click SQL Server:

- Click Finish
- In the Name edit box of the Create A New Data Source To SQL Server
wizard, type PeopleIKnow and press Tab
- In the Description edit box, type A List of People in my Life
- Click the arrow of the Server combo box and select the server where
the Northwind database resides:
- Click Next
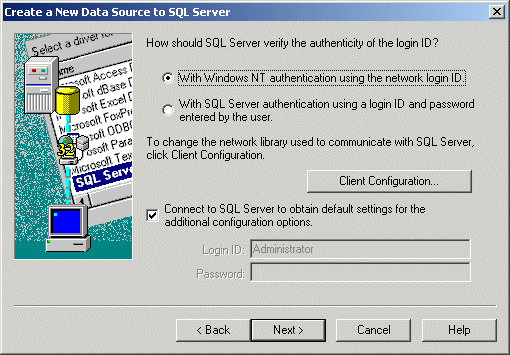
- Select the desired authentication. For this example, I accept the
Windows NT Authentication. I also accept to connect to SQL Server with
Default Settings by leaving the check box untouched:

- Click Next
- In the new page of the Create A New Data Source To SQL Server
wizard, click the Change The Default Database To check box
- Once the combo box is enabled, click its arrow and select
Acquaintances:

- For this example, leave the Attach Database FileName check box
unchecked and accept the other defaults. Click Next
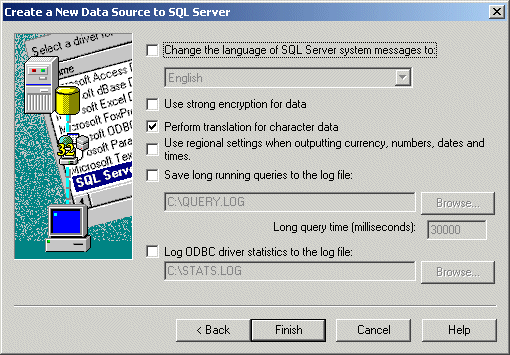
- Unless you have any other reason, accept the default (language,
encryption, etc) settings of the new page:

- Click Finish
- On the ODBC Microsoft SQL Server Setup dialog box, click the Test
Data Source button:

- When the SQL Server ODBC Data Source Test dialog box confirms that
the TESTS COMPLETED SUCCESSFULLY!, click OK:

- On the ODBC Microsoft SQL Server Setup dialog box, click OK
- In the User DSN property page of the ODBC Data Source Administrator
dialog box, make sure that the PeopleIKnow data store is listed in the
User Data Sources list box

- Click OK
|

