|
A security principal is a person or an object that needs
access to a database. The security principal can be considered as one entity
or as a group of entities:
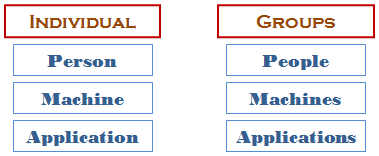
This means that a security principal can be considered
as a lone entity or as member of a group. For example, a person who accesses
a database can be considered an entity. A group of people who perform the
same job and have been give the same accecss(s) to a database (or to an
object of a database) is considered a collection.
Creating a Group in Microsoft Windows 7:
- Start Control Panel
- Click User Accounts
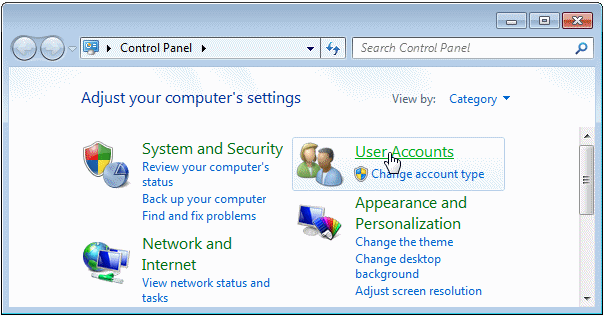
- Click User Accounts again
- Click Manage Accounts

- Click Advanced
- Click Advanced again
- In the left frame, right-click Groups and click New Group...

- Enter the desired name of the group and an optional description

- You can click Create
- When creating a group or after creating it, to make it useful, you
should (must) add one or more users to it. If you have created a group
and had closed the dialog box already, open it using the previous steps.
To add a user, click Add...
- This would open a dialog box. First check the location. If it is not
displaying the right computer, click Locations... In the Locations
dialog box, if you will access the database locally, select the name of
the computer and click OK.
In the bottom text box, type the
(complete) username of the person you want to add

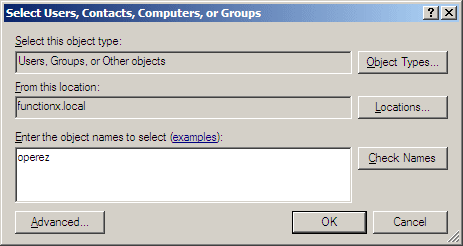
- Click Check Names


- Once the name has been resolved, click OK.
You can either add one
name at a time or add the other names one after another
Creating a Group in Microsoft Windows Server 2003 -
2008:
- Open the Active Directory Users and Computers
- Right-click Users -> New -> Group
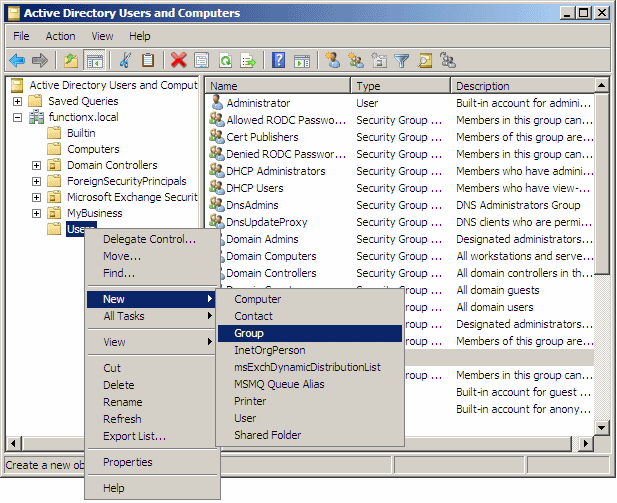
- Type the desired name for the group and check the options of the
radio buttons
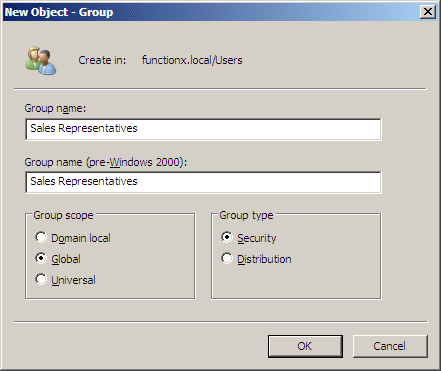
- After providing and checking the options, click OK
- In order to use a group, you should add at least one user to it. To
do this, locate the group and double-click it or right-click the group
and click Properties
- When the dialog box opens, click the Members tab
- Click Add
- In the bottom text box, enter the (complete) user name of the
account
- Click Check Names
- When the name has been resolved, click OK
You can control the type of access that a security
principal can exercise on a machine or a database, based on a level of
accecss. There are three levels: Windows, server, and database:

Based on the functionality of a security principal, it
can be considered as belonging to a collection.
To help the operating system identify them, each
security principal uses a unique number called a security identifier (SID).
|
Creating an
Administrator Account
|
|
To actually install Microsoft SQL Server 2008, you must
use a user account that has the ability to install an application. If you
are using Microsoft Windows XP, Vista, or 7, you should use the
Administrator account or create a new account that has administrative
rights. The account must also use/have a password.
 |
During the installation of Microsoft SQL Server,
you must log in, using a username and a password. If you are working
in Microsoft Windows XP->7, after the installation, if you want, you
can remove the password on the account, but you will not be able to
connect to Microsoft SQL Server again. If you want to connect to the
server, you will have to use a password again.
|
Creating an Administrator in Microsoft Windows 7
- To start, display the [Local Users and Groups (Local)] window
- In the left frame, click Groups
- In the right frame, either double-click Administrators or
right-click it and click Properties
- Click Add...
- Check the contents of the Location. If you are working locally,
click Locations. If a dialog box comes up, click Cancel. Select the name
of the computer
In the bottom text box, type the (complete) user name
of the person
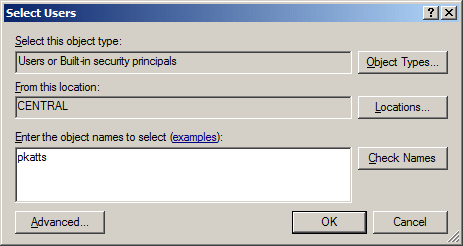
- Click Check Names

- When the name has been resolved, click OK
Creating an Administrator in Microsoft Windows Server
2003-2008
- To start, display the Active Directory Users and Computers window
- You have various options:
- To add an account to the built-in Administrators group:
- In the left frame, click BuiltIn
- In the right frame, either double-click Administrators or
right-click it and click Properties
- To add an account to another group, such as the Domain Admins:
- In the left frame, click Users
- In the right-click frame, either double-click Domain Admins
- Click the Members tab
- Click Add...
- In the bottom text box, type the (complete) user name of the person
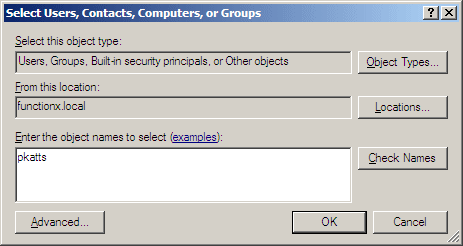
- Click Check Names
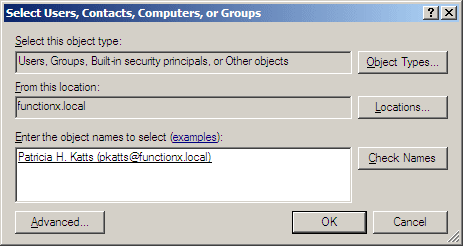
- When the name has been resolved, click OK
 |
From now on, that is, for the rest of our
lessons, we will consider that you are using a computer on which you
have administrative rights. You must always log in using that
account when you start your computer or use an account that has
administrative rights.
|
|
|