|
 Practical
Learning: Creating the Application Practical
Learning: Creating the Application
|
|
- Create a new Windows Application named CollegeParkAutoParts3
- In the Solution Explorer, right-click Form1.vb and click Rename
- Type CollegeParkAutoParts.vb and press Enter
- Double-click the middle of the form and write code as follows:
Imports System.Data.SqlClient

Public Class CollegeParkAutoParts
    Friend Sub CreateDatabase()

        Using Connect As SqlConnection = _
            New SqlConnection("Data Source=(local);" & _
                              "Integrated Security=SSPI;")

            Dim Command As SqlCommand = _
            New SqlCommand("CREATE DATABASE CollegeParkAutoParts1;", Connect)
            Connect.Open()

            Command.ExecuteNonQuery()
            msgbox("A database named CollegeParkAutoParts has been created.")
        End Using

        Using Connect As SqlConnection = _
            New SqlConnection("Data Source=(local);" & _
                              "Database=CollegeParkAutoParts1;" & _
                              "Integrated Security=SSPI;")

            Dim strCreate As String = _
                           "CREATE TABLE AutoParts(" & _
                           "PartNumber int identity(100001, 1) NOT NULL, " & _
                           "CarYear int, " & _
                           "Make varchar(50), " & _
                           "Model varchar(50), " & _
                           "Category varchar(50), " & _
                           "PartName varchar(100), " & _
                           "UnitPrice money, " & _
                           "CONSTRAINT PK_AutoParts PRIMARY " & _
                           "    KEY (PartNumber));"
            Dim Command As SqlCommand = New SqlCommand(strCreate, Connect)
            Connect.Open()

            Command.ExecuteNonQuery()
            msgbox("A table named Parts has been created.")
        End Using

        Using Connect As SqlConnection = _
            New SqlConnection("Data Source=(local);" & _
                              "Database=CollegeParkAutoParts1;" & _
                              "Integrated Security=SSPI;")

            Dim strCreate As String = _
		"CREATE TABLE CustomersOrders(" & _
                "CustomerOrderID int identity(1001, 1) NOT NULL, " & _
                "ReceiptNumber int NOT NULL, " & _
                               "PartNumber int NULL, " & _
                               "PartName varchar(100), " & _
                               "UnitPrice money, " & _
                               "Quantity int, " & _
                               "SubTotal money, " & _
                               "PartsTotal money, " & _
                               "TaxRate decimal(6, 2), " & _
                               "TaxAmount money, " & _
                               "OrderTotal money, " & _
                               "CONSTRAINT PK_CustomersOrderts PRIMARY " & _
                               "    KEY (CustomerOrderID));"
            Dim Command As SqlCommand = New SqlCommand(strCreate, Connect)
            Connect.Open()

            Command.ExecuteNonQuery()
            MsgBox("A table named CustomersOrders has been created.")
        End Using
    End Sub

    Private Sub CollegeParkAutoParts_Load(ByVal sender As System.Object, _
                                          ByVal e As System.EventArgs) _
                                          Handles MyBase.Load
        CreateDatabase()
    End Sub
End Class
|
- Execute the application to create the database
- Close the form and return to your programming environment
- To create a dialog box, on the main menu, click Project -> Add Windows
Form...
- In the Templates list, click Dialog
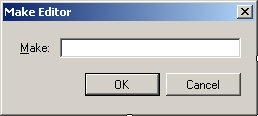
- Set the name to MakeEditor and click Add
- Design the form as follows:
 |
| Control |
Text |
Name |
Other Properties |
| Label |
&Make: |
|
|
| TextBox |
|
TxtMake |
Modifiers: Public |
| Button |
OK |
BtnOK |
DialogResult: OK |
| Button |
Cancel |
BtnCancel |
DialogResult: Cancel |
|
| Form Property |
Value |
| FormBorderStyle |
FixedDialog |
| Text |
Make Editor |
| StartPosition |
CenterScreen |
| AcceptButton |
BtnOK |
| CancelButton |
BtnCancel |
| MaximizeBox |
False |
| MinimizeBox |
False |
| ShowInTaskbar |
False |
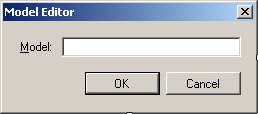
- To create a dialog box, on the main menu, click Project -> Add Windows
Form...
- Set the name to ModelEditor and click Add
- Design the form as follows:
 |
| Control |
Text |
Name |
Other Properties |
| Label |
&Model: |
|
|
| TextBox |
|
TxtModel |
Modifiers: Public |
| Button |
OK |
BtnOK |
DialogResult: OK |
| Button |
Cancel |
BtnCancel |
DialogResult: Cancel |
|
| Form Property |
Value |
| FormBorderStyle |
FixedDialog |
| Text |
Model Editor |
| StartPosition |
CenterScreen |
| AcceptButton |
BtnOK |
| CancelButton |
BtnCancel |
| MaximizeBox |
False |
| MinimizeBox |
False |
| ShowInTaskbar |
False |
- To create a dialog box, in the Solution Explorer, right-click
CollegeParkAutoParts3 -> Add -> Windows Form...
- Set the name to CategoryEditor and click Add
- Design the form as follows:
 |
| Control |
Text |
Name |
Other Properties |
| Label |
&Category: |
|
|
| TextBox |
|
TxtCategory |
Modifiers: Public |
| Button |
OK |
BtnOK |
DialogResult: OK |
| Button |
Cancel |
BtnCancel |
DialogResult: Cancel |
|
| Form Property |
Value |
| FormBorderStyle |
FixedDialog |
| Text |
Category Editor |
| StartPosition |
CenterScreen |
| AcceptButton |
BtnOK |
| CancelButton |
BtnCancel |
| MaximizeBox |
False |
| MinimizeBox |
False |
| ShowInTaskbar |
False |
- On the main menu, click Project -> Add Windows Form...
- Set the Name to PartEditor and click Add
- Design the form as follows:
 |
| Control |
Text |
Name |
Other Properties |
| Label |
&Year: |
|
|
| ComboBox |
|
CbxYears |
|
| Label |
&Make: |
|
|
| ComboBox |
|
CbxMakes |
|
| Button |
New C&ategory... |
BtnNewMake |
|
| Label |
M&odel: |
|
|
| ComboBox |
|
CbxModels |
|
| Button |
New Mo &del... |
BtnNewModel |
|
| Label |
&Category: |
|
|
| ComboBox |
|
CbxCategories |
|
| Button |
New Ca&tegory |
BtnNewCategory |
|
| Label |
&Part Name: |
|
|
| TextBox |
|
TxtPartName |
|
| Label |
&Unit Price: |
|
|
| TextBox |
0.00 |
TxtUnitPrice |
TextAlign: Right |
| Label |
Part #: |
|
|
| TextBox |
|
TxtPartNumber |
Enabled: False |
| Button |
Submit |
BtnSubmit |
|
| Button |
Close |
BtnClose |
DialogResult: Cancel |
|
| Form Property |
Value |
| FormBorderStyle |
FixedDialog |
| Text |
College Park Auto -Parts: Part Editor |
| StartPosition |
CenterScreen |
| MaximizeBox |
False |
| MinimizeBox |
False |
| ShowInTaskbar |
False |
- Right-click the Part Editor dialog box and click View Code
- In the Class Name combo box, select BtnMake
- In the Method Name combo box, select Click
- Change the file as follows:
Imports System.Data.SqlClient

Public Class PartEditor

    Private Sub BtnNewMake_Click(ByVal sender As Object, _
                                 ByVal e As System.EventArgs) _
                                 Handles BtnNewMake.Click
        Dim Editor As MakeEditor = New MakeEditor

        If Editor.ShowDialog() = DialogResult.OK Then
            If Editor.TxtMake.Text.Length > 0 Then
                Dim strMake As String = Editor.TxtMake.Text

                ' Make sure the category is not yet in the list
                If CbxMakes.Items.Contains(strMake) Then
                    MsgBox(strMake & " is already in the list")
                Else
                    ' Since this is a new category, add it to the combox box
                    CbxMakes.Items.Add(strMake)
                End If

                CbxMakes.Text = strMake
            End If
        End If
    End Sub
End Class
|
- In to Class Name combo box, select BtnNewModel
- In the Method Name combo box, select Click and implement the event as follows:
Private Sub BtnNewModel_Click(ByVal sender As Object, _
                              ByVal e As System.EventArgs) _
                              Handles BtnNewModel.Click
    Dim Editor As ModelEditor = New ModelEditor

    If Editor.ShowDialog() = DialogResult.OK Then
        If Editor.TxtModel.Text.Length > 0 Then
            Dim strModel As String = Editor.TxtModel.Text

            ' Make sure the category is not yet in the list
            If CbxModels.Items.Contains(strModel) Then
                MsgBox(strModel & " is already in the list")
            Else
                ' Since this is a new category, add it to the combox box
                CbxModels.Items.Add(strModel)
            End If

            CbxModels.Text = strModel
        End If
    End If
End Sub
|
- In to Class Name combo box, select BtnNewCategory
- In the Method Name combo box, select Click and implement the event as follows:
Private Sub BtnNewCategory_Click(ByVal sender As Object, _
                                 ByVal e As System.EventArgs) _
                                 Handles BtnNewCategory.Click
    Dim Editor As CategoryEditor = New CategoryEditor

    If Editor.ShowDialog() = DialogResult.OK Then
        If Editor.TxtCategory.Text.Length > 0 Then
            Dim strCategory As String = Editor.TxtCategory.Text

            ' Make sure the category is not yet in the list
            If CbxCategories.Items.Contains(strCategory) Then
                MsgBox(strCategory + " is already in the list")
            Else
                ' Since this is a new category, add it to the combo box
                CbxCategories.Items.Add(strCategory)
            End If

            CbxCategories.Text = strCategory
        End If
    End If
End Sub
|
- In to Class Name combo box, select BtnSubmit
- In the Method Name combo box, select Click and implement the event as follows:
Private Sub BtnSubmit_Click(ByVal sender As Object, _
                                ByVal e As System.EventArgs) _
                                Handles BtnSubmit.Click
        Dim UnitPrice As Double = 0.0

        If CbxYears.Text = "" Then
            MsgBox("You must specify the year of the car.")
            Exit Sub
        End If

        If CbxMakes.Text = "" Then
            MsgBox("You must specify the car manufacturer.")
            Exit Sub
        End If

        If CbxModels.Text = "" Then
            MsgBox("You must specify the car model.")
            Exit Sub
        End If

        If TxtPartName.Text = "" Then
            MsgBox("You must enter the name of the part.")
            Exit Sub
        End If

        If TxtUnitPrice.Text = "" Then
            MsgBox("You must enter the unit price of the part.")
            Exit Sub
        End If

        Try
            UnitPrice = CDbl(TxtUnitPrice.Text)
        Catch ex As Exception
            MsgBox("Invalid Unit Price.")
        End Try

        Using Connect As SqlConnection = _
               New SqlConnection("Data Source=(local);" & _
                                 "Database=CollegeParkAutoParts1;" & _
                                 "Integrated Security=SSPI;")

            Dim strAutoPart As String = "INSERT INTO AutoParts(" & _
                                 "CarYear, Make, Model, Category, " & _
                                 "PartName, UnitPrice) VALUES('" & _
                                 CbxYears.Text & "', '" & _
                                 CbxMakes.Text & "', '" & _
                                 CbxModels.Text & "', '" & _
                                 CbxCategories.Text & "', '" & _
                                 TxtPartName.Text & "', '" & _
                                 TxtUnitPrice.Text & "');"

            Dim Command As SqlCommand = New SqlCommand(strAutoPart, Connect)

            Connect.Open()
            Command.ExecuteNonQuery()

            MsgBox("The new part has been added.")
        End Using
End Sub
|
- Save the file and close the form
- In the Solution Explorer, double-click CollegeParkAutoParts.vb to
open the form
- To create an icon, on the main menu, click Project -> Add New Item...
- In the Templates list, click Icon File
- Set the Name to cpap1 and click Add
- Right-click the white area and click Delete Image Type
- Design the 16x16, 16 colors version of the icon as follows:
- On the main menu, click File -> Save cpap1.ico As
- Select the bin\Debug folder of the current folder and click Save
- On the main menu, click File -> Close
- In the Solution Explorer, expand bin and expand Debug
- In the Solution Explorer, right-click the Debug folder -> Add -> New
Item...
- In the Templates list, make sure Icon File is selected.
Set the Name to cpap2 and click Add
- Right-click the white area and click Delete Image Type
- Design the 16x16, 16 colors version of the icon as follows:
- Save the file and close the icon window
- In the Solution Explorer, right- click the Debug folder -> Add ->
New Item...
- In the Templates list, make sure Icon File is selected.
Set the Name to year1 and click Add
- Right-click the white area and click Delete Image Type
- Design the 16x16, 16 colors version of the icon as follows:
- Save the file and close the icon window
- In the Solution Explorer, right- click the Debug folder -> Add ->
New Item...
- In the Templates list, make sure Icon File is selected.
Set the Name to year2 and click Add
- Right-click the white area and click Delete Image Type
- Design the 16x16, 16 colors version of the icon as follows:
- Save the file and close the icon window
- In the Solution Explorer, right- click the Debug folder -> Add ->
New Item...
- In the Templates list, make sure Icon File is selected.
Set the Name to make1 and click Add
- Right-click the white area and click Delete Image Type
- Design the 16x16, 16 colors version of the icon as follows:
- Save the file and close the icon window
- In the Solution Explorer, right- click the Debug folder -> Add ->
New Item...
- In the Templates list, make sure Icon File is selected.
Set the Name to make2 and click Add
- Right-click the white area and click Delete Image Type
- Design the 16x16, 16 colors version of the icon as follows:
- Save the file and close the icon window
- In the Solution Explorer, right- click the Debug folder -> Add ->
New Item...
- In the Templates list, make sure Icon File is selected.
Set the Name to model1 and click Add
- Right-click the white area and click Delete Image Type
- Design the 16x16, 16 colors version of the icon as follows:
- Save the file and close the icon window
- In the Solution Explorer, right- click the Debug folder -> Add ->
New Item...
- In the Templates list, make sure Icon File is selected.
Set the Name to model2 and click Add
- Right-click the white area and click Delete Image Type
- Design the 16x16, 16 colors version of the icon as follows:
- Save the file and close the icon window
- In the Solution Explorer, right- click the Debug folder -> Add ->
New Item...
- In the Templates list, make sure Icon File is selected.
Set the Name to category1 and click Add
- Right-click the white area and click Delete Image Type
- Design the 16x16, 16 colors version of the icon as follows:
- Save the file and close the icon window
- In the Solution Explorer, right- click the Debug folder -> Add ->
New Item...
- In the Templates list, make sure Icon File is selected.
Set the Name to category2 and click Add
- Right-click the white area and click Delete Image Type
- Design the 16x16, 16 colors version of the icon as follows:
- Save the file and close the icon window
- From the Components section of the Toolbox, click ImageList and click the
form
- In the Properties window, click (Name) and type imgAutoParts
- Click the ellipsis button of the Images field
- In the Image Collection Editor, click Add
- Locate the folder that contains the icons you created and display it in
the Look In combo box
- Select cpap1.ico and click Open
- In the same way, add the other pictures in the following order: cpap2.ico,
year1.ico, year2.ico, make1.ico, make2.ico, model1.ico, model2.ico,
category1.ico, and category1.ico
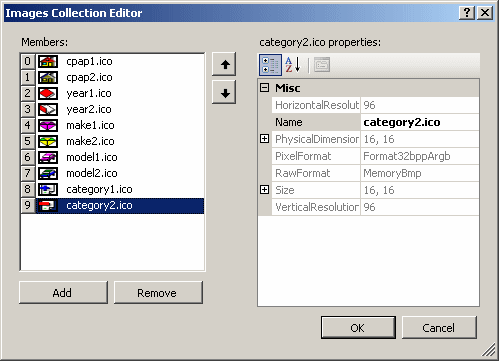
- Click OK
- Design the form as follows:
 |
| Control |
Text |
Name |
Other Properties |
| Label |
 |
College Park Auto-Parts |
|
Font: Times New Roman,
20.25pt, style=Bold
ForeColor: Blue |
| Panel |
 |
|
|
Height: 2 |
| GroupBox |
 |
Part Identification |
|
|
| TreeView |
 |
|
tvwAutoParts |
ImageList: imgAutoParts |
| GroupBox |
|
Available Parts |
|
|
| ListView |
 |
|
lvwAutoParts |
FullRowSelect: True
GridLines: True
View: Details |
| Columns |
|
(Name) |
Text |
TextAlign |
Width |
| colPartNumber |
Part # |
|
|
| colPartName |
Part Name |
|
300 |
| colUnitPrice |
Unit Price |
Right |
80 |
| GroupBox |
|
Customer Order - Selected Parts |
|
|
| Label |
|
Part # |
|
|
| Label |
|
Part Name |
|
|
| Label |
|
Unit Price |
|
|
| Label |
|
Qty |
|
|
| Label |
|
Sub Total |
|
|
| TextBox |
 |
|
TxtPartNumber |
|
| TextBox |
|
|
TxtPartName |
|
| TextBox |
|
0.00 |
TxtUnitPrice |
TextAlign: Right |
| TextBox |
|
0 |
TxtQuantity |
TextAlign: Right |
| TextBox |
|
0.00 |
TxtSubTotal |
TextAlign: Right |
| Button |
 |
Add/Select |
BtnAdd |
|
| ListView |
|
|
LvwSelectedParts |
FullRowSelect: True
GridLines: True
View: Details |
| Columns |
|
(Name) |
Text |
TextAlign |
Width |
| colPartNumberSelected |
Part # |
|
45 |
| colPartNameSelected |
Part Name |
|
274 |
| colUnitPriceSelected |
Unit Price |
Right |
58 |
| colQuantitySelected |
Qty |
Right |
28 |
| colSubTotalSelected |
Sub-Total |
Right |
58 |
| GroupBox |
|
Order Summary |
|
|
| Button |
|
New Au&to Part... |
BtnNewAutoPart |
|
| Label |
|
Receipt #: |
|
|
| TextBox |
|
|
TxtSave |
|
| Button |
|
Save |
BtnSave |
|
| Label |
|
Tax Rate: |
|
|
| TextBox |
|
7.75 |
TxtTaxRate |
TextAlign: Right |
| Label |
|
% |
|
|
| Label |
|
Parts Total: |
|
|
| TextBox |
|
0.00 |
TxtPartsTotal |
TextAlign: Right |
| Button |
|
&New Customer Order |
BtnNewCustomerOrder |
|
| Label |
|
Receipt #: |
|
|
| TextBox |
|
|
TxtOpen |
|
| Button |
|
Save |
BtnOpen |
|
| Label |
|
Tax Amount: |
|
|
| TextBox |
|
0.00 |
TxtTaxAmount |
TextAlign: Right |
| Label |
|
Order Total: |
|
|
| TextBox |
|
0.00 |
TxtOrderTotal |
TextAlign: Right |
| Button |
|
Close |
BtnClose |
|
|
- Right-click the form and click View Code
- In the Class Name combo box, select LvwAutoParts
- In the Method Name combo box, select DoubleClick and make changes as follows:
Private Sub CollegeParkAutoParts_Load(ByVal sender As System.Object, _
                                      ByVal e As System.EventArgs) _
                                      Handles MyBase.Load
    ' CreateDatabase()
End Sub

Private Sub LvwAutoParts_DoubleClick(ByVal sender As Object, _
                                     ByVal e As System.EventArgs) _
                                     Handles LvwAutoParts.DoubleClick
    Dim lviAutoPart As ListViewItem = LvwAutoParts.SelectedItems(0)

    If (LvwAutoParts.SelectedItems.Count = 0) Or _
       (LvwAutoParts.SelectedItems.Count > 1) Then
        Exit Sub
    End If

    TxtPartNumber.Text = lviAutoPart.Text
    TxtPartName.Text = lviAutoPart.SubItems(1).Text
    TxtUnitPrice.Text = lviAutoPart.SubItems(2).Text

    TxtQuantity.Text = "1"
    TxtSubTotal.Text = lviAutoPart.SubItems(2).Text

    TxtQuantity.Focus()
End Sub
|
- Under the above End Sub line, implement the following event:
Private Sub ControlsLeave(ByVal sender As Object, _
                          ByVal e As System.EventArgs) _
                          Handles TxtUnitPrice.Leave, _
                                  TxtQuantity.Leave
    Dim UnitPrice As Double = 0.0
    Dim Quantity As Integer = 0
    Dim SubTotal As Double = 0.0

    Try
        UnitPrice = CDbl(TxtUnitPrice.Text)
    Catch ex As Exception
        MsgBox("Invalid Unit Price!")
    End Try

    Try
        Quantity = CInt(TxtQuantity.Text)
    Catch ex As Exception
        MsgBox("Invalid Quandtity!")
    End Try

    SubTotal = UnitPrice * Quantity
    TxtSubTotal.Text = FormatCurrency(SubTotal)
End Sub
|
- Under the above End Sub line, define the following procedure:
Friend Sub CalculateOrder()
    If lvwSelectedParts.Items.Count = 0 Then
        TxtTaxAmount.Text = "0.00"
        TxtPartsTotal.Text = "0.00"
        TxtOrderTotal.Text = "0.00"
        Exit Sub
    End If

    ' Calculate the current total order and update the order
    Dim PartsTotal As Double = 0.0
    Dim TaxRate As Double = 0.0
    Dim TaxAmount As Double = 0.0
    Dim OrderTotal As Double = 0.0

    For Each lvi As ListViewItem In LvwSelectedParts.Items
         Dim SubItem As ListViewItem.ListViewSubItem = lvi.SubItems(4)
         PartsTotal = PartsTotal + CDbl(SubItem.Text)
    Next

    Try
        TaxRate = CDbl(TxtTaxRate.Text) / 100
    Catch Exc As Exception
        msgbox("Invalid Tax Rate")
    End Try

    TaxAmount = PartsTotal * TaxRate
    OrderTotal = PartsTotal + TaxAmount

    TxtPartsTotal.Text = FormatNumber(PartsTotal)
    TxtTaxAmount.Text  = FormatNumber(TaxAmount)
    TxtOrderTotal.Text = FormatNumber(OrderTotal)
End Sub
|
- In the Class Name combo box, select LvwSelectedParts
- In the Method Name combo box, select DoubleClick and implement the event as follows:
Private Sub LvwSelectedParts_DoubleClick(ByVal sender As Object, _
                                         ByVal e As System.EventArgs) _
                                 Handles LvwSelectedParts.DoubleClick
    Dim lviSelectedPart As ListViewItem = LvwSelectedParts.SelectedItems(0)

    If (LvwSelectedParts.SelectedItems.Count = 0) Or _
       (LvwSelectedParts.SelectedItems.Count > 1) Then
        Exit Sub
    End If

    TxtPartNumber.Text = lviSelectedPart.Text
    TxtPartName.Text = lviSelectedPart.SubItems(1).Text
    TxtUnitPrice.Text = lviSelectedPart.SubItems(2).Text
    TxtQuantity.Text = lviSelectedPart.SubItems(3).Text
    TxtSubTotal.Text = lviSelectedPart.SubItems(4).Text

    LvwSelectedParts.Items.Remove(lviSelectedPart)
    CalculateOrder()
End Sub
|
- Save all
|
Practical Learning: Using a Collection-Based Class |
|
- In the Solution Explorer, right-click CollegeParkAutoParts3 -> Add
-> Class...
- Set the name to AutoPart and press Enter
- Create a class as follows:
Public Class AutoPart
    Public PartNumber As Integer
    Public CarYear As Integer
    Public Make As String
    Public Model As String
    Public Category As String
    Public PartName As String
    Public UnitPrice As Double
End Class
|
- In the Solution Explorer, right-click PartEditor.vb and click View Code
- In the Class Name combo box, select (PartEditor Events)
- In the Method Name combo box, select Load and implement the event as follows:
Friend Sub ResetPartEditor()
    Dim i As Integer

    CbxYears.Items.Clear()
    CbxMakes.Items.Clear()
    CbxModels.Items.Clear()
    CbxCategories.Items.Clear()
    TxtPartName.Text = ""
    TxtUnitPrice.Text = "0.00"
    TxtPartNumber.Text = ""

    ' Put the years in the top combo box
    ' Start with next year down to 1960
    For i = DateTime.Today.Year + 1 To 1960 Step -1
        CbxYears.Items.Add(i.ToString())
    Next

    ' Prepare a data set object for the parts
    Dim dsParts As DataSet = New DataSet("PartsSet")

    ' Establish a connection to the database
    Using Connect As SqlConnection = _
            New SqlConnection("Data Source=(local);" & _
                              "Database=CollegeParkAutoParts1;" & _
                              "Integrated Security=SSPI;")

        ' Create a command that will select the parts
        Dim Command As SqlCommand = _
            New SqlCommand("SELECT * FROM AutoParts;", _
                           Connect)
        ' Open the connection
        Connect.Open()

        ' Create a data adapter that will get the values from the table
        Dim sdaParts As SqlDataAdapter = New SqlDataAdapter(Command)
        ' Store those values in the data set
        sdaParts.Fill(dsParts)

        ' Create an auto part object
        Dim StoreItem As AutoPart = Nothing
        ' Create an empty list of auto parts
        Dim ListOfAutoParts As List(Of AutoPart) = New List(Of AutoPart)

        ' Check each record from the (only) table in the data set
        For Each Record As DataRow In dsParts.Tables(0).Rows
            ' Use the auto part object ...
            StoreItem = New AutoPart()
            ' ... to create a record object
            StoreItem.PartNumber = Record(0)
            StoreItem.CarYear = Record(1)
            StoreItem.Make = Record(2)
            StoreItem.Model = Record(3)
            StoreItem.Category = Record(4)
            StoreItem.PartName = Record(5)
            StoreItem.UnitPrice = Record(6)
            ' Once the record is ready, store it in the collection variable
            ListOfAutoParts.Add(StoreItem)
        Next

        ' To avoid duplicate values in the combo boxes,
        ' we will use collection classes
        Dim ListOfMakes As List(Of String) = New List(Of String)
        Dim ListOfCategories As List(Of String) = New List(Of String)

        ' Check the list of makes
        For Each Part As AutoPart In ListOfAutoParts
            ' If the list doesn't yet contain the make, add it
            If Not ListOfMakes.Contains(Part.Make) Then
                ListOfMakes.Add(Part.Make)
            End If
        Next

        ' Once we have the list of makes,
        ' put them in the Make combo box
        For Each strMake As String In ListOfMakes
            CbxMakes.Items.Add(strMake)
        Next

        For Each Part As AutoPart In ListOfAutoParts
            If Not ListOfCategories.Contains(Part.Category) Then
                ListOfCategories.Add(Part.Category)
            End If
        Next

        For Each strCategory As String In ListOfCategories
            CbxCategories.Items.Add(strCategory)
        Next
    End Using
End Sub

Private Sub PartEditor_Load(ByVal sender As Object, _
                            ByVal e As System.EventArgs) _
                            Handles Me.Load
    ResetPartEditor()
End Sub
|
- Call the ResetPartEditor() method before the closing curly bracket of the
Click event of the Submit button:
Private Sub BtnSubmit_Click(ByVal sender As Object, _
                            ByVal e As System.EventArgs) _
                            Handles btnSubmit.Click

    . . . No Change

    ResetPartEditor()
End Sub
|
- In the Class Name combo box, select CbxYears
- In the Method Name combo box, select SelectedIndexChanged and implement the event as follows:
Private Sub CbxYears_SelectedIndexChanged(ByVal sender As Object, _
                                          ByVal e As System.EventArgs) _
                                  Handles CbxYears.SelectedIndexChanged
    ' If the user was working on a previous part, cancel it
    CbxModels.Items.Clear()
End Sub
|
- In the Class Name combo box, select CbxMakes
- In the Method Name combo box, select SelectedIndexChanged and implement
the event as follows:
Private Sub CbxMakes_SelectedIndexChanged(ByVal sender As Object, _
                                          ByVal e As System.EventArgs) _
                                  Handles CbxMakes.SelectedIndexChanged
    ' Create a data set of parts
    Dim dsParts As DataSet = New DataSet("PartsSet")

    ' Establish a connection to the database
    Using Connect As SqlConnection = _
            New SqlConnection("Data Source=(local);" & _
                              "Database=CollegeParkAutoParts1;" & _
                              "Integrated Security=SSPI;")

        ' Create a command that will select the parts
        Dim Command As SqlCommand = _
                New SqlCommand("SELECT * FROM AutoParts;", _
                               Connect)
        ' Open the connection
        Connect.Open()

        ' Create a data adapter that will get
        ' the record from the command
        Dim sdaParts As SqlDataAdapter = New SqlDataAdapter(Command)

        ' Store those records in the data set
        sdaParts.Fill(dsParts)

        ' Create an empty object that can receive one record
        Dim StoreItem As AutoPart = Nothing
        ' Create an empty list that can receive a list of records
        Dim ListOfAutoParts As List(Of AutoPart) = New List(Of AutoPart)

        ' Check each record
        For Each Record As DataRow In dsParts.Tables(0).Rows
            ' Get the values of the current record
            StoreItem = New AutoPart()
            ' Store the values in the object
            StoreItem.PartNumber = Record(0)
            StoreItem.CarYear = Record(1)
            StoreItem.Make = Record(2)
            StoreItem.Model = Record(3)
            StoreItem.Category = Record(4)
            StoreItem.PartName = Record(5)
            StoreItem.UnitPrice = Record(6)
            ' Once the record is ready, store it in the collection
            ListOfAutoParts.Add(StoreItem)
        Next

        ' This will hold the list of parts
        Dim ListOfModels As List(Of String) = New List(Of String)

        For Each Part As AutoPart In ListOfAutoParts
            If (Part.CarYear = CInt(CbxYears.Text)) And _
               (Part.Make = CbxMakes.Text) Then
                If Not ListOfModels.Contains(Part.Model) Then
                    ListOfModels.Add(Part.Model)
                End If
            End If
        Next

        For Each strModel As String In ListOfModels
            CbxModels.Items.Add(strModel)
        Next
    End Using
End Sub
|
- In the Solution Explorer, right-click CollegeParkAutoParts.vb and click View Code
- Just above the End Class line, create the following method:
Friend Sub ShowAutoParts()
    Dim Years As Integer
    TvwAutoParts.Nodes.Clear()
    Dim NodeRoot As TreeNode = _
        TvwAutoParts.Nodes.Add("College Park Auto-Parts", _
                               "College Park Auto-Parts", 0, 1)
    ' Show the years nodes
    For Years = DateTime.Today.Year + 1 To 1960 Step -1
        NodeRoot.Nodes.Add(Years.ToString(), Years.ToString(), 2, 3)
    Next

    TvwAutoParts.SelectedNode = NodeRoot
    ' Expand the root node
    TvwAutoParts.ExpandAll()

    ' Create an empty data set
    Dim dsParts As DataSet = New DataSet("PartsSet")

    ' Create a connection to the database
    Using Connect As SqlConnection = _
            New SqlConnection("Data Source=(local);" & _
                              "Database=CollegeParkAutoParts1;" & _
                              "Integrated Security=SSPI;")

        ' Use a command to specify what action we want to take
        Dim Command As SqlCommand = _
            New SqlCommand("SELECT * FROM AutoParts;", Connect)
        ' Open the connection
        Connect.Open()

        ' Use a data adapter to retrieve the values from the command
        Dim sdaParts As SqlDataAdapter = _
            New SqlDataAdapter(Command)
        ' Fill the data set with the values from the data adapater
        sdaParts.Fill(dsParts)

        ' Prepare a variable from the class we will use
        Dim StoreItem As AutoPart = Nothing
        ' Create a collection
        Dim ListOfAutoParts As List(Of AutoPart) = New List(Of AutoPart)

        ' Check each record from the table from the data set
        For Each Record As DataRow In dsParts.Tables(0).Rows

            ' Identify each record as a value of our class
            StoreItem = New AutoPart()
            ' Get the values of the record and put them in the class
            StoreItem.PartNumber = Record(0)
            StoreItem.CarYear = Record(1)
            StoreItem.Make = Record(2)
            StoreItem.Model = Record(3)
            StoreItem.Category = Record(4)
            StoreItem.PartName = Record(5)
            StoreItem.UnitPrice = Record(6)
            ' Store the record in the collection
            ListOfAutoParts.Add(StoreItem)
        Next

        ' Now that we have the records,
        ' we can use them as a normal collection
        For Each NodeYear As TreeNode In NodeRoot.Nodes
            Dim ListMakes As List(Of String) = New List(Of String)

            For Each Part As AutoPart In ListOfAutoParts
                If NodeYear.Text = Part.CarYear Then
                    If Not ListMakes.Contains(Part.Make) Then
                        ListMakes.Add(Part.Make)
                    End If
                End If
            Next
            For Each strMake As String In ListMakes
                NodeYear.Nodes.Add(strMake, strMake, 4, 5)
            Next
        Next

        For Each NodeYear As TreeNode In NodeRoot.Nodes
            For Each NodMake As TreeNode In NodeYear.Nodes
                Dim ListOfModels As List(Of String) = New List(Of String)

                For Each Part As AutoPart In ListOfAutoParts
                    If (NodeYear.Text = Part.CarYear.ToString()) And _
                        (NodMake.Text = Part.Make) Then

                        If Not ListOfModels.Contains(Part.Model) Then
                            ListOfModels.Add(Part.Model)
                        End If
                    End If
                Next

                For Each strModel As String In ListOfModels
                    NodMake.Nodes.Add(strModel, strModel, 6, 7)
                Next
            Next
        Next

        For Each NodeYear As TreeNode In NodeRoot.Nodes
            For Each NodeMake As TreeNode In NodeYear.Nodes
                For Each NodeModel As TreeNode In NodeMake.Nodes
                    Dim ListOfCategories As _
			List(Of String) = New List(Of String)

                    For Each Part As AutoPart In ListOfAutoParts
                        If (NodeYear.Text = Part.CarYear) And _
                           (NodeMake.Text = Part.Make) And _
                           (NodeModel.Text = Part.Model) Then
                            If Not ListOfCategories.Contains(Part.Category) Then
                                ListOfCategories.Add(Part.Category)
                            End If
                        End If
                    Next

                    For Each strCategory As String In ListOfCategories
                        NodeModel.Nodes.Add(strCategory, strCategory, 8, 9)
                    Next
                Next
            Next
        Next
    End Using
End Sub
|
- In the Class Name combo box, select (CollegeParkAutoParts Events)
- In the Method Name combo box, select Loadhe and change the event as
follows:
Private Sub CollegeParkAutoParts_Load(ByVal sender As System.Object, _
                                      ByVal e As System.EventArgs) _
                                      Handles MyBase.Load
    ' CreateDatabase()
    ShowAutoParts()
End Sub
|
- In the Class Name combo box, select BtnNewAutoPart
- In the Method Name combo box, select Click and implement the event as follows:
Private Sub BtnNewAutoPart_Click(ByVal sender As Object, _
                                 ByVal e As System.EventArgs) _
                                 Handles BtnNewAutoPart.Click
    Dim Editor As PartEditor = New PartEditor

    If Editor.ShowDialog() = DialogResult.Cancel Then
        ShowAutoParts()
    End If
End Sub
|
- Execute the application
- Click the New Auto Part button and use the
Part Editor to create a few parts
- Close the forms and return to your programming environment
- In the Class Name combo box, select tvwAutoParts
- In the Method Name combo box, select NodeMouseClick and implement the event as follows:
Private Sub TvwAutoParts_NodeMouseClick(ByVal sender As Object, _
             ByVal e As System.Windows.Forms.TreeNodeMouseClickEventArgs) _
                                        Handles TvwAutoParts.NodeMouseClick
    Dim NodeClicked As TreeNode = e.Node

    If NodeClicked.Level = 4 Then
        LvwAutoParts.Items.Clear()
    End If

    Dim dsParts As DataSet = New DataSet("PartsSet")

    Using Connect As SqlConnection = _
            New SqlConnection("Data Source=(local);" & _
                              "Database=CollegeParkAutoParts1;" & _
                              "Integrated Security=SSPI;")

        Dim Command As SqlCommand = _
  		New SqlCommand("SELECT * FROM AutoParts;", Connect)
        Connect.Open()

        Dim sdaParts As SqlDataAdapter = New SqlDataAdapter(Command)
        sdaParts.Fill(dsParts)

        Dim StoreItem As AutoPart = Nothing
        Dim ListOfAutoParts As List(Of AutoPart) = New List(Of AutoPart)

        For Each Record As DataRow In dsParts.Tables(0).Rows
            StoreItem = New AutoPart()
            StoreItem.PartNumber = Record(0)
            StoreItem.CarYear = Record(1)
            StoreItem.Make = Record(2)
            StoreItem.Model = Record(3)
            StoreItem.Category = Record(4)
            StoreItem.PartName = Record(5)
            StoreItem.UnitPrice = Record(6)
            ListOfAutoParts.Add(StoreItem)
        Next

        Try
            For Each Part As AutoPart In ListOfAutoParts
                If (Part.Category = NodeClicked.Text) And _
                   (Part.Model = NodeClicked.Parent.Text) And _
                   (Part.Make = NodeClicked.Parent.Parent.Text) And _
                   (Part.CarYear.ToString() = _
			NodeClicked.Parent.Parent.Parent.Text) Then
                    Dim ListViewAutoPart As ListViewItem = _
                                New ListViewItem(Part.PartNumber)

                    ListViewAutoPart.SubItems.Add(Part.PartName)
            ListViewAutoPart.SubItems.Add(FormatNumber(Part.UnitPrice))
                    LvwAutoParts.Items.Add(ListViewAutoPart)
                End If
            Next
        Catch Exc As NullReferenceException

        End Try
    End Using
End Sub
|
- In the Class Name combo box, select BtnAddSelect
- In The Method Name combo box, select Click and implement the event as follows:
Private Sub BtnAddSelect_Click(ByVal sender As System.Object, _
                               ByVal e As System.EventArgs) _
                               Handles BtnAddSelect.Click
    If TxtPartNumber.Text.Length = 0 Then
        MsgBox("There is no part to be added to the order")
        Exit Sub
    End If

    Dim dsParts As DataSet = New DataSet("PartsSet")

    Using Connect As SqlConnection = _
              New SqlConnection("Data Source=(local);" & _
                                "Database=CollegeParkAutoParts1;" & _
                                "Integrated Security=SSPI;")

        Dim Command As SqlCommand = _
	     New SqlCommand("SELECT * FROM AutoParts;", Connect)
        Connect.Open()

        Dim sdaParts As SqlDataAdapter = New SqlDataAdapter(Command)
        sdaParts.Fill(dsParts)

        Dim StoreItem As AutoPart = Nothing
        Dim ListOfAutoParts As List(Of AutoPart) = New List(Of AutoPart)

        For Each Record As DataRow In dsParts.Tables(0).Rows
            StoreItem = New AutoPart()
            StoreItem.PartNumber = Record(0)
            StoreItem.CarYear = Record(1)
            StoreItem.Make = Record(2)
            StoreItem.Model = Record(3)
            StoreItem.Category = Record(4)
            StoreItem.PartName = Record(5)
            StoreItem.UnitPrice = Record(6)
            ListOfAutoParts.Add(StoreItem)
        Next

        For Each Part As AutoPart In ListOfAutoParts
            If Part.PartNumber = CInt(TxtPartNumber.Text) Then
                Dim ListViewSelectedPart As ListViewItem = _
                            New ListViewItem(Part.PartNumber)

                ListViewSelectedPart.SubItems.Add(Part.PartName)
        ListViewSelectedPart.SubItems.Add(FormatNumber(Part.UnitPrice))
                ListViewSelectedPart.SubItems.Add(TxtQuantity.Text)
        ListViewSelectedPart.SubItems.Add(FormatNumber(TxtSubTotal.Text))
                LvwSelectedParts.Items.Add(ListViewSelectedPart)
            End If
        Next

        CalculateOrder()
    End Using
End Sub
|
- In the Class Name combo box, select BtnNewCustomer
- In the Method Name combo box, select Click and implement the event as follows:
Private Sub BtnNewCustomerOrder_Click(ByVal sender As Object, _
                                      ByVal e As System.EventArgs) _
                                      Handles BtnNewCustomerOrder.Click
    ShowAutoParts()
    LvwAutoParts.Items.Clear()
    TxtPartNumber.Text = ""
    TxtPartName.Text = ""
    TxtUnitPrice.Text = "0.00"
    TxtQuantity.Text = "0"
    TxtSubTotal.Text = "0.00"
    LvwSelectedParts.Items.Clear()
    TxtPartsTotal.Text = "0.00"
    TxtTaxRate.Text = "5.75"
    TxtTaxAmount.Text = "0.00"
    TxtOrderTotal.Text = "0.00"
    TxtReceiptNumber.Text = ""
End Sub
|
- In the Class Name combo box, select BtnSaveCustomerOrder
- In the Method Name combo box, select Click and implement the event as follows:
Private Sub BtnSaveCustomerOrder_Click(ByVal sender As Object, _
                                       ByVal e As System.EventArgs) _
                                       Handles BtnSaveCustomerOrder.Click
    Dim i As Integer

    If LvwSelectedParts.Items.Count = 0 Then
        Exit Sub
    Else
        Dim ReceiptNumber As Integer = 0
        Dim strReceiptNumber As String = ""

        ' The following code allows us to get
        ' the highest receipt number
        ' 1. Create a connection to the database
        Using Connect As SqlConnection = _
                   New SqlConnection("Data Source=(local);" & _
                                     "Database=CollegeParkAutoParts1;" & _
                                     "Integrated Security=SSPI;")

            ' Use the MAX() function to locate
            ' the highest receipt number
            Dim strSelect As String = _
		"SELECT MAX(ReceiptNumber) FROM CustomersOrders;"
            Dim Command As SqlCommand = New SqlCommand(strSelect, Connect)

            ' 2. Open the connection
            Connect.Open()

            ' 3. Use a data reader to get
            '  the values from the Customer Orders table
            Dim rdrReceiptNumber As SqlDataReader = Command.ExecuteReader()

            ' 4. Read through the receipt numbers to get to the last
            While rdrReceiptNumber.Read()
                strReceiptNumber = rdrReceiptNumber(0).ToString()
            End While

            ' If there is no receipt number (yet),
            ' then set the first to 1000
            If strReceiptNumber = "" Then
                strReceiptNumber = "1000"
            End If

            ' Now that we have a receipt number, we will increase it by 1
            ReceiptNumber = CInt(strReceiptNumber) + 1
        End Using

        ' The following variable will hold the whole INSERT statement
        Dim strCustomerOrder As String = ""

        ' Check each selected part and get it ready to add to the table
        ' Each selected part of this order will have a common receipt #
        For i = 0 To LvwSelectedParts.Items.Count - 1
              strCustomerOrder = strCustomerOrder & _
		    "INSERT INTO CustomersOrders(" & _
                    "ReceiptNumber, PartNumber, PartName, " & _
                    "UnitPrice, Quantity, SubTotal) VALUES('" & _
                    ReceiptNumber.ToString() + "', '" & _
                    LvwSelectedParts.Items(i).Text & "', '" & _
                    LvwSelectedParts.Items(i).SubItems(1).Text & "', '" & _
                    LvwSelectedParts.Items(i).SubItems(2).Text & "', '" & _
                    LvwSelectedParts.Items(i).SubItems(3).Text & "', '" & _
                    LvwSelectedParts.Items(i).SubItems(4).Text & "'); "
        Next

        ' We will also use the same common receipt number
        ' to save the values of the receipt
        strCustomerOrder = strCustomerOrder & _
                           "INSERT INTO CustomersOrders(" & _
                           "ReceiptNumber, PartsTotal, TaxRate, " & _
                           "TaxAmount, OrderTotal) VALUES('" & _
                           ReceiptNumber.ToString() + "', '" & _
                           TxtPartsTotal.Text & "', '" & _
                           TxtTaxRate.Text & "', '" & _
                           TxtTaxAmount.Text & "', '" & _
                           TxtOrderTotal.Text & "');"

        Using Connect As SqlConnection = _
               New SqlConnection("Data Source=(local);" & _
                                 "Database=CollegeParkAutoParts1;" & _
                                 "Integrated Security=SSPI;")

            Dim Command As SqlCommand = _
                    New SqlCommand(strCustomerOrder, Connect)
            Connect.Open()

            Command.ExecuteNonQuery()

            ' Let the user know that the order has been created
            MsgBox("The customer order has been saved.")
            ' Reset the form
            BtnNewCustomerOrder_Click(sender, e)
        End Using
    End If
End Sub
|
- In the Class Name combo box, select BtnOpen
- In the Method Name combo box, select Click and implement the event as follows:
Private Sub BtnOpen_Click(ByVal sender As Object, _
                          ByVal e As System.EventArgs) _
                          Handles BtnOpen.Click
    Dim i As Integer
    LvwSelectedParts.Items.Clear()

    Using Connect As SqlConnection = _
           New SqlConnection("Data Source=(local);" & _
                             "Database=CollegeParkAutoParts1;" & _
                             "Integrated Security=SSPI;")

        Dim strSelect As String = "SELECT * FROM CustomersOrders " & _
                                  "WHERE (ReceiptNumber = '" & _
                                  TxtReceiptNumber.Text & "') AND " & _
                                  "PartNumber IS NOT NULL;"

        Dim Command As SqlCommand = _
     	       	     New SqlCommand(strSelect, Connect)
        Dim sdaCustomerOrder As SqlDataAdapter = _
        	     New SqlDataAdapter(Command)

        Connect.Open()

        Dim dsCustomerOrder As DataSet = New DataSet("CustomersOrdersSet")
        sdaCustomerOrder.Fill(dsCustomerOrder)

        For i = 0 To dsCustomerOrder.Tables(0).Rows.Count - 1
            Dim RecordOrder As DataRow = dsCustomerOrder.Tables(0).Rows(i)

            Dim ListViewOrder As ListViewItem = _
		New ListViewItem(CStr(RecordOrder("PartNumber")))
            ListViewOrder.SubItems.Add(RecordOrder("PartName"))
            ListViewOrder.SubItems.Add(RecordOrder("UnitPrice"))
            ListViewOrder.SubItems.Add(RecordOrder("Quantity"))
            ListViewOrder.SubItems.Add(RecordOrder("SubTotal"))
            LvwSelectedParts.Items.Add(ListViewOrder)
        Next
    End Using

    Using Connect As SqlConnection = _
               New SqlConnection("Data Source=(local);" & _
                                 "Database=CollegeParkAutoParts1;" & _
                                 "Integrated Security=SSPI;")

        Dim strInvoice As String = _
		"SELECT ReceiptNumber, PartsTotal, TaxRate, " & _
                "TaxAmount, OrderTotal " & _
                "FROM CustomersOrders " & _
                "WHERE (ReceiptNumber = '" & _
                TxtReceiptNumber.Text & "') AND " & _
                "      (PartNumber IS NULL) AND " & _
                "      (PartName IS NULL);"

        Dim Command As SqlCommand = New SqlCommand(strInvoice, Connect)

        Connect.Open()
        Dim rdrInvoice As SqlDataReader = Command.ExecuteReader()

        While rdrInvoice.Read()
            TxtPartsTotal.Text = rdrInvoice(1)
            TxtTaxRate.Text = rdrInvoice(2)
            TxtTaxAmount.Text = rdrInvoice(3)
            TxtOrderTotal.Text = rdrInvoice(4)
        End While
    End Using
End Sub
|
- In the Class Name combo box, select BtnClose
- In the Method Name combo box, select Click and implement the event as follows:
Private Sub BtnClose_Click(ByVal sender As System.Object, _
                           ByVal e As System.EventArgs) _
                           Handles BtnClose.Click
    Close()
End Sub
|
- Create a few customer orders and save them
- Close the forms and return to your programming environment
- Execute the application again and open a previously saved order
- Close the forms and return to your programming environment
- Open the CollegeParkAutoParts3 database from this lesson
- Add a context menu for the Available Parts list view with the items:
Select, Edit..., and Delete
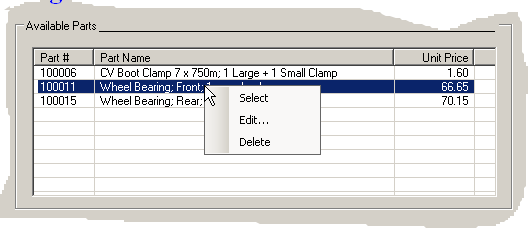
- Configure the context menu so that
- If the user clicks Select, the behavior would be the same as if the
user had double-clicked the item
- If the user clicks Edit..., the Part Editor dialog box would display
with the part in it. The user can then edit any part (year, make, model,
category, part name, or unit price) except the part number. Then the
user can save the changed part
- If the user clicks Delete, a message box would warn the user and ask
for confirmation with Yes/No answers. If the user clicks Yes, the part
would be deleted from the AutoParts table
- Configure the application so that the user can open an order, add new
parts to it, or delete parts from it, then save the order
- Extend the application so that the store can also sell items that are, or
are not, car-related, such as books, t-shirts, cleaning items, maintenance
items (steering oils, brake oils, etc), license plates, etc. Every item in
the store should have an item number. The user can enter that item number in
the Part # text box and press Tab or Enter. The corresponding item would
then be retrieved from the database and displayed on the form. If there is
no item with that number, a message box should let the user know
|
|


