The Columns of a Table
|
|
The Columns of a Table |
|
Columns Fundamentals |
|
Introduction |
|
In our study of data sets and in our introduction to tables, we saw that a list could be organized in categories called columns. Here is an example:
As you can see from this arrangement, a column is used to particularly classify one type of data. For example, one column can be used to list some names. Another column can be used to list numbers. Yet another column can be used for a select list of items that keep repeating. |
|
To organize the information that a column holds, a table needs a series of details about each column. Two aspects are particularly important: a name and the type of data that a column should/must/can hold. To be able to recognize the categories of information that a column holds, the column must have a name. In the Microsoft SQL Server Management Studio, the name of a column displays in the top, the header part, of the column. The name of a column allows the database as a file to identify the column. The name of a column also will help you, the database developer, to identify that column. There are rules and suggestions you must or should follow when naming the columns of a table. The name of a column:
After respecting these rules, you can add your own rules. In our lessons, here are the rules we will use to name our columns:
After deciding on the name of a column, the database needs to know what kind of information the column would hold. Since there are various kinds of information a database can deal with, we saw in Lesson 20 the types of data that Microsoft SQL Server supported. Therefore, you must specify the data type that is necessary for a particular column.
A database deals with various types of data, appropriate or not for certain fields. This means that you should take care of jobs behind the scenes as much as you can. One way you can do this is by controlling the amount of information that can be stored in a particular field. As various columns can hold different types of data, so can the same data type control its own mechanism of internal data entry. The length of data means different things to different fields. Columns that carry the same data type can have different lengths. Bit Fields: We saw already that a bit column type is meant for one of two answers. The user is supposed to simply let the database know that the answer is yes or no, true or false, on or off, 1 or 0. Therefore, the only length of this field is 1. Integers: The length of an integer is the number of bytes its field can hold. For an int type, that would be 4 bytes. Decimal and Floating-Point Numbers: The Length specifies how many bytes the field can store. Strings: The length of a character or string column specifies the maximum number of characters that the field can hold. In some circumstances, you will need to change or specify the length as it applies to a particular field. For example, since you should use the varchar data type for a string field whose content will change from one record to another, not all varchar columns need to have the same length. Although a First Name and a Book Title columns should use the varchar type, both columns would not have the same length of entries. As it happens, people hardly have a first name that is beyond 20 characters and many book titles go beyond 32 characters. In this case, both fields would use the same data type but different lengths. On the other hand, for columns of datetime and money data types, you should accept the default length suggested by the database. There are two ways you can change the length of a string-based column:
We saw that the primary formula to create a table was: CREATE TABLE TableName After specifying the name of the table, you must list the columns of the table. The list of columns starts with an opening parenthesis "(". The list ends with a closing parenthesis ")". Each column must be separated from the next with a comma, except for the last column. You can include all columns on the same line if possible as follows: CREATE TABLE Country(Column1, Column2, Column3) There are two primary pieces of information you must specify for each column: its name and its type. Therefore, the syntax of creating a column is: ColumnName DataType Options The name of the column follows the rules and suggestions we listed. After typing the name of the column, type the desired or appropriate data type for the column. For this example, use one of the (appropriate) data types we reviewed. Remember that some of the data types need to have a length. This is certainly true for all string or text-based columns (char, text, varchar, etc). In the case of text-based columns, when using SQL to create your columns, because it is less visual than the table design, you cannot rely on the default length of strings suggested by SQL (in fact, in MySQL, you must specify a length for varchar). As it happens, the table design specifies different default values for text-based columns. Therefore, when using SQL to create your columns, you should (strongly) specify your own default length for text-based columns. To create a table in your Windows application, you can pass the CREATE TABLE expression to a command object. Here is an example: Private Sub Exercise_Load(ByVal sender As Object, _
ByVal e As System.EventArgs) _
Handles Me.Load
Using Connect As SqlConnection = _
New SqlConnection("Data Source=(local);" & _
"Database='Exercise';" & _
"Integrated Security=yes;")
Dim Cmd As SqlCommand = _
New SqlCommand("CREATE TABLE Customers (" & _
"DrvLicNbr VarChar(50), " & _
"DateIssued DateTime," & _
"DateExpired DateTime," & _
"FullName varchar(120)," & _
"Address VARCHAR(120)," & _
"City varchar(50)," & _
"State varchar(100)," & _
"PostalCode varchar(20)," & _
"HomePhone varchar(20)," & _
"OrganDonor bit);", _
Connect)
Connect.Open()
Cmd.ExecuteNonQuery()
MsgBox("A new table named ""Customers"" has been created.")
End Using
End Sub
We also saw that you could use sample code to create a table. This allows you to have more control over the various columns you want the table to have. To do this, open an empty query window and display the Templates Explorer. Expand the Table node. Under Table, you can drag Create Table, Add Column, or Drop Column, and drop it in the query window. If you used Add Column or Drop Column, you can delete the undesired sections of the code and isolate only the part that handles table creation. Here is an example: --========================================================================== -- Add column template -- -- This template creates a table, then it adds a new column to the table. --========================================================================== USE <database, sysname, AdventureWorks> GO CREATE TABLE <schema_name, sysname, dbo>.<table_name, sysname, sample_table> ( column1 int, column2 char(10) ) GO
We will write many expressions that include the names of columns. In such expressions, you will need to indicate the particular column you are referring to. There are various ways you can do this. To refer to, or to indicate, a table:
You can create an alias name of a table to use in an expression that involves a column. To do this, type a letter or a word that will represent the table to which the column belongs. The letter or the word is followed by a period operator, and followed by the name of the column. An example would be empl.LastName. At the end of the statement, you must type the name of the table, followed by space, and followed by the letter or the word. An example would be Employee empl.
Column maintenance consists of reviewing or changing any of its aspects. This includes reviewing the structure of columns of a table, renaming a column, deleting a column, changing the data type or the nullity of a column, etc.
To see the structure of a table in Microsoft Visual, in the Server Explorer, expand the connection to the desired database, expand the Tables node, and expand the table whose columns you want to see. Here is an example:
To view the columns of a table using SQL code, in a query window, execute sp_columns followed by the name of the table the columns belong to.
A column on a table controls what kind of data is appropriate for that particular column. The characteristics that identify or describe such a table are defined as its properties. As we have seen previously, three primary properties are particularly important and required for each column: the name, the data type, and the length. Besides these, some other properties can be used to further control the behavior of a particular field. Besides the name, the data type, and the length of a column, you can control the columns of a table using the Column Properties tab in the lower section of the table design view. These properties sometimes depend on the data type of the column. Therefore, to specify the properties of a column, you must first select it in the upper section of the table. This selection can be done by just clicking either the name, the data type, or the length of the column. Then you can either press F6 or click the first field in the lower section, select the desired property and type the necessary value:
Description: Common and enabled for all fields, the description is used for a sentence that describes the column. You can type anything on that field.
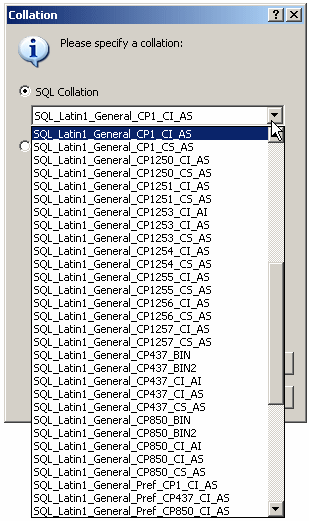
Because different languages use different mechanisms in their alphabetical characters, this can affect the way some sort algorithms or queries are performed on data, you can ask the database to apply a certain language mechanism to the field by changing the Collation property. To visually specify the language collation of a column, after selecting the column in the top section, in the lower section, click Collation and click the ellipsis button of its right field. This would open a Collation dialog box. You have two categorical options. To use a collation defined by the SQL, you can accept the SQL Collation radio button, and click the arrow of the top combo box to select the desired option:
To specify these options using SQL, when programmatically creating the table, type COLLATE, followed by the desired collation code. Here is an example: CREATE TABLE Customers(
FullName varchar(50) COLLATE SQL_Latin1_General_CP1_CI_AS
);
As you can see, the SQL's collation can be hard to figure out. If you are using the Collation dialog box, you can click the Windows Collation radio button and click the arrow of the second combo box. This time, you would receive a list of familiar names of languages. Besides the language of your choice, you can also specify the types of sort algorithms that you want the SQL interpreter to follow. The options are under the second combo box. After making your selections, you can click OK.
When making a change on a column, you are also said to alter the table. To visually modify a column, from the Server Explorer, right-click its parent table and click Open Table Definition. Locate the column and change any characteristic you want: name, data type, nullity, or properties. To programmatically support this operation, the SQL starts with the following formula: ALTER TABLE TableName When using this statement, the ALTER TABLE expression is required and it is followed by the name of the table.
After a table has already been created, you can still add a new column to it. To add a new column in Microsoft Visual Studio, in the Server Explorer, expand the connection to the desired database, expand the Tables node, and expand the table. Here Right-click the table and click Open Table Definition. To add a new column to the end of the table, click the first empty field under Column Name, type a name, and specify the other options. To insert a new column between two existing one, right-click the column that will succeed it and click Insert Column:
This would create a new empty field. Type the desired name and specify the other options. In SQL, the basic formula to add a new column to an existing table is: ALTER TABLE TableName ADD ColumnName Properties The ColumnName factor is required. In fact, on the right side of the ADD operator, define the column by its name and use all the options we reviewed for columns. Here is an example: Private Sub Exercise_Load(ByVal sender As Object, _
ByVal e As System.EventArgs) _
Handles Me.Load
Using Connect As SqlConnection = _
New SqlConnection("Data Source=(local);" & _
"Database='Exercise';" & _
"Integrated Security=yes;")
Dim Cmd As SqlCommand = _
New SqlCommand("ALTER TABLE Customers " & _
"ADD EmaillAddress varchar(100);", _
Connect)
Connect.Open()
Cmd.ExecuteNonQuery()
MsgBox("A new column named ""EmailAddress"" has been added.")
End Using
End Sub
When this code is executed, a new column named Address, of type varchar, with a limit of 100 characters, that allows empty entries, will be added to a table named StaffMembers in the current database. In Microsoft SQL Server Management Studio, you can use sample code to add a new column to a table. First display an empty query window and display the Templates Explorer. Expand the Table node. Under Table, drag Add Column and drop it in the query window. Delete the undesired sections of code and keep only the part that deals with adding a column. Here is an example: --========================================================================== -- Add column template -- -- This template creates a table, then it adds a new column to the table. --========================================================================== USE <database, sysname, AdventureWorks> GO -- Add a new column to the table ALTER TABLE <schema_name, sysname, dbo>.<table_name, sysname, sample_table> ADD <new_column_name, sysname, column3> <new_column_datatype,, datetime> <new_column_nullability,, NULL> GO
If you find out that the name of a column is not appropriate, you can change it. To visually rename a column in Microsoft Visual Studio, in the Server Explorer, right-click the table that the column belongs to and click Open Table Definition. In the design view, highlight the name of the desired column to put it into edit mode and edit it. In Microsoft SQL Server Management Studio, to change the name of a column, first open an empty query window. In a query window, execute sp_rename using the following formula: sp_rename 'TableName.ColumnName', 'NewColumnName', 'COLUMN' The sp_rename factor and the 'COLUMN' string are required. The TableName factor is the name of the table that the column belongs to. The ColumnName is the current name of the column. The NewColumnName is the desired name you want to give to the column. Here is an example: Private Sub Exercise_Load(ByVal sender As Object, _
ByVal e As System.EventArgs) _
Handles Me.Load
Dim strConnection As String = _
"sp_rename 'Customers.DateExpired', 'ExpirationDate', 'COLUMN';"
Dim Connect As SqlConnection = _
New SqlConnection("Data Source=(local);" & _
"Database='Exercise';" & _
"Integrated Security=yes")
Dim cmdDatabase As SqlCommand = _
New SqlCommand(strConnection, Connect)
Connect.Open()
cmdDatabase.ExecuteNonQuery()
MsgBox("The DateExpired column has been renamed to ExpirationDate")
Connect.Close()
End Sub
When this code is executed, the interpreter will look for a column named FullName in the StaffMembers table of the current or selected database. If it finds that column in the table, then it renames it EmployeeName.
If you have an undesired column that you don't want anymore in a table, you can remove it. To visually delete a column, in the Server Explorer, right-click the table and click Open Table Definition. In the table, right-click the undesired column and click Delete Column:
You would not receive a warning. To programmatically delete a column, use the following formula: ALTER TABLE TableName DROP COLUMN ColumnName On the right side of the ALTER TABLE expression, type the name of the table. On the right side of the DROP COLUMN expression, enter the name of the undesired column. Here is an example: Private Sub Exercise_Load(ByVal sender As Object, _
ByVal e As System.EventArgs) _
Handles Me.Load
Using Connect As SqlConnection = _
New SqlConnection("Data Source=(local);" & _
"Database='Exercise';" & _
"Integrated Security=yes;")
Dim Cmd As SqlCommand = _
New SqlCommand("ALTER TABLE Customers " & _
"DROP Column DateIssued;", _
Connect)
Connect.Open()
Cmd.ExecuteNonQuery()
MsgBox("The column named ""DateIssued"" has been deleted.")
End Using
End Sub
When this code is executed, the interpreter will look for a column named CurrentResidence in a table named StaffMembers of the current. If it finds that column, it will remove it from the table. Microsoft SQL Server can also generate sample code you can use to delete a column from a table. In the Microsoft SQL Server Management Studio, before doing this, first display an empty query window and display the Templates Explorer. Expand the Table node. In the Table section, drag Drop Column and drop it in the query window. Delete the undesired sections of code and keep only the part that deals with adding a column. Here is an example: --============================================ -- Drop column template -- -- This template creates a table, then it -- drops one of the columns of the table. --============================================ USE <database, sysname, AdventureWorks> GO -- Drop a column from the table ALTER TABLE <schema_name, sysname, dbo>.<table_name, sysname, sample_table> DROP COLUMN <new_column_name, sysname, column3> GO
|
|
|
||
| Home | Copyright © 2008-2016, FunctionX, Inc. | |
|
|
||