Notice that, what constitutes this collection is that each item share many basic characteristics with the others. For example, all of them are human beings. All of them are doing something. To support collections, the Visual Basic language has a class named Collection. To formally create a collection, declare a variable of type Collection: Private Sub Detail_Click()
Dim colPersons As Collection
End Sub
After declaring the variable, you must initialize it and allocate memory for it. To initialize it, use the Set operator to identify the variable. To allocation memory for the variable, use the New operator followed by the name of the class: Collection. Here is an example: Private Sub Detail_Click()
Dim People As Collection
Set People = New Collection
End Sub
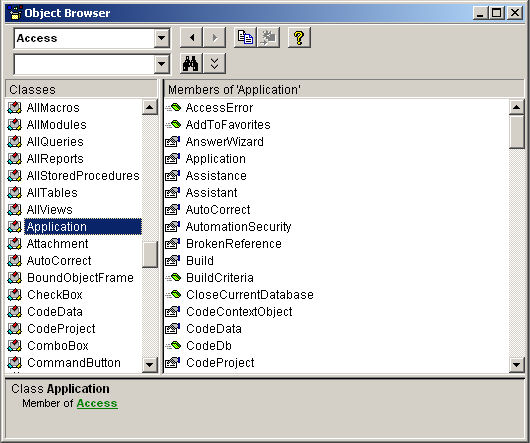
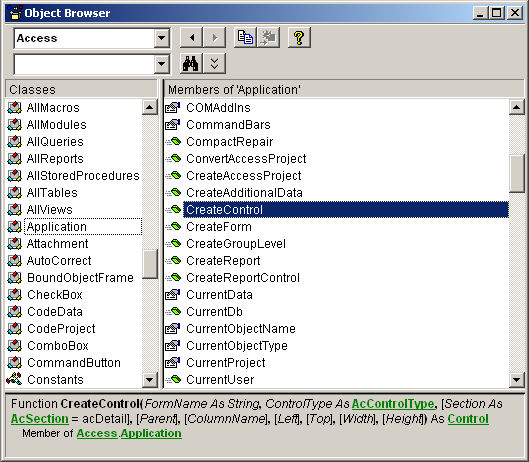
As done in the real worlds, Microsoft Access also heavily relies on collections to manage the objects of a database. To make this possible, most of the collections you will use need have already been created, are available in each database, and Microsoft Access knows how to find them. To distinguish them, each collection is recognized with a name. For example, all of the forms of a database belong to a collection named AllForms. There are many other collections. In many tasks of your database development, you will usually need to know what collection an object belongs to. We will always specify the collection. Each of the collections you will use has its own implementation (its own interpretation) of the Collection class. As we will review the Collection class in the next few sections, some of the collections have different names for the properties and methods of the Collection class. Some of the classes also have a (usually slightly) different behavior compared to the same functionality from the Collection class. Still, once you have a good idea of how the Collection class works, you should be able to use any built-in collection class. If you create your own collection, after declaring the variable, it is empty. To make it useful, you must add items to it. To support this operation, the Collection class is equipped with a method named Add. Its syntax is: Collection.Add(Item, [Key], [Before], [After]) The only required thing you must provide is the item you want to add. If you are only interested in adding the new item and do not need to get any value back, you can omit the parentheses. Here is an example: Private Sub Detail_Click()
Dim People As Collection
Set People = New Collection
People.Add "Hermine Poussaint"
End Sub
In the same way, you can add as many items as you want. Here are examples: Private Sub Detail_Click()
Dim People As Collection
Set People = New Collection
People.Add "Hermine Poussaint"
People.Add "Laurent Tigers"
People.Add "Gertrude Simms"
People.Add "James Cranston"
People.Add "Paula Aurora"
End Sub
As mentioned already, many collections have different versions of the names of methods in the Collection class. For example, the combo box has built-in collection functionality. Its method used to add items to its list is called AddItem. Other than that, the functionality is the same. Here is an example of adding items to a combo box named Private Sub Detail_Click()
cbxPersons.AddItem "Hermine Poussaint"
cbxPersons.AddItem "Laurent Tigers"
cbxPersons.AddItem "Gertrude Simms"
cbxPersons.AddItem "James Cranston"
cbxPersons.AddItem "Paula Aurora"
End Sub
(If you want to do this, you must set its Row Source Type to Value List). After an item has been added to a collection, or once an object exists in a series, you can retrieve it and eventually use it as you see fit. You can use the collection as a whole or you may want to access only one of its items. To give you access to an item, The Collection class, and each built-in collection, has a property called Item (the name of this property may be different from one collection to another but in most cases, it is called Item). This property is flexible with the way it allows you to access a member of its collection. A member of a collection is accessed using its index and you have two main choices. Consider our People collection. Each item of that collection has a numeric position, also called its index. The first item has a position or index of 1. The second has an index of 2 and so on:
To access an item using its numeric index, type the name of the collection, followed by the period operator, followed by Item with an opening and a closing parentheses. In the parentheses of Item, enter the index of the item that you want to access. For this example, imagine that you want to access the first little girl item, you would use the following statement: Private Sub cmdSelectPerson_Click()
Dim People As Collection
Set People = New Collection
People.Add "Hermine Poussaint"
People.Add "Laurent Tigers"
People.Add "Gertrude Simms"
People.Add "James Cranston"
People.Add "Paula Aurora"
txtPerson = People.Item(1)
End Sub
To access the lady overwhelmed with work and submerged in papers, you would use: People.Item(3) Based on the design of the Visual Basic language, Item is the default property of a collection. Based on this, you do not have to use the Item name to access the item. You can directly apply the parentheses on the name of the collection. Here is an example: Private Sub cmdSelectPerson_Click()
Dim People As Collection
Set People = New Collection
People.Add "Hermine Poussaint"
People.Add "Laurent Tigers"
People.Add "Gertrude Simms"
People.Add "James Cranston"
People.Add "Paula Aurora"
txtPerson = People.Item(3)
End Sub
You may already think of problems that would occur when trying to access an item by its index. For example, you must know with certainty what item is stored at a particular position and Microsoft Access has no way of giving this information (but you can use VBA to find out, with code). The reason is that you may have created the collection, so you, not Microsoft Access, should know what item was stored where in the collection. Imagine someone, or something, changes the order of items in the collection:
Notice that the indexes have not changed (because the indexes never change) but the previous indexes do not point to the same objects anymore. This means that if you use an index again to locate an item, you would get the wrong item. Fortunately, the Collection class provides a solution to this problem. When we reviewed the ability to add items to a collection, we saw that the syntax of the Add() method was: Collection.Add(Item, [Key], [Before], [After]) The second argument allows you to create a type of tag and apply it to each item. This tag is like an identification. It can be used to identify an item using something else than its index. This tag is called a key. To create a key when adding an item, pass a second string to the method. The string can be anything you want but you should not make it too complicated. Here are examples where we used to initial of each person's name to create its corresponding key: Private Sub cmdSelectPerson_Click()
Dim People As Collection
Set People = New Collection
People.Add "Hermine Poussaint", "HP"
People.Add "Laurent Tigers", "LT"
People.Add "Gertrude Simms", "GS"
People.Add "James Cranston", "JC"
People.Add "Paula Aurora", "PA"
End Sub
Based on this, if you know the key of an item, you can use it instead of the index to get the item. To use the key, apply an opening and a closing parentheses to the name of the collection. In the parentheses, use the key, as a string. Here is an example: Private Sub cmdSelectPerson_Click()
Dim People As Collection
Set People = New Collection
People.Add "Hermine Poussaint", "HP"
People.Add "Laurent Tigers", "LT"
People.Add "Gertrude Simms", "GS"
People.Add "James Cranston", "JC"
People.Add "Paula Aurora", "PA"
txtPerson = People("JC")
End Sub
When you use a key, even if the collection changes, for example, if the items are moved by their positions, when you refer to one by its name, Microsoft Access would look for the item that has that key, regardless of its position. To access a certain object that belongs to a collection, first type the name of a collection, such as Forms. Then, type the exclamation point operator "!", followed by the name of the object that belongs to the collection. This object is considered a parent but it can be referred to as a container because it "contains" other objects. For example, as we will see in future lessons, a form as a container can container one or more controls such as text boxes or list boxes. Therefore, this container could be a form named Customers. After the name of the form, type the exclamation point operator again "!", followed by the name of an object that is positioned. This object could be a text box named txtLastName. Once you have the object, you can then access any of its properties using the period operator and the name of the property as we saw in the previous section. Here is an example that changes the background color of a control named Text2 that is positioned in a form named Form1 that is part of the collection of forms named Forms of the current database: Private Sub cmdChangeColor_Click()
Forms!frmMain!Text3.BackColor = 39759
End Sub
As mentioned earlier, it is not unusual to have the name of an object made of more than one word. In this case, always remember to enclose the name of an object in square brackets. Based on this, the above code would be written: Private Sub cmdChangeColor_Click()
[Forms]![frmMain]![Text3].BackColor = 39759
End Sub
One of the pieces of information you can get from a collection is the number of its members. To give you access to the number of items of a collection, the Collection class is equipped with a property named Count. To get the number of items of a collection, type the name of the collection, followed by the period operator, followed by the name of the count property. Here is an example: People.Count In most, if not all cases, the Count property is read-only. This means that you cannot change it and therefore you cannot assign a value to it. You can only retrieve the value stored in the Count property.
If you have an item in a collection but do not need that item anymore, you can delete it. To support the ability to remove an item from a collection, the Collection class is equipped with a method named Remove. Its syntax is: Remove(Index) When calling this method, pass the index of the item you want to delete. If you pass an index that does not exist, you would receive an error.
The built-in data types we have used so far allow you to declare a variable of a specific known type. Alternatively, you can create a new data type by using one of the above or by combining some them to get a new one. To do this, you must create a new module for the new type. You start the new type with the Type keyword followed by the name of the new type. The create of the type ends with the End Type expression: Type SampleType
End Type
Between the Type line and the End Type line, you can declare one or more existing types as variables. That is, each declaration can be made of a name for a variable, followed by As, and followed by a known data type. Here is an example: Type Employee
DateHired As Date
FullName As String
IsMarried As Boolean
HourlySalary As Double
End Type
After creating the type, in the procedure or event where you want to use it, declare a variable based on it. To access any of the member variables of the type, enter the name of its variable, followed by a period operator, and followed by the name of the member variable. After accessing a member variable of a type, you can initialize, change its value, or assign it to another variable. Here is an example: Private Sub cmdCreate_Click()
Dim Contractor As Employee
Contractor.DateHired = #12/4/2000#
Contractor.FullName = "Leslie Abramson"
Contractor.IsMarried = True
Contractor.HourlySalary = 20.15
txtDateHired = CStr(Contractor.DateHired)
txtFullName = Contractor.FullName
chkIsMarried.Value = Contractor.IsMarried
txtHourlySalary = Contractor.HourlySalary
End Sub
Consider the following list:
When writing a program, you can use 1 to represent Female. You can use 2 to represent Male. Consider this other list:
This time, you can use 1 to represent a single family house and you can use 2 to represent a townhouse. One of the problems with these arrangement is that the numbers are vague and you must remember them exactly. Instead of just remembering that the constant 1 represents Single Family, you can create a list that has that type of house. In another list, instead of using 1 again, you can give it a name. Consequently, in each list, although the constant 1 would still be considered, at least it would mean something precise. An enumeration is a series of constant integers that each has a specific position in the list and can be recognized by a meaningful name. To create an enumeration, you use the Enum keyword, followed by the name of the enumeration, press Enter, and end with End Enum: Enum HouseTypes End Enum The name of the enumerator and the name of each item of the list follows the rules we reviewed for names. The section between both lines is referred to as the body of the enumeration. In the body of the enumeration, type the name of each item on its own line. The name follows the same rules we reviewed for other names. Here are examples: Enum HouseTypes
SingleFamily
Townhouse
Condominiium
Unknown
End Enum
After creating an enumeration, you can use it. To do this, declare a variable for it, just like we have done so far to declare other variables. Here is an example: Private Sub cmdEnumeration_Click()
Dim HouseType As HouseTypes
End Sub
To access a member of the enumeration, type the name of the variable, followed by a period, followed by the desired member of the enumeration. You can use that formula to initialize the variable. Here is an example: Private Sub cmdEnumeration_Click()
Dim HouseType As HouseTypes
HouseType = HouseTypes.Condominiium
End Sub
After initializing the variable, you can use its values wherever necessary. Here is an example: Private Sub cmdEnumeration_Click()
Dim HouseType As HouseTypes
HouseType = HouseTypes.Townhouse
txtFilename = HouseType
End Sub
When you create a variable by listing the members in its body, each members holds a value of a natural number. By default, 0 is assigned to the first member. 1 is assigned to the second member, and so on. Consider the above code: Private Sub cmdEnumeration_Click()
Dim HouseType As HouseTypes
HouseType = HouseTypes.Townhouse
txtFilename = HouseType
End Sub
This produces 1 because Townhouse is the second member of the enumeration. If you don't want the default values for the members, you can specify the value of one or each member of the enumeration. Suppose you want the SingleFamily member in the above enumeration to have a value of 5. To do this, use the assignment operator "=" to give the desired value. The enumerator would be: Enum HouseTypes
SingleFamily = 5
Townhouse
Condominiium
Unknown
End Enum
In this case, SingleFamily now has a value of 5, Townhouse now has a value of 6, and Condominium has a value of 7. If you want, you can also assign a value to more than one member of an enumeration. Here is an example: Enum HouseTypes
SingleFamily = 5
Townhouse = 12
Condominiium = 8
Unknown
End Enum
Notice that you don't have to assign a value to each member, and you don't have to assign an incremental number to each member. If you omit to assign a value to a member, the member gets the value of the previous member + 1. In the above code, SingleFamily has a value of 5. Townhouse has a value of 12. Condominium has a value of 8 and Unknown has a value of 9.
By default, if you create an enumeration the way we have proceeded so far, it would be available only in the project it belongs to. To control an enumeration's accessibility, you can precede it with the Private or the Public keyword. Here is an example: Private Enum HouseTypes
SingleFamily = 5
Townhouse = 12
Condominiium = 8
Unknown = 114
End Enum
|
|
|||||||||||||||||||||||||||||||||||||||||||||||||||||||||||||||||||||||||||||||||||||||||||||||||||||||||
|
|
||||||||||||||||||||||||||||||||||||||||||||||||||||||||||||||||||||||||||||||||||||||||||||||||||||||||||


