Home

The Properties Window


The Appearance of the Properties Window


Introduction

To manipulate an object, you can use the Properties window:
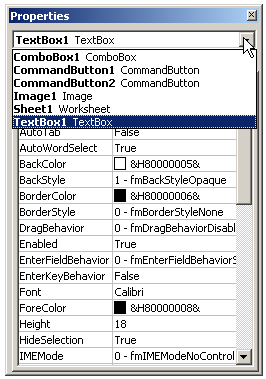
Selecting a Control Using the Properties Window


Practical LearningPractical Learning: Introducing Properties

  1. Start Microsoft Excel
  2. On the Ribbon, click Developer
  3. In the Controls section, click Insert
  4. Under ActiveX Controls, click any object and click the main area of the spreadsheet
  5. Right-click the object you added and click Properties

The Name of a Property

After adding a control to your application, you can manipulate its characteristics. If you are working in Microsoft Excel, to put a control into edit mode, in the Controls section of the Ribbon, click the Design Mode button Design Mode.

Each field in the Properties window has two sections: the property’s name and the property's value:
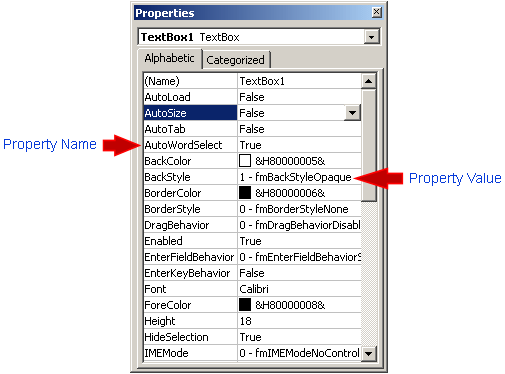
 

Properties Names and Values

The name of a property is represented in the left column. This is the official name of the property. Notice that the names of properties are in one word. Based on this, our House class would have been defined as follows:

House
[
      Address
      TypeOfHouse
      NumberOfBedrooms
      NumberOfBathrooms
      HasIndoorGarage
      LivingRoomCoveredWithCarpet
      KitchenHasIslandStove
]

You can use this same name to access the property in code.

Accessing a Control's Property

To access a property of a control using code, type the name of the control, followed by a period, followed by the name of the property. Based on this, if you have a House object named Langston, to access its TypeOfHouse property, you would write:

Langston.TypeOfHouse

The Value of a Property

The box on the right side of each property name represents the value of the property that you can set for an object. There are various kinds of fields you will use to set the properties. To know what particular kind a field is, you can click its name. To set or change a property, you use the box on the right side of the property’s name: the property's value, also referred to as the field's value.

The Default Value of a Control's Property

To programmatically change the value of a property, type the name of the control, followed by a period, followed by the name of the property, followed by =. Then, on the right side of equal, you must provide the value but this depends on the type of value.

The people who developed the controls also assigned some primary values to their properties. This is the type of value that a property either is most likely to have or can use unless you decide to change it. The primary value given to a property is referred to as its default value. Most of the time, you can use that property. In some other assignments, the default value will not be suitable.

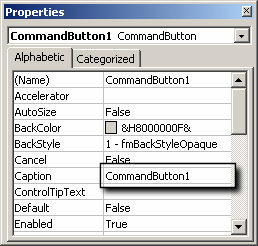


Types of Properties


Empty Fields

Empty Field  

By default, these fields don't have a default value. Most of these properties are dependent on other settings of project.

To set the property on such a field, you can type in it or sometimes you will need to select from a list.


Text Fields

There are fields that expect you to type a value. Most of these fields have a default value.

To change the value of the property, click the name of the property, type the desired value, and press Enter or Tab. While some properties, such as the Caption, would allow anything, some other fields expect a specific type of text, such as a numeric value.

To programmatically change the value of a text-based property, on the right side of the = sign, you can type the value in double quotes. For example, suppose you have a House object named Langston. If you want to specify its address, you would write:

Text Field
Langston.Address = "6802 Leighton Ave"

Numeric Fields

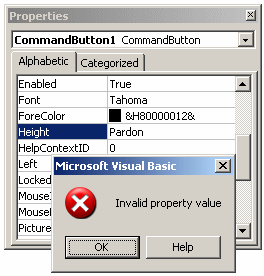
Some fields expect a numeric value. In this case, you can click the name of the field and type the desired value. If you type an invalid value, you would receive a message box notifying you of the error:

Value Error

When this happens, click OK and type a valid value. If the value is supposed to be an integer, make sure you don't type it with a fractional part.

Expandable Fields

Expandable Field

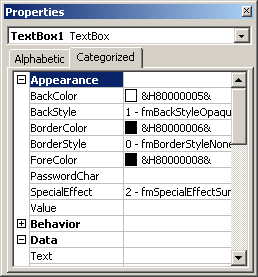
Some fields have a - or a + button. This indicates that the property has a set of sub-properties that actually belong to the same property and are defined together. To expand such a field, click its + button and a – button will appear.

To collapse the field, click the – button. Some of the properties are numeric based. With such a property, you can click its name and type the numeric value. Some other properties are created from a sub-list. If you expand such a field, it would display various options. With such a property, you should select from a list.


Boolean Fields

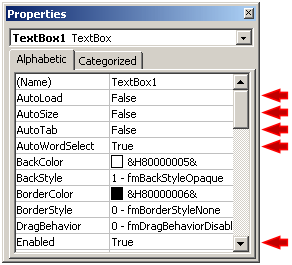
Some fields can have only a True or False value. These are Boolean fields. To change their value, you can either select from the combo box or double-click the property to switch to the other value.

To programmatically specify the value of a Boolean property, on the right side of the = symbol, type True or False. Here is an example:

Langston.HasIndoorGarage= True
 

Boolean Field

Intermediary Fields

Intermediary

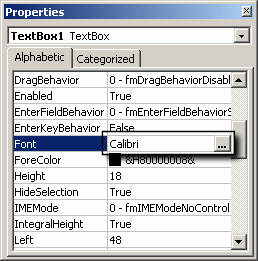
Some fields use a value that can be set through an intermediary action. Such fields display a browse button Browse. When you click the button, a dialog box would come up and you can set the value for the field.


List-Based Fields

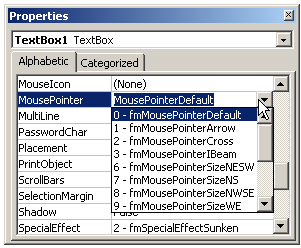
To change the value of some of the fields, you would first click the arrow of their combo box to display the available values. After clicking the arrow, a list would display:

Property Selection

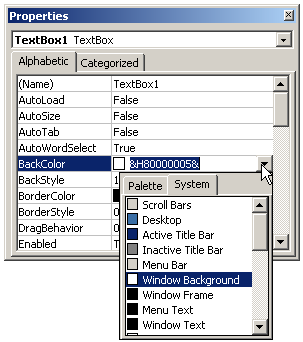
There are various types of list-based fields. Some of them display just two items. To change their value, you can just double-click the field. Some other fields have more than two values in the list. To change them, you can click their arrow and select from the list. You can also double-click a few times until the desired value is selected. Some other items would dispplay a window from where you would click the option you want:

Property Selection

To programmatically specify the value of a list-based property, you must use one from a list. For example, suppose you had defined a list of types of house as tpeSingleFamily, tpeTownHouse, and tpeCondominium. To use one of these values for a House object named Langston, you would type:

Langston.TypeOfHouse = tpeSingleFamily

In most cases, each member of such a list also uses a natural number. An example would be:

TypeOfHouse Value
0 tpeSingleFamily
1 tpeTownHouse
2 tpeCondominium

Although we used 0, 1, and 2 in this list, there are no predefined rules as to the number allocated for each member of the list. The person who created the list also decided what number, if any, each member of the list would have (if you are curious, in most programming languages or libraries, these types of properties are created using an enumeration (in C++ or in the the .NET Framework) or a set (Borland VCL)). Based on this, the above code would also be written as:

Langston.TypeOfHouse = 0

Practical Learning: Closing Microsoft Excel

  1. To close Microsoft Excel, click the Office Button and click Exit Excel
  2. When asked whether you want to save the file, click No


Previous Copyright © 2008-2016, FunctionX, Inc. Next