Home

GDI+ Objects: Bitmaps


Bitmaps


Introduction

A bitmap is a graphic object used for displaying pictures on windows. It is the primary type of graphic used for various occasions. For example, a bitmap can be used as a background for a window. That is the case for the Pinball game that ships with some versions of Microsoft Windows:

An example of a bitmap

A bitmap can also be used for an aesthetic purpose to decorate a dialog box. That’s how it is used on some of the installation wizard boxes such as the graphic on the left section of the WordPerfect 2002 installer:

WordPerfect

Probably the most regular use of bitmaps is as small graphics on toolbars:

Toolbar
 

Creating a Bitmap

To create a bitmap, you can use any graphics application, including the Paint program that is installed with Microsoft Windows. In Visual Studio .NET, to create a bitmap, on the main menu, you would click Project -> Add New Item... In the Add New Item dialog box, click Bitmap File, accept the suggested name of the file or specify your own, and click Open:

Add New Item

A new file with an extension of .bmp would be added to your project. You can then design it as you see fit. Here is an example:

Horse Bitmap


Practical Learning Practical Learning: Creating a Bitmap

  1. Start a new Windows Forms Application named Resources1
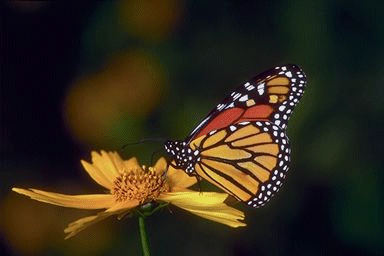
  2. Right-click the following picture and click Copy
     
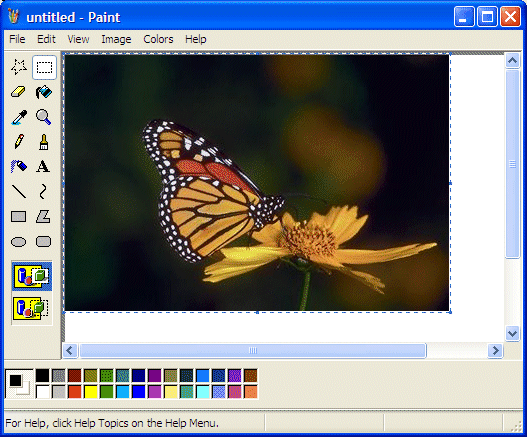
  3. To start Microsoft Paint, on the Taskbar, click Start -> (All) Programs -> Accessories -> Paint
  4. On the main menu of Paint, click Edit -> Paste
  5. To change the orientation of the butterfly, on the main menu of Paint, click Image -> Flip/Rotate...
  6. In the Flip and Rotate dialog box, click the Flip Horizontal radio button and click OK
     
  7. To save the picture, on the main menu of Paint, click File -> Exit
  8. When asked whether you want to save, click Yes
  9. Locate the Resources1 folder of the current project and display it in the Save In combo box
  10. Double-click the bin folder to display it in the Save In combo box
  11. Save the file as Butterfly.bmp and return to Visual Studio
 

Using a Bitmap

To support bitmaps, GDI+ provides the Bitmap class. The Bitmap class is based on the abstract Image class. If you have created a bitmap and stored it as a file, you can pass the path of that file to the following constructor of the class:

Public Sub New(ByVal filename As String)

Once the picture is ready, to present it to the user, you can call the Graphics.DrawImage() method that is overloaded with as many different versions as you can possibly need. One of the versions of this method has the following syntax:

Overloads Public Sub DrawImage( ByVal image As Image, ByVal point As Point)

The first argument can be a bitmap that you can have previously initialized. The second argument specifies the location where the picture will be drawn, which will be the top-left corner of the picture with regards to its parent.

Here is an example:

Private Sub Form1_Paint(ByVal sender As Object, ByVal e As System.Windows.Forms.PaintEventArgs) Handles MyBase.Paint
        Dim bmpHorse As Bitmap = New Bitmap("Horse.bmp")
        e.Graphics.DrawImage(bmpHorse , 20, 10)
End Sub
Horse Bitmap
 

Practical Learning Practical Learning: Displaying a Bitmap

  1. Right-click somewhere in the body of the form and click View Code
  2. In the Class name combo box, select (Form1 Events)
  3. In the Method Name combo box, select Paint
  4. Implement the event as follows:
     
    Private Sub Form1_Paint(ByVal sender As Object, ByVal e As System.Windows.Forms.PaintEventArgs) Handles MyBase.Paint
            Dim butterfly As Bitmap = New Bitmap("Butterfly.bmp")
    
            e.Graphics.DrawImage(butterfly, 10, 10)
    End Sub
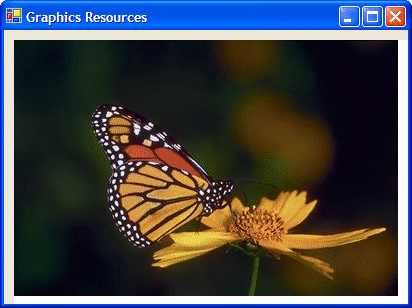
  5. Execute the application to test it:
     
  6. Close the form and return to your programming environment
 

Previous Copyright © 2004-2010 FunctionX, Inc.