.NET Controls: The Browse For Folder Dialog Box
 |
.NET Controls: The Browse For Folder Dialog Box |
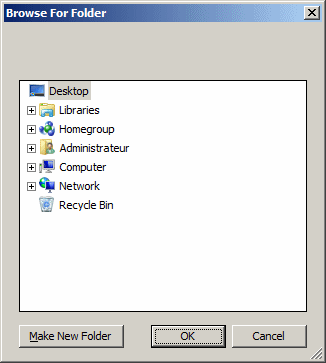
Microsoft Windows provides a dialog box specially made that allows a user to select a folder if an application needs one for any reason a programmer judges necessary. This dialog box appears as follows:  When this dialog box comes up, it displays the Desktop folder as the parent and all the other folders can be located from it. To use it, the user can click one of the folders or drives and click OK. If the desired folder is not seen but is available, the user can expand the existing folders and drives, click the desired folder and click OK. If the necessary folder is not available at all, the user can first select an existing folder or drive, click the Make New Folder button, type a name for the new folder, and click OK. Besides the folders, the Browse For Folder also allows the user to navigate to folders or directory of the network.
The Browse For Folder dialog box is made available through the FolderBrowserDialog class that is derived from the CommonDialog class. To provide its functionality to your application, at design time, from the Toolbox, click FolderBrowserDialog and click the form. To programmatically initiate this dialog box, you can declare a variable of type FolderBrowserDialog, use the new operator to allocate memory for it by calling its default constructor. Here is an example: using System;
using System.Drawing;
using System.Collections;
using System.ComponentModel;
using System.Windows.Forms;
using System.Data;
namespace WindowsApplication3
{
/// <summary>
/// Summary description for Form1.
/// </summary>
public class Form1 : System.Windows.Forms.Form
{
/// <summary>
/// Required designer variable.
/// </summary>
private System.ComponentModel.Container components = null;
FolderBrowserDialog fbd;
public Form1()
{
//
// Required for Windows Form Designer support
//
InitializeComponent();
fbd = new FolderBrowserDialog();
}
. . . No Change
}
}
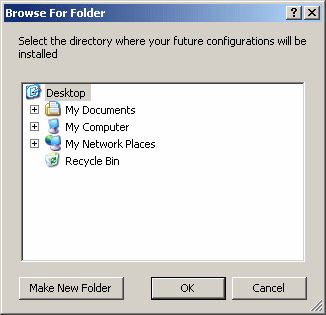
If you observe the above dialog box, you may find out that it doesn't indicate what it is used for. This is because it is left to you to let the user know what you expect. To provide this information, the Browse For Folder dialog box is equipped with a label that can be made visible or not. It is available through the Description property. If you provide a string for this property, it would display under the title bar but above the tree view of the dialog box. If you add the FolderBrowserDialog control to the form, you can type a string in the Description in the Properties window. You can also programmatically assign a string to the FolderBrowserDialog object. Here is an example: private void Form1_DoubleClick(object sender, System.EventArgs e)
{
fbd.Description = "Select the directory where your future configurations will be installed";
fbd.ShowDialog();
}
This would produce:  As you can see from this picture, when the dialog box comes up, it selects the Desktop, by default, as the parent folder. If you want, you can specify a different default folder to be selected. This information is carried by the RootFolder property. The RootFolder value must be a member of the SpecialFolder enumerator of the Environment class. For example, to select My Documents, you would type the following: private void Form1_DoubleClick(object sender, System.EventArgs e)
{
fbd.Description = "Select the directory where your future configurations will be installed";
fbd.RootFolder = Environment.SpecialFolder.Personal;
fbd.ShowDialog();
}
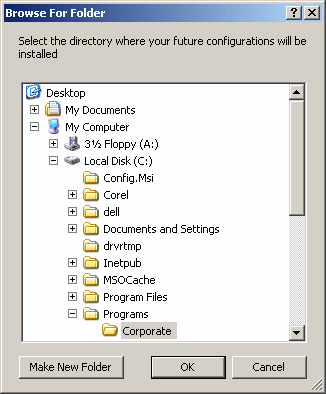
Since there is only a limited number of folders of the SpecialFolder enumerator, you may want to specify a different folder. The advantage of the Special Folder is that it is likely to be found on the user's computer. If you know for sure that a certain folder exists on the computer and you would rather select that folder, you can provide its complete path to the SelectedPath property. Here is an example: private void Form1_DoubleClick(object sender, System.EventArgs e)
{
fbd.Description = "Select the directory where your future configurations will be installed";
fbd.SelectedPath = "C:\\ADO Lessons\\Fundamentals";
fbd.ShowNewFolderButton = false;
fbd.ShowDialog();
}
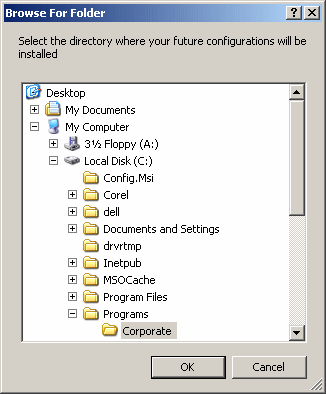
This would produce:  You should not specify both the RootFolder and the SelectedPath properties on the same FolderBrowserDialog control. After using the Browse For Folder dialog box, the user may select a folder and click OK. Imagine you are creating a commercial application, you can't possibly know the content of every customer's computer. This means that there is a possibility that the user would not find the desired folder. One solution you can use is to give users the opportunity to create a new folder. This option is available by default. If you want to prevent the user from creating a new folder, assign a false value to the ShowNewFolderButton Boolean property. You can do this in the Properties window at design time or programmatically as follows: private void Form1_DoubleClick(object sender, System.EventArgs e)
{
fbd.Description = "Select the directory where your future configurations will be installed";
fbd.RootFolder = Environment.SpecialFolder.Personal;
fbd.ShowNewFolderButton = false;
fbd.ShowDialog();
}
This would produce:  You can also check the value of the ShowNewFolderButton property to find out whether the dialog box is equipped with a Make New Folder button. After the user has used the Browse For Folder dialog box, has selected a folder, and clicked OK, to find out what folder the user selected, get the value of the SelectedPath property. |
|
|
||
| Home | Copyright © 2004-2010 FunctionX, Inc. | |
|
|
||