|
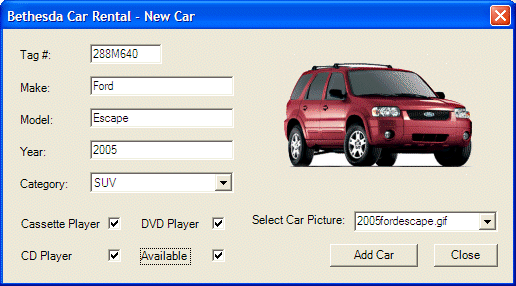
Cars are at the center of the rental transactions of
our company. A car is the main reason a customer comes to the business. In
our application, we will provide all the necessary information related to
a car such as its make, model, year, picture, and whether it is available.
Because we know that sometimes when renting or choosing a car, a customer
may want to know the options available on a particular car, we will also
list these basic pieces of information. Finally, we will mark a car as
available or not. This will allow the clerk processing an order to know
whether the customer can rent the car or not.
We will create two forms related to cars. One form
will be used to enter a new car when the company acquires one. On the
other hand, when interviewing a customer, if the clerk wants to see a list
of the company cars, we will create a form that can help with this,
allowing the clerk to navigate among cars for a review. |
|
 Practical Learning: Processing Cars
|
|
- Copy the following pictures to the debug sub-folder of the bin sub-folder
inside the main folder of the current project (Save
them with their default names):
- Return to your programming environment
- To add a new form to the application, on the main menu, click Project
-> Add Windows Forms
- Set the Name to NewCar and press Enter
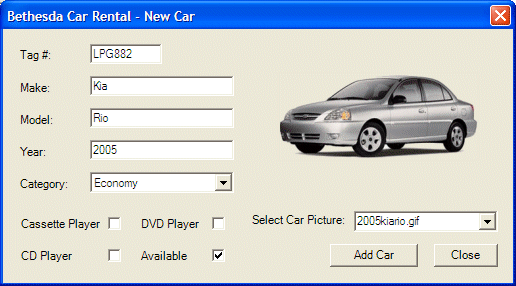
- Design the form as follows:
 |
| Control |
Text |
Name |
Other Properties |
| Label |
Text # |
|
|
| TextBox |
|
txtTagNumber |
|
| Label |
Make: |
|
|
| TextBox |
|
txtMake |
|
| Label |
Model: |
|
|
| TextBox |
|
txtModel |
|
| Label |
Year: |
|
|
| TextBox |
|
txtYear |
|
| Label |
Category: |
|
|
| ComboBox |
|
cboCategory |
DropDownStyle: DropDownList |
| Items: |
Economy
Compact
Standard
Full Size
Mini Van
SUV
Truck
Van |
| CheckBox |
Cassete Player |
chkK7Player |
CheckAlign: MiddleRight |
| CheckBox |
DVD Player |
chkDVDPlayer |
CheckAlign: MiddleRight |
| CheckBox |
CD Player |
chkCDPlayer |
CheckAlign: MiddleRight |
| CheckBox |
Available |
chkAvailable |
CheckAlign: MiddleRight |
| PictureBox |
|
pctCar |
SizeMode: CenterImage |
| Label |
Select Car Picture: |
|
|
| ComboBox |
none.gif |
cboPictures |
|
| Button |
Add Car |
btnAddCar |
|
| Button |
Close |
btnClose |
DialogResult: OK |
| Form |
|
|
FormBorderStyle: FixedDialog
MaximizeBox: False
MinimizeBox: False
ShowInTaskbar: False |
|
- To add a new class to the project, on the main menu, click Project -> Add
Class...
- Set the Class Name to Car and click Open
- Access the Car.cs file and change it as follows:
using System;

namespace BCR2
{
	/// <summary>
	/// Summary description for Car.
	/// </summary>
	[Serializable]
	sealed public class Car
	{
		public string TagNumber;
		public string Make;
		public string Model;
		public int    Year;
		public string Category;
		public int    HasK7Player;
		public int    HasCDPlayer;
		public int    HasDVDPlayer;
		public string PictureName;
		public int    IsAvailable;

		public Car()
		{
			TagNumber    = "000-000";
			Make         = "Make";
			Model        = "Model";
			Year         = 1960;
			Category     = "Small";
			HasK7Player  = 0;
			HasCDPlayer  = 0;
			HasDVDPlayer = 0;
			PictureName  = "";
			IsAvailable  = 0;
		}

		public Car(string tag, string mk, string mdl,
			int yr, string cat, int k7, int cd,
			int dvd, string pct, int avl)
		{
			TagNumber    = tag;
			Make         = mk;
			Model        = mdl;
			Year         = yr;
			Category     = cat;
			HasK7Player  = k7;
			HasCDPlayer  = cd;
			HasDVDPlayer = dvd;
			PictureName  = pct;
			IsAvailable  = avl;
		}
	}
}
|
- Display the NewCar form. Right-click it and click View Code
- In the top section of the file, type the following:
using System;
using System.Drawing;
using System.Collections;
using System.ComponentModel;
using System.Windows.Forms;
using System.IO;
using System.Runtime.Serialization.Formatters.Soap;

namespace BCR2
{
|
- Declare an ArrayList variable and name it lstCars:
private System.ComponentModel.Container components = null;
ArrayList lstCars;
|
- Return to the NewCar form. Double-click an unoccupied area of its body to
generate its Load event and implement it as follows:
private void NewCar_Load(object sender, System.EventArgs e)
{
	lstCars = new ArrayList();
	string strFilename = "Cars.bcr";
	SoapFormatter bcrSoap = new SoapFormatter();

	if( File.Exists(strFilename) )
	{
		FileStream bcrStream = new FileStream(strFilename,
			FileMode.Open, FileAccess.Read, FileShare.Read);
		lstCars = (ArrayList)bcrSoap.Deserialize(bcrStream);
		bcrStream.Close();
	}
	else
	{
		FileStream bcrStream = new FileStream(strFilename,
				FileMode.OpenOrCreate, FileAccess.Write,
				FileShare.Write);
		bcrSoap.Serialize(bcrStream, lstCars);
		bcrStream.Close();
	}

	// Locate the director that contains the current application
	DirectoryInfo dirInfo = new DirectoryInfo(".\\");

	// Get a reference to each file in that directory
	FileInfo[] lstFiles = dirInfo.GetFiles();

		// Display the names of the graphics files
		foreach(FileInfo fi in lstFiles)
		{
			if( fi.Extension.Equals(".gif") ||
				fi.Extension.Equals(".jpeg") ||
				fi.Extension.Equals(".jpg") ||
				fi.Extension.Equals(".bmp") ||
				fi.Extension.Equals(".png") )
				cboPictures.Items.Add(fi.Name);
		}

	cboPictures.Text = "none.gif";
}
|
- Return to the NewCar form and double-click the combo box on then right
side of Select Car Picture
- Implement its SelectedIndexChanged event as follows:
private void cboPictures_SelectedIndexChanged(object sender,
		System.EventArgs e)
{
	this.pctCar.Image = Image.FromFile(cboPictures.Text);
}
|
- Return to the NewCar form and double-click the Add Car button to generate
its Click event
- Implement it as follows:
private void btnAddCar_Click(object sender, System.EventArgs e)
{
	Car vehicle = new Car();

	vehicle.TagNumber = this.txtTagNumber.Text;
	vehicle.Make      = this.txtMake.Text;
	vehicle.Model     = this.txtModel.Text;
	vehicle.Year      = int.Parse(this.txtYear.Text);
	vehicle.Category  = this.cboCategory.Text;
	if( this.chkK7Player.Checked == true )
		vehicle.HasK7Player  = 1;
	else
		vehicle.HasK7Player  = 0;
	if( this.chkCDPlayer.Checked == true )
		vehicle.HasCDPlayer  = 1;
	else
		vehicle.HasCDPlayer  = 0;
	if( this.chkDVDPlayer.Checked == true )
		vehicle.HasDVDPlayer = 1;
	else
		vehicle.HasDVDPlayer = 0;
	vehicle.PictureName  = cboPictures.Text;
	if( this.chkAvailable.Checked == true )
		vehicle.IsAvailable  = 1;
	else
		vehicle.IsAvailable  = 0;

	lstCars.Add(vehicle);

	string strFilename = "Cars.bcr";
	SoapFormatter bcrSoap = new SoapFormatter();
	FileStream bcrStream = new FileStream(strFilename,
		FileMode.OpenOrCreate, FileAccess.Write, FileShare.Write);
	bcrSoap.Serialize(bcrStream, lstCars);
	bcrStream.Close();

	this.txtTagNumber.Text = "";
	this.txtMake.Text      = "";
	this.txtModel.Text     = "";
	this.txtYear.Text      = "1960";
	this.cboCategory.SelectedIndex = 0;
	this.chkK7Player.Checked = false;
	this.chkCDPlayer.Checked  = false;
	this.chkDVDPlayer.Checked = false;
	cboPictures.Text = "none.gif";
	this.chkAvailable.Checked = false;
	this.pctCar.Image = Image.FromFile("none.gif");
	this.txtTagNumber.Focus();
}
|
- Display the first form, Switchboard.cs [Design]. Add a Button to the form and
change its properties as follows:
(Name): btnNewCar
Text: New Car
- Double-click the New Car button to generate its Click event
- Implement the event as
follows:
private void btnNewCar_Click(object sender, System.EventArgs e)
{
	NewCar car = new NewCar();
	car.ShowDialog();
}
|
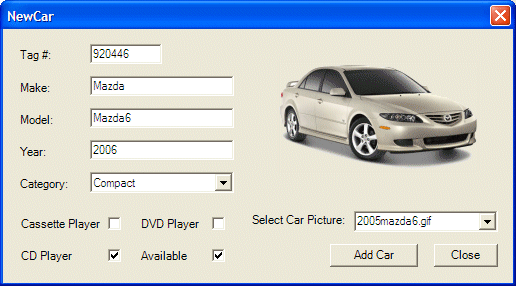
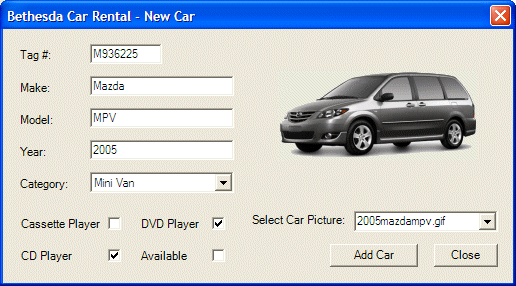
- Execute the application
- Create a few cars as follows:
- Close the forms and return to your programming environment
- To add a new form to the application, on the main menu, click Project
-> Add Windows Forms
- Set the Name to Cars and press Enter
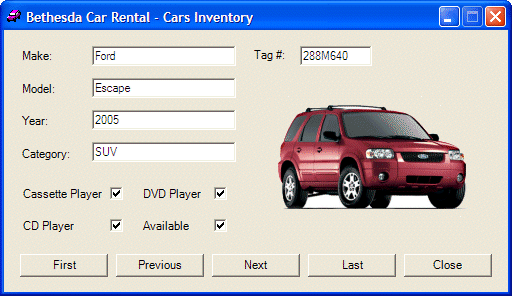
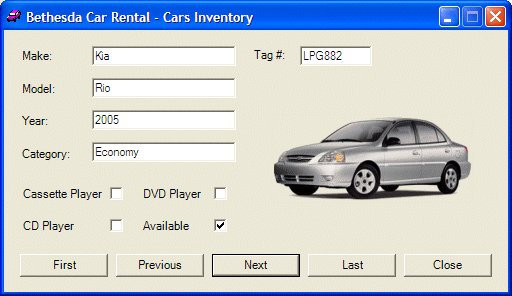
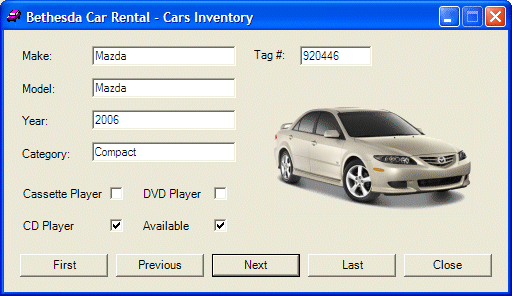
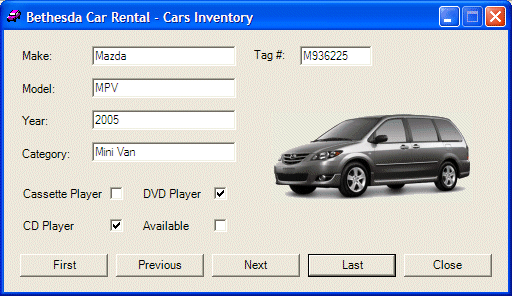
- Design the form as follows:
 |
| Control |
Text |
Name |
Other Properties |
| Label |
Make: |
|
|
| TextBox |
|
txtMake |
|
| Label |
Model: |
|
|
| TextBox |
|
txtModel |
|
| Label |
Year: |
|
|
| TextBox |
|
txtYear |
|
| Label |
Category: |
|
|
| TextBox |
|
txtCategory |
|
| CheckBox |
Cassete Player |
chkK7Player |
CheckAlign: MiddleRight |
| CheckBox |
DVD Player |
chkDVDPlayer |
CheckAlign: MiddleRight |
| CheckBox |
CD Player |
chkCDPlayer |
CheckAlign: MiddleRight |
| CheckBox |
Available |
chkAvailable |
CheckAlign: MiddleRight |
| Label |
Tag #: |
|
|
| TextBox |
|
txtTagNumber |
|
| PictureBox |
|
pctCar |
|
| Button |
First |
btnFirst |
|
| Button |
Previous |
btnPrevious |
|
| Button |
Next |
btnNext |
|
| Button |
Last |
btnLast |
|
| Button |
Close |
btnClose |
|
| Form |
|
|
MaximizeBox: False
StartPosition: CenterScreen |
|
- Right-click it and click View Code
- In the top section of the file, type the following:
using System;
using System.Drawing;
using System.Collections;
using System.ComponentModel;
using System.Windows.Forms;
using System.IO;
using System.Runtime.Serialization.Formatters.Soap;

namespace BCR2
{
|
- In the class, declare an ArrayList and name it lstCars:
private System.ComponentModel.Container components = null;
ArrayList lstCars;
int CurrentPosition;
|
- Return to the Cars form and double-click an empty area of its
body
- Implement the event as follows:
private void Cars_Load(object sender, System.EventArgs e)
{
	lstCars = new ArrayList();
	CurrentPosition = 0;

	string strFilename = "Cars.bcr";
	SoapFormatter bcrSoap = new SoapFormatter();

	if( File.Exists(strFilename) )
	{
		FileStream bcrStream = new FileStream(strFilename,
FileMode.Open, FileAccess.Read, FileShare.Read);
		lstCars = (ArrayList)bcrSoap.Deserialize(bcrStream);

		bcrStream.Close();
		this.btnFirst_Click(sender, e);
	}
}

void ShowCarInformation(Car vehicle)
{
	this.txtTagNumber.Text = vehicle.TagNumber;
	this.txtMake.Text = vehicle.Make;
	this.txtModel.Text = vehicle.Model;
	this.txtYear.Text  = vehicle.Year.ToString();
	this.txtCategory.Text  = vehicle.Category;

	if( vehicle.HasK7Player == 1 )
		this.chkK7Player.Checked = true;
	else
		this.chkK7Player.Checked = false;

	if( vehicle.HasCDPlayer == 1 )
		this.chkCDPlayer.Checked = true;
	else
		this.chkCDPlayer.Checked = false;

	if( vehicle.HasDVDPlayer == 1 )
		this.chkDVDPlayer.Checked = true;
	else
		this.chkDVDPlayer.Checked = false;

	string strPictureName = vehicle.PictureName;

	try
	{
		this.pctCar.Image =
			Image.FromFile(vehicle.PictureName);
	}
	catch(OutOfMemoryException)
	{
		this.pctCar.Image = Image.FromFile("none.gif");
	}

	if( vehicle.IsAvailable == 1 )
		this.chkAvailable.Checked = true;
	else
		this.chkAvailable.Checked = false;
}
|
- Return to the Cars form and double-click the First button
- Implement its Click event as follows:
private void btnFirst_Click(object sender, System.EventArgs e)
{
	if( lstCars.Count == 0 )
		return;

	CurrentPosition = 0;
	Car car = new Car();

	car = (Car)this.lstCars[CurrentPosition];

	ShowCarInformation(car);
}
|
- Return to the Cars form
- Double-click the Previous button and
implement its Click event as follows:
private void btnPrevious_Click(object sender, System.EventArgs e)
{
	if( lstCars.Count == 0 )
		return;

	if( CurrentPosition == 0 )
		return;

	CurrentPosition--;
	Car vehicle = new Car();

	vehicle = (Car)lstCars[CurrentPosition];

	ShowCarInformation(vehicle);
}
|
- Return to the Cars form. Double-click the Next button and
implement its Click event as follows:
private void btnNext_Click(object sender, System.EventArgs e)
{
	if( lstCars.Count == 0 )
		 return;

	 if( CurrentPosition == lstCars.Count - 1 )
		 return;
	 else
	 {
		 CurrentPosition++;

		 Car vehicle = new Car();

		 vehicle = (Car)lstCars[CurrentPosition];

		ShowCarInformation(vehicle);
	 }
}
|
- Return to the Cars form. Double-click the Last button and
implement its Click event as follows:
private void btnLast_Click(object sender, System.EventArgs e)
{
	if( lstCars.Count == 0 )
		return;

	CurrentPosition = lstCars.Count - 1;
	Car vehicle = new Car();

	vehicle = (Car)this.lstCars[CurrentPosition];

	ShowCarInformation(vehicle);
}
|
- Return to the Cars form. Double-click the Close button and
implement its Click event as follows:
private void btnClose_Click(object sender, System.EventArgs e)
{
	Close();
}
|
- Display the first form, Switchboard.cs [Design]. Add a Button to the form and
change its properties as follows:
(Name): btnCarsReview
Text: Car Review
- Double-click the New Car button to generate its Click event
- Implement the event as
follows:
private void btnCarsReview_Click(object sender, System.EventArgs e)
{
	Cars frmCars = new Cars();
	frmCars.Show();
}
|
- Execute the application and review the list of cars using the Cars form
- Close the forms and return to your programming environment
|
|