|
Due to the high level of support of XML in the
Microsoft .NET Framework, there are various ways you can create an XML
file that would be used in Visual C# .NET. The most common technique consists of using a simple text editor. In
Microsoft Windows, this would be Notepad, or even WordPad. An XML file is first of all a normal text-based
document that has a .xml extension. Therefore, however you create
it, it must specify that extension.
Many other applications allow creating an XML file or
generating one from an existing file. There are also commercial editors
you can get or purchase to create the XML file. You can also create your own XML editor using Visual
C#
.NET. Normally, it is not particularly easy because you would also need to
include a parser in the application and you may have to write that parser
yourself.
|
|
 Practical
Learning: Introducing XML
Practical
Learning: Introducing XML
|
|
- Start Microsoft Visual Studio .NET and create a Windows
Application named CPAP1
|
Creating an XML File With a Text Editor |
|
|
Probably the most common way to create an XML file in
Microsoft Windows consists of using Notepad or any other text editor.
After opening the text editor, you can enter the necessary lines of code. After creating the file, you must save it. When saving
it, you can include the name of the file in double-quotes. Here is an
example:

You can also first set the Files Of Type combo box to
All Files and then enter the name of the file with the .xml extension |
|
Creating an XML File With Visual Studio .NET Without
a Project |
|
|
Microsoft Visual Studio .NET provides its own means of
creating an XML file. Like any other XML file, Visual Studio doesn't
control what you do with the file nor does it control where and when you
can use the file. Whether you are working on a project or not, you can
start creating an XML file any time.
If you are not working on any
project, for example if you had just started Visual Studio and no project
is opened, to create an XML file, on the main menu, you can click File . New
. File... In the Templates section, you can click XML File:
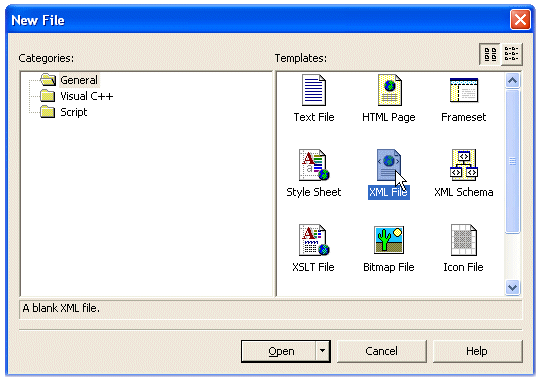
After clicking Open, a new file named XMLFile1 would
be created. Internally, the file would have the .xml extension. If you add
another XML file using the same technique, it would be called XMLFile2 or the incremental number.
|
|
Creating an XML File With Visual Studio .NET Within
a Project |
|
|
If you are already working on a project, to start an
XML file, on the main menu, you can click Project . Add New Item...
Then, in the Templates section, click XML File (.xml). You would be
required to give a name to the file:

After typing a name in the Name box, you can click
Open.
|
|
Practical
Learning: Adding a New XML File
|
|
- To add an XML file, on the main menu, click File -> New ->
File...
- In the Templates list of the New File dialog box, click XML File (.xml)
- Click Open
- To save the file, on the the Standard toolbar, click the Save button
- Locate the folder that contains the current project. Double-click
its bin folder, then double-click its debug sub folder to display it
in the Save In combo box
- Change the file name to Parts
- Click Save
|
The Document Object Model and the XmlDocument |
|
To implement XML, the .NET Framework provides the System.Xml
namespace. When you create an XML file, there are standard rules you should
(must) follow in order to have a valid document. The standards for an XML file
are defined by the W3C Document Object Model (DOM). To support these standards,
the System.Xml namespace provides the XmlDocument class. This
class allows you to create an XML document, its contents, and many other related
operations you may want to perform on the contents of the file.
|
Creating XML Code Using XmlDocument |
|
|
To create XML code using XmlDocument, this
class has a method called LoadXml(). Its syntax is:
public virtual void LoadXml(string xml);
This method takes a String as argument.
The XmlDocument.LoadXml() method doesn't create an XML file, it
only allows you to provide or create XML code. The code can be created as
argument. You can also first declare and initialize a pointer to String with the XML code, then pass
it as argument to the XmlDocument.LoadXml()
method.
The advantage of creating an XML file using Visual
Studio .NET is that the file, its name, and an extension are created
automatically. If you use the XmlDocument.LoadXml() method, only
the XML code is created, not the file. To actually create the Windows
file, you can call the XmlDocument.Save() method. This method is
provided in four versions. One of them takes as argument a String
value that would be the file name. The syntax of this method is:
public virtual void Save(string filename);
The argument must be a valid filename and must include
the .xml extension. If you pass a string without backlashes, the file
would be created in the same folder as the current project. If you want
the file to be created somewhere else, pass the whole path.
|
|
Practical
Learning: Creating an XML Document
|
|
- Display the form. In the Toolbox, click the Button control and click the
form
- Change its Text to Create Employees and its Name to btnCreateEmployees
- Double-click the newly added button to generate its Click event
- In the top section of the file, under the other using lines, type:
using System.Xml;
- Implement the Click event of the btnCreateEmployees button as
follows:
private void btnCreateEmployees_Click(object sender, System.EventArgs e)
{
	XmlDocument docXML = new XmlDataDocument();

	docXML.LoadXml("");
}
|
- Save all
|
|
