 |
Example Application: College Park Auto-Parts |
|
|
|
The .NET Framerowk provides an impression series of
collection classes. This application is an example of using generic
collection classes. It is a fictitious company that sells auto/car parts
|
|
 Practical
Learning: Starting the Appliction Practical
Learning: Starting the Appliction
|
|
- Start Microsoft Visual Studio and create a new Windows Application
named CollegeParkAutoParts1
- To create a dialog box, on the main menu, click Project -> Add
Windows Form...
- Set the name to MakeEditor and click Add
- Design the form as follows:
 |
| Control |
Text |
Name |
Other Properties |
| Label |
&Make: |
|
|
| TextBox |
|
txtMake |
Modifiers: Public |
| Button |
OK |
btnOK |
DialogResult: OK |
| Button |
Cancel |
btnCancel |
DialogResult: Cancel |
|
| Form Property |
Value |
| FormBorderStyle |
FixedDialog |
| Text |
Make Editor |
| StartPosition |
CenterScreen |
| AcceptButton |
btnOK |
| CancelButton |
btnCancel |
| MaximizeBox |
False |
| MinimizeBox |
False |
| ShowInTaskbar |
False |
- To create a dialog box, on the main menu, click Project -> Add
Windows Form...
- Set the name to ModelEditor and click Add
- Design the form as follows:
 |
| Control |
Text |
Name |
Other Properties |
| Label |
&Model: |
|
|
| TextBox |
|
txtModel |
Modifiers: Public |
| Button |
OK |
btnOK |
DialogResult: OK |
| Button |
Cancel |
btnCancel |
DialogResult: Cancel |
|
| Form Property |
Value |
| FormBorderStyle |
FixedDialog |
| Text |
Model Editor |
| StartPosition |
CenterScreen |
| AcceptButton |
btnOK |
| CancelButton |
btnCancel |
| MaximizeBox |
False |
| MinimizeBox |
False |
| ShowInTaskbar |
False |
- To create a dialog box, in the Solution Explorer, right-click
CollegeParkAutoParts1 -> Add -> Windows Form...
- Set the name to CategoryEditor and click Add
- Design the form as follows:
 |
| Control |
Text |
Name |
Other Properties |
| Label |
&Category: |
|
|
| TextBox |
|
txtCategory |
Modifiers: Public |
| Button |
OK |
btnOK |
DialogResult: OK |
| Button |
Cancel |
btnCancel |
DialogResult: Cancel |
|
| Form Property |
Value |
| FormBorderStyle |
FixedDialog |
| Text |
Category Editor |
| StartPosition |
CenterScreen |
| AcceptButton |
btnOK |
| CancelButton |
btnCancel |
| MaximizeBox |
False |
| MinimizeBox |
False |
| ShowInTaskbar |
False |
- On the main menu, click Project -> Add Windows Form...
- Set the Name to NewStoreItem and click Add
- Design the form as follows:
 |
| Control |
Text |
Name |
Other Properties |
| Label |
&Year: |
|
|
| TextBox |
|
txtItemNumber |
|
| Label |
&Make: |
|
|
| ComboBox |
|
cbxMakes |
|
| Button |
New C&ategory... |
btnNewMake |
|
| Label |
M&odel: |
|
|
| ComboBox |
|
cbxModels |
|
| Button |
New Mo &del... |
btnNewModel |
|
| Label |
&Category: |
|
|
| ComboBox |
|
cbxCategories |
|
| Button |
New Ca&tegory |
btnNewCategory |
|
| Label |
&Unit Price: |
|
|
| TextBox |
0.00 |
txtUnitPrice |
TextAlign: Right |
| Label |
Part #: |
|
|
| TextBox |
|
txtPartNumber |
|
| Label |
&Part Name: |
|
|
| TextBox |
|
txtPartName |
|
| Button |
Submit |
btnSubmit |
|
| Button |
Close |
btnClose |
DialogResult: Cancel |
|
| Form Property |
Value |
| FormBorderStyle |
FixedDialog |
| Text |
College Park Auto -Parts: Part Editor |
| StartPosition |
CenterScreen |
| MaximizeBox |
False |
| MinimizeBox |
False |
| ShowInTaskbar |
False |
- Double-click the New Make button and implement it as follows:
private void btnNewMake_Click(object sender, EventArgs e)
{
    var editor = new MakeEditor();

    if (editor.ShowDialog() == DialogResult.OK)
    {
        if (editor.txtMake.Text.Length > 0)
        {
            var strMake = editor.txtMake.Text;

            // Make sure the category is not yet in the list
            if (cbxMakes.Items.Contains(strMake))
                MessageBox.Show(strMake + " is already in the list");
            else
            {
                // Since this is a new category, add it to the combo box
                cbxMakes.Items.Add(strMake);
            }

            cbxMakes.Text = strMake;
        }
    }
}
- Return to the Part Editor dialog box and double-click the New Model
button
- Implement the event as follows:
private void btnNewModel_Click(object sender, EventArgs e)
{
    var editor = new ModelEditor();

    if (editor.ShowDialog() == DialogResult.OK)
    {
        if (editor.txtModel.Text.Length > 0)
        {
            var strModel = editor.txtModel.Text;

            // Make sure the category is not yet in the list
            if (cbxModels.Items.Contains(strModel))
                MessageBox.Show(strModel + " is already in the list");
            else
            {
                // Since this is a new category, add it to the combo box
                cbxModels.Items.Add(strModel);
            }

            cbxModels.Text = strModel;
        }
    }
}
- Return to the Part Editor dialog box and double-click the New
Category button
- Implement the event as follows:
private void btnNewCategory_Click(object sender, EventArgs e)
{
    var editor = new CategoryEditor();

    if (editor.ShowDialog() == DialogResult.OK)
    {
        if (editor.txtCategory.Text.Length > 0)
        {
            var strCategory = editor.txtCategory.Text;

            // Make sure the category is not yet in the list
            if (cbxCategories.Items.Contains(strCategory))
                MessageBox.Show(strCategory + " is already in the list");
            else
            {
                // Since this is a new category, add it to the combo box
                cbxCategories.Items.Add(strCategory);
            }

            cbxCategories.Text = strCategory;
        }
    }
}
- Save the file and close the form
- To create an icon, on the main menu, click Project -> Add New
Item...
- In the Templates list, click Icon File
- Set the Name to cpap1 and click Add
- Right-click the white area and click Delete Image Type
- Design the 16x16, 16 colors version of the icon as follows:
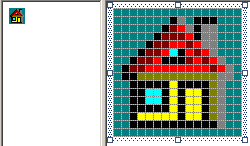
- On the main menu, click File -> Save cpap1.ico As
- Select the bin\Debug folder of the current folder and click Save
- On the main menu, click File -> Close
- In the Solution Explorer, expand bin and expand Debug
- In the Solution Explorer, right-click the Debug folder -> Add -> New
Item...
- In the Templates list, make sure Icon File is selected.
Set the
Name to cpap2 and click Add
- Right-click the white area and click Delete Image Type
- Design the 16x16, 16 colors version of the icon as follows:
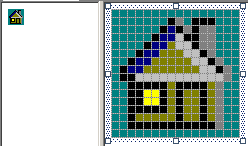
- Save the file and close the icon window
- In the Solution Explorer, right- click the Debug folder -> Add ->
New Item...
- In the Templates list, make sure Icon File is selected.
Set the
Name to year1 and click Add
- Right-click the white area and click Delete Image Type
- Design the 16x16, 16 colors version of the icon as follows:
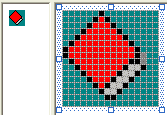
- Save the file and close the icon window
- In the Solution Explorer, right- click the Debug folder -> Add ->
New Item...
- In the Templates list, make sure Icon File is selected.
Set the
Name to year2 and click Add
- Right-click the white area and click Delete Image Type
- Design the 16x16, 16 colors version of the icon as follows:
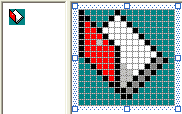
- Save the file and close the icon window
- In the Solution Explorer, right- click the Debug folder -> Add ->
New Item...
- In the Templates list, make sure Icon File is selected.
Set the
Name to make1 and click Add
- Right-click the white area and click Delete Image Type
- Design the 16x16, 16 colors version of the icon as follows:

- Save the file and close the icon window
- In the Solution Explorer, right- click the Debug folder -> Add ->
New Item...
- In the Templates list, make sure Icon File is selected.
Set the
Name to make2 and click Add
- Right-click the white area and click Delete Image Type
- Design the 16x16, 16 colors version of the icon as follows:

- Save the file and close the icon window
- In the Solution Explorer, right- click the Debug folder -> Add ->
New Item...
- In the Templates list, make sure Icon File is selected.
Set the
Name to model1 and click Add
- Right-click the white area and click Delete Image Type
- Design the 16x16, 16 colors version of the icon as follows:
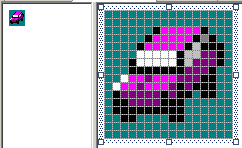
- Save the file and close the icon window
- In the Solution Explorer, right- click the Debug folder -> Add ->
New Item...
- In the Templates list, make sure Icon File is selected.
Set the
Name to model2 and click Add
- Right-click the white area and click Delete Image Type
- Design the 16x16, 16 colors version of the icon as follows:
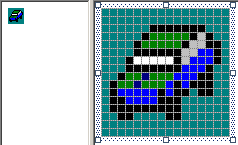
- Save the file and close the icon window
- In the Solution Explorer, right- click the Debug folder -> Add ->
New Item...
- In the Templates list, make sure Icon File is selected.
Set the
Name to category1 and click Add
- Right-click the white area and click Delete Image Type
- Design the 16x16, 16 colors version of the icon as follows:
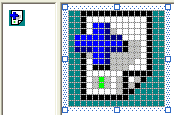
- Save the file and close the icon window
- In the Solution Explorer, right- click the Debug folder -> Add ->
New Item...
- In the Templates list, make sure Icon File is selected.
Set the
Name to category2 and click Add
- Right-click the white area and click Delete Image Type
- Design the 16x16, 16 colors version of the icon as follows:

- Save the file and close the icon window
- In the Solution Explorer, right-click Form1.cs and click Rename
- Type Central.cs and press Enter twice to display the Central
form
- From the Components section of the Toolbox, click ImageList and
click the form
- In the Properties window, click (Name) and type AutoPartsImages
- Click the ellipsis button of the Images field
- In the Image Collection Editor, click Add
- Locate the folder that contains the icons you created and display it
in the Look In combo box
- Select cpap1.ico and click Open
- In the same way, add the other pictures in the following order:
cpap2.ico, year1.ico, year2.ico, make1.ico, make2.ico, model1.ico,
model2.ico, category1.ico, and category1.ico

- Click OK
- Design the form as follows:
 |
| Control |
Text |
Name |
Other Properties |
| Label |
 |
College Park Auto-Parts |
|
Font: Times New
Roman, 20.25pt, style=Bold
ForeColor: Blue |
| Panel |
 |
|
|
Height: 2 |
| GroupBox |
 |
Part Identification |
|
|
| TreeView |
 |
|
tvwAutoParts |
ImageList:
imgAutoParts |
| GroupBox |
 |
Available Parts |
|
|
| ListView |
 |
|
lvwAutoParts |
FullRowSelect:
True
GridLines: True
View: Details |
| Columns |
|
(Name) |
Text |
TextAlign |
Width |
| colPartNumber |
Part # |
|
|
| colPartName |
Part Name |
|
300 |
| colUnitPrice |
Unit Price |
Right |
80 |
| GroupBox |
 |
Customer Order - Selected
Parts |
|
|
| Label |
 |
Part # |
|
|
| Label |
 |
Part Name |
|
|
| Label |
 |
Unit Price |
|
|
| Label |
 |
Qty |
|
|
| Label |
 |
Sub Total |
|
|
| TextBox |
 |
|
txtPartNumber |
|
| TextBox |
 |
|
txtPartName |
|
| TextBox |
 |
0.00 |
txtUnitPrice |
TextAlign: Right |
| TextBox |
 |
0 |
txtQuantity |
TextAlign: Right |
| TextBox |
 |
0.00 |
txtSubTotal |
TextAlign: Right |
| Button |
 |
Add/Select |
btnAdd |
|
| ListView |
 |
|
lvwSelectedParts |
FullRowSelect:
True
GridLines: True
View: Details |
| Columns |
|
(Name) |
Text |
TextAlign |
Width |
| colPartNumberSelected |
Part # |
|
45 |
| colPartNameSelected |
Part Name |
|
274 |
| colUnitPriceSelected |
Unit Price |
Right |
58 |
| colQuantitySelected |
Qty |
Right |
28 |
| colSubTotalSelected |
Sub-Total |
Right |
58 |
| GroupBox |
 |
Order Summary |
|
|
| Button |
 |
New Au&to Part... |
btnNewAutoPart |
|
| Label |
 |
Receipt #: |
|
|
| TextBox |
 |
|
txtSave |
|
| Button |
 |
Save |
btnSave |
|
| Label |
 |
Tax Rate: |
|
|
| TextBox |
 |
7.75 |
txtTaxRate |
TextAlign: Right |
| Label |
 |
% |
|
|
| Label |
 |
Parts Total: |
|
|
| TextBox |
 |
0.00 |
txtPartsTotal |
TextAlign: Right |
| Button |
 |
&New Customer Order |
btnNewCustomerOrder |
|
| Label |
 |
Receipt #: |
|
|
| TextBox |
 |
|
txtOpen |
|
| Button |
 |
Save |
btnOpen |
|
| Label |
 |
Tax Amount: |
|
|
| TextBox |
 |
0.00 |
txtTaxAmount |
TextAlign: Right |
| Label |
 |
Order Total: |
|
|
| TextBox |
 |
0.00 |
txtOrderTotal |
TextAlign: Right |
| Button |
 |
Close |
btnClose |
|
|
- Click the Available Parts list view
- In the Properties window, click the Events button and, in the Events
section, double-click DoubleClick
- Implement the event as follows:
private void lvwAutoParts_DoubleClick(object sender, EventArgs e)
{
    var lviAutoPart = lvwAutoParts.SelectedItems[0];

    if( (lvwAutoParts.SelectedItems.Count == 0) ||
        (lvwAutoParts.SelectedItems.Count > 1) )
                return;

    txtPartNumber.Text = lviAutoPart.Text;
    txtPartName.Text = lviAutoPart.SubItems[1].Text;
    txtUnitPrice.Text = lviAutoPart.SubItems[2].Text;

    txtQuantity.Text = "1";
    txtSubTotal.Text = lviAutoPart.SubItems[2].Text;

    txtQuantity.Focus();
}
- Return to the Central form
- Click the Unit Price text box and, in the Events section of the
Properties window, double-click Leave
- Implement the event as follows:
private void txtUnitPrice_Leave(object sender, EventArgs e)
{
    var UnitPrice = 0.00D;
    var Quantity = 0;
    var SubTotal = 0.00D;

    try
    {
        UnitPrice = double.Parse(txtUnitPrice.Text);
    }
    catch (FormatException)
    {
        MessageBox.Show("Invalid Unit Price!");
    }

    try { Quantity = int.Parse(txtQuantity.Text); }
    catch (FormatException)
    {
        MessageBox.Show("Invalid Quandtity!");
    }

    SubTotal = UnitPrice * Quantity;
    txtSubTotal.Text = SubTotal.ToString("F");
}

internal void CalculateOrder()
{
    // Calculate the current total order and update the order
    var PartsTotal = 0.00D;
    var TaxRate = 0.00D;
    var TaxAmount = 0.00D;
    var OrderTotal = 0.00D;

    foreach (ListViewItem lvi in lvwSelectedParts.Items)
    {
        ListViewItem.ListViewSubItem SubItem = lvi.SubItems[4];
        PartsTotal += double.Parse(SubItem.Text);
    }

    try
    {
        TaxRate = double.Parse(txtTaxRate.Text) / 100;
    }
    catch (FormatException)
    {
        MessageBox.Show("Invalid Tax Rate");
    }

    TaxAmount = PartsTotal * TaxRate;
    OrderTotal = PartsTotal + TaxAmount;

    txtPartsTotal.Text = PartsTotal.ToString("F");
    txtTaxAmount.Text = TaxAmount.ToString("F");
    txtOrderTotal.Text = OrderTotal.ToString("F");
}
- Return to the Central form and click the Qty text box
- In the Events section of the Properties, click Leave, then click the
arrow of its combo box and select txtUnitPrice_Leave
- Return to the Central form
- Click the Available Parts list view (the list view in the
bottom-right section of the form)
- In the Events section of the Properties window, double-click
DoubleClick
- Implement the event as follows:
private void lvwSelectedParts_DoubleClick(object sender, EventArgs e)
{
    var lviSelectedPart = lvwSelectedParts.SelectedItems[0];

    if( (lvwSelectedParts.SelectedItems.Count == 0) ||
        (lvwSelectedParts.SelectedItems.Count > 1) )
        return;

    txtPartNumber.Text = lviSelectedPart.Text;
    txtPartName.Text = lviSelectedPart.SubItems[1].Text;
    txtUnitPrice.Text = lviSelectedPart.SubItems[2].Text;
    txtQuantity.Text = lviSelectedPart.SubItems[3].Text;
    txtSubTotal.Text = lviSelectedPart.SubItems[4].Text;

    lvwSelectedParts.Items.Remove(lviSelectedPart);
    CalculateOrder();
}
- In the Solution Explorer, right-click CollegeParkAutoParts1 -> Add
-> Class...
- Set the name to PartDescription and press Enter
- To create a class that can hold a structured item of a list, change
the class as follows:
using System;
using System.Collections.Generic;
using System.Linq;
using System.Text;

namespace CollegeParkAutoParts1
{
    [Serializable]
    public class PartDescription
    {
        // These members will be used to define a car part
        private long ID;
        private int yr;
        private string mk;
        private string mdl;
        private string cat;
        private string name;
        private double price;

        public PartDescription()
        {
            this.ID = 0;
            this.yr = 1960;
            this.mk = "";
            this.mdl = "";
            this.name = "Unknown";
            this.price = 0.00;
        }

        public PartDescription(long code, int year, string make,
                               string model, string type,
                               string desc, double UPrice)
        {
            this.ID = code;
            this.yr = year;
            this.mk = make;
            this.mdl = model;
            this.cat = type;
            this.name = desc;
            this.price = UPrice;
        }

        public long PartNumber
        {
            get { return ID; }
            set { ID = value; }
        }

        public int Year
        {
            get { return yr; }
            set { yr = value; }
        }

        public string Make
        {
            get { return mk; }
            set { mk = value; }
        }

        public string Model
        {
            get { return mdl; }
            set { mdl = value; }
        }

        public string Category
        {
            get { return cat; }
            set { cat = value; }
        }

        public string PartName
        {
            get { return name; }
            set { name = value; }
        }

        public double UnitPrice
        {
            get { return (price < 0) ? 0.00 : price; }
            set { price = value; }
        }

        public override string ToString()
        {
            return this.PartNumber + " " +
                   this.Year.ToString() + " " +
                   this.Make + " " +
                   this.Model + " " +
                   this.Category + " " +
                   this.PartName + " " +
                   this.UnitPrice;
        }
    }
}
- In the Solution Explorer, right-click CollegeParkAutoParts1 -> Add
-> Class...
- Set the name to PartsOrdered and press Enter
- To create another class independent for a list, change the document
as follows:
using System;
using System.Collections.Generic;
using System.Linq;
using System.Text;

namespace CollegeParkAutoParts1
{
    [Serializable]
    public class PartsOrdered
    {
        public long PartNumber;
        public string PartName;
        public double UnitPrice;
        public int Quantity;
        public double SubTotal;
    }
}
- Save all
|
 Practical
Learning: Adding Items to an ArrayList List Practical
Learning: Adding Items to an ArrayList List
|
|
- Display the Part Editor form and double-click the Submit button
- Implement the event as follows:
using System;
using System.Collections.Generic;
using System.ComponentModel;
using System.Data;
using System.Drawing;
using System.Linq;
using System.Text;
using System.Windows.Forms;
using System.IO;
using System.Runtime.Serialization.Formatters.Binary;

namespace CollegeParkAutoParts1
{
    public partial class NewStoreItem : Form
    {
        List<PartDescription> lstAutoParts;

        . . . No Change

        private void btnSubmit_Click(object sender, EventArgs e)
        {
            FileStream stmAutoParts = null;
            BinaryFormatter bfmAutoParts = new BinaryFormatter();

            // If this directory doesn't exist, create it
            Directory.CreateDirectory(@"C:\College Park Auto Parts");
            // This is the file that holds the list of items
            string FileName = @"C:\College Park Auto Parts\Parts.prs";

            // Create a random number that will be used to identify the item
            Random rnd = new Random();
            txtPartNumber.Text = rnd.Next(100000, 999999).ToString();

            // Make sure the user had selected a make
            if (cbxYears.Text.Length == 0)
            {
                MessageBox.Show("You must specify the year");
                cbxYears.Focus();
                return;
            }

            // Make sure the user had selected a make
            if (cbxMakes.Text.Length == 0)
            {
                MessageBox.Show("You must specify the car name");
                cbxMakes.Focus();
                return;
            }

            // Make sure the user had selected a model
            if (cbxModels.Text.Length == 0)
            {
                MessageBox.Show("You must specify the model of the car");
                cbxModels.Focus();
                return;
            }

            // Make sure the user had selected the part category
            if (cbxCategories.Text.Length == 0)
            {
                MessageBox.Show("You must specify the part's category");
                cbxCategories.Focus();
                return;
            }

            // Make sure the user had entered a name/description
            if (txtPartName.Text.Length == 0)
            {
                MessageBox.Show("You must enter the name (or a " +
                                "short description) for the part");
                txtPartName.Focus();
                return;
            }

            // Make sure the user had typed a price for the item
            if (txtUnitPrice.Text.Length == 0)
            {
                MessageBox.Show("You must enter the price of the item");
                txtUnitPrice.Focus();
                return;
            }

            // Before saving the new part, find out if there was
            // already a file that holds the list of parts
            // If that file exists, open it and store its parts
            // in our lstParts variable
            if (File.Exists(FileName))
            {
                stmAutoParts = new FileStream(FileName,
                                              FileMode.Open,
                                              FileAccess.Read,
                                              FileShare.Read);

                try
                {
                    // Retrieve the list of items from file
                lstAutoParts =
                    (List<PartDescription>)bfmAutoParts.Deserialize(stmAutoParts);
                }
                finally
                {
                    stmAutoParts.Close();
                }
            }

            // Create the part
            PartDescription part = new PartDescription();
            part.PartNumber = long.Parse(txtPartNumber.Text);
            part.Year = int.Parse(cbxYears.Text);
            part.Make = cbxMakes.Text;
            part.Model = cbxModels.Text;
            part.Category = cbxCategories.Text;
            part.PartName = txtPartName.Text;
            part.UnitPrice = double.Parse(txtUnitPrice.Text);

            // Call the Add method of our collection class to add the part
            lstAutoParts.Add(part);

            // Save the list
            stmAutoParts = new FileStream(FileName,
                                          FileMode.Create,
                                          FileAccess.Write,
                                          FileShare.Write);

            try
            {
                bfmAutoParts.Serialize(stmAutoParts, lstAutoParts);

                // After saving the item, reset the form
                cbxYears.Text = "";
                cbxMakes.Text = "";
                cbxModels.Text = "";
                cbxCategories.Text = "";
                txtPartName.Text = "";
                txtUnitPrice.Text = "0.00";
                txtPartNumber.Text = rnd.Next(100000, 999999).ToString();
            }
            finally
            {
                stmAutoParts.Close();
            }
        }
    }
}
- In the Solution Explorer, right-click Central.cs and click View Code
- Add the following namespaces in the top section of the file:
using System;
using System.Collections.Generic;
using System.ComponentModel;
using System.Data;
using System.Drawing;
using System.Linq;
using System.Text;
using System.Windows.Forms;
using System.IO;
using System.Runtime.Serialization.Formatters.Binary;
- Return to the Central form and double-click the Save Customer Order
button
- Implement its event as follows:
private void btnSaveCustomerOrder_Click(object sender, EventArgs e)
{
    BinaryFormatter bfmCustomerOrder = new BinaryFormatter();

    // We will store our files in the following folder
    string strDirectory = @"C:\College Park Auto Parts\Receipts";
    DirectoryInfo dirInfo = new DirectoryInfo(strDirectory);

    string strFilename = strDirectory + "\\" + txtSave.Text + ".cap";

    List<PartsOrdered> lstOrderedParts = null;

    if (lvwSelectedParts.Items.Count == 0)
        return;
    else
    {
        lstOrderedParts = new List<PartsOrdered>();

        for (int i = 0; i < lvwSelectedParts.Items.Count; i++)
        {
            PartsOrdered part = new PartsOrdered();

            part.PartNumber = long.Parse(lvwSelectedParts.Items[i].Text);
            part.PartName = lvwSelectedParts.Items[i].SubItems[1].Text;
            part.UnitPrice = double.Parse(lvwSelectedParts.Items[i].SubItems[2].Text);
            part.Quantity = int.Parse(lvwSelectedParts.Items[i].SubItems[3].Text);
            part.SubTotal = double.Parse(lvwSelectedParts.Items[i].SubItems[4].Text);
            lstOrderedParts.Add(part);
        }

        FileStream stmCustomerOrder = new FileStream(strFilename, FileMode.Create);

        try
        {
            bfmCustomerOrder.Serialize(stmCustomerOrder, lstOrderedParts);
        }
        finally
        {
            stmCustomerOrder.Close();
        }
    }
}
- Save all
|
 Practical
Learning: Enumerating a List Practical
Learning: Enumerating a List
|
|
- Display the Part Editor form and double-click the Makes combo box
- Implement its SelectedIndexChanged event as follows:
private void cbxMakes_SelectedIndexChanged(object sender, EventArgs e)
{
    cbxModels.Text = "";
    cbxModels.Items.Clear();

    foreach (PartDescription part in lstAutoParts)
        if (part.Make == cbxMakes.Text)
            if (!cbxModels.Items.Contains(part.Model))
                cbxModels.Items.Add(part.Model);
}
- Display the Central form and double-click the Add/Select button
- Implement the event as follows:
private void btnAdd_Click(object sender, EventArgs e)
{
    if (txtPartNumber.Text.Length == 0)
    {
        MessageBox.Show("There is no part to be added to the order");
        return;
    }

    foreach (PartDescription part in lstAutoParts)
    {
        if (part.PartNumber == long.Parse(txtPartNumber.Text))
        {
            ListViewItem lviSelectedPart =
		new ListViewItem(part.PartNumber.ToString());

            lviSelectedPart.SubItems.Add(part.PartName);
            lviSelectedPart.SubItems.Add(part.UnitPrice.ToString());
            lviSelectedPart.SubItems.Add(txtQuantity.Text);
            lviSelectedPart.SubItems.Add(txtSubTotal.Text);
            lvwSelectedParts.Items.Add(lviSelectedPart);
        }
    }

    CalculateOrder();
}
- Return to the Central form and double-click the Open button
- Implement its event as follows:
private void btnOpen_Click(object sender, EventArgs e)
{
    List<PartsOrdered> lstReceipts = null;
    BinaryFormatter bfmReceipts = new BinaryFormatter();
    FileStream stmReceipts = null;

    string strDirectory = @"C:\College Park Auto Parts\Receipts";
    string strFilename = "";

    DirectoryInfo dirReceipts = new DirectoryInfo(strDirectory);
    FileInfo[] fleReceipts = dirReceipts.GetFiles();

    if (txtOpen.Text.Length == 0)
    {
        MessageBox.Show("You must enter a receipt number\n" +
                        "There is no receipt number to " +
                        "open a customer's order");
        txtOpen.Focus();
        return;
    }

    if (fleReceipts.Length == 0)
    {
        MessageBox.Show("There is no customer order to open");
        txtOpen.Focus();
        return;
    }
    else
    {
        lvwAutoParts.Items.Clear();
        lvwSelectedParts.Items.Clear();

        strFilename = strDirectory + "\\" + txtOpen.Text + ".cap";

        if (File.Exists(strFilename))
        {
            try
            {
                stmReceipts = new FileStream(strFilename, FileMode.Open);
                lstReceipts =
			(List<PartsOrdered>)bfmReceipts.Deserialize(stmReceipts);

                foreach (PartsOrdered part in lstReceipts)
                {
                    ListViewItem lviReceiptPart =
			new ListViewItem(part.PartNumber.ToString());

                    lviReceiptPart.SubItems.Add(part.PartName);
                    lviReceiptPart.SubItems.Add(part.UnitPrice.ToString());
                    lviReceiptPart.SubItems.Add(part.Quantity.ToString());
                    lviReceiptPart.SubItems.Add(part.SubTotal.ToString());
                    lvwSelectedParts.Items.Add(lviReceiptPart);
                }
            }
            finally
            {
                stmReceipts.Close();
            }

            CalculateOrder();
            txtSave.Text = txtOpen.Text;
        }
        else
            MessageBox.Show("There is no customer order with that receipt number");
    }
}
- Save the file
|
 Practical
Learning: Checking the Existence of an Item Practical
Learning: Checking the Existence of an Item
|
|
- Display the Part Editor form and double-click an unoccupied area of
its body
- Implement the Load event as follows:
private void NewStoreItem_Load(object sender, EventArgs e)
{
    // Since all values seem ready, prepare to process the item
    lstAutoParts = new List<PartDescription>();
    BinaryFormatter bfmAutoParts = new BinaryFormatter();

    for (int i = DateTime.Today.Year + 1; i >= 1960; i--)
        cbxYears.Items.Add(i.ToString());

    // Create a random number that will be used to identify the item
    Random rnd = new Random();
    txtPartNumber.Text = rnd.Next(100000, 999999).ToString();

    // This is the file that holds the list of parts
    string FileName = @"C:\College Park Auto Parts\Parts.prs";

    if (File.Exists(FileName))
    {
        FileStream stmAutoParts = new FileStream(FileName,
                                                 FileMode.Open,
                                                 FileAccess.Read,
                                                 FileShare.Read);

        try
        {
            // Retrieve the list of items from file
            lstAutoParts =
		(List<PartDescription>)
			bfmAutoParts.Deserialize(stmAutoParts);

            // Display the car manufacturers in the Make combo box
            for (int i = 0; i < lstAutoParts.Count; i++)
            {
                PartDescription part = (PartDescription)lstAutoParts[i];

                if (!cbxMakes.Items.Contains(part.Make))
                    cbxMakes.Items.Add(part.Make);
            }

            // Display the pats categories in the Category combo box
            for (int i = 0; i < lstAutoParts.Count; i++)
            {
                PartDescription part = (PartDescription)lstAutoParts[i];

                if (!cbxCategories.Items.Contains(part.Category))
                    cbxCategories.Items.Add(part.Category);
            }
        }
        finally
        {
            stmAutoParts.Close();
        }
    }
}
- Display the Central form and click the Part # text box
- In the Events section of the Properties window, double-click Leave
and implement the event as follows:
private void txtPartNumber_Leave(object sender, EventArgs e)
{
    // We will allow the user to enter a part number
    // In the beginning, we assume that the user
    // had entered an invalid number
    bool found = false;
    // This will represent the part found, if any
    PartDescription PartFound = null;

    // After the user had entered a part number,
    // check the whole list of parts
    foreach (PartDescription part in lstAutoParts)
    {
        // If you find a part that holds the number the user had entered
        if( part.PartNumber == long.Parse(txtPartNumber.Text) )
        {
            // Mark that part
            PartFound = part;
            // And update the flag that specifies that the part has been found
            found = true;
        }
        // If the part number was not found, check the next
    } // If no part has that number, the found flag keeps marked as false

    // If a part with that number was found...
    if (found == true)
    {
        // Show the corresponding part name and unit price
        txtPartName.Text = PartFound.PartName;
        txtUnitPrice.Text = PartFound.UnitPrice.ToString("F");
        txtQuantity.Text = "1";
        txtSubTotal.Text = PartFound.UnitPrice.ToString("F");
        // Give focus to the quantity in case the user was to increase it
        txtQuantity.Focus();
    }
    else
    {
        // Since no part with that number was found,
        // reset the text boxes
        txtPartName.Text = "";
        txtUnitPrice.Text = "0.00";
        txtQuantity.Text = "0";
        txtSubTotal.Text = "0.00";

        // Let the user know that the part number that
        // was entered is not in the list
        MessageBox.Show("There is no part with that number");
    }
}
- Return to the Central form and double-click the New Auto Part button
- Implement the event as follows:
using System;
using System.Collections.Generic;
using System.ComponentModel;
using System.Data;
using System.Drawing;
using System.Linq;
using System.Text;
using System.Windows.Forms;
using System.IO;
using System.Runtime.Serialization.Formatters.Binary;

namespace CollegeParkAutoParts1
{
    public partial class Central : Form
    {
        int iFileName;
        List<PartDescription> lstAutoParts;

        public Central()
        {
            InitializeComponent();
        }

        void ShowAutoParts()
        {
            tvwAutoParts.Nodes.Clear();
            TreeNode nodRoot =
		tvwAutoParts.Nodes.Add("College Park Auto-Parts",
                                       "College Park Auto-Parts", 0, 1);
            // Show the years nodes
            for (int years = DateTime.Today.Year + 1; years >= 1960; years--)
                nodRoot.Nodes.Add(years.ToString(), years.ToString(), 2, 3);

            tvwAutoParts.SelectedNode = nodRoot;
            // Expand the root node
            tvwAutoParts.ExpandAll();

            lstAutoParts = new List<PartDescription>();
            BinaryFormatter bfmAutoParts = new BinaryFormatter();

            // This is the file that holds the list of auto parts
            string FileName = @"C:\College Park Auto Parts\Parts.prs";

            if (File.Exists(FileName))
            {
                FileStream stmAutoParts = new FileStream(FileName,
                                                         FileMode.Open,
                                                         FileAccess.Read,
                                                         FileShare.Read);
                try
                {
                    // Retrieve the list of parts from file
                    lstAutoParts =
			(List<PartDescription>)
				bfmAutoParts.Deserialize(stmAutoParts);

                    // Show the makes nodes
                    foreach (TreeNode nodYear in nodRoot.Nodes)
                    {
                        List<string> lstMakes = new List<string>();

                        foreach (PartDescription part in lstAutoParts)
                        {
                            if (nodYear.Text == part.Year.ToString())
                            {
                                if (!lstMakes.Contains(part.Make))
                                    lstMakes.Add(part.Make);
                            }
                        }

                        foreach (string strMake in lstMakes)
                            nodYear.Nodes.Add(strMake, strMake, 4, 5);
                    }

                    // Showing the models nodes
                    foreach (TreeNode nodYear in nodRoot.Nodes)
                    {
                        foreach (TreeNode nodMake in nodYear.Nodes)
                        {
                            List<string> lstModels = new List<string>();

                            foreach (PartDescription part in lstAutoParts)
                            {

                                if ((nodYear.Text == part.Year.ToString()) &&
                                    (nodMake.Text == part.Make))
                                {
                                    if (!lstModels.Contains(part.Model))
                                        lstModels.Add(part.Model);

                                }
                            }

                            foreach (string strModel in lstModels)
                                nodMake.Nodes.Add(strModel, strModel, 6, 7);
                        }
                    }

                    // Showing the categories nodes
                    foreach (TreeNode nodYear in nodRoot.Nodes)
                    {
                        foreach (TreeNode nodMake in nodYear.Nodes)
                        {
                            foreach (TreeNode nodModel in nodMake.Nodes)
                            {
                                List<string> lstCategories = new List<string>();

                                foreach (PartDescription part in lstAutoParts)
                                {

                                    if ((nodYear.Text == part.Year.ToString()) &&
                                        (nodMake.Text == part.Make) &&
                                        (nodModel.Text == part.Model))
                                    {
                                       if (!lstCategories.Contains(part.Category))
                                            lstCategories.Add(part.Category);
                                    }
                                }

                                foreach (string strCategory in lstCategories)
                                    nodModel.Nodes.Add(strCategory,
						       strCategory, 8, 9);
                            }
                        }
                    }
                }
                finally
                {
                    stmAutoParts.Close();
                }
            }
        }

	. . . No Change

        private void btnNewAutoPart_Click(object sender, EventArgs e)
        {
            var editor = new NewStoreItem();

            if (editor.ShowDialog() == DialogResult.Cancel)
                ShowAutoParts();
        }
    }
}
- Display the Central form and double- click the New Customer Order
button
- Implement the event as follows:
private void btnNewCustomerOrder_Click(object sender, EventArgs e)
{
    // We will store our files in the following folder
    string strDirectory = @"C:\College Park Auto Parts\Receipts";
    DirectoryInfo dirInfo = Directory.CreateDirectory(strDirectory);

    // Get the list of files, if any, from our directory
    FileInfo[] fleList = dirInfo.GetFiles();

    // If there is no file in the directory,
    // then we will use 1000 as the first file name
    if (fleList.Length == 0)
    {
        iFileName = 1000;
    }
    else // If there was at least one file in the directory
    {
        // Get a reference to the last file
        FileInfo fleLast = fleList[fleList.Length - 1];
        // Get the name of the last file without its extension
        string fwe = Path.GetFileNameWithoutExtension(fleLast.FullName);
        // Increment the name of the file by 1
        iFileName = int.Parse(fwe) + 1;
    }

    txtSave.Text = iFileName.ToString();

    lvwAutoParts.Items.Clear();
    lvwSelectedParts.Items.Clear();
}
- Display the Central form and double-click an unoccupied area of its
body
- Define a new method and implement the Load event as follows:
private void Central_Load(object sender, EventArgs e)
{
    ShowAutoParts();
    btnNewCustomerOrder_Click(sender, e);
}
- Return to the Central form and click the tree view
- In the Properties window, click the Events button and, in the Events
section, double-click NodeMouseClick
- Implement the event as follows:
private void tvwAutoParts_NodeMouseClick(object sender,
			TreeNodeMouseClickEventArgs e)
{
    TreeNode nodClicked = e.Node;

    if (nodClicked.Level == 4)
        lvwAutoParts.Items.Clear();

    try
    {
        foreach (PartDescription part in lstAutoParts)
        {
            if ((part.Category == nodClicked.Text) &&
                (part.Model == nodClicked.Parent.Text) &&
                (part.Make == nodClicked.Parent.Parent.Text) &&
                (part.Year.ToString() == nodClicked.Parent.Parent.Parent.Text))
            {
                ListViewItem lviAutoPart =
			new ListViewItem(part.PartNumber.ToString());

                lviAutoPart.SubItems.Add(part.PartName);
                lviAutoPart.SubItems.Add(part.UnitPrice.ToString("F"));
                lvwAutoParts.Items.Add(lviAutoPart);
            }
        }
    }
    catch (NullReferenceException)
    {
    }
}
- Return to the Central form and double-click the Close button
- Implement the event as follows:
private void btnClose_Click(object sender, EventArgs e)
{
    Close();
}
- Execute the application
- Click the New Auto Part button and use
the Part Editor to
create a
few parts (let the computer generate the part numbers)
- Close the Part Editor
- Create a few customer part orders and save them:


- Close the forms and return to your programming environment
- Execute the application again and open a previously saved order
- Close the forms and return to your programming environment
|
|