If you want to add a certain control many times, before selecting it on the Toolbox, press and hold Ctrl. Then click it in the Toolbox. This permanently selects the control. Every time you click the form, the control would be added. Once you have added the desired number of this control, on the Toolbox, click the Pointer button to dismiss the control.
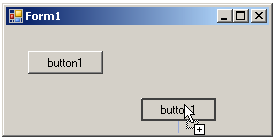
We mentioned earlier how you could add a control many times. An alternative is to copy a control. To do this, on the form:
You can use these two techniques to copy a group of controls.
The objects used in a Windows application are defined in various assemblies. To add one of these controls to your application, you must first know the name of its class. With this information, you can declare a variable of its class. For example, a command button is an object of type Button that is based on the Button class. The Button class is defined in the System.Windows.Forms namespace of the System.Windows.Forms.dll assembly. Based on this, to create a button, you can create a variable of type Button. Here is an example: using System;
using System.Windows.Forms;
public class Exercise : Form
{
private Button btnSubmit;
public Exercise()
{
}
public static int Main()
{
Application.Run(new Exercise());
return 0;
}
}
After declaring the variable, you can use the new operator to allocate memory for it: public class Exercise : Form
{
private Button btnSubmit;
public Exercise()
{
btnSubmit = new Button();
}
public static int Main()
{
Application.Run(new Exercise());
return 0;
}
}
This is also referred to as dynamically creating a control. After declaring the variable and allocating memory for it, the control is available but doesn't have a host, which makes it invisible. A control must be positioned on a host like a form. The Form class itself contains a member variable named Controls. This member holds a list of the objects that are placed on the form. To specify that a control you have instantiated must be positioned on a form, the Controls member has a method named Add. Therefore, to make an object part of the form, pass its variable to the Add() method. Here is an example: using System;
using System.Windows.Forms;
public class Exercise : Form
{
private Button btnSubmit;
public Exercise()
{
btnSubmit = new Button();
Controls.Add(btnSubmit);
}
public static int Main()
{
Application.Run(new Exercise());
return 0;
}
}
This makes it possible for the control to appear on the form when the form displays to the user:
These two techniques of visual addition of objects and dynamic creation are the most used to add Windows controls to an application. The Windows controls are also called components.
Because there can be many controls used in a program, instead of using the constructor to initialize them, the Visual Studio standards recommend that you create a method called InitializeComponent to initialize the various objects used in your application. Then simply call that method from the constructor of your form. This would be done as follows: using System;
using System.Windows.Forms;
public class Exercise : Form
{
private Button btnSubmit;
private void InitializeComponent()
{
btnSubmit = new Button();
Controls.Add(btnSubmit);
}
public Exercise()
{
InitializeComponent();
}
public static int Main()
{
Application.Run(new Exercise());
return 0;
}
}
Notice that the control is created in the InitializeComponent() method.
Starting in Microsoft Visual C# 2005, and probably getting close to C++, you can use two files to create and use a form. Each file would hold a partial definition of the class. As done in a header file of a C++ application, the first file in C# would hold the variable or control declarations. While in C++ a header file holds the same name (but different extensions) as its corresponding source file, because C# does not have the concepts of header and source file, in C#, each file must have a different name. Here is a starting file: using System;
using System.Windows.Forms;
public partial class Exercise
{
private Button btnSubmit;
}
Like the source file of a C++ application, the second file that serves a class can then be used to define or implement the methods. Here is an example: using System;
using System.Windows.Forms;
public partial class Exercise : Form
{
private void InitializeComponent()
{
btnSubmit = new Button();
Controls.Add(btnSubmit);
}
public Exercise()
{
InitializeComponent();
}
public static int Main()
{
Application.Run(new Exercise());
return 0;
}
}
In Microsoft Visual C#, the name of the first file of a form starts with the name of the form, followed by a period, followed by Designer, followed by a period, and followed by the cs extension.
As you add and remove components on an application, you need a way to count them to keep track of what components and how many of them your application is using. To assist you with this, the .NET Framework provides a class called Container. This class is defined in the ComponentModel namespace that is itself part of the System namespace. To use a variable of this class in your application, declare a variable of type Container. Because no other part of the application is interested in this variable, you should declare it private. This can be done as follows: using System;
using System.Windows.Forms;
public partial class Exercise
{
private Button btnSubmit;
System.ComponentModel.Container components;
}
After this declaration, the compiler can keep track of the components that are part of the form.
If you are using a .NET Framework control, you must know the name of the class on which the control is based (and each control is based on a particular class). If you have examined the types of classes available but none implements the behavior you need, you can first locate one that is close to the behavior you are looking for, then use it as a base to derive a new class. To derive a class from an existing control, you can use your knowledge of inheritance. Here is an example: public class Numeric : System.Windows.Forms.TextBox
{
}
If you want to perform some early initialization to customize your new control, you can declare a constructor. Here is an example: public class Numeric : System.Windows.Forms.TextBox
{
public Numeric()
{
}
}
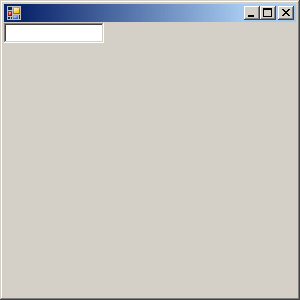
Besides the constructor, in your class, you can add the fields and methods as you see fit. You can also use it to globally set a value for a field of the parent class. Once the control is ready, you can dynamically use it like any other control. Here is an example:
This produce:
When designing an application, you will manipulate the windows controls on a form. After adding a control to a form, before performing any operation on that control, you must first select it. You can also manipulate many controls at the same time. To do that, you will have to select all those controls.
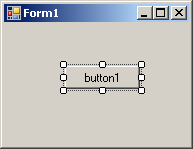
To select one control on the form, you can simply click it. A control that is selected indicates this by displaying 8 small squares, also called handles, around it. Between these handles, the control is surrounded by dotted rectangles. In the following picture, the selected rectangle displays 8 small squares around its shape:  After selecting a control, you can manipulate it or change its characteristics, also called properties.
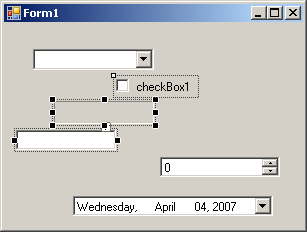
To select more than one control on the form, click the first. Press and hold either Shift or Ctrl. Then click each of the desired controls on the form. If you click a control that should not be selected, click it again. After selecting the group of controls, release either Shift or Ctrl that you were holding. When a group of controls is selected, the last selected control displays 8 square handles around but its handles are white while the others are black. Another technique you can use to select various controls consists of clicking on an unoccupied area on the form, holding the mouse down, drawing a fake rectangle, and releasing the mouse:  Every control touched by the fake rectangle or included in it would be selected: 
If there is a control on your form but you don't need it, you can remove it from the application. To delete a control, first select it and then click or press Delete. You can also right-click a control and click Cut. To remove a group of controls, first select them, then click or press Delete or right-click the selection and click Cut.
|
|||||||||||||||||||||||||||||||||||||||||||||||||||


