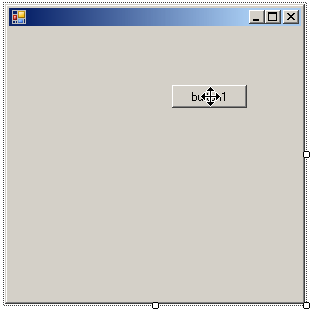
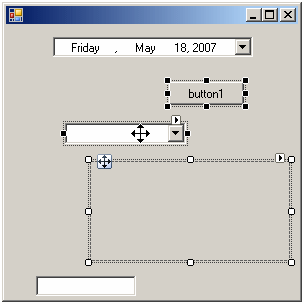
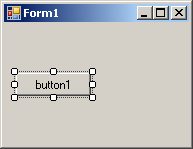
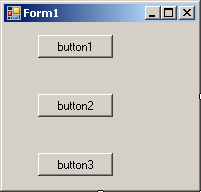
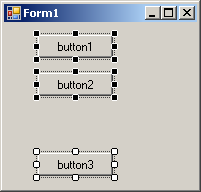
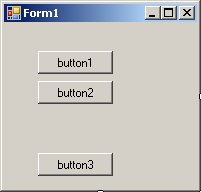
You can also move various controls at the same time. To do this, first select the controls:
After adding a control to a form, you can move the control to change its position, as we will learn in the next few sections. In the next lesson, we will learn how you can change the size of a control. The availability of these two operations is controlled by a Boolean property named Locked. The default value of this property is False. Therefore, to prevent the control from being moved or resized, access its Properties window and set the Locked property to True.
Microsoft Visual Studio 2010 provides various tools to assist you with aligning your controls on a form. You can first add a control to a form and position the control the way you want. Here is an example:
Once you have a control on your form, you can add another control as we saw in the previous lesson. To position the other control, you can use the previous one as a reference. To assist you with this, when moving the new control to position it, a guiding vertical line would show you the alignment to follow with regards to an existing control. Here is an example:
Using this approach, once the control is aligned fine, you can release the mouse. As another technique, after positioning one or a few controls, to align a control with reference to another, press and hold Ctrl. Then press the left, the up, the right, or the down arrow key. When you press one of these keys, the control would move to align itself with the next control in that direction. Once the alignment is to your liking, release Ctrl. There are various other techniques you can use to align the controls. We will review them.
If you have a certain control on the form and want to
position it exactly at equal distance between the left and the right borders
of the form, select the control, then click the Center Horizontally button
on the Layout toolbar
Horizontal alignment affects controls whose distance from the left border of the parent must be the same. To perform this type of alignment, the Layout toolbar provides the necessary buttons. The same actions can be performed using menu items of the Format group on the main menu. The options are as follows:
As seen above, the horizontal-oriented buttons allow moving controls left or right. Another option you have consists of moving controls up or down for better alignment. Once again you must first select the controls. Then on the Layout toolbar or the Format group of the main menu, use the following options:
Another valuable option you have consists of controlling the alignment of objects with regards to the extreme borders of controls of the selected group.
You can also position one or more controls in the middle
of the form. To do that, select the control, then click the Center
Vertically button on the Layout toolbar
Suppose you have a group of horizontally aligned controls as follows:  Obviously the buttons on this form are not enjoying the most professional alignment. For one thing, the distance between the Continue and the Submit buttons is longer than the distance between the Submit and the Deny buttons. The Layout toolbar and the Format group of the main menu allow you to specify a better horizontal alignment of controls with regards to each other. The options available are:
Result: The Forms Designer will calculate the horizontal distances that separate each combination of two controls and find their average. This average is applied to the horizontal distance of each combination of two controls:
Result: The Forms Designer will move each control horizontally, except the base control (the control that has white squares) by one unit away from the base control. This will be done every time you click the Increase Horizontal Spacing button or the Format -> Horizontal Spacing -> Increase menu item:
Result: The Forms Designer will move each control horizontally, except the base control (the control that has darker handles) by one unit towards the base control. This will be done every time you click the Decrease Horizontal Spacing button or the Format -> Horizontal Spacing -> Decrease menu item:
Result: The Forms Designer will move all controls (horizontally), except for the left control, to the left so that the left border of a control touches the right border of the next control:
Suppose you have a group of horizontally positioned controls as follows: 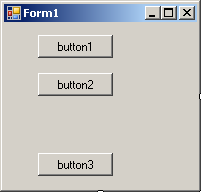 The buttons on this form are not professionally aligned with regards to each other. Once again, the Layout toolbar and the Format group of the main menu allow you to specify a better vertical alignment of controls relative to each other. The options available are:
Result: The Forms Designer will calculate the total vertical distances that separate each combination of two controls and find their average. This average is applied to the vertical distance of each combination of two controls:
Result: The Forms Designer will move each control vertically, except the base control (the control that has darker handles) by one unit away from the base control. This will be done every time you click the Increase Horizontal Spacing button or the Format -> Horizontal Spacing -> Increase menu item:
Result: The Forms Designer will move each control, except the base control (the control that has darker handles) by one unit towards the base control. This will be done every time you click the Decrease Horizontal Spacing button or the Format -> Horizontal Spacing -> Decrease menu item:
Result: The Forms Designer will move all controls vertically, except for the top control, to the top so that the top border of a control touches the bottom border of the next control towards the top:
Most of the controls you will use to create your applications are defined in the .NET Framework and each is based on a particular class. To provide them with basic and common characteristics, all visual Windows controls of the .NET Framework are based on a class called Control which is available in the System.Windows.Forms namespace of the System.Windows.Forms.dll assembly. Based on this, the characteristics common to .NET Framework graphical controls are accessed and managed from one point, then inherited by those controls. As you should know from your learning C#, in order to use a variable in your application, you must declare a variable for it and, when declaring a variable, you must give it a name. This rule also applies to Windows controls you will use in your application. Based on this, and as seen in the previous lesson, you can programmatically create a control by declaring a variable for and give that variable a name.
To create a control, the primary piece of information you must provide is its name. This allows you and the compiler to know what control you are referring to when the program is running. Specifying the name of a control may depend on the technique you decide to use to create the control. After adding a control to a form, it automatically receives a name. In the Properties window, the control’s name displays in the (Name) field.
The default name of a newly added control reflects the name of its control. To differentiate newly added controls of the same class, the Properties window adds an incremental number. For example, if you click the TextBox button on the Toolbox and click the form, the control would be named TextBox1. If you add a second TextBox control, it would be named TextBox2. This causes the default names to be incremental. Since a program usually consists of many controls, it is usually a good idea to rename your controls and give them meaningful and friendlier names. The name should help you identify what the button is used for. To change the name of a control, on the Properties window, click the (Name) field, type the desired name and press Enter. When you add a control to a form, the Forms Designer declares a variable for it. To hold the names of controls on a form, Microsoft Visual Studio 2010 creates and associates an additional file to the form. This file is called Form_Name.Designer.cs and you can open it from the Solution Explorer. When you change the name of a control in the Properties window, the studio also changes that name in the designer file. After creating a control in the Forms Designer, you can change its name programmatically but you should avoid doing that unless you have a good reason to. To change the name of a control, use the Properties window where you would click the (Name) field and type the desired name. If you change the name of a control in the Properties window, the studio automatically makes the necessary changes in the designer file but, if you had used the previous name in your code, you must manually update your code: the studio would not do it for you. If you are creating a control with code, after declaring its variable and allocating memory for it, you can access its Name property and assign it a string as the name. The name must follow the rules of C# names. Here is an example: public class Exercise : Form
{
private Button btnSubmit;
private void InitializeComponent()
{
btnSubmit = new Button();
btnSubmit.Name = "Submit";
this.Controls.Add(btnSubmit);
}
}
To programmatically change the name of a control, access its Name property and assign a string, using the C# rules of variable names. To retrieve the name of a control, access its Name property.
Up to 2002, Microsoft Windows programmers relied on a library called Win32 to create applications for the operating system. The Win32 library was the only resource of classes (in fact structures), functions, etc, that gave functional instructions to the operating system. The other languages such as Pascal, Visual Basic, etc, used directly or indirectly these resources in their own "dialect" to communicate with Microsoft Windows. The Win32 library is still around (it can never disappear unless the operating system changes completely) and serves as the platform for Microsoft Windows programming. To harmonize programming for this platform, Microsoft created the .NET Framework as a substitute library. This is the library used in Microsoft Visual Studio .NET programming environment. Most of the functionality of Win32 has been redefined in the .NET Framework. The operations were implemented in various libraries or assemblies. Some other operations, such as those related to the Registry, were kept in the Microsoft.Win32 namespace. The Win32 library uses a concept called handle to represent each object of an application. A handle in Win32 is simply an unsigned integer used in place of a control. The new .NET Framework also uses handles to internally represent controls but defines a handle as a pointer to an integer. Based on this, every control has a handle. You have a choice of using it or not but it exists. The handle is created by the operating system when the application comes up. This means that you don't need to create it but you can access it to retrieve its value. To access the handle to a control, you can call its Handle property. In the .NET Framework, the Handle property is defined as an IntPtr value. To retrieve the handle of a control, you can access its Handle property.
Some controls are text-based, meaning they are meant to display or sometimes request text from the user. For such controls, this text is referred to as caption while it is simply called text for some other controls. This property is not available for all controls. If a control displays text, then it has a property called Text. After adding such a control to a form, in some cases, its Text field in the Properties window would hold the same text as its name. In some other cases, the Text property would be empty. At design time, to change the text of the control, in its Properties window, click its Text field and type the desired value. For most controls, there are no strict rules to follow for this text. Therefore, it is your responsibility to type the right value. The text provided in a Text field of a text-based control can only be set “as is” at design time. To programmatically specify or change the text of a control, assign a value to its Text property. If you want the text to change while the application is running, you can format it. For example, such a control can display the current time or the name of the user who is logged in. These format attributes cannot be set at design time. To change the text of a text-based control at run time, either assign a simple string or provide a formatted string to the Text property. Here is an example: public class Exercise : Form
{
private Button btnSubmit;
private void InitializeComponent()
{
btnSubmit = new Button();
btnSubmit.Text = "Submit";
this.Controls.Add(btnSubmit);
}
}
In the previous lesson, we saw how you could visually change the size of a control. In reality, many pre-requisites must be met and many options are available. After adding a control to a form, we saw that it would be surrounded by 8 small squares In reality, this is not true for all controls.
Notice that some controls, such as the label, display one square handle. Some other controls, such as the text box, display 2 square handles. And then some controls display 8 square handles:
Many controls (not all), such as the Label
The ability of a control to enlarge itself to accommodate its long is controlled by a Boolean property named AutoSize. For some controls, the default value of this property is False. For some other controls, this property is defaulted to True. Therefore, use this property to control whether a control on the form can be resized or not. To programmatically specify the auto-sizing option of a control, access its AutoSize property and assign it the desired Boolean value. Here is an example: public class Exercise : Form
{
private Button btnSubmit;
private void InitializeComponent()
{
btnSubmit = new Button();
btnSubmit.Text = "Submit";
btnSubmit.AutoSize = true;
Controls.Add(btnSubmit);
}
}
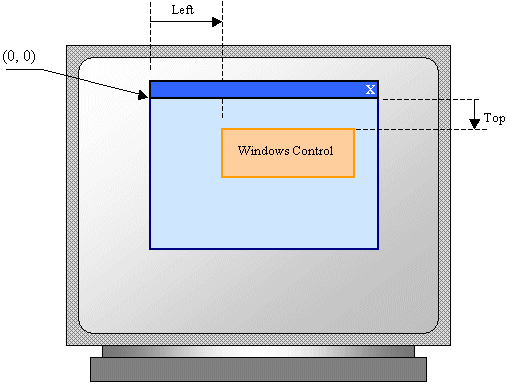
The controls added to a parent window are confined to the area of the body offered by that window. After adding it to a window, the control is positioned in the body of the parent using a Cartesian coordinate system whose origin is located on the top-left corner of the parent window. If the parent is a form, the origin is located just under the title bar to the left. The horizontal measurements move from the origin to the right. The vertical measurements move from the origin to the bottom. In the previous lesson, we saw how to position a control on a form. The position of a control on a form (or a container) is referred to as its location. The location is defined by two values:
The location of a Windows control can be illustrated as follows:
The location of a control is programmatically specified using a structure called Point. To identify the concept of a point, the System.Drawing namespace provides the Point structure. The Point structure is defined in the System.Drawing.dll. Therefore, if you want to use a Point object in your application, include that assembly in your application. After adding the reference, you can access the Point object. One of the properties of the Point structure is X, which represents the horizontal distance of the point from the top-left corner of the object that owns the point. Another property, Y, represents the vertical measurement of the point with regards to the top-left corner of the object that owns the point. Based on this, a Point object can be represented on the Windows coordinate system as follows: 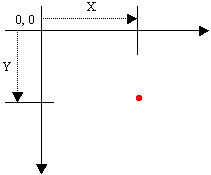 To visually specify the location of a control, access its Properties window, and use the Location field:
You can programmatically specify the location of a control. To support this, each control has a property named Location. To assist you with specifying the location of a control, the Point class provides a constructor as follows: public Point(int x, int y) This constructor takes a left and a top arguments. Here is an example of programmatically setting the location of a control: using System;
using System.Drawing;
using System.Windows.Forms;
public class Exercise : Form
{
private Button btnSubmit;
private void InitializeComponent()
{
btnSubmit = new Button();
btnSubmit.Text = "Submit";
btnSubmit.Location = new Point(100, 40);
this.Controls.Add(btnSubmit);
}
public Exercise()
{
InitializeComponent();
}
}
public class Program
{
static int Main()
{
Application.Run(new Exercise());
return 0;
}
}
You can also use an existing Point object and assign it to the Location property of the control. Here is an example: public class Exercise : Form
{
private Button btnSubmit;
private void InitializeComponent()
{
btnSubmit = new Button();
btnSubmit.Text = "Submit";
Point pt = new Point();
pt.X = 100;
pt.Y = 40;
btnSubmit.Location = pt;
this.Controls.Add(btnSubmit);
}
}
You can also retrieve the location of a control and store it in a Point object. To do this, you can simply assign the Location property of a control to a Point object. public class Exercise : Form
{
private Button btnSubmit;
private void InitializeComponent()
{
btnSubmit = new Button();
btnSubmit.Text = "Submit";
btnSubmit.Location = new Point(100, 40);
Point pt = btnSubmit.Location;
Controls.Add(btnSubmit);
}
}
When studying control alignment, we saw that you could use the location of one control as a reference to position another control. You can also do this programmatically by retrieving the location of one control and changing either its X or its Y values to position the new control. Here is an example: using System;
using System.Drawing;
using System.Windows.Forms;
public class Exercise : Form
{
private Button btnSubmit;
private TextBox txtEmployeeName;
private void InitializeComponent()
{
btnSubmit = new Button();
btnSubmit.Text = "Submit";
btnSubmit.Location = new Point(100, 40);
txtEmployeeName = new TextBox();
Point pt = btnSubmit.Location;
txtEmployeeName.Location = new Point(pt.X, pt.Y + 32);
Controls.Add(btnSubmit);
Controls.Add(txtEmployeeName);
}
public Exercise()
{
InitializeComponent();
}
}
public class Program
{
static int Main()
{
Application.Run(new Exercise());
return 0;
}
}
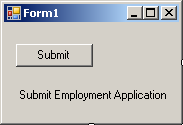
This would produce:
The Point structure provides other constructors you can use for the location of a control.
|
||||||||||||||||||||||||||||||||||||||||||||||||||||||||||||||||||||||||||||||||||||||||||||||||||||||||||||||||||||||||||||||||||||||||||||||||||||||||||||||||||||||||||||||||||||||||||||||||||||||||||||||||||||||||||||||||||||||||||||||||||||||||||||||||

