Home

GDI+ Brushes: Texture Brushes


Introduction

The hatch brushes we have used are based on already designed patterns to fill a shape. In some cases, you may want to create or design your own pattern and use it to fill an area. To do this, you must perform two main steps. First, you must design a picture and save it as a file. Then you must create an object referred to as a texture brush and pass the picture to it.

A texture brush is an object that holds a picture and uses it to regularly fill the interior of a closed shape. To initialize it, you can use an existing picture designed by someone else or you can design your own picture using any normal graphics application, including Microsoft Paint that is automatically installed with Microsoft Window. You should have the picture as a file with a normal graphics file extension, which could be .bmp. Here is an example of a designed bitmap saved as Papers.bmp:

Bitmap

Equipped with the picture, you can then use the TextureBrush class that provides various constructors.

Creating a Texture Brush

The simplest constructor of this class takes as argument an Image object. The syntax of this constructor is:

public TextureBrush(Image bitmap);

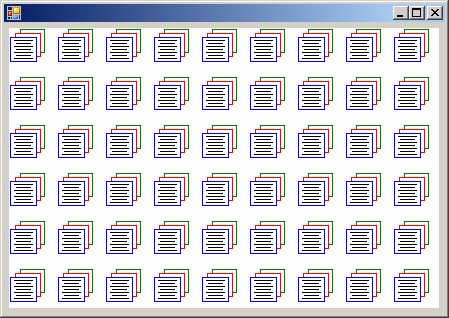
This constructor expects a bitmap as argument. After initializing the brush, you can use it to fill the interior of a closed shape. For example, you can call a Fill... method to paint its shape. Here is an example:

using System;
using System.Drawing;
using System.Windows.Forms;

public class Exercise : Form
{
    public Exercise()
    {
        InitializeComponent();
    }

    void InitializeComponent()
    {
        Paint += new PaintEventHandler(Exercise_Paint);
    }

    private void Exercise_Paint(object sender, PaintEventArgs e)
    {
        Bitmap bmpPapers = new Bitmap("Papers.bmp");
        TextureBrush brushPapers = new TextureBrush(bmpPapers);
        e.Graphics.FillRectangle(brushPapers, 5, 5, 430, 280);
    }
}

public class Program
{
    public static int Main()
    {
        Application.Run(new Exercise());

        return 0;
    }
}

Texture Brush

If you use this constructor, the compiler would itself find out the location and dimensions of the picture in the area where it was designed. Although the location must be at (0, 0), the width and the height must be lower or equal to the intended dimensions of the bitmap. For example, if you have a picture that is 48x48 pixels, the width you can use from this picture must be <= 48 and the height must be <= 48. This allows you to use only a portion of the picture if you want. To use a portion of the picture, you can use the following constructor:

public TextureBrush(Image bitmap, Rectangle destination);

The second argument to this constructor is used to specify the width and height of the picture. If you prefer to use a rectangle whose arguments are decimal numbers, you can use the following constructor:

public TextureBrush(Image bitmap, RectangleF destination);

Here is an example:

private void Exercise_Paint(object sender, PaintEventArgs e)
{
        Bitmap bmpPapers = new Bitmap("Papers.bmp");
        TextureBrush brushPapers = new TextureBrush(bmpPapers,
                                   new Rectangle(0, 0, 42, 42));
        e.Graphics.FillRectangle(brushPapers, 5, 5, 416, 290);
}

Texture Brush

Wrapping a Texture Brush

The constructors we have used so far allow you to draw the bitmap in each allocated rectangle in a tiled fashion. To make it more fun, the TextureBrush class is equipped with a factor referred to as wrap mode. This factor specifies how the tiling must be performed. To apply it, you can use one of the following constructors:

public TextureBrush(Image bitmap,
		 WrapMode wrapMode);
public TextureBrush(Image bitmap,
		 WrapMode wrapMode,
		 Rectangle destination);
public TextureBrush(Image bitmap,
		 WrapMode wrapMode,
		 RectangleF destination);

The bitmap and the destination arguments are used in the same way we have done so far. The wrapMode argument is a member of the WrapMode enumerator. The WrapMode enumerator is defined in the System.Drawing.Drawing2D namespace. It has the following members:

Clamp: Draws one picture in the allocated rectangle:

using System;
using System.Drawing;
using System.Windows.Forms;
using System.Drawing.Drawing2D;

public class Exercise : Form
{
    public Exercise()
    {
        InitializeComponent();
    }

    void InitializeComponent()
    {
        Paint += new PaintEventHandler(Exercise_Paint);
    }

    private void Exercise_Paint(object sender, PaintEventArgs e)
    {
        Bitmap bmpPapers = new Bitmap("Papers.bmp");
        TextureBrush brushPapers = new TextureBrush(bmpPapers,
					    WrapMode.Clamp);
        e.Graphics.FillRectangle(brushPapers, 5, 5, 438, 290);
    }
}

public class Program
{
    public static int Main()
    {
        Application.Run(new Exercise());

        return 0;
    }
}

Texture Brush

Tile: Draws the picture continuous in a tiled fashion:

private void Exercise_Paint(object sender, PaintEventArgs e)
{
        Bitmap bmpPapers = new Bitmap("Papers.bmp");
        TextureBrush brushPapers = new TextureBrush(bmpPapers,
                                                                                    WrapMode.Tile,
                        			new Rectangle(0, 0, 42, 42));
        e.Graphics.FillRectangle(brushPapers, 5, 5, 414, 290);
}

Texture Brush

TileFlipX: Draws the picture, draws it again on its right side but flipped horizontally, and then repeats this technique continuous in a tiled fashion and in the allocated rectangle:

private void Exercise_Paint(object sender, PaintEventArgs e)
{
        Bitmap bmpPapers = new Bitmap("Papers.bmp");
        TextureBrush brushPapers = new TextureBrush(bmpPapers,
                                                                                    WrapMode.TileFlipX);
        e.Graphics.FillRectangle(brushPapers, 5, 5, 430, 280);
}

Tile Flip X

TileFlipY: Draws the picture, draws it again under it but flipped vertically, and then repeats this technique continuous in a tiled fashion and in the allocated rectangle:

private void Exercise_Paint(object sender, PaintEventArgs e)
{
        Bitmap bmpPapers = new Bitmap("Papers.bmp");
        TextureBrush brushPapers = new TextureBrush(bmpPapers,
                                                                                     WrapMode.TileFlipX,
                                                      new Rectangle(0, 0, 42, 42));
        e.Graphics.FillRectangle(brushPapers, 5, 5, 412, 290);
}

Tile Flip X

TileFlipXY: Draws the picture, draws it again on its right side but flipped horizontally, then draws both the original and the right copy under each other but flipped vertically. These four pictures are redrawn in a tiled fashion and in the allocated rectangle:

private void Exercise_Paint(object sender, PaintEventArgs e)
{
        Bitmap bmpPapers = new Bitmap("Papers.bmp");
        TextureBrush brushPapers = new TextureBrush(bmpPapers,
                                                                                    WrapMode.TileFlipXY,
                                                      new Rectangle(0, 0, 42, 42));
        e.Graphics.FillRectangle(brushPapers, 5, 5, 412, 244);
}

Texture Brush

ApplicationApplication: Using Texture Brushes

  1. Start a new Windows Forms Application named SchoolEnrolment2
  2. Design the form as follows:
     
    School Enrolment
    Control Name Text
    Label Label   Enrolment / Program ___________________________
    Label Label   Graduates
    Label Label   Undergraduates
    Label Label   Certificates
    TextBox TextBox txtGraduates 0
    TextBox TextBox txtUndergraduates 0
    TextBox TextBox txtCertificates 0
    Button Button btnCreateChart Create Chart
    PictureBox PictureBox pbxChart  
    Label Label   ____Legend____
    Label Label lblGraduates Graduates
    Label Label lblUndergraduates Undergraduates
    Label Label lblCertificates Certificates
    Button Button btnClose Close
  3. To design a bitmap, on the main menu, click Project -> Add New Item...
  4. In the middle list, click Bitmap File
  5. Change the Name to graduates and click Add
  6. To change the file location of the bitmap, on the main menu, click File -> Save graduates.bmp As...
  7. Locate and display the SchoolEnrolment2\SchoolEnrolment2\bin\debug folder
  8. Click Save
  9. In the Solution Explorer, double-click graduates.bmp to make sure it is displayed
  10. In the Properties Window, click Width and type 16
  11. Click Height and type 16
  12. Design the bitmap as follows:
     
    Graduates
  13. In the Solution Explorer, right-click the Debug folder -> Add -> New Item...
  14. In the middle list, make sure Bitmap File is selected.
    Set the Name to undergraduates and click Add
  15. In the Properties window, click Width and type 16
  16. Click Height and type 16
  17. Design the bitmap as follows:
     
    Undergraduates
  18. In the Solution Explorer, right-click the Debug folder -> Add -> New Item...
  19. In the middle list, make sure Bitmap File is selected.
    Set the Name to certificates and click Add
  20. In the Properties window, click Width and type 16
  21. Click Height and type 16
  22. Design the bitmap as follows:
     
    Certificates
  23. Display the form
  24. Right-click the form and click View Code
  25. Declare three variables as follows:
    using System;
    using System.Collections.Generic;
    using System.ComponentModel;
    using System.Data;
    using System.Drawing;
    using System.Linq;
    using System.Text;
    using System.Windows.Forms;
    
    namespace SchoolEnrolment2
    {
        public partial class Form1 : Form
        {
            float Graduates;
            float Undergraduates;
            float Certificates;
    
            public Form1()
            {
                InitializeComponent();
            }
        }
    }
  26. Return to the form and click an unoccupied area of its body. In the Properties window, click the Events button Events
  27. Double-click the Paint field and implement the event as follows:
    private void Form1_Paint(object sender, PaintEventArgs e)
    {
                Bitmap bmpGraduates = new Bitmap("graduates.bmp");
                TextureBrush brushGraduates = new TextureBrush(bmpGraduates);
                Bitmap bmpUndergraduates = new Bitmap("undergraduates.bmp");
                TextureBrush brushUndergraduates = new TextureBrush(bmpUndergraduates);
                Bitmap bmpCertificates = new Bitmap("certificates.bmp");
                TextureBrush brushCertificates = new TextureBrush(bmpCertificates);
    
                pbxChart.CreateGraphics().FillPie(brushGraduates,
                                          0.0F,
                                  0.0F,
                                  260.0F,
                                  200.0F, 0.0F, Graduates);
    
                pbxChart.CreateGraphics().FillPie(brushUndergraduates,
                                          0.0F,
                                  0.0F,
                                  260.0F,
                            200.0F, Graduates, Undergraduates);
    
                pbxChart.CreateGraphics().FillPie(brushCertificates,
                                          0.0F,
                                  0.0F,
                                  260.0F,
                              200.0F, Graduates + Undergraduates,
                                  Certificates);
    
                e.Graphics.FillRectangle(brushGraduates,
                                      new Rectangle(lblGraduates.Left,
                                    lblGraduates.Top + 18,
                            btnClose.Width,
                            20));
    
                e.Graphics.DrawRectangle(new Pen(Color.Black),
                                      new Rectangle(lblGraduates.Left - 1,
                                    lblGraduates.Top + 18,
                            btnClose.Width,
                            20));
    
                e.Graphics.FillRectangle(brushUndergraduates,
                                      new Rectangle(btnClose.Left,
                                    lblUndergraduates.Top + 18,
                            btnClose.Width,
                            20));
    
                e.Graphics.DrawRectangle(new Pen(Color.Black),
                                      new Rectangle(btnClose.Left - 1,
                                    lblUndergraduates.Top + 18,
                            btnClose.Width + 1,
                            20));
    
                e.Graphics.FillRectangle(brushCertificates,
                                      new Rectangle(btnClose.Left,
                                    lblCertificates.Top + 18,
                            btnClose.Width,
                                20));
    
                e.Graphics.DrawRectangle(new Pen(Color.Black),
                                      new Rectangle(btnClose.Left - 1,
                                    lblCertificates.Top + 18,
                            btnClose.Width + 1,
                                20));
    
    
                pbxChart.CreateGraphics().DrawPie(new Pen(Color.Blue),
                                          0.0F,
                                  0.0F,
                                  260.0F,
                                  200.0F, 0.0F, Graduates);
                pbxChart.CreateGraphics().DrawPie(new Pen(Color.Red),
                                          0.0F,
                                  0.0F,
                                  260.0F,
                            200.0F, Graduates, Undergraduates);
                pbxChart.CreateGraphics().DrawPie(new Pen(Color.Green),
                                          0.0F,
                                  0.0F,
                                  260.0F,
                              200.0F, Graduates + Undergraduates,
                                  Certificates);
    
                pbxChart.CreateGraphics().DrawEllipse(new Pen(Color.Red, 2),
                                          new Rectangle(0,
                                            0,
                                        260,
                                        200));
    }
  28. Return to the form and click the picture box
  29. In the Events section of the Properties window, double-click Paint and implement its event as follows:
    private void pbxChart_Paint(object sender, PaintEventArgs e)
    {
                Invalidate();
    }
  30. Return to the form and double-click the Create Chart button
  31. Implement the event as follows:
    private void btnCreateChart_Click(object sender, EventArgs e)
    {
                float grad = 0.00F,
                      under = 0.00F,
                      cert = 0.00F,
                      total = 0.00F;
                float percentGraduates = 0.00F,
                      percentUndergraduates = 0.00F,
                      percentCertificates = 0.00F;
    
                try
                {
                    grad = float.Parse(txtGraduates.Text);
                }
                catch (FormatException)
                {
                    MessageBox.Show("Invalid Value");
                }
                try
                {
                    under = float.Parse(txtUndergraduates.Text);
                }
                catch (FormatException)
                {
                    MessageBox.Show("Invalid Value");
                }
    
                try
                {
                    cert = float.Parse(txtCertificates.Text);
                }
                catch (FormatException)
                {
                    MessageBox.Show("Invalid Value");
                }
    
                total = grad + under + cert;
                percentGraduates = (grad / total) * 100;
                percentUndergraduates = (under / total) * 100;
                percentCertificates = (cert / total) * 100;
    
                Graduates = (360 * percentGraduates) / 100;
                Undergraduates = (360 * percentUndergraduates) / 100;
                Certificates = (360 * percentCertificates) / 100;
    
                pbxChart.Invalidate();
    }
  32. Return to the form and double-click the Close button
  33. Implement its event as follows:
    private void btnClose_Click(object sender, EventArgs e)
    {
                Close();
    }
  34. Execute the application and test the form
     
     School Enrolment
  35. After using it, close the form
 

Home Copyright © 2010-2016, FunctionX