The Code Editor is a window specially designed for code writing.
To display the code editor, in the Solution Explorer,
you can click the View Code button

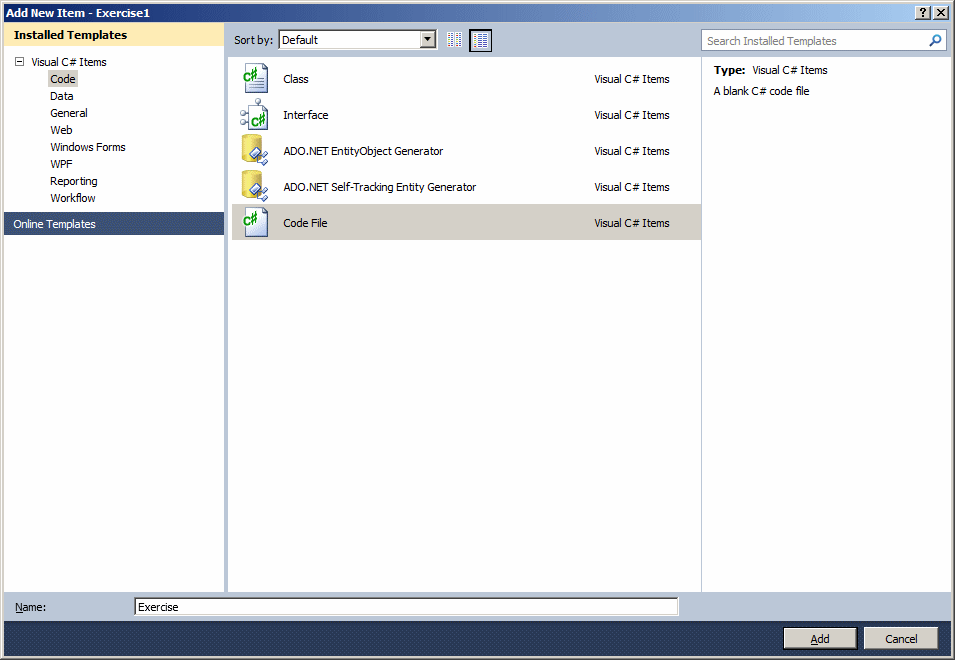
The top section of the Code Editor displays headers. Each header represents a file. To add a new file to the project:
Once in the Add New Item dialog box, in the middle list, click the type of file you want to create, type a name in the Name text box, and press Enter. After the file has been created, it is represented by a labeled header in the top section of the Code Editor. In the same way, you can add as many files as you judge them necessary. To access a file:
By default, the header section displays the files in the order they were created or added to the project. If you don't like that arrangement, click and drag a header either left or right beyond the next header.
The top-left section of the Code Editor displays a combo box. The Types combo box holds a list of the types as classes and structures that were created in the current file. You can display the list if you click the arrow of the combo box:
Each item of the Types combo box displays the name of its type associated with its parent as implemented in the code. The parent can be a class or a namespace. If you select a class in the list, the Code Editor jumps to that class and positions the caret at the beginning of the class' definition.
The top-right section of the Code Editor displays a combo box named Members. The Members combo box holds a list of the members of classes. The content of the Members combo box depends on the item that is currently selected in the Types combo box. This means that, before accessing the members of a particular class, you must first select that class in the Types combo box. Then, when you click the arrow of the Members combo box, the members of only that class display:  If you select an item from the Members combo box, the Code Editor jumps to that members and positions the cursor to the left of the member.
Code is written in a wide area with a white background. In that area, you use the keyboard to insert code with common readable characters. The Code Editor uses some colors to differentiate categories of words or lines of text. The colors used are highly customizable. To change the colors, on the main menu, you can click Tools -> Options... In the Options dialog box, in the Environment section, click Fonts and Colors. To set the color of a category, in the Display Items section, click the category. In the Item Foreground combo box, select the desired color. If you want the words of the category to have a colored background, click the arrow of the Item Background combo box and select one: In both cases, the combo boxes display a fixed list of colors. If you want more colors, you can click a Custom button to display the Color dialog box that allows you to "create" a color. When code of a file is long, it can be tiresome to scroll up and down. The Microsoft Visual Studio's Code Editor allows you to create sections that allow the code to behave like the tree arrangement of the left pane of Windows Explorer. This means that you can expand or collapse section of code. The Code Editor supports this feature automatically by adding + buttons at the beginning of the lines of sections that can be expanded or collapsed. This is the case for namespaces, classes, methods, interfaces, properties, etc. The end of an expandable section displays a - button to the beginning of the line. Besides the default sections that the Code Editor is intuitively aware of, you can create your own region. A region must have a beginning and an end. To specify the start of a section, type #region. You can optionally add a label to the right of #region to name the region. After creating a region with #region, the Code Editor adds a + button to its left. To expand a region, you can click its + button. This changes it into a - button. To collapse the region, click the - button. If you don't specify the end of the region, the code from #region to the end of the file would be considered as belonging to the to the region. Therefore, you should specify the end of the region you created. To mark the end of the region, in the desired line, type #endregion. Here are examples of regions: using System;
namespace GeometricFormulas
{
interface IGeometry
{
double Length { get; set; }
double Height { get; set; }
}
class Square
{
#region Formulas to Calculate a Square's Perimeter and Area
public double Perimeter(double side)
{
return side * 4;
}
public double Area(double side)
{
return side * side;
}
#endregion
}
class Trapezoid
{
private double _base1;
}
class Rectangle : IGeometry
{
private double len;
private double hgt;
public Rectangle()
{
this.len = 0.00;
this.hgt = 0.00;
}
public Rectangle(double L, double H)
{
this.len = L;
this.hgt = H;
}
#region IGeometry Members
public double Length
{
get
{
// TODO: Add Rectangle.Length getter implementation
return len;
}
set
{
// TODO: Add Rectangle.Length setter implementation
len = value;
}
}
public double Height
{
get
{
// TODO: Add Rectangle.Height getter implementation
return hgt;
}
set
{
// TODO: Add Rectangle.Height setter implementation
hgt = value;
}
}
#endregion
public double Perimeter
{
get { return (len + hgt) * 2; }
}
public double Area
{
get { return len * hgt; }
}
}
}
The Code Editor can help you specify the beginning and end of a region.
Microsoft Visual Studio or Microsoft Visual C# 2010 Express is a programming environment that allows you to create various types of applications. In our lessons, we will create graphical applications, also called Windows applications or Windows Forms applications. A Windows application primarily appears as a rectangular object that occupies a portion of the screen. This type of object is under the management of the operating system: Microsoft Windows. Based on the functionality of Microsoft Windows, for an application to become useful, it must be opened. An application must have an entry point. On a C/C++ application, this entry point is a function called main. On a Win32 application, this entry point is a function called WinMain. The C# language defines this entry point with a class that contains the Main function, as you should know already from your learning C# (some languages like Pascal, F#, or JScript .NET don't explicitly designate an entry point but they make it clear and the operating system knows where it is). The Main() function of C# can be defined as void or as returning an integer value.
Although you can directly create a graphical application when starting your project, if you had created a console application, you can still easily transform it into a Windows Forms application, on the main menu, you can click Project -> ProjectName Properties... and then change the value of the Output Type combo box to Windows Application. Before or after setting the Output Type to Windows Application, you can create a form. If you are working from a text editor, to compile at the Command Prompt, you use the csc.exe compiler. The csc compiler is free from Microsoft. You likely have it already on your computer. If not, download the .NET Framework from the Microsoft web site (there is no way you can follow these lessons if the .NET Framework is not yet installed on your computer). Find out where your .NET Framework folder is because that folder contains the csc compiler. By default, its path is C:\Windows\Microsoft.NET\Framework\v4.0.21006 You should add the path of the csc.exe to the Environment Variables's Path. To start, select the path in the top combo box of the file utility and copy it (to the clipboard). Open the Control Panel. From Control Panel, click System and Security:
In the next window, click System:
In the next window, click Change Settings. In the System Properties dialog box, click the Advanced property page, then click Environment Variables:
Under System Variables, click Path. Click Edit:
First check whether the path had been added already (there is no reason to add it again). If the doesn't exist yet, press the right arrow key, type the semi-colon, then paste the path. Click OK, OK, and OK.
Windows Forms is a technique of creating computer applications based on the common language runtime (CLR). It offers a series of objects called Windows Controls or simply, controls. These controls are already created in the .NET Framework through various classes. Application programming consists of taking advantage of these controls and customizing them for a particular application. To exploit these controls and other features of the .NET Framework, there are various types of applications you can create, including graphical applications (Windows Forms Application), web-based applications (ASP.NET Web Application), console applications (Console Application), etc. The objects used in a Windows application are stored in libraries also called assemblies. As normal libraries, these assemblies have the extension .dll (which stands for dynamic link library). In order to use one of these objects, you must know the name of the assembly in which it is stored. If you are compiling your application from the Command Prompt, you must reference the DLLs. If you are working from Microsoft Visual Studio, you must add a reference to the assembly (or assemblies) to your project. To add a reference to an assembly in Microsoft Visual Studio, on the main menu, you can click Project -> Add Reference... You can also right-click the automatically created References node in Solution Explorer and click Add Reference... Any of these actions would display the Add Reference dialog box from where you can click the reference, click Select and click OK. If you don't see the reference you are looking for, you can locate it on another drive or directory using the Browse button. There are two broad categories of objects used in a Windows Forms application: the forms and the controls. A form is the most fundamental object used in an application. It is a rectangular object that uses part of the computer desktop to represent an application. A form is based on the Form class that is defined in the System.Windows.Forms namespace created in the System.Windows.Forms.dll assembly. Every GUI application you will create starts with a form. There are various techniques you can use to get a form in your application:
The form is the object that gives presence to an application. Once you have created the (primary) form of your application, you can get it ready to display on the screen. This is taken care of by the Application class equipped to start an application, process its messages or other related issues, and stop the application. The Application class provides the overloaded Run() method that can be used to start a program. One of the versions of this method takes a form as argument. This form must be the first, main or primary form of your application; it will be the first to display when the application comes up. Here is an example of calling the Application.Run() method: using System;
using System.Windows.Forms;
public class Exercise : Form
{
public static int Main()
{
Application.Run(new Exercise());
return 0;
}
}
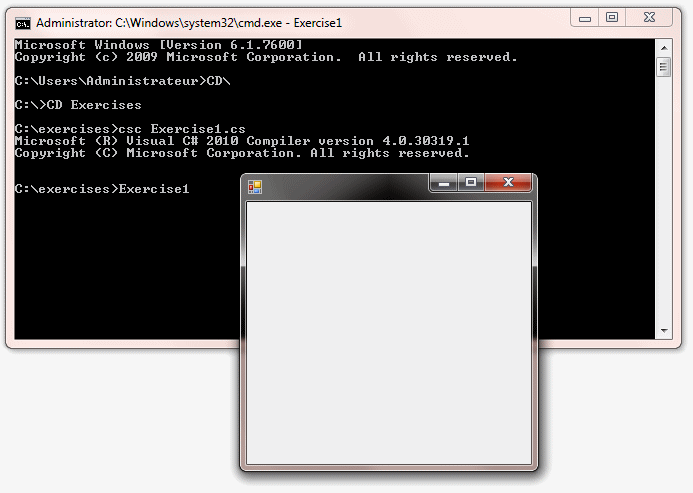
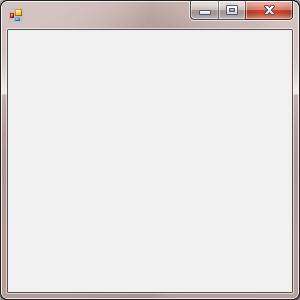
Before building the project at the Command Prompt, switch to the folder the contains your file. To compile, type csc followed by the name of the file and its extension. To execute, type the name of the file that contains the Main() function and press Enter: Normally, to compile, you would type csc, followed by either /r: or /reference:, followed by the names of the DLLs that contain the objects you are using in your code, followed by the name(s) of the file(s) that contain(s) your code and its (their) extension(s). An example would be: csc /reference:System.Windows.Forms.dll exercise.cs To indicate that you are creating a graphical application, after the list of DLLs but before the name(s) of the file(s), type either /t:winexe or /target:winexe, Here is an example: csc /reference:System.Windows.Forms.dll /target:winexe exercise.cs
Remember that, after compiling, to execute, type the name of the file that contains the Main() function and press Enter.
|
|||||||||||||||||||||||||||||||||||||||||||||||||||||||||


