|
The CEditView class is used to create a simple
text editor type of application, like Notepad. Its class is equipped all
the primary functionality you would need from it. This is because all the
necessary behavior is already implemented in the class, with just a few
minor exceptions. |
|
If you use AppWizard to create an MFC application
based on CEditView, the interface presented is mostly the same
shared by other CView derived applications. Therefore, if you want, you
add the other features once you finish with the wizard. Fortunately, to
implement some of these features, you don't need to write a single line of
code. For some others, because the features may be based on your own
needs, you may have to write code accordingly. |
|
Practical Learning: Starting the Exercise |
|
- Start Microsoft Visual C++
- To create a new project, display the New dialog box
- In the Projects property page, select MFC AppWizard (exe)
- Set the name of the project to Notes and click OK
- In MFC AppWizard - Step 1, select Single Document and click Next
five times
- In MFC AppWizard - Step 6 of 6, in the Base Class combo box, select CEditView
and click Finish then click OK
- From the ResourceView tab of the Workspace, expand the Notes
Resources and expand the Menu node
- Double-click IDR_MAINFRAME
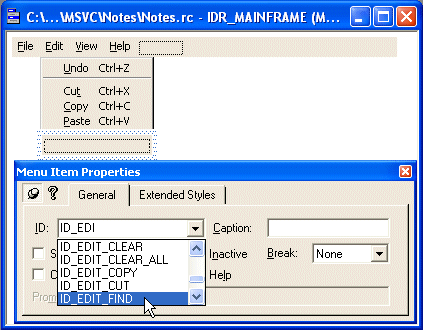
- Right-click the first empty field under the Edit menu and click
Properties
- Make it a Separator
- Click the first empty field under the new separator
- In the ID combo box, select ID_EDIT_FIND

- Change its Caption to &Find...\tCtrl+F
- In the same way, set the menu as follows:
| ID |
Caption |
Separator |
| |
Undo |
|
| |
Cut |
|
| |
Paste |
|
| |
|
Separator |
| ID_EDIT_FIND |
&Find...\tCtrl+F |
|
| ID_EDIT_REPLACE |
&Replace...\tCtrl+H |
|
| |
|
Separator |
| ID_EDIT_SELECTALL |
Select &All\tCtrl+A |
|
| ID_EDIT_CLEAR |
&Delete\tDel |
|
- In the ResourceView tab of the Workspace, expand the Accelerator tab
and double-click IDR_MAINFRAME
- Double-click the first empty field in the list. In the Accel
Properties window, in the ID combo box, select ID_EDIT_FIND and press
Tab. In the Key combo box, type F and press Enter
- In the same way, add an accelerator for the newly added menu item.
For the ID_EDIT_CLEAR, in the Key combo box, select VK_DELETE and
remove the check mark on the Ctrl check box before pressing Enter
- Test the application. Notice that, without having written code, you
can use the Find or the Replace dialog boxes
- To change the initial font of the editor, press Ctrl + W
- In the MFC ClassWizard dialog box and in the Message Maps property
page, select CNotesView in the Class Name combo box
- In the Messages combo box, double-click OnInitialUpdate and click
Edit Code
- Implement the event as follows:
void CNotesView::OnInitialUpdate()
{
	CEditView::OnInitialUpdate();

	// TODO: Add your specialized code here and/or call the base class
	CEdit &curEditor = GetEditCtrl();
	CFont *SimpleFont = new CFont;

	SimpleFont->CreatePointFont(120, "Times New Roman");
	curEditor.SetFont(SimpleFont);
}
|
- Display the IDR_MAINFRAME menu again
- To allow the user to select a different font, click the empty box on
the right side of Help
- Type F&ormat and press Enter
- In the first box under Format, click and type &Font...
- Change its Prompt to Select a different font\nFont
- Move the Format menu item to position it between View and Help
- Press Ctrl + W
- In the Class Name combo box, select CNotesView. In the Object IDs
list, select ID_FORMAT_FONT
- In the Messages list, double-click COMMAND
- Accept the suggested name of the function and click OK then click
Edit Code
- Implement the event as follows:
void CNotesView::OnFormatFont()
{
    // TODO: Add your command handler code here
    CEdit &curEditor = GetEditCtrl();
    CFont *SimpleFont = new CFont;
    CFontDialog dlgFont;

    dlgFont.m_cf.Flags &= ~CF_EFFECTS;

    if( dlgFont.DoModal() )
    {
	SimpleFont->CreatePointFont(dlgFont.GetSize(), dlgFont.GetFaceName());
	curEditor.SetFont(SimpleFont);
    }
}
|
- Test the application
- After using it, close it and return to your programming environment.
|
|
|

