Introduction to Class Abstraction

Introduction to Class Abstraction
Foundations of Abstract Classes
Introduction
A class is said to be abstract if its primary role is to serve as parent for other classes. This means that another class must be derived from the abstract class. After that, the abstract class can be used somehow in an application.
![]() Practical Learning: Introducing Class Abstraction
Practical Learning: Introducing Class Abstraction
namespace GasUtilityCompany2
{
    public class BillPreparation
    {
        public int InvoiceNumber { get; set; }
        public double CounterReadingStart { get; set; }
        public double CounterReadingEnd { get; set; }

        public double CCFTotal
        {
            get
            {
                return CounterReadingEnd - CounterReadingStart;
            }
        }

        public double TotalTherms
        {
            get
            {
                return CCFTotal * 1.0367;
            }
        }

        public double DistributionAdjustment
        {
            get
            {
                return TotalTherms * 0.13086;
            }
        }

        public double CalculateTransportationCharges()
        {
            if (TotalTherms <= 5000)
                return TotalTherms * 0.016289;
            else
                return TotalTherms * 0.009577;
        }

        public double CalculateDeliveryTotal()
        {
            double first50Therms = 0, over50Therms = 0;

            if (TotalTherms < 5000)
            {
                first50Therms = TotalTherms * 0.05269;
                over50Therms = 0;
            }
            else
            {
                first50Therms = 5000 * 0.5269;
                over50Therms = (TotalTherms - 5000) * 0.04995;
            }

            return CalculateTransportationCharges() + DistributionAdjustment + first50Therms + over50Therms;
        }

        public double EnvironmentalCharges
        {
            get
            {
                return CalculateDeliveryTotal() * 0.0045;
            }
        }

        public double AmountDue
        {
            get
            {
                return CalculateDeliveryTotal() + EnvironmentalCharges;
            }
        }
    }
}
| Control | (Name) | Text |
| Label | Invoice #: | |
| TextBox | txtInvoiceNumber | |
| Label | Counter Reading Start: | |
| TextBox | txtCounterReadingStart | |
| Label | Counter Reading End: | |
| TextBox | txtCounterReadingEnd | |
| Button | btnPrepareInvoice | Prepare Invoice |
| Label | CCF Total: | |
| TextBox | txtCCFTotal | |
| Label | Total Therms: | |
| TextBox | txtTotalTherms | |
| Label | Ditribution Adjustment: | |
| TextBox | txtDitributionAdjustment | |
| Label | Transportation Charges: | |
| TextBox | txtTransportationCharges | |
| Label | ______________ | |
| Label | Total Delivery: | |
| TextBox | txtTotalDelivery | |
| Label | Environment Charges: | |
| TextBox | txtEnvironmentCharges | |
| Label | ______________ | |
| Label | Amount Due: | |
| TextBox | txtAmountDue |
using System;
using System.Windows.Forms;

namespace GasUtilityCompany2
{
    public partial class Form1 : Form
    {
        public Form1()
        {
            InitializeComponent();
        }

        private void btnPrepareInvoice_Click(object sender, EventArgs e)
        {
            BillPreparation bp = new BillPreparation();

            bp.InvoiceNumber = int.Parse(txtInvoiceNumber.Text);
            bp.CounterReadingStart = double.Parse(txtCounterReadingStart.Text);
            bp.CounterReadingEnd = double.Parse(txtCounterReadingEnd.Text);

            txtCCFTotal.Text = bp.CCFTotal.ToString("F");
            txtTotalTherms.Text = bp.TotalTherms.ToString("F");
            txtDitributionAdjustment.Text = bp.DistributionAdjustment.ToString("F");
            txtTransportationCharges.Text = bp.CalculateTransportationCharges().ToString("F");
            txtTotalDelivery.Text = bp.CalculateDeliveryTotal().ToString("F");
            txtEnvironmentCharges.Text = bp.EnvironmentalCharges.ToString("F");
            txtAmountDue.Text = bp.AmountDue.ToString("F");
        }
    }
}


namespace GasUtilityCompany2
{
    public class CustomerInvoice
    {
    }
}To let you create an abstract class, the C# language provides the abstract keyword. Therefore, to create an abstract class, type this keyword to the left of the class keyword. Here is an example:
abstract class Triangle
{
}
If you decide to apply an access level (public or internal) on the class creation, the abstract keyword can appear before or after the access level.
In the class, you can add any type of member, like any of the types of constructors, methods, or properties we have used so far.
![]() Practical Learning: Creating an Abstract Class
Practical Learning: Creating an Abstract Class
namespace GasUtilityCompany2
{
    public abstract class BillPreparation
    {
        public int InvoiceNumber          { get; set; }
        public double CounterReadingStart { get; set; }
        public double CounterReadingEnd   { get; set; }

        public double CCFTotal
        {
            get => CounterReadingEnd - CounterReadingStart;
        }

        public double TotalTherms
        {
            get => CCFTotal * 1.0367;
        }

        public double DistributionAdjustment
        {
            get => TotalTherms * 0.13086;
        }

        public double CalculateTransportationCharges()
        {
            if (TotalTherms <= 5000)
                return TotalTherms * 0.016289;
            else
                return TotalTherms * 0.009577;
        }

        public double CalculateDeliveryTotal()
        {
            double first50Therms = 0, over50Therms = 0;

            if (TotalTherms < 5000)
            {
                first50Therms = TotalTherms * 0.05269;
                over50Therms = 0;
            }
            else
            {
                first50Therms = 5000 * 0.5269;
                over50Therms = (TotalTherms - 5000) * 0.04995;
            }

            return CalculateTransportationCharges() + DistributionAdjustment + first50Therms + over50Therms;
        }

        public double EnvironmentalCharges
        {
            get => CalculateDeliveryTotal() * 0.0045;
        }

        public double AmountDue
        {
            get => CalculateDeliveryTotal() + EnvironmentalCharges;
        }
    }
}
Deriving from an Abstract Class
An abstract class cannot be directly used like any of the classes we have used so far. This means that you cannot use a constructor of an abstract class to instantiate an object. You have various solutions to solve this problem. The first thing you must do is to create a class derived from the abstract class. You can then create an object of that class.
![]() Practical Learning: Deriving from an Abstract Class
Practical Learning: Deriving from an Abstract Class
namespace GasUtilityCompany2
{
    public class CustomerInvoice : BillPreparation
    {
    }
}
An Object of an Abstract Class
Although you must always derive a class from an abstract class in order to make the abstract class useful, you can declare a variable of an abstract class. Such a variable must be initialized with a constructor of a class derived from the abstract class.
![]() Practical Learning: Deriving from an Abstract Class
Practical Learning: Deriving from an Abstract Class
using System;
using System.Windows.Forms;

namespace GasUtilityCompany2
{
    public partial class Form1 : Form
    {
        public Form1()
        {
            InitializeComponent();

            Random rndNumber = new Random();
            txtInvoiceNumber.Text = rndNumber.Next(100001, 999999).ToString();
            txtCounterReadingStart.Text = rndNumber.Next(2126, 2880).ToString();
            txtCounterReadingEnd.Text = rndNumber.Next(2880, 3306).ToString();
        }

        private void btnPrepareInvoice_Click(object sender, EventArgs e)
        {
            BillPreparation bp = new CustomerInvoice();

            bp.InvoiceNumber = int.Parse(txtInvoiceNumber.Text);
            bp.CounterReadingStart = double.Parse(txtCounterReadingStart.Text);
            bp.CounterReadingEnd = double.Parse(txtCounterReadingEnd.Text);

            txtCCFTotal.Text = bp.CCFTotal.ToString("F");
            txtTotalTherms.Text = bp.TotalTherms.ToString("F");
            txtDitributionAdjustment.Text = bp.DistributionAdjustment.ToString("F");
            txtTransportationCharges.Text = bp.CalculateTransportationCharges().ToString("F");
            txtTotalDelivery.Text = bp.CalculateDeliveryTotal().ToString("F");
            txtEnvironmentCharges.Text = bp.EnvironmentalCharges.ToString("F");
            txtAmountDue.Text = bp.AmountDue.ToString("F");
        }
    }
}

A Parameter of an Abstract Class
As done for any class, you can create a method that uses a parameter of an abstract class. In the body of the method, use the parameter like any other. For example, you can access the members of the abstract class.
When calling a method that uses a parameter of an abstract class, the argument you pass must hold an appropriate value, which should be an object of a class derived from the abstract class.
![]() Practical Learning: Passing an Object of an Abstract Type
Practical Learning: Passing an Object of an Abstract Type
using System;
using System.Windows.Forms;

namespace GasUtilityCompany2
{
    public partial class Form1 : Form
    {
        public Form1()
        {
            InitializeComponent();

            Random rndNumber = new Random();
            txtInvoiceNumber.Text = rndNumber.Next(100001, 999999).ToString();
            txtCounterReadingStart.Text = rndNumber.Next(2126, 2880).ToString();
            txtCounterReadingEnd.Text = rndNumber.Next(2880, 3393).ToString();
        }

        void PresentInvoice(BillPreparation values)
        {
            txtCCFTotal.Text              = values.CCFTotal.ToString("F");
            txtTotalTherms.Text           = values.TotalTherms.ToString("F");
            txtDitributionAdjustment.Text = values.DistributionAdjustment.ToString("F");
            txtTransportationCharges.Text = values.CalculateTransportationCharges().ToString("F");
            txtTotalDelivery.Text         = values.CalculateDeliveryTotal().ToString("F");
            txtEnvironmentCharges.Text    = values.EnvironmentalCharges.ToString("F");
            txtAmountDue.Text             = values.AmountDue.ToString("F");
        }

        private void btnPrepareInvoice_Click(object sender, EventArgs e)
        {
            BillPreparation bp = new CustomerInvoice();

            bp.InvoiceNumber = int.Parse(txtInvoiceNumber.Text);
            bp.CounterReadingStart = double.Parse(txtCounterReadingStart.Text);
            bp.CounterReadingEnd = double.Parse(txtCounterReadingEnd.Text);

            PresentInvoice(bp);
        }
    }
}
Returning an Object of Abstract Type
You can create a method that returns an object of an abstract class type. For such a method, make sure it returns an object of that type. Outside the class, when calling the method, you can assign it to a variable of the abstract class.
![]() Practical Learning: Creating an Object of Abstract Type
Practical Learning: Creating an Object of Abstract Type
using System;
using System.Windows.Forms;

namespace GasUtilityCompany2
{
    public partial class Form1 : Form
    {
        public Form1()
        {
            InitializeComponent();

            Random rndNumber = new Random();
            txtInvoiceNumber.Text = rndNumber.Next(100001, 999999).ToString();
            txtCounterReadingStart.Text = rndNumber.Next(2126, 2880).ToString();
            txtCounterReadingEnd.Text = rndNumber.Next(2880, 3393).ToString();
        }

        void PresentInvoice(BillPreparation values)
        {
            txtCCFTotal.Text              = values.CCFTotal.ToString("F");
            txtTotalTherms.Text           = values.TotalTherms.ToString("F");
            txtDitributionAdjustment.Text = values.DistributionAdjustment.ToString("F");
            txtTransportationCharges.Text = values.CalculateTransportationCharges().ToString("F");
            txtTotalDelivery.Text         = values.CalculateDeliveryTotal().ToString("F");
            txtEnvironmentCharges.Text    = values.EnvironmentalCharges.ToString("F");
            txtAmountDue.Text             = values.AmountDue.ToString("F");
        }

        BillPreparation PrepareInvoice()
        {
            BillPreparation preparation = new CustomerInvoice();

            preparation.InvoiceNumber = int.Parse(txtInvoiceNumber.Text);
            preparation.CounterReadingStart = double.Parse(txtCounterReadingStart.Text);
            preparation.CounterReadingEnd = double.Parse(txtCounterReadingEnd.Text);

            return preparation;
        }

        private void btnPrepareInvoice_Click(object sender, EventArgs e)
        {
            BillPreparation bp = PrepareInvoice();

            PresentInvoice(bp);
        }
    }
}
namespace Geometry18
{
    public abstract class Triangle
    {
        public double Angle;
        public double Base { get; set; }
        public virtual double Height { get; set; }

        public double Area
        {
            get
            {
                return Base * Height / 2.00;
            }
        }
    }
}using System;
namespace Geometry18
{
public class Equilateral : Triangle
{
public Equilateral()
{
Angle = 60;
}
public double Side
{
get
{
return Base;
}
}
}
}The Members of an Abstract Class
Introduction
Like a normal class, an abstract class can contain virtual methods and properties. As seen for non-abstract classes, if you create a virtual member in an abstract class, an object of the derived class can directly use that member. On the other hand, if you want the derived class to provide a different version of the virtual member, you must override it in the child class. This is done exactly as seen for non-abstract classes.
An Abstract Method
A method is said to be abstract if its class doesn't implement that method but the derived class must implement it. An abstract method can only belong to an abstract class.
To create an abstract method, apply the following rules:
After creating an abstract method, every class that derives from that class must provide an implementation of (each of) the abstract method(s). To implement the method, you must apply the override keyword to it as we reviewed for virtual methods.
Remember that an abstract method must not have a body. If you want the method to have a body, you can mark it with the virtual keyword.
![]() Practical Learning: Creating an Abstract Method
Practical Learning: Creating an Abstract Method
namespace Geometry18
{
    public abstract class Triangle
    {
        public double Angle;
        public double Base { get; set; }
        public virtual double Height { get; set; }

        public double Area
        {
            get
            {
                return Base * Height / 2.00;
            }
        }

        public abstract double CalculatePerimeter();
    }
}using System;
namespace Geometry18
{
public class Equilateral : Triangle
{
public Equilateral()
{
Angle = 60;
}
public double Side
{
get
{
return Base;
}
}
public override double CalculatePerimeter()
{
return Side * 3.00;
}
}
}An Abstract Property
A property is abstract if its class doesn't include an implementation of that property. Any class based on the abstract class must implement the abstract property using the override keyword.
If you want to create an abstract property that has only a get accessor, the property must use the abstract keyword. Here is an example:
public abstract class GeometricFigure
{
    public abstract double Perimeter { get; }
}
If the property has both a get and a set accessors, it can use either the abstract or the virtual keyword. Here are examples:
public abstract class GeometricFigure
{
    public abstract double Median { get; set;  }
    public virtual double Perimeter { get; set;  }
}
![]() Practical Learning: Creating an Abstract Property
Practical Learning: Creating an Abstract Property
namespace Geometry15
{
    public abstract class Triangle
    {
        public double Base { get; set; }
        public abstract double Height { get; set; }

        public double Area
        {
            get
            {
                return Base * Height / 2.00;
            }
        }

        public abstract double CalculatePerimeter();
    }
}using System;
using System;
namespace Geometry15
{
public class Equilateral : Triangle
{
const double Angle = 60;
private double hgt;
public double Side
{
get
{
return Base;
}
}
public override double Height
{
get
{
return Math.Sqrt(3.00) * Side / 2.00;
}
set
{
hgt = value;
}
}
public override double CalculatePerimeter()
{
return Side * 3.00;
}
}
}
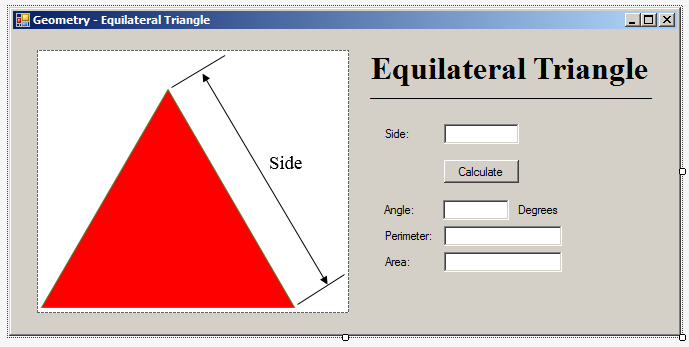
| Control | (Name) | Text | Other properties |
| PictureBox | Image: Equilateral | ||
| Label | Equilateral Triangle | Font: Times New Roman, 24pt, style=Bold | |
| Label | __________________ | ||
| Label | Side: | ||
| TextBox | txtSide | TextAlign: Right | |
| Button | btnCalculate | Calculate | |
| Label | Angle: | ||
| TextBox | txtAngle | TextAlign: Right | |
| Label | Degrees: | ||
| Label | Perimeter: | ||
| TextBox | txtPerimeter | TextAlign: Right | |
| Label | Area: | ||
| TextBox | txtArea | TextAlign: Right |
using System;
using System.Windows.Forms;

namespace Geometry18
{
    public partial class Form1 : Form
    {
        public Form1()
        {
            InitializeComponent();
        }

        (string, string) CreateMessage()
        {
            return ("You must specify the length of each side of the triangle.", "Geometry - Equilateral Triangle");
        }

        private void btnCalculate_Click(object sender, EventArgs e)
        {
            Triangle tri = new Equilateral();

            try
            {
                tri.Base = double.Parse(txtSide.Text);
            }
            catch (FormatException)
            {
                MessageBox.Show(CreateMessage().Item1, CreateMessage().Item2);
            }

            txtAngle.Text = tri.Angle.ToString(); ;
            txtPerimeter.Text = tri.CalculatePerimeter().ToString();
            txtArea.Text = tri.Area.ToString();
        }
    }
}


Having Many Methods that Return the Same Type of Abstract Object
Consider an abstract class as follows::
public abstract class Triangle
{
    public double Angle1;
    public double Angle2;
    public double Side1;
}
Imagine you have a method that returns an object of this abstract class. Here is an example:
public abstract class Triangle
{
    public double Angle1;
    public double Angle2;
    public double Side1;
}

public class Oblique : Triangle
{
    public Triangle View()
    {
        Triangle ot = new Oblique();

        return ot;
    }
}
If you need to have one or more other methods that perform the same type(s) of operation(s) and/or return the same type of object, you don't need to declare a variable to call the first method. Here are examples:
public abstract class Triangle
{
    public double Angle1;
    public double Angle2;
    public double Side1;
}

public class Oblique : Triangle
{
    public Triangle View()
    {
        Triangle ot = new Oblique();

        return ot;
    }

    public Triangle Calculate()
    {
        return View();
    }

    public Triangle Evaluate()
    {
        return View();
    }

    public Triangle Summarize()
    {
        return View();
    }
}
Built-In Abstract Classes: The Type Class
Introduction
When studying conditional statements, we saw how to check the value held by a variable. In some cases, when you have a variable, you may need to identify the name of the class of that variable. To assist you with this, the .NET Framework provides an abstract class named Type. The Type class is created in the System namespace. Because Type is an abstract class, you cannot declare a variable of it.
To assist you with finding out the data type or the class of a variable, the C# language provides an operator named typeof. Its formula is:
Type type = typeof(data-type | class-name);
typeof is a unary operator. That is, it acts on one operand. The operand can be a known primitive data type or a class. If you pass a C# data type (such as double, int, or decimal with which we are familiar already) as the operand, the typeof operator produces the equivalent .NET Framework type. In reality, the typeof operator produces the Type name of its operand.
The Type GetType() method can also return the data type of the variable that called it. If the variable that calls this method is of a primitive C# data type, this method returns its .NET Framework equivalent. Here is an example of calling this method:
using System;

public class Program
{
    public static void Main()
    {
        Type tp = typeof(int);

        Console.Write("The type of the int is ");
        Console.WriteLine(tp);
        Console.WriteLine("=========================================");

        return;
    }
}
This would produce:
The type of the int is System.Int32
=========================================
Press any key to continue . . .
The Type of an Object
You will usually need the services of the Type class to know the data type of a variable or of an argument to a method. To make this possible, the Object class is equipped with a method named GetType. Its syntax is:
public Type GetType();
This method takes no argument and returns the name of the class. Here is an example:
using System;

public class Program
{
    public static void Main()
    {
        Square sqr = new Square(1.00);
        Type tp = sqr.GetType();

        Console.Write("The type of the object is ");
        Console.WriteLine(tp);

        Console.WriteLine("=============================");

        return;
    }
}

public class Square
{
    public Square(double side)
    {
        Side = side;
    }

    public double Side { get; set; }

    public double Area
    {
        get { return Side * Side; }
    }
}
This would produce:
The type of the object is Square
=============================
Press any key to continue . . .
The Base Type of a Class
The Type.GetType() method gives you the name of the class of a variable. If the class is derived from another class and you want to know the name of its parent class, the Type class can help you, using a property named BaseType. Here is an example of accessing it:
using System;

public class Program
{
    public static void Main()
    {
        var rect = new Rectangle(1.00, 2.00);
        Type tp = rect.GetType();

        Console.Write("The base type of the rectangle is ");
        Console.WriteLine(tp.BaseType);

        Console.WriteLine("=============================");

        return;
    }
}

public class Square
{
    public Square(double side)
    {
        Side = side;
    }

    public double Side { get; set; }

    public double Area
    {
        get { return Side * Side; }
    }
}

public class Rectangle : Square
{
    public Rectangle(double width, double height)
         : base(width)
    {
        Height = height;
    }

    public double Height { get; set; }

    public double Area
    {
        get
        {
            return Side * Height;
        }
    }
}
This would produce:
The base type of the rectangle is Square
=============================
Press any key to continue . . .
The Assembly a Type Belongs To
If a class is defined in an assembly, you may want to know what that assembly is. To assist you with getting this information, the Type class is equipped with a property named Assembly.
When accessing the Type.Assembly property, make sure the class of the variable you are using has a formal assembly. Otherwise you would receive an error.
The Full Name of a Type
To get the complete name of the class of a variable without the assembly, use the Type.FullName property.
The Namespace of a Type
Besides the assembly in which the class of a variable exists, you may want to know the namespace in which that class is defined. To let you get this information, the Type class is equipped with the Namespace property.
Finding Out Whether a Type is a Class or an Abstract
Sometimes when using a type, you may want to know whether it is a simple regular class, an abstract class, a structure, an enumeration, or another type we haven't studied yet (interface, generic, etc). To assist you with checking this, the Type class provides various Boolean properties such as IsAbstract or IsClass.
![]() Practical Learning: Ending the Lesson
Practical Learning: Ending the Lesson
|
|
||
| Previous | Copyright © 2002-2021, FunctionX | Next |
|
|
||