Home

Introduction to Data Analysis

Introduction to Conditions

Overview

As mentioned in previous lessons, data analysis resembles using a funel whose job is to select some records and exclude or ignore others. You must present a condition that the funel will follow to allow or disallow some records. A condition is also referred to as a criterion. The plural is criteria.

A criterion is formulated using a Boolean operation. Microsoft Access provides many options to specify the conditions.

Practical LearningPractical Learning: Introducing Data Filters

  1. Start Microsoft Access
  2. In the list of files, click Altair Realtors2 from Lesson 32
  3. On the Ribbon, click Create and click Query Design
  4. On the Show Table dialog box, double-click Properties and click Close
  5. In the top list, double-click PropertyNumber, PropertyType, City, Condition, Bedrooms, Bathrooms, FinishedBasement, Stories, and MarketValue
  6. To see the results, on the status bar, click the Datasheet button Datasheet View Button
  7. If necessary, on the Ribbon, click Home.
    Change the following characteristics:
    Font Name: Calisto MT (if you don't have that font, select Times New Roman)
    Background Color: Green, Accent 6, Lighter 40% (Theme Colors: 10th column, 4th row)
    Alternate Row Color: Green, Accent 6, Lighter 80% (Theme Colors: 10th column, 2nd row)

    Introduction to Conditions

  8. After viewing the result, in the Views section of the Ribbon, click the arrow below the View button and click SQL View
  9. Change the SQL statement as follows:
    SELECT Properties.PropertyNumber,
           Properties.City,
           Properties.PropertyType,
           Properties.Condition,
           Properties.Bedrooms AS Beds,
           Properties.Bathrooms AS Baths,
           Properties.FinishedBasement,
           Properties.Stories,
           Properties.MarketValue
    FROM Properties;
  10. After viewing the statement, on the Ribbon, click the down-pointing button below the View button and click Design View

Setting Criteria in a Regular View

To set the condition by which to isolate records, if a table, a query, or a form is displaying in the Datasheet View, a form in Form View, or a report in Report View or in Layout View, in the Sort & Filter section of the Ribbon (Home tab), click the Advanced button and click Advanced Filter/Sort... A window that resembles the Design View of a query will display.

Setting Criteria on the Table, Form, and Report in Design View

To prepare the condition by which some of the records must display on a table, a form, or a report in Design View, access its Property Sheet. Click Filter and type an appropriate expression.

By default, an expression set as the filter will not apply immediately. If you want the condition to apply when the object displays in its regular view, set the Filter On Load property to Yes.

Setting Criteria on a Field

Normally, the condition for data anlasysis is set on a data field and that condition applies to the other records. This type of condition is specified in the Design View of a query or a similar window.

In the Design View, the row that controls the filters is named Criteria. To set the condition in the Design View of a query, locate the text box at the intersection of the column and the Criteria row:

Clearing a Filter

WHERE is the Filter?

To assist you in creating a condition to select or exclude some records, the SQL provides the WHERE keyword. Its section, also called a WHERE clause, must come at the end of a SELECT statement. The formula to follow is:

SELECT what-field(s) FROM what-bject WHERE expression;

Remember that, to make your code easy to read, you can write the sections of the SELECT expression of different lines. In this case and by tradition, the WHERE clause is usually written on its own line (rememeber that this is not a rule but a suggestion). The formula to follow would be:

SELECT what-field(s)
FROM what-bject
WHERE expression;

We are already familiar with the sections before WHERE. The expression used in a condition is a Boolean expression. This means that the expression written using the formula:

column-name operator value

The column-name must be an existing column of a table or query. It is followed by an appropriate operator. The value is the value that will control the condition.

To make the statement easier to read, you should include it in parentheses after WHERE.

Primary Filtering Operations

Matching a Value

The easiest way to create a condition in data analysis is to find an exact value. This is done using the = operator. The formula to follow is:

WHERE field-name = value

If the field is:

  • Number-based, use its value directly
  • Text-based, provide its value between either single-quotes or double-quotes
  • Boolean-based, provide its value as either True or False
  • Date or time, start its value with # and end it with #

Practical LearningPractical Learning: Matching a Value for Data Analysis

  1. In the bottom side of the window, click the text box at the intersection of Stories and Criteria
  2. Type 1

    Matching a Value for Data Analysis

  3. To see a list of homes that either have only one level or condominiums on the first floor, on the Ribbon, click the Run button Run

    Matching a Value for Data Analysis

  4. After viewing the results, on the Ribbon, click the View button (or click its down-pointing button and click Design View)
  5. In the bottom side, delete 1
  6. Click the Criteria text box for the PropertyType column and type single family

    Matching a String

  7. To see the result, right-click the Query1 tab and click Datasheet View

    Matching a String

  8. To return to the design, right-click the Query1 tab and click Design View
  9. In the bottom side of the window, click the check box below PropertyType and delete "single family"

Negating a Condition

Sometimes you want the opposite or reverse of an expression. To assist you with this, the SQL provides the NOT operator. There are many ways to use this operator. One way is to precede the operator with the expression.

Practical LearningPractical Learning: Negating a Condition

  1. In the bottom side of the window, Click the Criteria box for the Condition column
  2. Type NOT "unknown"
  3. Preview the result in the Datasheet View:

    Negating a Condition

  4. After seeing the result, returnr to the Design View
  5. In the bottom side of the window, delete Not "unknown"

Hiding a Column

If you apply a condition to a SELECT statement, it is obvious that all values of the conditional field would be the same. In some cases, there is no need to show such a field in the result.

To visually hide a column from a query, in the Criteria pane, set the condition expression in its corresponding Criteria box. Then click the check box of the Show row to remove it.

To hide a field in SQL, omit that column in the SELECT statement but involve it in the WHERE condition.

Topics on Filtering Records

Practical LearningPractical Learning: Not Showing a Column

  1. Click the Criteria box for the PropertyType column and type single family
  2. Click the corresponding check box to remove the check mark

    Not Showing a Column

  3. Preview the results in the Datasheet View

    Not Showing a Column

  4. After viewing the results, to examine the SQL code, on the status bar, click the SQL View button
  5. Change the statement as follows:
    SELECT Properties.PropertyNumber,
           Properties.PropertyType,
           Properties.City,
           Properties.Condition,
           Properties.Bedrooms AS Beds,
           Properties.FinishedBasement,
           Properties.Stories,
           Properties.MarketValue
    FROM Properties
    WHERE Properties.Bathrooms = 3.50;
  6. To see the result, on the Ribbon, click the Run button Run

    Hiding a Field

  7. Display the SQL View of the query
  8. Change the statement as follows:
    SELECT Properties.PropertyNumber,
           Properties.PropertyType,
           Properties.City,
           Properties.Condition,
           Properties.Bedrooms AS Beds,
           Properties.Bathrooms AS Baths,
           Properties.FinishedBasement,
           Properties.Stories,
           Properties.MarketValue
    FROM Properties;
  9. Display the Design View of the query
 

Logical Comparisons

Introduction

A comparison is a Boolean operation that produces a true or a false result, depending on the values on which the comparison is performed. A comparison is performed between two values of the same type; for example, you can compare two numbers, two characters, the names of two cities, the value of one column with a constant, or the values of two columns.

Equality Operator =

To compare two values for equality, use the = operator. The formula to follow is:

value1 = value2
Logical Comparisons

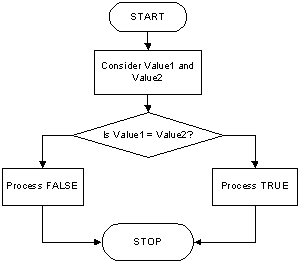
The equality operation is used to find out whether two values are the same. If both values are the same, the comparison produces a True result. If they are different, the comparison renders False.

The equality operation can be illustrated as follows:

Equalilty Flowchart

Updating Records

You can perform the comparison for equality on columns that use all of the data types we have seen so far but there are some details you should keep in mind:

  • When performed on natural numbers, the equality is used to find out if two numbers are exactly the same
  • When the equality comparison is performed on text (strings), the character or symbol on the same positions of two strings are compared. The symbols, the characters and their cases, would be compared using the rules of the language used by the computer (this concept is referred to as collation)
  • You should avoid performing equality comparision on floating-point numbers because you could get unpredictable or unintended results. For example, we know that 2.67 and 2.99 could be converted to 3.00 depending on how the numbers are used (with or without precision, or depending on the type of precision)

As mentioned already, to find the opposite of an equality operation, you can precede its expression with the NOT operator.

Practical LearningPractical Learning: Comparing For Equality

  1. In the bottom side of the window, click the Criteria box for the Bedrooms column and type 4 and click the Show check box (to remove the check mark)

    Creating a Condition in a Query Design

  2. In the Results section of the Ribbon, click the Run button Run

    Creating a Condition in a Query Design

  3. Display the SQL View of the query
  4. Change the code as follows:
    SELECT PropertyNumber, 
           City, 
           PropertyType, 
           Bedrooms AS Beds, 
           Bathrooms AS Baths, 
           FinishedBasement, 
           Stories, 
           MarketValue
    FROM Properties
    WHERE Condition = "Excellent";
  5. In the Results section of the Ribbon, click the Run button Run

    Creating a Condition in a Query Design

  6. Close the query without saving it
  7. Open the StatesStatistics3 database from the previous lesson
  8. In the Navigation Pane, double-click the Particular Conditions form
  9. After viewing the form, on the Ribbon, click the down-pointing button below View and click Design View
  10. In the Data tab of the Property Sheet, click Filter and type Region = "Pacific"
  11. Click Filter On Load, then click the arrow of its combo box and click Yes

    Creating a Condition in a Form in Design

  12. To see the results, in the Views section of the Ribbon, click the View button Datasheet View

    Creating a Condition in a Query Design

  13. Close the form
  14. When asked whether you want to save, click Yes

Not Equal <>

As opposed to equality, to find out if two values are not equal, use the <> operator. The formula to follow is:

value1 <> value2

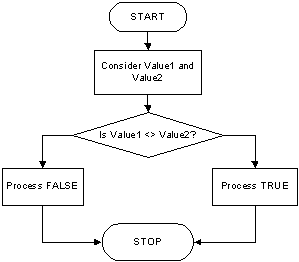
The <> operator can be illustrated as follows:

Flowchart: Not Equal

The comparison for inequality follows the same concerns as equality:

  • Natural numbers provide the easiest and most reliable comparisons
  • Inequality comparison on strings follows the same rules as equality for the alphabet of the language is taken into consideration
  • Comparison for inequality on floating-point numbers should be avoided

The Not Equal operator <> is the opposite to the equality operator =. Of course, you can get the result of a Not Equal operation by preceding an equal expression with the NOT operator.

Practical LearningPractical Learning: Comparing For Inequality

  1. On the Ribbon, click File and click Open
  2. In the list of files, click Altair Realtors2
  3. On the Ribbon, click Create and click Query Design
  4. On the Show Table dialog box, double-click Properties and click Close
  5. In the top list, double-click PropertyNumber, City, PropertyType, Condition, Bedrooms, Bathrooms, FinishedBasement, Stories, and MarketValue
  6. Click the Criteria box that corresponds to the PropertyType column
  7. Type <>"condominium"

    Setting a Condition on a Query to Isolate Records

  8. To see the results, in the Results section of the Ribbon, click the Run button Run

    Creating a Condition in a Query Design

  9. On the Ribbon, click the View button Design View
  10. Delete <>"condominium"

Less Than <

To find out whether one value is lower than another, use the < operator. The formula to apply is:

value1 < value2

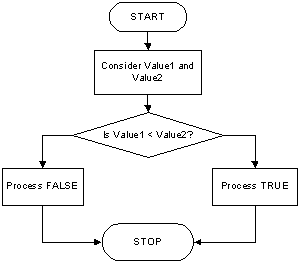
The value held by Value1 is compared to that of Value2. The operation can be illustrated as follows:

Flowchart: Less Than

Practical LearningPractical Learning: Comparing For Lower Value

  1. In the bottom side of the window, click the Criteria box that corresponds to the MarketValue column
  2. Type < 500000
  3. To see the results, in the Results section of the Ribbon, click the Run button Run

    Setting Criteria on a Query

  4. On the Ribbon, click File and click Open
  5. In the list of files, click StatesStatistics3
  6. When asked whether you want to save, click No
  7. In the Navigation Pane, double-click the Particular Conditions form
  8. After viewing the records, right-click the title bar of the table and click Design View

Less Than Or Equal To <=

The Equality and the Less Than operators can be combined to compare two values. This allows you to know if two values are the same or the first is lower than the second. The operator used is <=. The formula to follow is:

value1 <= value2

If both value1 and value2 are the same, the result is true or positive. If the left operand holds a value lower than the second operand, the result is still true. If the left value is strictly higher than the other Value, the comparison produces a False result.

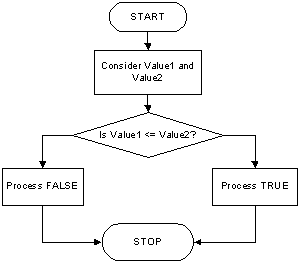
A <= operation can be illustrated as follows:

Flowchart

Practical LearningPractical Learning: Testing Lower or Equal Value

  1. In the All tab of the Property Sheet, click Filter and type AreaSqrMiles <= 50000
  2. On the Ribbon, click the down-pointing button below the View button Form View Button

    Filtering Records

  3. After viewing the records, right-click the title bar of the table and click Design View

Greater Than >

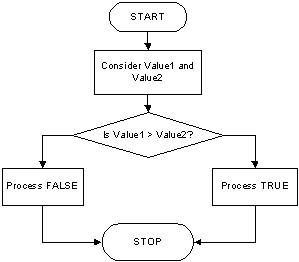
To find out if one value is strictly greater than another, you can use the > operator. The formula to apply is:

Value1 > Value2

The > operator can be illustrated as follows:

Greater Than

The > operator is the opposite to <=.

Practical LearningPractical Learning: Comparing For Greater Value

  1. In the Data tab of the Property Sheet, click Filter and type StateName > "Maine"
  2. To execute, On the Ribbon, click the (Form) View button

    Filtering Records

  3. On the Ribbon, click File and click Open
  4. In the list of files, click Checmistry2
  5. In the Navigation Pane, double-click the Elements table

    Filter

  6. After viewing the records, on the status bar, click the Design View button Design View
  7. In the Property Sheet, click Filter and press Delete
  8. Close the table
  9. When asked whether you want to save, click Yes

Greater Than or Equal To >=

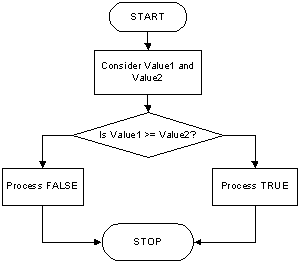
The greater than and the equality operators can be combined to produce an operator as follows: >=. This is the "greater than or equal to" operator. Its formula is:

Value1 >= Value2

The operation can be illustrated as follows:

Flowchart: Greater Than Or Equal To

The >= operator is the opposite to <.

Practical LearningPractical Learning: Comparing For Greater or Equal Value

  1. In the Property Sheet, click Filter and type AtomicWeight >= 20
  2. Still in the Property Sheet, double-click Filter On Load to set its value to Yes
  3. To execute, on the status bar, click the Datasheet View button Design View
  4. When asked whether you want to save, click Yes

    Filter Records on a Table

  5. After viewing the records, on the status bar, click the Design View button Design View
  6. In the Property Sheet, click Filter and change the statement as follows Not(AtomicWeight >= 20)
  7. To execute, on the status bar, click the Datasheet View button Design View
  8. When asked whether you want to save, click Yes

    Filter Records on a Table

  9. After viewing the records, on the status bar, click the Design View button Design View
  10. In the Property Sheet, click Filter and press Delete
  11. Close the table
  12. When asked whether you want to save, click Yes

Sorting Filtered Records

Sorting Records in Regular Views

You don't have to sort records when filtering them, but you can. If want to sort the records when designing a query, in the bottom side of the Query window, use the Sort combo box of the desired field.

Practical Learning: Ending the Lesson

  • Close Microsoft Access

Previous Copyright © 2002-2021, FunctionX, Inc. Next