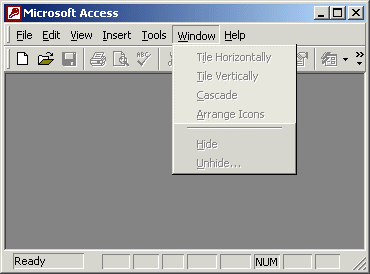
- Under the title bar, there is a horizontal list of words. This list is made of items such as File, Edit, View, etc. Since there are various kinds of menus on this application, the menu on top will be referred to as the Main Menu and sometimes the Menu Bar.
To use a menu item, you click one of its words and the menu expands. If an item is missing from the main menu, you can customize it.
To experiment with the main menu, click File. There are four main types of menus you will encounter.
 When clicked, the behavior of a menu that stands alone depends on the actions prior to clicking it. Under the File menu, examples are Close or Exit When clicked, the behavior of a menu that stands alone depends on the actions prior to clicking it. Under the File menu, examples are Close or Exit
 A menu that is disabled is not accessible at the moment. This kind of menu depends on another action or the availability of something else. A menu that is disabled is not accessible at the moment. This kind of menu depends on another action or the availability of something else.
To see an example, on the main menu, double-click Window:

 A menu with three dots
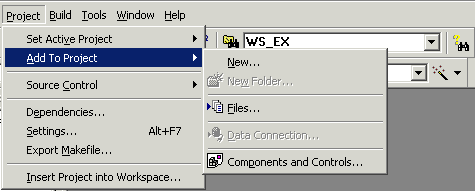
(known as an ellipsis) means that an intermediary action is required in order to apply its assignment. Usually, this menu would call a dialog box where the user would have to make a decision. A menu with three dots
(known as an ellipsis) means that an intermediary action is required in order to apply its assignment. Usually, this menu would call a dialog box where the user would have to make a decision.
As an example, on the main menu, position the mouse on File and click Open...- On the dialog box, click Cancel
 A menu with an arrow holds a list of menu items under it. A menu under another menu is called a submenu. To use such a menu, you would position the mouse on it to display its submenu. A menu with an arrow holds a list of menu items under it. A menu under another menu is called a submenu. To use such a menu, you would position the mouse on it to display its submenu.
For example, on the main menu, click Tools and position the mouse on Database Utilities

- To dismiss the menu, click Tools
- Notice that, on the main menu (and any menu), there is one letter underlined on each word. Examples are F in File, E in Edit, V in View, etc. The underlined letter is called an access key (the word access has nothing to do with Microsoft Access, it is used in this sense throughout Microsoft Windows and other operating systems). The access key allows you to access the same menu item using the keyboard. In order to use an access key, the menu should have focus first. The menu is given focus by pressing either the Alt or the F10 keys.
To see an example, press Alt
- Notice that one of the items on the menu, namely File, has its borders raised. This means that the File menu item has focus
- Press t and notice that the Tools menu is expanded
- When the menu has focus and you want to dismiss it, you can press Esc.
For example, press Esc
- Notice that the Tools menu has collapsed but the main menu still has focus
- Press f then press o. Notice that the Open dialog box displays.
- To dismiss the Open dialog box, click Cancel
- On some menu items, there is a key or a combination of keys we call a shortcut. This key or this combination allows you to perform the same action on that menu using the keyboard.
If the shortcut is made of one key only, you can just press it. If the shortcut is made of two keys, press and hold the first one, while you are holding the first, press the second key once and release the first key. Some shortcuts are a combination of three keys.
To apply an example, press and hold Ctrl, then press o, and release Ctrl
- Notice that the Open dialog box opens. To dismiss it, Click Cancel
|

