|
Based on this, the clerk can simply type the name of the customer and perform the transaction. When the same customer comes back for another type of transaction such as money withdrawal or transfer, the clerk would use another form and enter the customer’s name. The likelihood of typing the name of the customer differently on various forms is really high. For example, when performing a deposit, the clerk may enter the name of the customer as Josiane
Tobolowski. On a form used to withdraw money, the clerk may enter the customer’s name as Jozian
Toblowsky. Obviously, these are two completely different names. To avoid this type of mistake, the solution is to create an object (table) that would hold the customer’s name and make that name available to
(all) other objects involved in transactions. The table that
holds the customer’s information may have the following fields:
|
Customer Information |
|
Full Name |
|
Account Number |
|
Address |
|
Phone Number |
|
Email Address |
|
When a customer needs a bank transaction, the clerk can simply select the customer’s name on a form and continue the transaction. To make this possible, there must be a relationship between the table that holds the customer’s information and the table on which the transaction is
performed:
|
Customer Information |
|
Customer Money Deposit |
|
|
Full Name |
|
Account Number |
|
Address |
|
Phone Number |
|
Email Address |
|
 |
| Customer Name |
| Bank Account |
| Transaction Date |
| Amount of Deposit |
|
When creating this type of relationship, you would be thinking that, although the customer’s information is needed by various objects of the database, different objects may need different types of information. For example, when performing money deposit, the clerk would need the customer’s account number and name. If the customer signed to receive newsletters from the bank, when another clerk is preparing these newsletters to customers, he would need the customer’s name and email address but not
the account number. For this reason, relational database provides you with the ability to create a special field in the table that holds the customer’s information. This field would be used to communicate with other objects of the database and provide them with the information they need about the customer. The name of this field usually ends with Number, Nbr, or No. Because this field is referred to
an identifier, it sometimes ends with ID. The table that holds a customer’s information may become:
|
Customer Information |
|
Full Name |
|
Account Number |
|
Address |
|
Phone Number |
|
Email Address |
|
Customer ID |
|
On the objects that need information stored in the customer’s information table, you must create a field that would hold the relationship. For example, you can create such a field on the table used for money deposit. This field does not directly belong to the
money deposit table: it acts as an “ambassador”. For this reason, it is called a foreign key. Because such a field belongs to the originating table, it should have the same name as the identifier of the original table. On the other hand, the field identifier will be used to manage the relationship between its table and those tables that need information stored in its table. It is called the primary key. After creating these two fields, they are used to “link” both tables:
|
Customer Information |
|
Customer Money Deposit |
|
|
Full Name |
|
Account Number |
|
Address |
|
Phone Number |
|
Email Address |
| Customer ID |
|
 |
| Customer Name |
| Bank Account |
| Transaction Date |
| Amount of Deposit |
|
Customer ID |
|
Although in this example of the customer’s information table we illustrated only one field as the primary key, you can use more than one field as the primary key.
In this scenario, what you need the primary key field to do is to keep track of the exchange of information between its
table and the tables related to it. In most circumstances, you will not need to enter information in the primary key field.
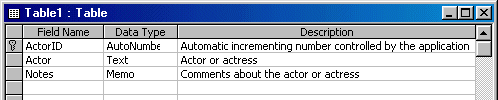
For this reason, you can ask Microsoft Access to provide an automatic number to the field.
Based on this, you can set this field’s
Data Type to AutoNumber. Of course, you can let the user type the
value of the primary key. For example, most companies make sure that two
employees don't use the same employee number. In other words, such a number must
be unique for each employee. In the same way, in the US, every person must have
a unique Social Security Number. Therefore, in some cases, you can let the data
entry person provide the value of the primary key. In practicality, you must
strongly refrain from letting the user tamper with the primary key. The role of
the primary key is to have a unique number that identifies a record in a table.
This means that two records should never have the same value of the primary key.
For this reason, you should also set it as AutoNumber and let Microsoft
Access deal with it.
There are three main ways you get a primary key on a table:
- If you create a table using the wizard, you will be asked whether you want Microsoft Access to assign a primary key for
you
- If you are creating a table in Design View, you can click the Primary Key button
 on the toolbar while the designated field is selected, you can also click Edit -> Primary Key from the main
menu
on the toolbar while the designated field is selected, you can also click Edit -> Primary Key from the main
menu
- If you try to save a table created in Datasheet View, since you will not have set a primary key, you will be prompted accordingly.
|