|
A method's job is to carry a
specific
assignment within a program. As such, it could provide a value once the
assignment has been carried. In some cases, a method must produce a result. If
it doesn't, then it is considered void. The type of value that a method can provide
(or return)
is written on the left side of the method name. If the method doesn't produce a
result, type void to its left. The assignment that a method carries is included
between an opening curly bracket "{" and a closing curly bracket
"}". Here is an example:
public class House
{
    public char PropertyType;
    public uint Bedrooms;

    void Display()
    {
    }
}
The most regularly used method of a C# program is
called Main.
After creating a method, in its body delimited by its
curly brackets, you can define the desired behavior. For example, you can
write the member variables in the parentheses of Console.Write() or
Console.WriteLine(). Here are examples:
public class House
{
    public char PropertyType;
    public uint Bedrooms;

    public void Display()
    {
        Console.WriteLine("=//= Altair Realty =//=");
        Console.WriteLine("Properties Inventory"); ;
        Console.Write("Property Type:  ");
        Console.WriteLine(PropertyType);
        Console.Write("Bedrooms:       ");
        Console.WriteLine(Bedrooms);
    }
}
In the same way, you can create as many methods as you want
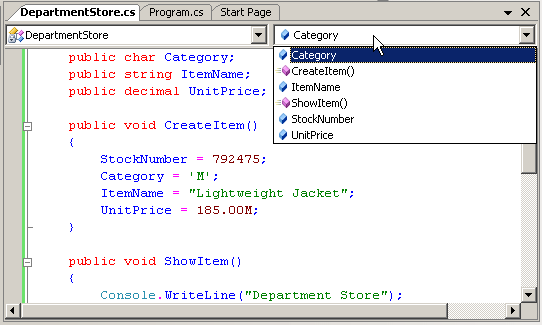
in a class. To assist you with managing the methods of a class, the Code Editor
is equipped with two combo boxes.

The left
combo box, called Types, displays the classes that are part of the
project. The right
combo box, named Members, displays the members of the class that is
selected in the Types combo box:

If you select an item from the Members combo box, the
caret would be displayed on its declaration in the file.
The Solution Explorer is a window that displays the file names and other
items used in your project. The items of this window display in a tree. To expand a node, you can
click its + button. To collapse it, click its - button. To explore an
item, you can double-click it. The result depends on the item you
double-clicked.
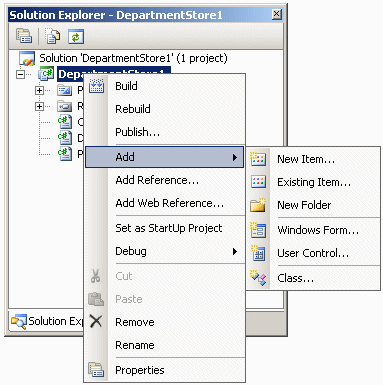
The Solution Explorer can be used to create and add a new
class or a new item to the current project. It can also be used to
add a another project to the current project. To perform any of these
operations, you can right-click a folder node such as the name of the project
and position the mouse on Add to select the desired operation:

Remember that you can also perform any of these operations
from the Project category of the main menu.
Besides adding new items to the project, you can also use
the Solution Explorer to build the project or change its properties. If you add
one or more other project(s) to the current one, one of the project must be set
as the default. That project would be the first to come up when the user
executes the application. By default, the first project created is set as the
default. If you have more than one project, to set the default, right-click the
name of the desired project in Solution Explorer and click Set As StartUp
Project.
The Solution Explorer also allows you to rename or delete some of
the items that belong to your project.
|
 Practical Learning: Creating the Methods of a Class
|
|
- Access the DepartmentStore.cs file
- To add some methods to the DepartmentStore class, change it as
follows:
using System;

namespace DepartmentStore1
{
    class DepartmentStore
    {
        public long StockNumber;
        public char Category;
        public string ItemName;
        public decimal UnitPrice;

        public void CreateItem()
        {
            StockNumber = 792475;
            Category = 'M';
            ItemName = "Lightweight Jacket";
            UnitPrice = 185.00M;
        }

        public void ShowItem()
        {
            Console.WriteLine("Department Store");
            Console.WriteLine("Stock #:   {0}", StockNumber);
            Console.WriteLine("Category:   {0}", Category);
            Console.WriteLine("Name:   {0}", ItemName);
            Console.WriteLine("Unit Price:   {0:C}", UnitPrice);
            Console.WriteLine();
        }
    }
}
|
-
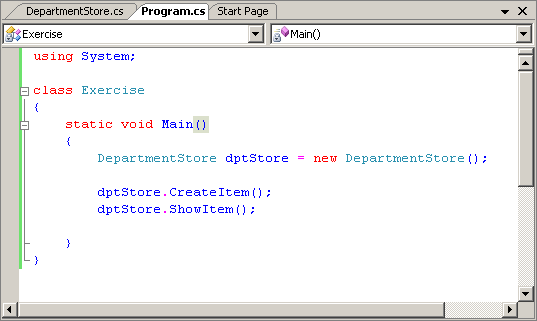
Access the Program.cs file and change Main() as follows:
using System;

namespace DepartmentStore1
{
    class Program
    {
        static void Main()
        {
            DepartmentStore dptStore = new DepartmentStore();

            dptStore.CreateItem();
            dptStore.ShowItem();
        }
    }
}
|
- Execute the application. This would produce:
Department Store
Stock #:    792475
Category:   M
Name:       Lightweight R4 Jacket
Unit Price: $185.00

Press any key to continue . . .
|
- Close the DOS window
After creating a method, you can access it outside of its
class. You do this following the same rules used to access a field, using the
period operator. Unlike a field, the name of a class must be followed by
parentheses. Here is an example:
using System;

public class House
{
    public char PropertyType;
    public uint Bedrooms;

    public void Display()
    {
        Console.WriteLine("=//= Altair Realty =//=");
        Console.WriteLine("Properties Inventory"); ;
        Console.Write("Property Type:  ");
        Console.WriteLine(PropertyType);
        Console.Write("Bedrooms:       ");
        Console.WriteLine(Bedrooms);
    }
}

class Program
{
    static void Main()
    {
        House property = new House();

        property.PropertyType = 'S';
        property.Bedrooms = 4;

        property.Display();
    }
}
This would produce:
=//= Altair Realty =//=
Properties Inventory
Property Type:  S
Bedrooms:       4
Press any key to continue . . .
|

