Introduction to Math Functions
Introduction to Math Functions
Introduction to the Built-In Math Class
Introduction
To help you perform some basic algebraic and geometric operations in your application, the .NET Framework provides a static class named Math. Besides the Math class, you can also take advantage of Visual Basic's very powerful library of functions. This library is one of the most extended set of functions of various area of business mathematics.
![]() Practical Learning: Introducing Math Functions
Practical Learning: Introducing Math Functions
body {
}

.bold        { font-weight:      bold;  }
.text-right  { text-align:       right  }
.delimiter   { margin:           auto;
               width:            650px; }
.top-bar     { border-bottom:    6px solid blue;
               background-color: #5f2c19 !important; }
.common-font { font-family:      Georgia, Garamond, 'Times New Roman', serif; }
.navbar-light .navbar-brand       { color:       white;  }
.navbar-light .navbar-brand:hover { color:       yellow; }
.navbar-light .navbar-brand:focus { color:       khaki;  }
.navbar-light .navbar-brand       { font-family: Georgia, Garamond, 'Times New Roman', serif; }
.nav-link { font-family: Georgia, Garamond, 'Times New Roman', serif; }<!DOCTYPE html>
<html lang="en">
<head>
<meta charset="utf-8" />
<meta name="viewport" content="width=device-width, initial-scale=1.0" />
<title>@ViewData["Title"] - Compound Interest</title>
<link rel="stylesheet" href="~/lib/bootstrap/dist/css/bootstrap.min.css" />
<link rel="stylesheet" href="~/css/site.css" asp-append-version="true" />
<link rel="stylesheet" href="~/css/CompoundInterest.css" asp-append-version="true" />
</head>
<body>
<header>
<nav class="navbar navbar-expand-sm navbar-toggleable-sm navbar-light bg-white border-bottom box-shadow mb-3 top-bar">
<div class="container">
<a class="navbar-brand" asp-area="" asp-page="/Index">Compound Interest</a>
<button class="navbar-toggler" type="button" data-bs-toggle="collapse" data-bs-target=".navbar-collapse" aria-controls="navbarSupportedContent"
aria-expanded="false" aria-label="Toggle navigation">
<span class="navbar-toggler-icon"></span>
</button>
<div class="navbar-collapse collapse d-sm-inline-flex justify-content-between">
<ul class="navbar-nav flex-grow-1">
<li class="nav-item">
<a class="nav-link text-white" asp-area="" asp-page="/Index">Home</a>
</li>
<li class="nav-item">
<a class="nav-link text-white" asp-area="" asp-page="/Privacy">Privacy</a>
</li>
</ul>
</div>
</div>
</nav>
</header>
<div class="container">
<main role="main" class="pb-3">
@RenderBody()
</main>
</div>
<footer class="border-top footer text-muted">
<div class="container">
<p class="text-center common-font">© 2022 - Compound Interest - <a asp-area="" asp-page="/Privacy">Privacy</a></p>
</div>
</footer>
<script src="~/lib/jquery/dist/jquery.min.js"></script>
<script src="~/lib/bootstrap/dist/js/bootstrap.bundle.min.js"></script>
<script src="~/js/site.js" asp-append-version="true"></script>
@await RenderSectionAsync("Scripts", required: false)
</body>
</html>The Sign of a Number
When initializing a numeric variable using a constant, you decide whether it is negative, 0 or positive. This is referred to as its sign. To help you determine the sign of a variable or of a number, the Math static class provides a method named Sign(). It is overloaded in various versions for each type. When calling this method, pass the value or the variable you want to consider, as argument. The method returns:
The Integral Side of a Floating-Point Number
We already know that a decimal number consists of an integral side and a precision side; both are separated by the decimal symbol which, in US English, is the period. To let you get the integral side of a decimal value, the Math static class provides a method named Truncate. It is overloaded in two versions whose syntaxes are:
public static double Truncate(double d);
public static double Truncate(double d);
When calling this method, pass it a number or a variable that holds a numeric value. The method returns the int side of the value.
The Minimum of Two Values
If you have two numbers, you can find the minimum of both without writing your own code. To assist you with this, the Math class is equipped with a method named Min. This method is overloaded in various versions with each version adapted to each integral or decimal type.
The Maximum of Two Values
As opposed to the minimum of two numbers, you may be interested in the higher of both. To help you find the maximum of two numbers, the Math class is equipped with a method named Max. It is overloaded in various versions with one for each type of numeric data.
Value Conversions
Implicit Conversions
If you have code with mixed types of variables, you may need to convert a value from one type to another. Implicit conversion is the ability to convert a value of one type into a value of another type. This is possible when the amount of memory that one type is using is lower than the amount necessary for another type. For example, a value of an integer can be directly converted into a double type. Here is an example:
int iNumber = 2445;

double dNumber = iNumber;
In the same way, as saw in our introduction to the double type, you can assign an integral value to a variable of type double. Here is an example:
double number = 927084;
This characteristic is referred to as implicit conversion.
Explicit Conversions
Because of memory requirements, the direct reverse of implicit conversion is not possible. Since the memory reserved for an int variable is smaller than that of a double, you cannot assign a value of type double to a variable of type int. As a result, the following code produces an error:
int hourlySalary = 24.75;
In the same way, you cannot assign a variable of type double to a variable of type int. This means that the following code produces an error:
double nbr = 9270.84;

int number = nbr;
Value Casting
Value casting consists of converting a value of one type into a value of another type. Value casting is also referred to as explicit conversion.
To cast a value or a variable, precede it with the desired data type in parentheses. Here is an example:
double number = 9270.84;

int nbr = (int)number;
When performing explicit conversion, that is, when casting, you should pay close attention to the value that is being cast. If a value cannot fit in the memory of the other, you may get an unpredictable result.
Arithmetic
Absolute Values
The absolute value of a number x is x if the number is (already) positive. If the number is negative, its absolute value is its positive equivalent. To let you get the absolute value of a number, the Math static class is equipped with a method named Abs, which is overloaded in various versions. The syntax for the int and the double types are:
public static int Abs(int value);
public static double Abs(double value);
This method takes the argument whose absolute value must be found.
The Ceiling of a Number
Consider a floating-point number such as 12.155. This number is between integer 12 and integer 13:

In the same way, consider a number such as -24.06. As this number is negative, it is between -24 and -25, with -24 being greater.
In arithmetic, the ceiling of a number is the closest integer that is greater or higher than the number considered. In the first case, the ceiling of 12.155 is 13 because 13 is the closest integer greater than or equal to 12.155. The ceiling of -24.06 is 24.
To support the finding of a ceiling, the Math static class is equipped with a method named Ceiling that is overloaded with two versions. The syntax for a double value is:
public static double Ceiling(double a);
This method takes as argument a number or variable whose ceiling needs to be found. Here is an example:
double value1 = 155.55;
double value2 = -24.06;

double nbr1 = Math.Ceiling(value1));
double nbr2 = Math.Ceiling(value2));
The Floor of a Number
Consider two floating numbers such as 128.44 and -36.72. The number 128.44 is between 128 and 129 with 128 being the lower. The number -36.72 is between -37 and -36 with -37 being the lower. The lowest but closest integer value of a number is referred to as its floor.
To assist you with finding the floor of a number, the Math static class provides the Floor() method. It is overloaded with two versions. The syntax for a double is:
public static double Floor(double d);
The Math.Floor() method takes the considered value as the argument and returns the integer that is less than or equal to the argument. Here is an example:
double value1 = 1540.25;
double value2 = -360.04;

double nbr1 = Math.Floor(value1);
double nbr2 = Math.Floor(value2);
The Power of a Number
The power is the value of one number or expression raised to another number. This follows the formula:
value = xy
To support this operation, the Math static class is equipped with a method named Pow. Its syntax is:
public static double Pow(double x, double y);
This method takes two arguments. The first argument, x, is used as the base number to be evaluated. The second argument, y, also called the exponent, will raise x to this value.
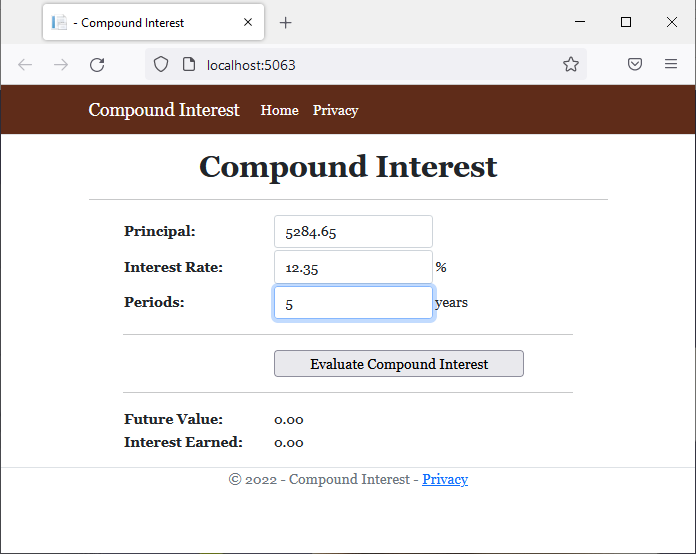
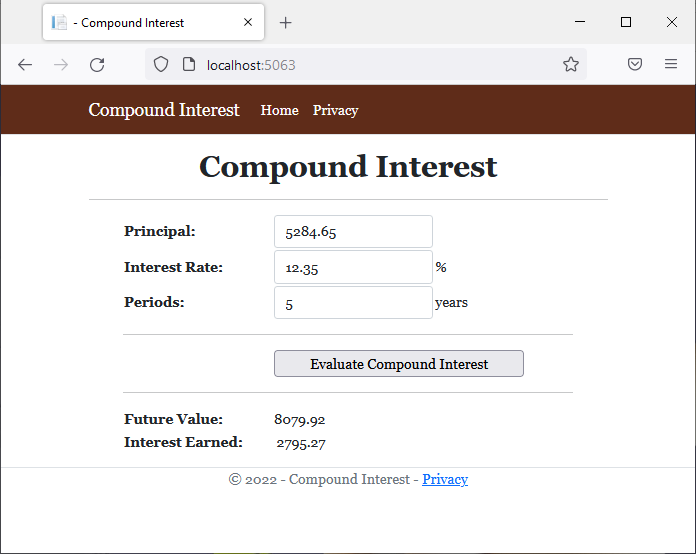
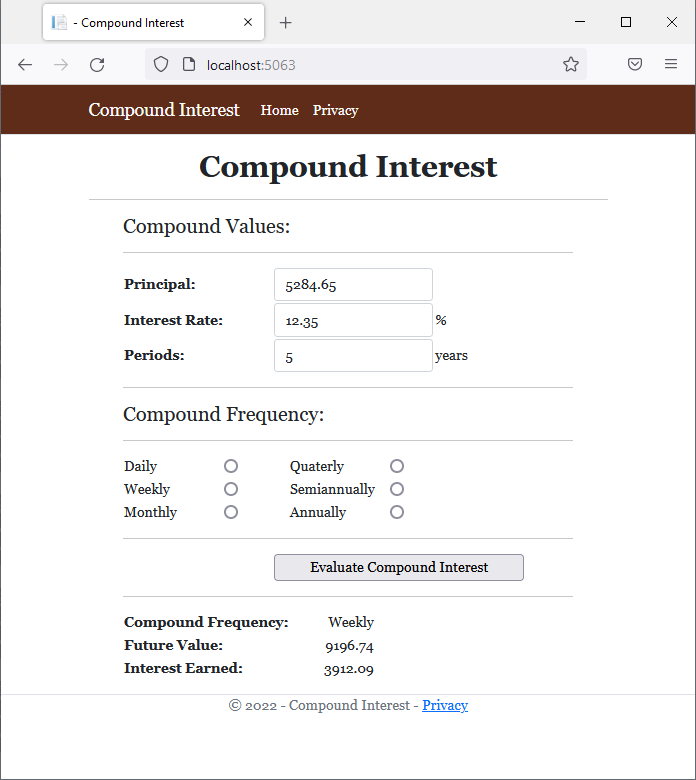
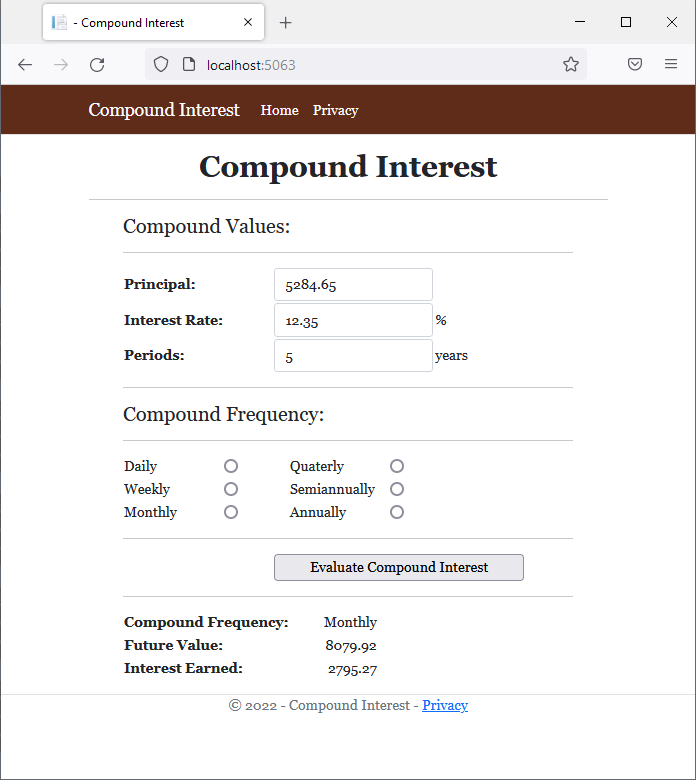
![]() Practical Learning: Getting the Power of a Number
Practical Learning: Getting the Power of a Number
@page
@model IndexModel
@{
string strError = "";
double periods = 0.00;
double principal = 0.00;
double interestRate = 0.00;
string strFutureValue = "0.00";
string strInterestEarned = "0.00";
if (Request.HasFormContentType)
{
try
{
principal = double.Parse(Request.Form["txtInitialValue"]);
}
catch(FormatException fe)
{
strError = "There was an error related to the Principal. The error is as follows: " +
Environment.NewLine + fe.Message;
}
try
{
interestRate = double.Parse(Request.Form["txtInterestRate"]);
}
catch (FormatException fe)
{
strError = "The program produced an error related to the interest rate. The error was as follows: " +
Environment.NewLine + fe.Message;
}
try
{
periods = double.Parse(Request.Form["txtPeriods"]);
}
catch (FormatException fe)
{
strError = "An error resulted from the value meant for the period. Please report the error as follows: " +
Environment.NewLine + fe.Message;
}
double frequency = 12.00;
double per = periods / 100;
double futureValue = principal * Math.Pow((1.00 + (interestRate / frequency)), frequency * per);
double interestEarned = futureValue - principal;
strFutureValue = $"{futureValue:F}";
strInterestEarned = $"{interestEarned:F}";
}
}
<h1 class="common-font text-center bold">Compound Interest</h1>
<hr />
<form name="PayrollEvaluation" method="post" class="common-font delimiter">
<h4>Compound Values:</h4>
<hr />
<table>
<tr>
<td style="width: 150px">@Html.Label("txtInitialValue", "Principal:", new { @class = "bold" })</td>
<td>@Html.TextBox("txtInitialValue", @principal, new { @class = "form-control" })</td>
<td> </td>
</tr>
<tr>
<td>@Html.Label("txtInterestRate", "Interest Rate:", new { @class = "bold" })</td>
<td>@Html.TextBox("txtInterestRate", @interestRate, new { @class = "form-control" })</td>
<td>%</td>
</tr>
<tr>
<td>@Html.Label("txtPeriods", "Periods:", new { @class = "bold" })</td>
<td>@Html.TextBox("txtPeriods", @periods, new { @class = "form-control" })</td>
<td>years</td>
</tr>
</table>
<hr />
<h4>Compound Frequency:</h4>
<hr />
<table>
<tr>
<td style="width: 100px"><label for="rdoDaily">Daily</label></td>
<td><input type="radio" id="rdoDaily" name="rdoFrequency" value="Daily" /></td>
<td style="width: 50px"> </td>
<td style="width: 100px"><label for="rdoQuaterly">Quaterly</label></td>
<td><input type="radio" id="rdoQuaterly" name="rdoFrequency" value="Quaterly" /></td>
</tr>
<tr>
<td><label for="rdoWeekly">Weekly</label></td>
<td><input type="radio" id="rdoWeekly" name="rdoFrequency" value="Weekly" /></td>
<td> </td>
<td><label for="rdoSemiannually">Semiannually</label></td>
<td><input type="radio" id="rdoSemiannually" name="rdoFrequency" value="Semiannually" /></td>
</tr>
<tr>
<td><label for="rdoMonthly">Monthly</label></td>
<td><input type="radio" id="rdoMonthly" name="rdoFrequency" value="Monthly" /></td>
<td> </td>
<td><label for="rdoAnnually">Annually</label></td>
<td><input type="radio" id="rdoAnnually" name="rdoFrequency" value="Annually" /></td>
</tr>
</table>
<hr />
<table>
<tr>
<td style="width: 150px"> </td>
<td><input type="submit" value="Evaluate Compound Interest" name="btnCalculate" style="width: 250px" /></td>
</tr>
</table>
<hr />
<table>
<tr>
<td style="width: 200px" class="bold">Future Value:</td>
<td style="text-align: right">@strFutureValue</td>
</tr>
<tr>
<td class="bold">Interest Earned:</td>
<td style="text-align: right">@strInterestEarned</td>
</tr>
</table>
</form>
@page
@model IndexModel
@{
string strError = "";
double periods = 0.00;
double principal = 0.00;
double interestRate = 0.00;
string strFutureValue = "0.00";
string strInterestEarned = "0.00";
string strFrequency = "";
if (Request.HasFormContentType)
{
try
{
principal = double.Parse(Request.Form["txtInitialValue"]);
}
catch(FormatException fe)
{
strError = "There was an error related to the Principal. The error is as follows: " +
Environment.NewLine + fe.Message;
}
try
{
interestRate = double.Parse(Request.Form["txtInterestRate"]);
}
catch (FormatException fe)
{
strError = "The program produced an error related to the interest rate. The error was as follows: " +
Environment.NewLine + fe.Message;
}
try
{
periods = double.Parse(Request.Form["txtPeriods"]);
}
catch (FormatException fe)
{
strError = "An error resulted from the value meant for the period. Please report the error as follows: " +
Environment.NewLine + fe.Message;
}
double frequency = 12.00;
strFrequency = Request.Form["rdoFrequency"];
switch (strFrequency)
{
case "Daily":
frequency = 365.00;
break;
case "Weekly":
frequency = 52.00;
break;
case "Monthly":
frequency = 12.00;
break;
case "Quaterly":
frequency = 4.00;
break;
case "Semiannually":
frequency = 2.00;
break;
case "Annually":
frequency = 1.00;
break;
}
double per = periods / 100;
double futureValue = principal * Math.Pow((1.00 + (interestRate / frequency)), frequency * per);
double interestEarned = futureValue - principal;
strFutureValue = $"{futureValue:F}";
strInterestEarned = $"{interestEarned:F}";
}
}
<h1 class="common-font text-center bold">Compound Interest</h1>
<hr />
<form name="PayrollEvaluation" method="post" class="common-font delimiter">
<h4>Compound Values:</h4>
<hr />
<table>
<tr>
<td style="width: 150px">@Html.Label("txtInitialValue", "Principal:", new { @class = "bold" })</td>
<td>@Html.TextBox("txtInitialValue", @principal, new { @class = "form-control" })</td>
<td> </td>
</tr>
<tr>
<td>@Html.Label("txtInterestRate", "Interest Rate:", new { @class = "bold" })</td>
<td>@Html.TextBox("txtInterestRate", @interestRate, new { @class = "form-control" })</td>
<td>%</td>
</tr>
<tr>
<td>@Html.Label("txtPeriods", "Periods:", new { @class = "bold" })</td>
<td>@Html.TextBox("txtPeriods", @periods, new { @class = "form-control" })</td>
<td>years</td>
</tr>
</table>
<hr />
<h4>Compound Frequency:</h4>
<hr />
<table>
<tr>
<td style="width: 100px"><label for="rdoDaily">Daily</label></td>
<td><input type="radio" id="rdoDaily" name="rdoFrequency" value="Daily" /></td>
<td style="width: 50px"> </td>
<td style="width: 100px"><label for="rdoQuaterly">Quaterly</label></td>
<td><input type="radio" id="rdoQuaterly" name="rdoFrequency" value="Quaterly" /></td>
</tr>
<tr>
<td><label for="rdoWeekly">Weekly</label></td>
<td><input type="radio" id="rdoWeekly" name="rdoFrequency" value="Weekly" /></td>
<td> </td>
<td><label for="rdoSemiannually">Semiannually</label></td>
<td><input type="radio" id="rdoSemiannually" name="rdoFrequency" value="Semiannually" /></td>
</tr>
<tr>
<td><label for="rdoMonthly">Monthly</label></td>
<td><input type="radio" id="rdoMonthly" name="rdoFrequency" value="Monthly" /></td>
<td> </td>
<td><label for="rdoAnnually">Annually</label></td>
<td><input type="radio" id="rdoAnnually" name="rdoFrequency" value="Annually" /></td>
</tr>
</table>
<hr />
<table>
<tr>
<td style="width: 150px"> </td>
<td><input type="submit" value="Evaluate Compound Interest" name="btnCalculate" style="width: 250px" /></td>
</tr>
</table>
<hr />
<table>
<tr>
<td style="width: 200px" class="bold">Compound Frequency:</td>
<td style="text-align: right">@strFrequency</td>
</tr>
<tr>
<td class="bold">Future Value:</td>
<td style="text-align: right">@strFutureValue</td>
</tr>
<tr>
<td class="bold">Interest Earned:</td>
<td style="text-align: right">@strInterestEarned</td>
</tr>
</table>
</form>
body {
}

.bold        { font-weight:      bold;  }
.text-right  { text-align:       right  }
.delimiter   { margin:           auto;
               width:            650px; }
.top-bar     { border-bottom:    6px solid blue;
               background-color: #0046be !important; }
.common-font { font-family:      Georgia, Garamond, 'Times New Roman', serif; }
.navbar-light .navbar-brand       { color:       white;  }
.navbar-light .navbar-brand:hover { color:       yellow; }
.navbar-light .navbar-brand:focus { color:       khaki;  }
.navbar-light .navbar-brand       { font-family: Georgia, Garamond, 'Times New Roman', serif; }
.nav-link { font-family: Georgia, Garamond, 'Times New Roman', serif; }<!DOCTYPE html>
<html lang="en">
<head>
<meta charset="utf-8" />
<meta name="viewport" content="width=device-width, initial-scale=1.0" />
<title>@ViewData["Title"] - Geometry</title>
<link rel="stylesheet" href="~/lib/bootstrap/dist/css/bootstrap.min.css" />
<link rel="stylesheet" href="~/css/site.css" asp-append-version="true" />
<link rel="stylesheet" href="~/css/Geometry.css" asp-append-version="true" />
</head>
<body>
<header>
<nav class="navbar navbar-expand-sm navbar-toggleable-sm navbar-light bg-white border-bottom box-shadow mb-3 top-bar">
<div class="container">
<a class="navbar-brand" asp-area="" asp-page="/Index">Geometry</a>
<button class="navbar-toggler" type="button" data-bs-toggle="collapse" data-bs-target=".navbar-collapse" aria-controls="navbarSupportedContent"
aria-expanded="false" aria-label="Toggle navigation">
<span class="navbar-toggler-icon"></span>
</button>
<div class="navbar-collapse collapse d-sm-inline-flex justify-content-between">
<ul class="navbar-nav flex-grow-1">
<li class="nav-item">
<a class="nav-link text-white" asp-area="" asp-page="/Square">Square</a>
</li>
<li class="nav-item">
<a class="nav-link text-white" asp-area="" asp-page="/EquilateralTriangle">Equilateral Triangle</a>
</li>
<li class="nav-item">
<a class="nav-link text-white" asp-area="" asp-page="/Trapezoid">Trapezoid</a>
</li>
<li class="nav-item">
<a class="nav-link text-white" asp-area="" asp-page="/TrapezoidalPrism">Trapezoid Prism</a>
</li>
</ul>
</div>
</div>
</nav>
</header>
<div class="container">
<main role="main" class="pb-3">
@RenderBody()
</main>
</div>
<footer class="border-top footer text-muted">
<div class="container">
<p class="text-center common-font">© 2022 - Geometry - <a asp-area="" asp-page="/Privacy">Privacy</a></p>
</div>
</footer>
<script src="~/lib/jquery/dist/jquery.min.js"></script>
<script src="~/lib/bootstrap/dist/js/bootstrap.bundle.min.js"></script>
<script src="~/js/site.js" asp-append-version="true"></script>
@await RenderSectionAsync("Scripts", required: false)
</body>
</html>The Exponential
To let you calculate the exponential value of a number, the Math static class provides the Exp() method. Its syntax is:
public static double Exp(double d);
If the value of the argument x is less than -708.395996093 (approximately), the result is reset to 0 and qualifies as underflow. If the value of the argument x is greater than 709.78222656 (approximately), the result qualifies as overflow.
Here is an example of calling this method:
<pre<The exponential of 709.78222656 is @(Math.Exp(709.78222656)</pre>
This would produce:
The exponential of 709.78222656 is 1.79681906923757E+308
The Natural Logarithm
To calculate the natural logarithm of a number, you can call the Math.Log() method. It is provides in two versions. The syntax of one is:
public static double Log(double d);
Here is an example:
@{
    double log = 12.48;
}

<pre<Log of @log is @(Math.Log(log)</pre>
This would produce:
Log of 12.48 is 2.52412736294128
The Base 10 Logarithm
The Math.Log10() method calculates the base 10 logarithm of a number. The syntax of this method is:
public static double Log10(double d);
The number to be evaluated is passed as the argument. The method returns the logarithm on base 10 using the formula:
y = log10x
which is equivalent to
x = 10y
Here is an example:
@{
    double log10 = 12.48;
}

<pre<Log 10 of @log10 is @(Math.Log10(log10)</pre>
This would produce:
Log 10 of 12.48 is 1.09621458534641
The Logarithm of Any Base
The Math.Log() method provides another version whose syntax is:
public static double Log(double a, double newBase);
The variable whose logarithmic value will be calculated is passed as the first argument to the method. The second argument allows you to specify a base of your choice. The method uses the formula:
Y = logNewBasex
This is the same as
x = NewBasey
Here is an example of calling this method:
@{
        double logN = 12.48D;
}

<pre<Log N of @logN is @(Math.Log(logN, 4)</pre>
This would produce:
Log N of 12.48 is 1.82077301454376
The Square Root
You can calculate the square root of a decimal positive number. To support this, the Math static class is equipped with a method named Sqrt whose syntax is:
public static double Sqrt(double d);
This method takes one argument as a positive floating-point number. After the calculation, the method returns the square root of x:
@{
    double sqrt = 8025.73;

    double number = Math.Sqrt(sqrt));
}
![]() Practical Learning: Finding the Square Root of a Number
Practical Learning: Finding the Square Root of a Number
namespace Geometry3.Models
{
    public class Square
    {
        public double Side { get; set; }

        public Square(double side)
        {
            Side = side;
        }

        public double Perimeter
        {
            get
            {
                return Side * 4.00;
            }
        }

        public virtual double Area
        {
            get
            {
                return Side * Side;
            }
        }

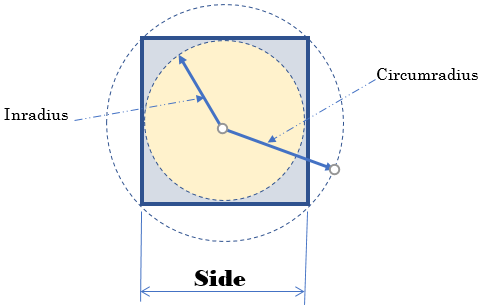
        public virtual double CalculateInradius()
        {
            return Side / 2.00;
        }

        public virtual double CalculateCircumradius()
        {
            return Math.Sqrt(2.00) * Side / 2.00;
        }
    }
}@page
@model Geometry3.Pages.SquareModel
@using Geometry3.Models
@{
double side = 0.00;
string? strMessage = null;
Square sqr = new Square(0.00);
if (Request.HasFormContentType)
{
try
{
side = double.Parse(Request.Form["txtSide"])!;
}
catch(FormatException fexc)
{
strMessage = "You must provide a valid value for the side of the square." +
Environment.NewLine + "The error produced is: " +
fexc.Message;
}
sqr = new(side);
}
}
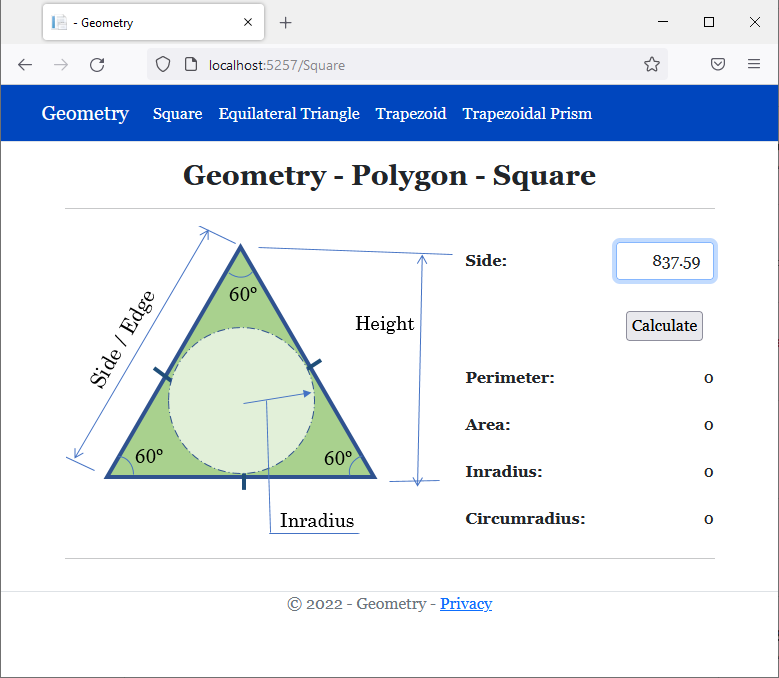
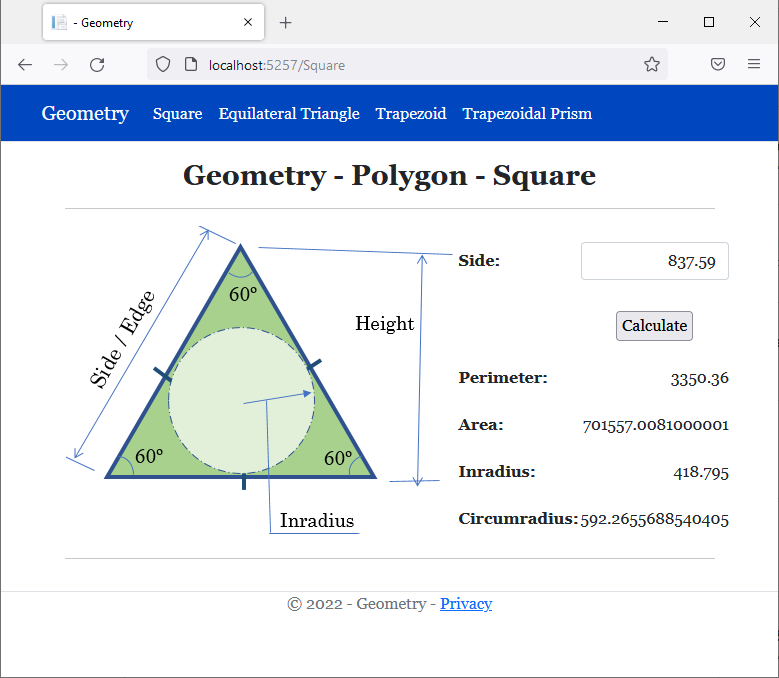
<div class="delimiter common-font">
<h2 class="text-center bold">Geometry - Polygon - Square</h2>
<hr />
<form name="frmGeometry" method="post">
<table>
<tr>
<td style="width: 400px" rowspan="8">
<img src="~/images/triangle1.png" width="391" height="315" alt="Geometry - Square">
</td>
<td style="width: 150px" class="bold">Side:</td>
<td>@Html.TextBox("txtSide", @sqr.Side, new { @class = "form-control text-right" })</td>
</tr>
<tr>
<td> </td>
<td style="text-align: center"><input type="submit" name="btnSubmit" value="Calculate" /></td>
</tr>
<tr>
<td class="bold">Perimeter:</td>
<td class="text-right">@sqr.Perimeter</td>
</tr>
<tr>
<td class="bold">Area:</td>
<td class="text-right">@sqr.Area</td>
</tr>
<tr>
<td class="bold">Inradius:</td>
<td class="text-right">@sqr.CalculateInradius()</td>
</tr>
<tr>
<td class="bold">Circumradius:</td>
<td class="text-right">@sqr.CalculateCircumradius()</td>
</tr>
</table>
</form>
<hr />
<p class="text-center">@strMessage</p>
</div>namespace Geometry3.Models
{
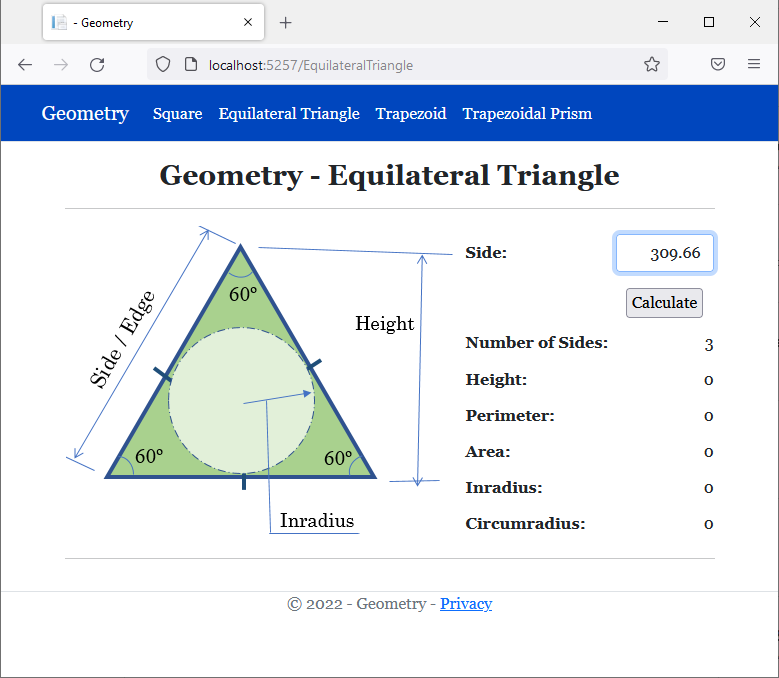
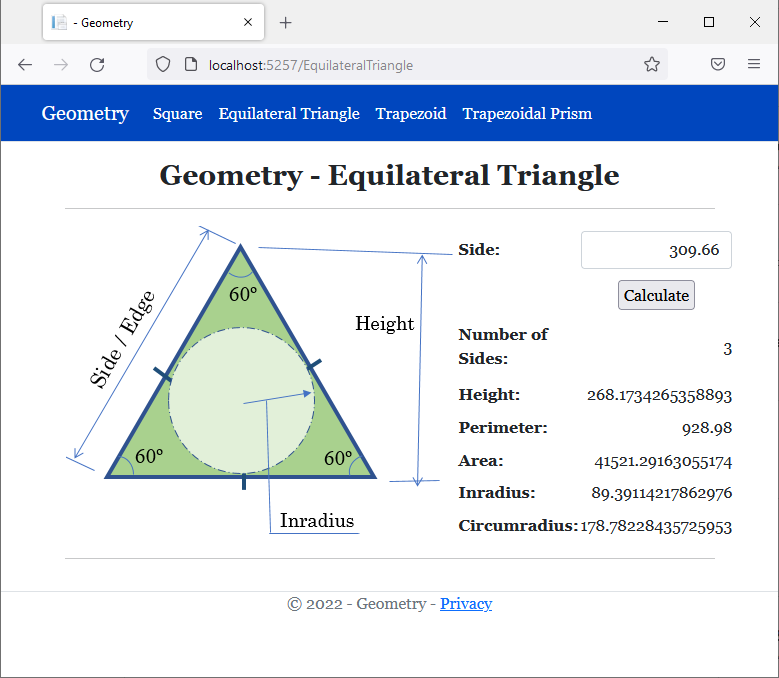
public class EquilateralTriangle
{
private double s;
public readonly double NumberOfSides;
public EquilateralTriangle(double side)
{
s = side;
NumberOfSides = 3;
}
public double Side
{
get { return s; }
set { s = value; }
}
public double Perimeter => s * NumberOfSides;
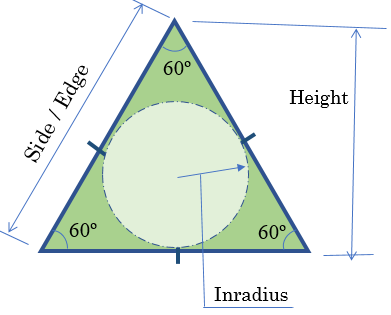
public double Height => s * Math.Sqrt(3) / 2;
public double Area => s * s * Math.Sqrt(3) / 4;
public double Inradius => s * Math.Sqrt(3) / 6;
public double Circumradius => s / Math.Sqrt(3);
}
}@page
@model Geometry3.Pages.EquilateralTriangleModel
@using Geometry3.Models
@{
double side = 0.00;
string? strMessage = null;
EquilateralTriangle et = new(0.00);
if (Request.HasFormContentType)
{
try
{
side = double.Parse(Request.Form["txtSide"])!;
}
catch(FormatException fexc)
{
strMessage = "You must provide a valid common value for the sides of the triangle." +
Environment.NewLine + "The error produced is: " +
fexc.Message;
}
et = new(side);
}
}
<div class="delimiter common-font">
<h2 class="text-center bold">Geometry - Equilateral Triangle</h2>
<hr />
<form name="frmGeometry" method="post">
<table>
<tr>
<td style="width: 400px" rowspan="8">
<img src="~/images/triangle1.png" width="391" height="315" alt="Geometry - Square">
</td>
<td style="width: 150px" class="bold">Side:</td>
<td>@Html.TextBox("txtSide", @et.Side, new { @class = "form-control text-right" })</td>
</tr>
<tr>
<td> </td>
<td style="text-align: center"><input type="submit" name="btnSubmit" value="Calculate" /></td>
</tr>
<tr>
<td class="bold">Number of Sides:</td>
<td class="text-right">@et.NumberOfSides</td>
</tr>
<tr>
<td class="bold">Height:</td>
<td class="text-right">@et.Height</td>
</tr>
<tr>
<td class="bold">Perimeter:</td>
<td class="text-right">@et.Perimeter</td>
</tr>
<tr>
<td class="bold">Area:</td>
<td class="text-right">@et.Area</td>
</tr>
<tr>
<td class="bold">Inradius:</td>
<td class="text-right">@et.Inradius</td>
</tr>
<tr>
<td class="bold">Circumradius:</td>
<td class="text-right">@et.Circumradius</td>
</tr>
</table>
</form>
<hr />
<p class="text-center">@strMessage</p>
</div>namespace Geometry3.Models
{
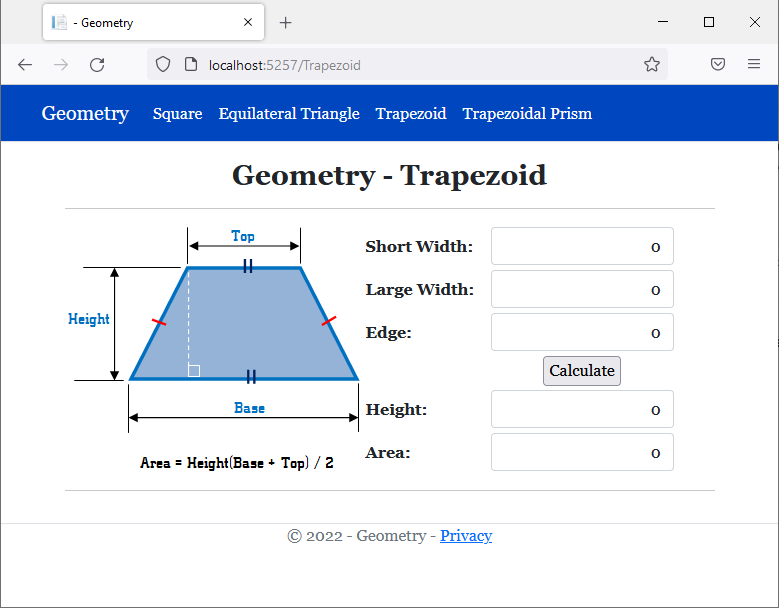
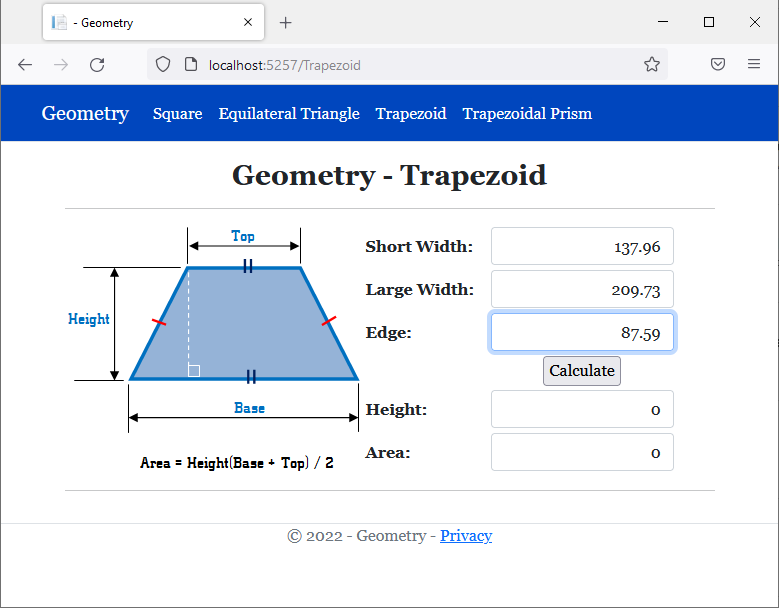
public class Trapezoid
{
public double Edge { get; set; }
public double ShortWidth { get; set; }
public double LargeWidth { get; set; }
public Trapezoid(double sSide, double lSide, double edge)
{
Edge = edge;
LargeWidth = lSide;
ShortWidth = sSide;
}
public double Perimeter => LargeWidth + Edge + ShortWidth + Edge;
// http://mathworld.wolfram.com/IsoscelesTrapezoid.html
public double Height
{
get
{
return Math.Sqrt((Edge * Edge) - (Math.Pow(LargeWidth - ShortWidth, 2.00) / 4.00));
}
}
virtual public double CalculateArea()
{
return (LargeWidth + ShortWidth) * Height / 2.00;
}
}
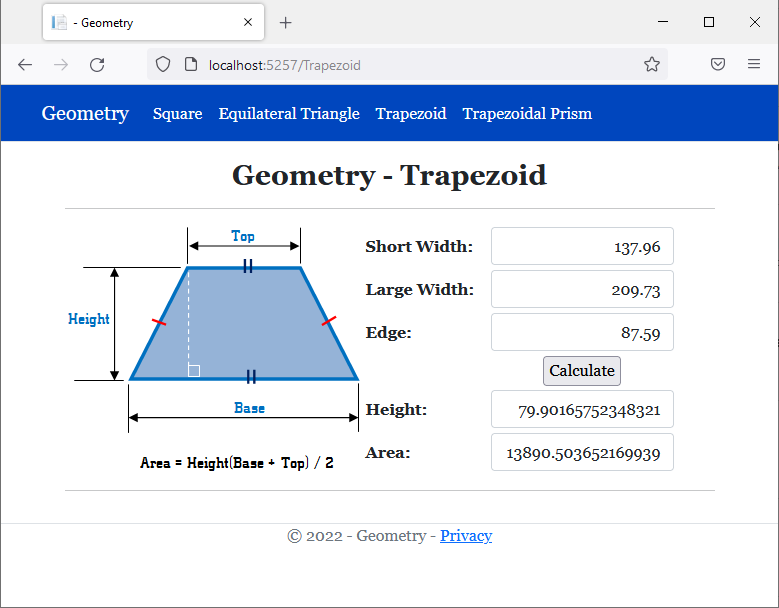
}@page
@model Geometry3.Pages.TrapezoidModel
@using Geometry3.Models
@{
string? strMessage = null;
Trapezoid trap = new(0.00, 0.00, 0.00);
if (Request.HasFormContentType)
{
try
{
trap.ShortWidth = double.Parse(Request.Form["txtShortWidth"]);
}
catch(FormatException fexc)
{
strMessage = fexc.Message;
}
try
{
trap.LargeWidth = double.Parse(Request.Form["txtLargeWidth"]);
}
catch(FormatException fexc)
{
strMessage = fexc.Message;
}
try
{
trap.Edge = double.Parse(Request.Form["txtEdge"]);
}
catch(FormatException fexc)
{
strMessage = fexc.Message;
}
}
}
<div class="delimiter common-font">
<h2 class="text-center bold">Geometry - Trapezoid</h2>
<hr />
<form name="frmGeometry" method="post">
<table>
<tr>
<td style="width: 300px" rowspan="9">
<img src="~/images/trapezoid1.png" width="296" height="247" alt="Geometry - Trapezoid">
</td>
<td style="width: 125px" class="bold">Short Width:</td>
<td>@Html.TextBox("txtShortWidth", @trap.ShortWidth, new { @class = "form-control text-right" })</td>
</tr>
<tr>
<td class="bold">Large Width:</td>
<td>@Html.TextBox("txtLargeWidth", @trap.LargeWidth, new { @class = "form-control text-right" })</td>
</tr>
<tr>
<td class="bold">Edge:</td>
<td>@Html.TextBox("txtEdge", @trap.Edge, new { @class = "form-control text-right" })</td>
</tr>
<tr>
<td> </td>
<td style="text-align: center"><input type="submit" name="btnSubmit" value="Calculate" /></td>
</tr>
<tr>
<td class="bold">Height:</td>
<td>@Html.TextBox("txtHeight", @trap.Height, new { @class = "form-control text-right" })</td>
</tr>
<tr>
<td class="bold">Area:</td>
<td>@Html.TextBox("txtArea", @trap.CalculateArea(), new { @class = "form-control text-right" })</td>
</tr>
</table>
</form>
<hr />
<p class="text-center">@strMessage</p>
</div>namespace Geometry3.Models
{
public class TrapezoidalPrism : Trapezoid
{
public double Length { get; set; }
public TrapezoidalPrism(double sSide, double lSide, double side, double len)
: base(sSide, lSide, side)
{
Length = len;
}
public double BaseArea => base.CalculateArea();
override public double CalculateArea()
{
double shortArea = ShortWidth * Length;
double longArea = LargeWidth * Length;
double sideArea = Edge * Length;
return (BaseArea * 2.00) + shortArea + longArea + (sideArea * 2.00);
}
public double Volume => BaseArea * Length;
}
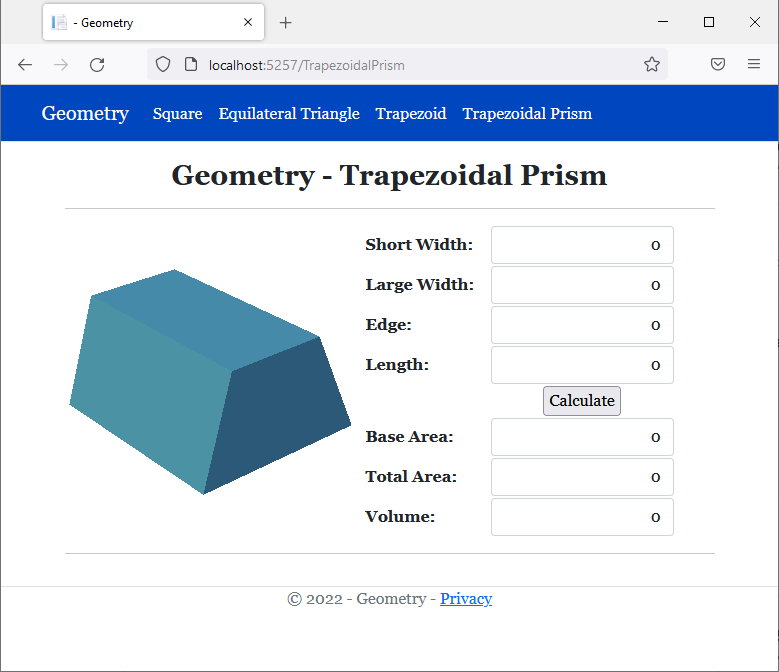
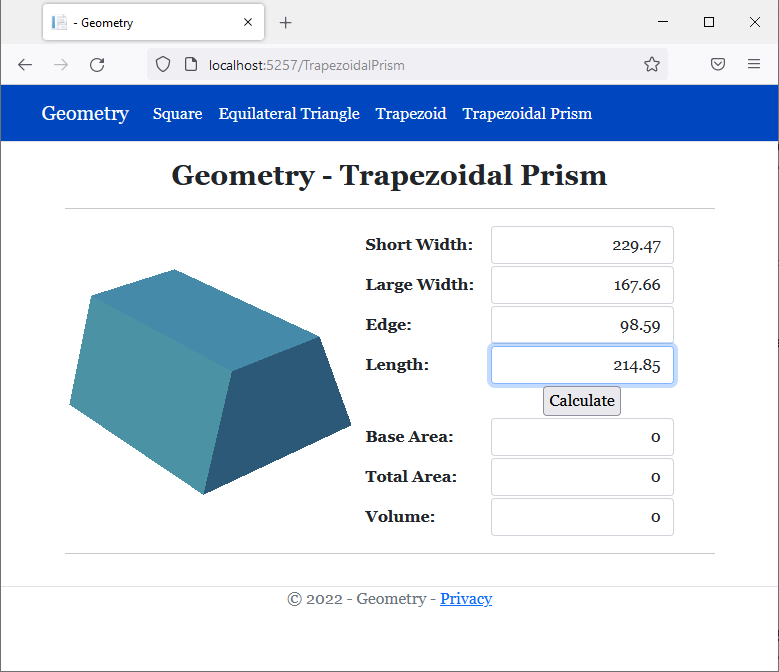
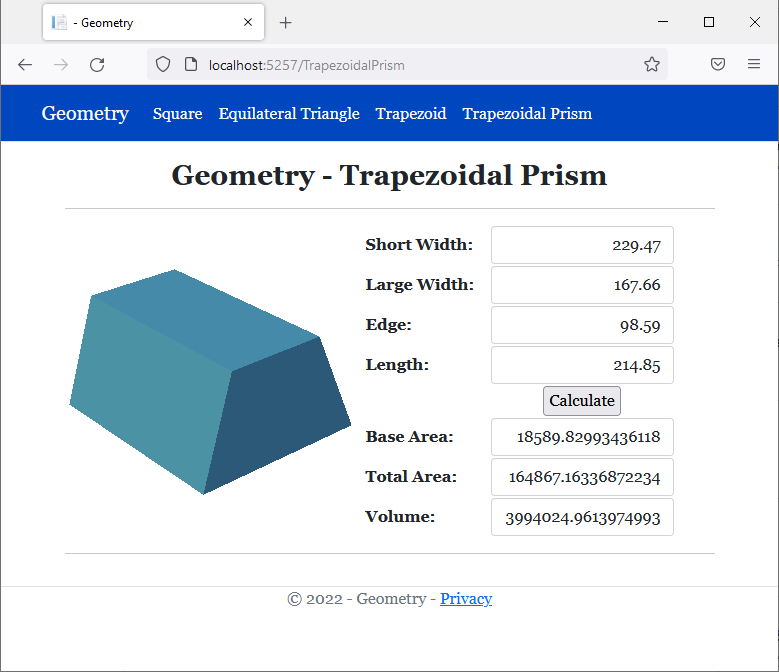
}@page
@model Geometry3.Pages.TrapezoidalPrismModel
@using Geometry3.Models
@{
string? strMessage = null;
TrapezoidalPrism trap = new TrapezoidalPrism(0.00, 0.00, 0.00, 0.00);
if (Request.HasFormContentType)
{
try
{
trap.ShortWidth = double.Parse(Request.Form["txtShortWidth"]);
}
catch(FormatException fexc)
{
strMessage = fexc.Message;
}
try
{
trap.LargeWidth = double.Parse(Request.Form["txtLargeWidth"]);
}
catch(FormatException fexc)
{
strMessage = fexc.Message;
}
try
{
trap.Edge = double.Parse(Request.Form["txtEdge"]);
}
catch(FormatException fexc)
{
strMessage = fexc.Message;
}
try
{
trap.Length = double.Parse(Request.Form["txtLength"]);
}
catch(FormatException fexc)
{
strMessage = fexc.Message;
}
}
}
<div class="delimiter common-font">
<h2 class="text-center bold">Geometry - Trapezoidal Prism</h2>
<hr />
<form name="frmGeometry" method="post">
<table>
<tr>
<td style="width: 300px" rowspan="9">
<img src="~/images/tp.png" width="289" height="230" alt="Geometry - Trapezoidal Prism">
</td>
<td style="width: 125px" class="bold">Short Width:</td>
<td>@Html.TextBox("txtShortWidth", @trap.ShortWidth, new { @class = "form-control text-right" })</td>
</tr>
<tr>
<td class="bold">Large Width:</td>
<td>@Html.TextBox("txtLargeWidth", @trap.LargeWidth, new { @class = "form-control text-right" })</td>
</tr>
<tr>
<td class="bold">Edge:</td>
<td>@Html.TextBox("txtEdge", @trap.Edge, new { @class = "form-control text-right" })</td>
</tr>
<tr>
<td class="bold">Length:</td>
<td>@Html.TextBox("txtLength", @trap.Length, new { @class = "form-control text-right" })</td>
</tr>
<tr>
<td> </td>
<td style="text-align: center"><input type="submit" name="btnSubmit" value="Calculate" /></td>
</tr>
<tr>
<td class="bold">Base Area:</td>
<td>@Html.TextBox("txt>BaseArea", @trap.BaseArea, new { @class = "form-control text-right" })</td>
</tr>
<tr>
<td class="bold">Total Area:</td>
<td>@Html.TextBox("txtTotalArea", @trap.CalculateArea(), new { @class = "form-control text-right" })</td>
</tr>
<tr>
<td class="bold">Volume:</td>
<td>@Html.TextBox("txtVolume", @trap.Volume, new { @class = "form-control text-right" })</td>
</tr>
</table>
</form>
<hr />
<p class="text-center">@strMessage</p>
</div>

|
|
|||
| Previous | Copyright © 2001-2022, FunctionX | Sunday 12 February 2022 | Next |
|
|
|||