Data Reading and Writing to the Console
Data Reading and Writing to the Console
Introduction to the Console
Overview
When you have created an ASP.NET Core Web application, when you execute it, Microsoft Visual Studio opens a Hosting window and creates a website to display in a browser. The Hosting window is a Microsoft Windows object with a black background that displays some characters. Here is an example:
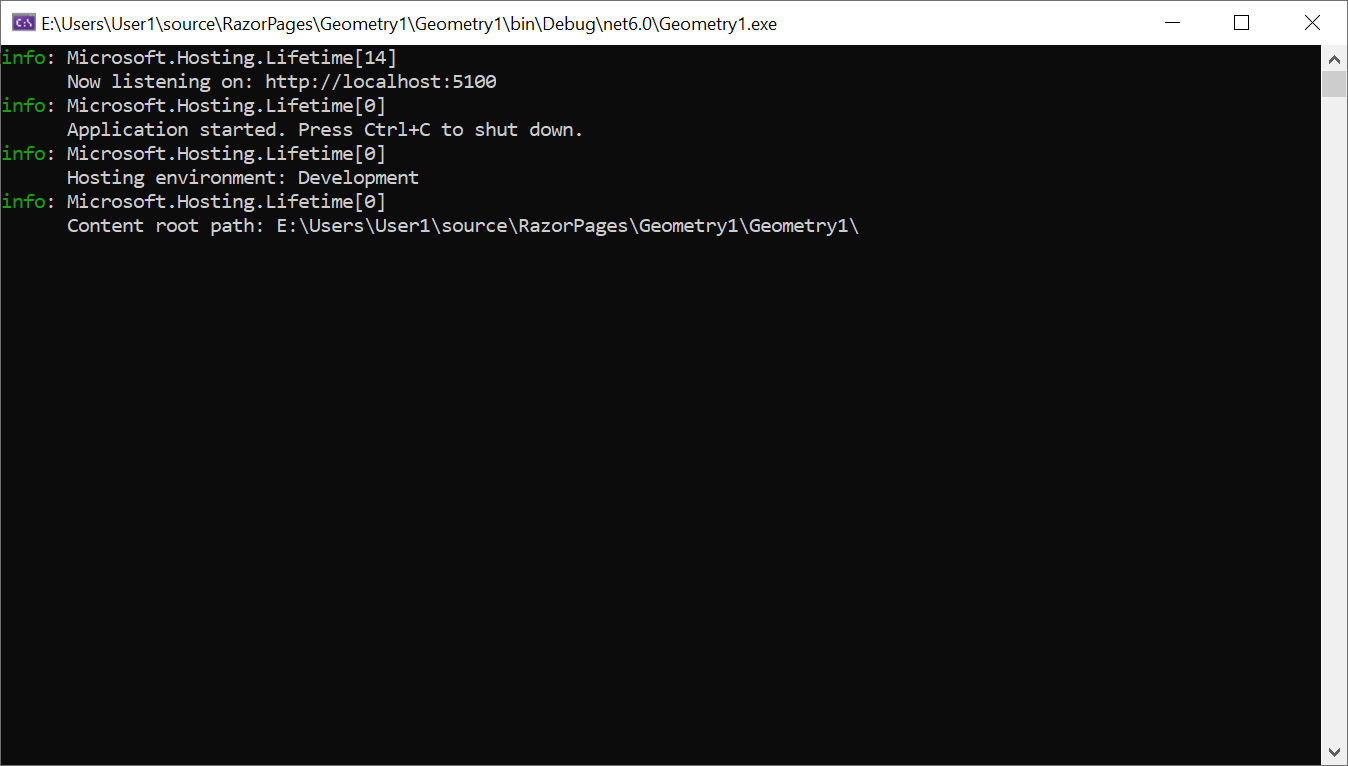
When the hosting window comes up, Microsoft Visual Studio writes some lines about the local server setup of your current application. You too can display some values about your application in that window. To allow you to display some values in the Hosting window, the .NET library provides a static class named Console.
![]() Practical Learning: Introducing the Console
Practical Learning: Introducing the Console
body {
}

.bold        { font-weight:      bold;  }
.text-right  { text-align:       right  }
.delimiter   { margin:           auto;
               width:            650px; }
.top-bar     { border-bottom:    6px solid blue;
               background-color: #800000 !important; }
.common-font { font-family:      Georgia, Garamond, 'Times New Roman', serif; }
.navbar-light .navbar-brand       { color:       white;  }
.navbar-light .navbar-brand:hover { color:       yellow; }
.navbar-light .navbar-brand:focus { color:       khaki;  }
.navbar-light .navbar-brand       { font-family: Georgia, Garamond, 'Times New Roman', serif; }
.nav-link { font-family: Georgia, Garamond, 'Times New Roman', serif; }<!DOCTYPE html>
<html lang="en">
<head>
<meta charset="utf-8" />
<meta name="viewport" content="width=device-width, initial-scale=1.0" />
<title>@ViewData["Title"] - Oblique Triangles</title>
<link rel="stylesheet" href="~/lib/bootstrap/dist/css/bootstrap.min.css" />
<link rel="stylesheet" href="~/css/site.css" asp-append-version="true" />
<link rel="stylesheet" href="~/css/Geometry.css" asp-append-version="true" />
</head>
<body>
<header>
<nav class="navbar navbar-expand-sm navbar-toggleable-sm navbar-light bg-white border-bottom box-shadow mb-3 top-bar">
<div class="container">
<a class="navbar-brand" asp-area="" asp-page="/Index">Oblique Triangles</a>
<button class="navbar-toggler" type="button" data-bs-toggle="collapse" data-bs-target=".navbar-collapse" aria-controls="navbarSupportedContent"
aria-expanded="false" aria-label="Toggle navigation">
<span class="navbar-toggler-icon"></span>
</button>
<div class="navbar-collapse collapse d-sm-inline-flex justify-content-between">
<ul class="navbar-nav flex-grow-1">
<li class="nav-item">
<a class="nav-link text-white" asp-area="" asp-page="/AAS">AAS</a>
</li>
<li class="nav-item">
<a class="nav-link text-white" asp-area="" asp-page="/SAS">SAS</a>
</li>
<li class="nav-item">
<a class="nav-link text-white" asp-area="" asp-page="/ASA">ASA</a>
</li>
<li class="nav-item">
<a class="nav-link text-white" asp-area="" asp-page="/SSS">SSS</a>
</li>
</ul>
</div>
</div>
</nav>
</header>
<div class="container">
<main role="main" class="pb-3">
@RenderBody()
</main>
</div>
<footer class="border-top footer text-muted">
<div class="container">
<p class="text-center common-font">© 2022 - Oblique Triangles - <a asp-area="" asp-page="/Privacy">Privacy</a></p>
</div>
</footer>
<script src="~/lib/jquery/dist/jquery.min.js"></script>
<script src="~/lib/bootstrap/dist/js/bootstrap.bundle.min.js"></script>
<script src="~/js/site.js" asp-append-version="true"></script>
@await RenderSectionAsync("Scripts", required: false)
</body>
</html>Starting Console Code
The Console class is defined in the System namespace. Therefore, to use it in your application, in your code, you can type System followed by a period. If you are using the code Editor in Microsoft Visual Studio to create your application, its Intellisense would display the available classes of that namespace.
Since the Console class is static, you never have to declare a variable of it in order to use it. Therefore, to access the Console class in your code, after typing System and a period, type Console. To access a member of this class, type a period after its name.
Writing to the Console
To provide the ability to display one or more values to the screen, the Console class is equipped with a method named Write. To use the Write() method, inside its parentheses, type the value you want to display. Here is an example:
@{
    System.Console.Write("The Wonderful World of C# Programming");
}
To be able to handle any value of the data types we have used so far, the Write() method is overloaded with various versions. There is a version for each data type. The syntaxes are:
public static void Write(int value);
public static void Write(uint value);
public static void Write(string value);
public static void Write(long value);
public static void Write(ulong value);
public static void Write(float value);
public static void Write(double value);
public static void Write(decimal value);
public static void Write(object value);
Writing With a New Line
After displaying a value on the screen, the Write() method keeps the caret on the same line. To give you the ability to move the caret to the next line after displaying a value, the Console class is equipped with a method named WriteLine. Like Write(), the WriteLine() method has a version for each of the data types we have used so far:
public static void WriteLine(int value);
public static void WriteLine(uint value);
public static void WriteLine(string value);
public static void WriteLine(long value);
public static void WriteLine(ulong value);
public static void WriteLine(float value);
public static void WriteLine(double value);
public static void WriteLine(decimal value);
public static void WriteLine(object value);
Besides these versions, the Write() and the WriteLine() methods have each a version that takes an unlimited number of arguments. Their syntaxes are:
public static void WriteLine(. . .);
public static void WriteLine(. . .);
To get skeleton code for System.Console.WriteLine, right-click the line where you want to add it, position the mouse on Snippet, and click Insert Snippet... Double-click Visual C#. In the list, double-click cw:

![]() Practical Learning: Introducing Data Writing
Practical Learning: Introducing Data Writing
@page
@model ObliqueTriangles3.Pages.AASModel
@{
double side1 = 0.00, side2 = 0.00, side3 = 0.00;
double angle1 = 0.00, angle2 = 0.00, angle3 = 0.00;
if (Request.HasFormContentType)
{
try
{
angle1 = double.Parse(Request.Form["txtAASAngle1"]);
}
catch (FormatException)
{
System.Console.WriteLine("You must type a value for the lower left angle of the AAS shape.");
}
try
{
angle2 = double.Parse(Request.Form["txtAASAngle2"]);
}
catch (FormatException)
{
System.Console.WriteLine("You must type a value for the lower right angle of the AAS shape.");
}
try
{
side1 = double.Parse(Request.Form["txtAASSide1"]);
}
catch (FormatException)
{
System.Console.WriteLine("You must type a value for the right side of the AAS shape.");
}
// Here, we use the law of sines
angle3 = 180 - (angle1 + angle2);
side2 = side1 * Math.Sin(angle2 * Math.PI / 180) / Math.Sin(angle1 * Math.PI / 180);
side3 = side1 * Math.Sin(angle3 * Math.PI / 180) / Math.Sin(angle1 * Math.PI / 180);
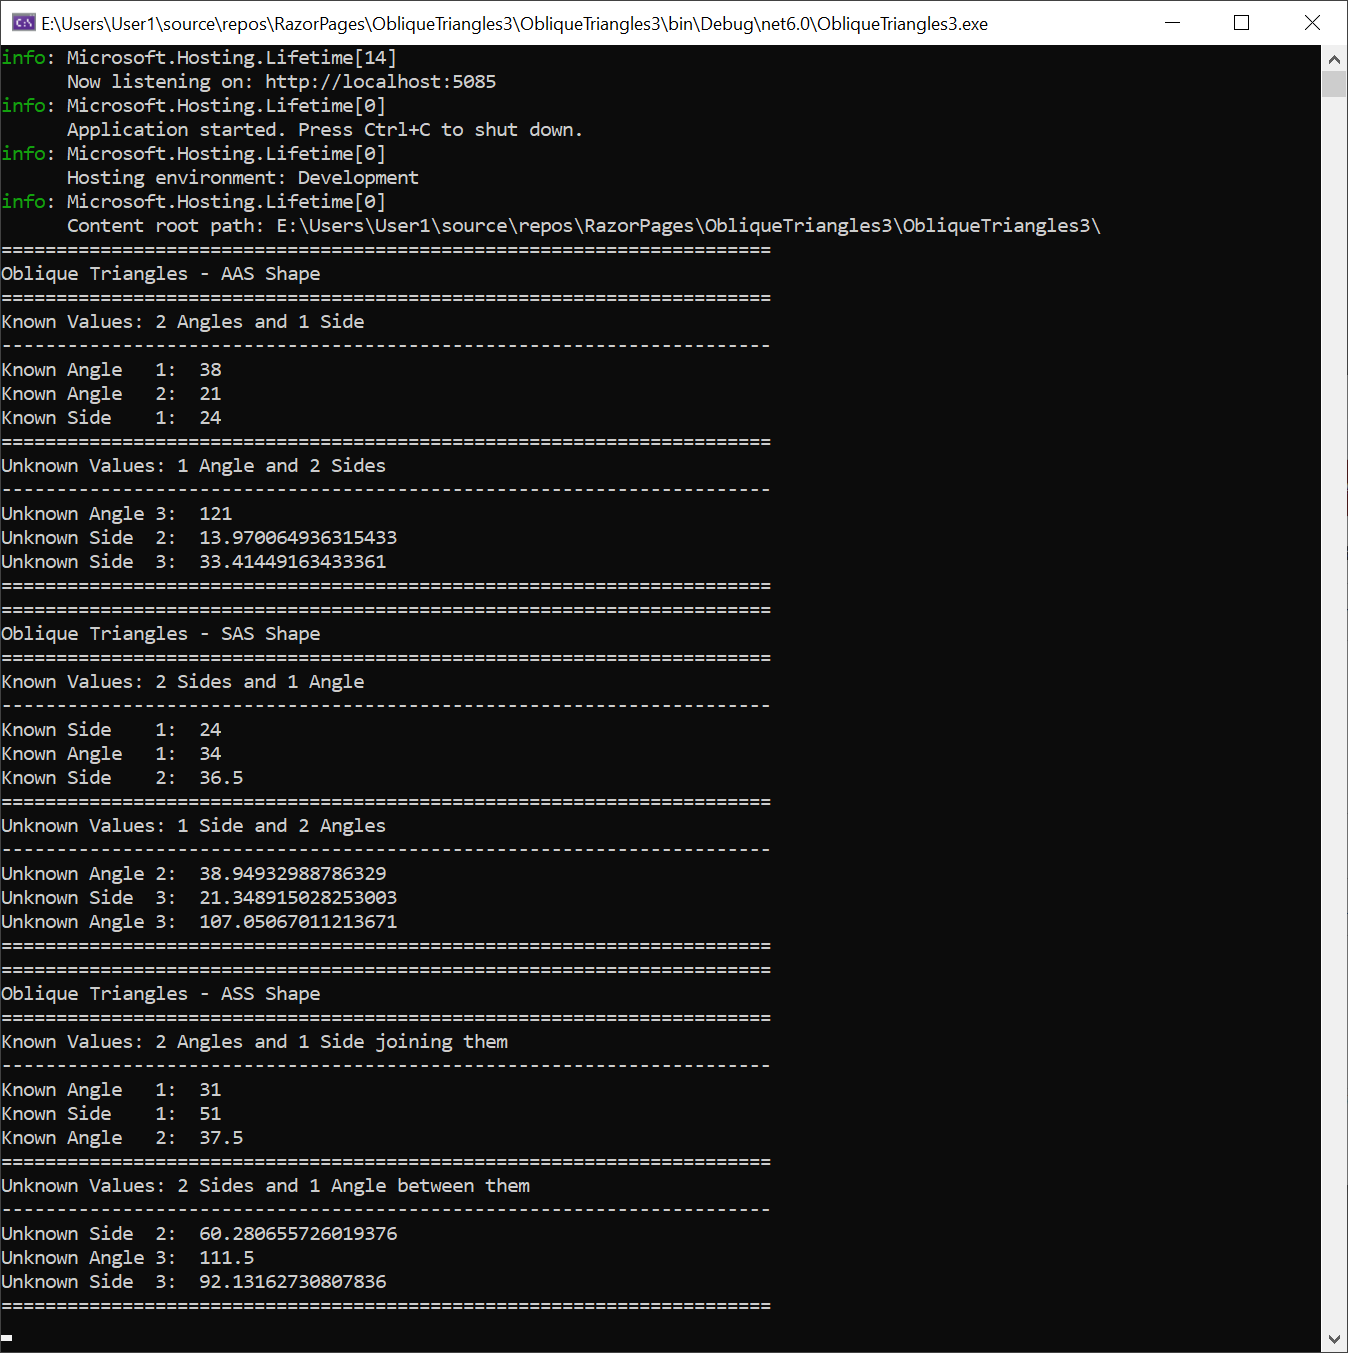
System.Console.WriteLine("======================================================================");
System.Console.WriteLine("Oblique Triangles - AAS Shape");
System.Console.WriteLine("======================================================================");
System.Console.WriteLine("Known Values: 2 Angles and 1 Side");
System.Console.WriteLine("----------------------------------------------------------------------");
System.Console.WriteLine("Known Angle 1: " + angle1.ToString());
System.Console.WriteLine("Known Angle 2: " + angle2.ToString());
System.Console.WriteLine("Known Side 1: " + side1.ToString());
System.Console.WriteLine("======================================================================");
System.Console.WriteLine("Unknown Values: 1 Angle and 2 Sides");
System.Console.WriteLine("----------------------------------------------------------------------");
System.Console.WriteLine("Unknown Angle 3: " + angle3.ToString());
System.Console.WriteLine("Unknown Side 2: " + side2.ToString());
System.Console.WriteLine("Unknown Side 3: " + side3.ToString());
System.Console.WriteLine("======================================================================");
}
}
<div class="delimiter common-font">
<h2 class="text-center bold">Oblique Triangles - AAS Shape</h2>
<hr />
<h5 class="text-right">Known Values: 2 Angles and 1 Side</h5>
<hr />
<form name="frmGeometry" method="post">
<table>
<tr>
<td style="width: 300px" rowspan="3">
<img src="~/images/aas.png" width="258" height="159" alt="Oblique Triangles - AAS Shape">
</td>
<td style="width: 150px">Known Angle 1:</td>
<td>@Html.TextBox("txtAASAngle1", @angle1, new { @class = "form-control text-right" })</td>
</tr>
<tr>
<td>Known Angle 2:</td>
<td>@Html.TextBox("txtAASAngle2", @angle2, new { @class = "form-control text-right" })</td>
</tr>
<tr>
<td>Known Side 1:</td>
<td>@Html.TextBox("txtAASSide1", @side1, new { @class = "form-control text-right" })</td>
</tr>
</table>
<hr />
<table>
<tr>
<td style="width: 350px"> </td>
<td style="text-align: center"><input type="submit" name="btnSubmit" value="Find Unknown Values" /></td>
</tr>
</table>
</form>
<hr />
<h5 class="text-right">Unknown Values: 1 Angle and 2 Sides</h5>
<hr />
<table>
<tr>
<td style="width: 300px"> </td>
<td style="width: 150px">Unknown Angle 3:</td>
<td>@Html.TextBox("txtAASAngle3", @angle3, new { @class = "form-control text-right" })</td>
</tr>
<tr>
<td> </td>
<td>Unknown Side 2:</td>
<td>@Html.TextBox("txtAASSide2", @side2, new { @class = "form-control text-right" })</td>
</tr>
<tr>
<td> </td>
<td>Unknown Side 3:</td>
<td>@Html.TextBox("txtAASSide3", @side3, new { @class = "form-control text-right" })</td>
</tr>
</table>
</div>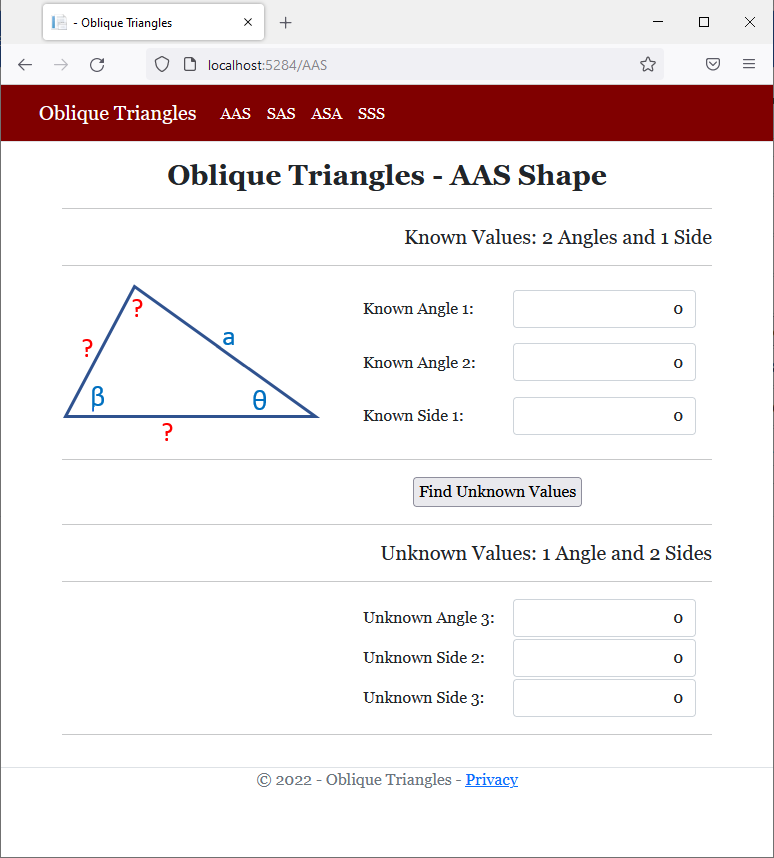
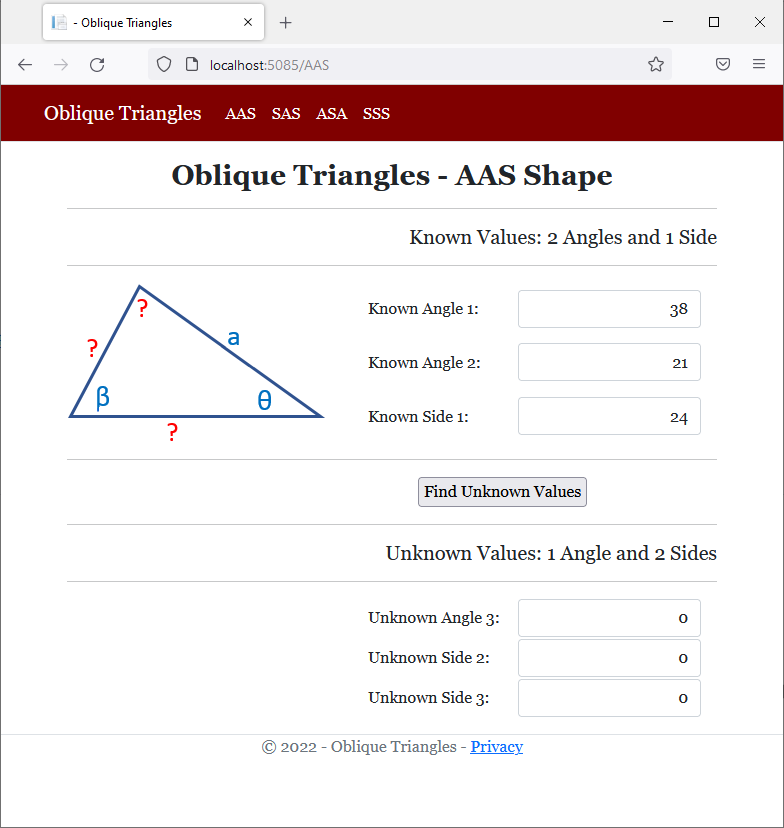
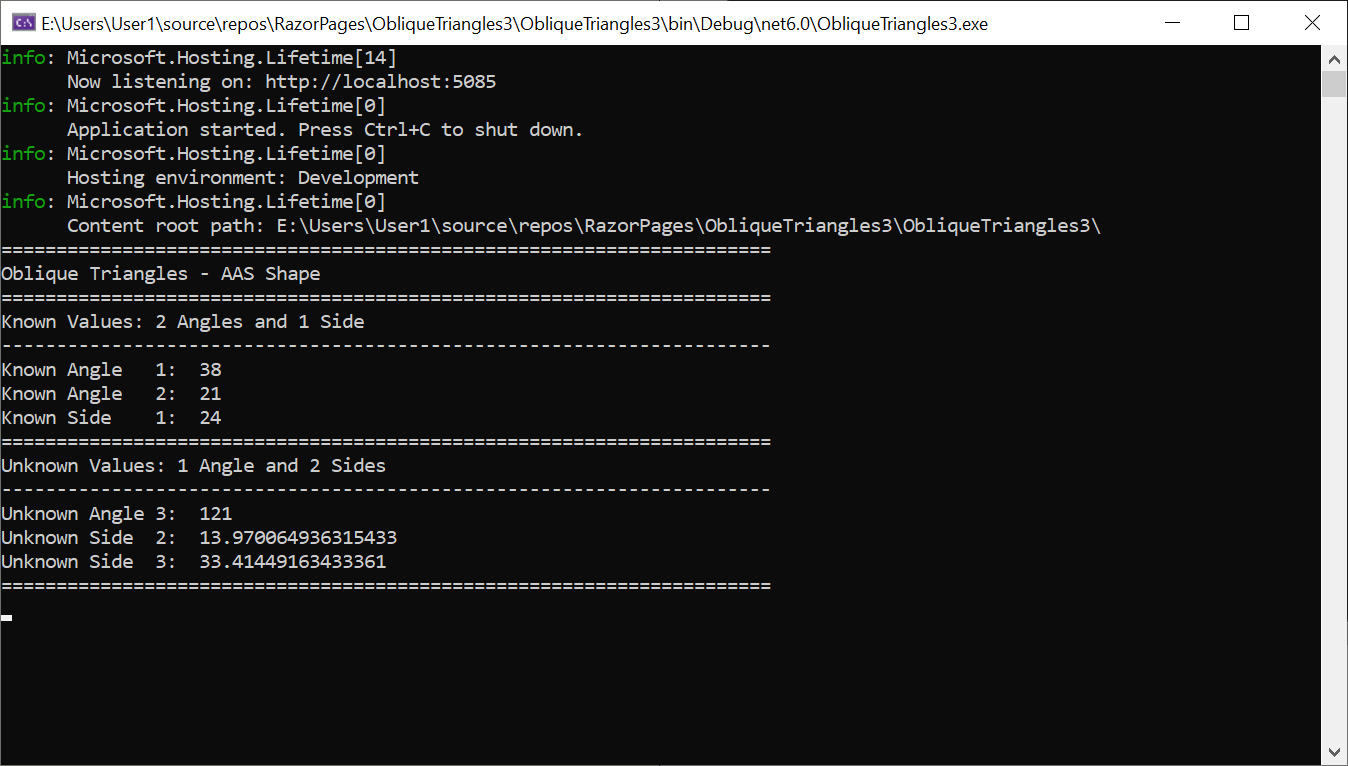

Accessing the Members of the Console Class
Remember that, to access any class, you can qualify it from its namespace. Here is an example of calling a method of the Console class that is defined in the System namespace:
@{
    System.Console.WriteLine("The Wonderful World of C# Programming");
}
Using a Namespace
As you may know by now, to use a namespace, in your code, usually in the top section, type using followed by the name of the namespace. If you are writing your code in a razor page, in the top section, after the @page and the other top lines, type @using System. After doing any of this, you can access a class of the namespace in your code.
![]() Practical Learning: Using a Namespace
Practical Learning: Using a Namespace
@page
@model ObliqueTriangles3.Pages.SASModel
@using System
@{
double side1 = 0.00, side2 = 0.00, side3 = 0.00;
double angle1 = 0.00, angle2 = 0.00, angle3 = 0.00;
if (Request.HasFormContentType)
{
try
{
side1 = double.Parse(Request.Form["txtSASSide1"]);
}
catch (FormatException)
{
Console.WriteLine("You must type a value for one of the known sides of the SAS shape.");
}
try
{
angle1 = double.Parse(Request.Form["txtSASAngle1"]);
}
catch (FormatException)
{
Console.WriteLine("You must type a value for the known angle of the SAS shape.");
}
try
{
side2 = double.Parse(Request.Form["txtSASSide2"]);
}
catch (FormatException)
{
Console.WriteLine("You must type a value for the other known side of the SAS shape.");
}
// Here, we use the law of cosines
side3 = Math.Sqrt((side1 * side1) +
(side2 * side2) -
(2 * side1 * side2 * Math.Cos(angle1 * Math.PI / 180)));
angle2 = Math.Acos(((side3 * side3) +
(side2 * side2) -
(side1 * side1)) /
(2 * side3 * side2)) * 180 / Math.PI;
angle3 = 180 - (angle1 + angle2);
System.Console.WriteLine("======================================================================");
System.Console.WriteLine("Oblique Triangles - SAS Shape");
System.Console.WriteLine("======================================================================");
System.Console.WriteLine("Known Values: 2 Sides and 1 Angle");
System.Console.WriteLine("----------------------------------------------------------------------");
System.Console.WriteLine("Known Side 1: " + side1.ToString());
System.Console.WriteLine("Known Angle 1: " + angle1.ToString());
System.Console.WriteLine("Known Side 2: " + side2.ToString());
System.Console.WriteLine("======================================================================");
System.Console.WriteLine("Unknown Values: 1 Side and 2 Angles");
System.Console.WriteLine("----------------------------------------------------------------------");
System.Console.WriteLine("Unknown Angle 2: " + angle2.ToString());
System.Console.WriteLine("Unknown Side 3: " + side3.ToString());
System.Console.WriteLine("Unknown Angle 3: " + angle3.ToString());
System.Console.WriteLine("======================================================================");
}
}
<div class="delimiter common-font">
<h2 class="text-center bold">Oblique Triangles - SAS Shape</h2>
<hr />
<h5 class="text-right">Known Values: 2 Sides and 1 Angle</h5>
<hr />
<form name="frmGeometry" method="post">
<table>
<tr>
<td style="width: 300px" rowspan="3">
<img src="~/images/sas.png" width="260" height="138" alt="Oblique Triangles - SAS Shape">
</td>
<td style="width: 150px">Known Side 1:</td>
<td>@Html.TextBox("txtSASSide1", @side1, new { @class = "form-control text-right" })</td>
</tr>
<tr>
<td>Known Angle 1:</td>
<td>@Html.TextBox("txtSASAngle1", @angle1, new { @class = "form-control text-right" })</td>
</tr>
<tr>
<td>Known Side 2:</td>
<td>@Html.TextBox("txtSASSide2", @side2, new { @class = "form-control text-right" })</td>
</tr>
</table>
<hr />
<table>
<tr>
<td style="width: 350px"> </td>
<td style="text-align: center"><input type="submit" name="btnSubmit" value="Find Unknown Values" /></td>
</tr>
</table>
</form>
<hr />
<h5 class="text-right">Unknown Values: 1 Side and 2 Angles</h5>
<hr />
<table>
<tr>
<td style="width: 300px"> </td>
<td style="width: 150px">Unknown Angle 2:</td>
<td>@Html.TextBox("txtSASAngle2", @angle2, new { @class = "form-control text-right" })</td>
</tr>
<tr>
<td> </td>
<td>Unknown Side 3:</td>
<td>@Html.TextBox("txtSASSide3", @side3, new { @class = "form-control text-right" })</td>
</tr>
<tr>
<td> </td>
<td>Unknown Angle 3:</td>
<td>@Html.TextBox("txtSASAngle3", @angle3, new { @class = "form-control text-right" })</td>
</tr>
</table>
</div>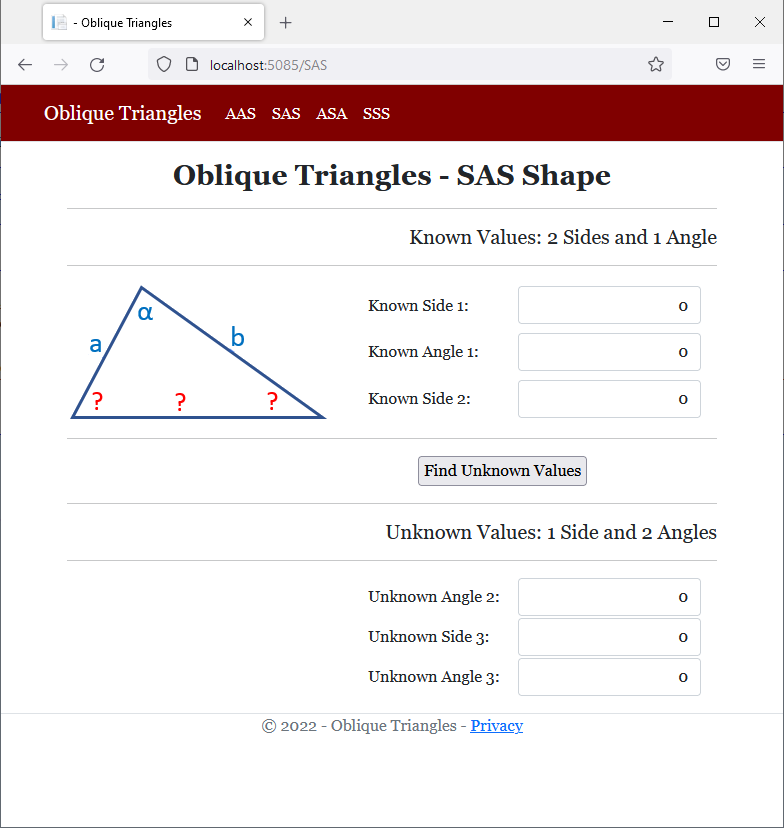
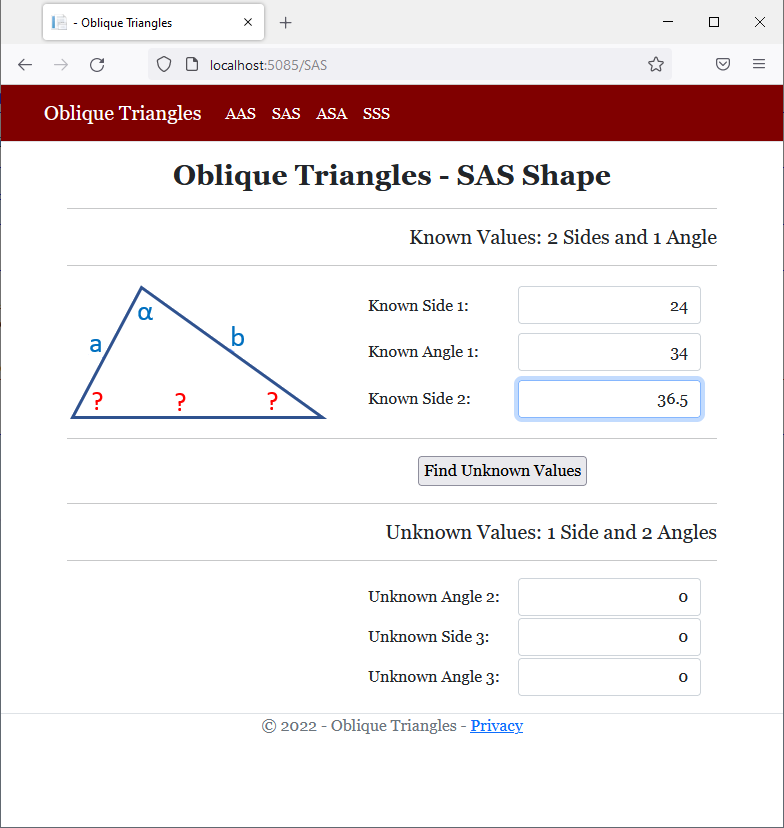
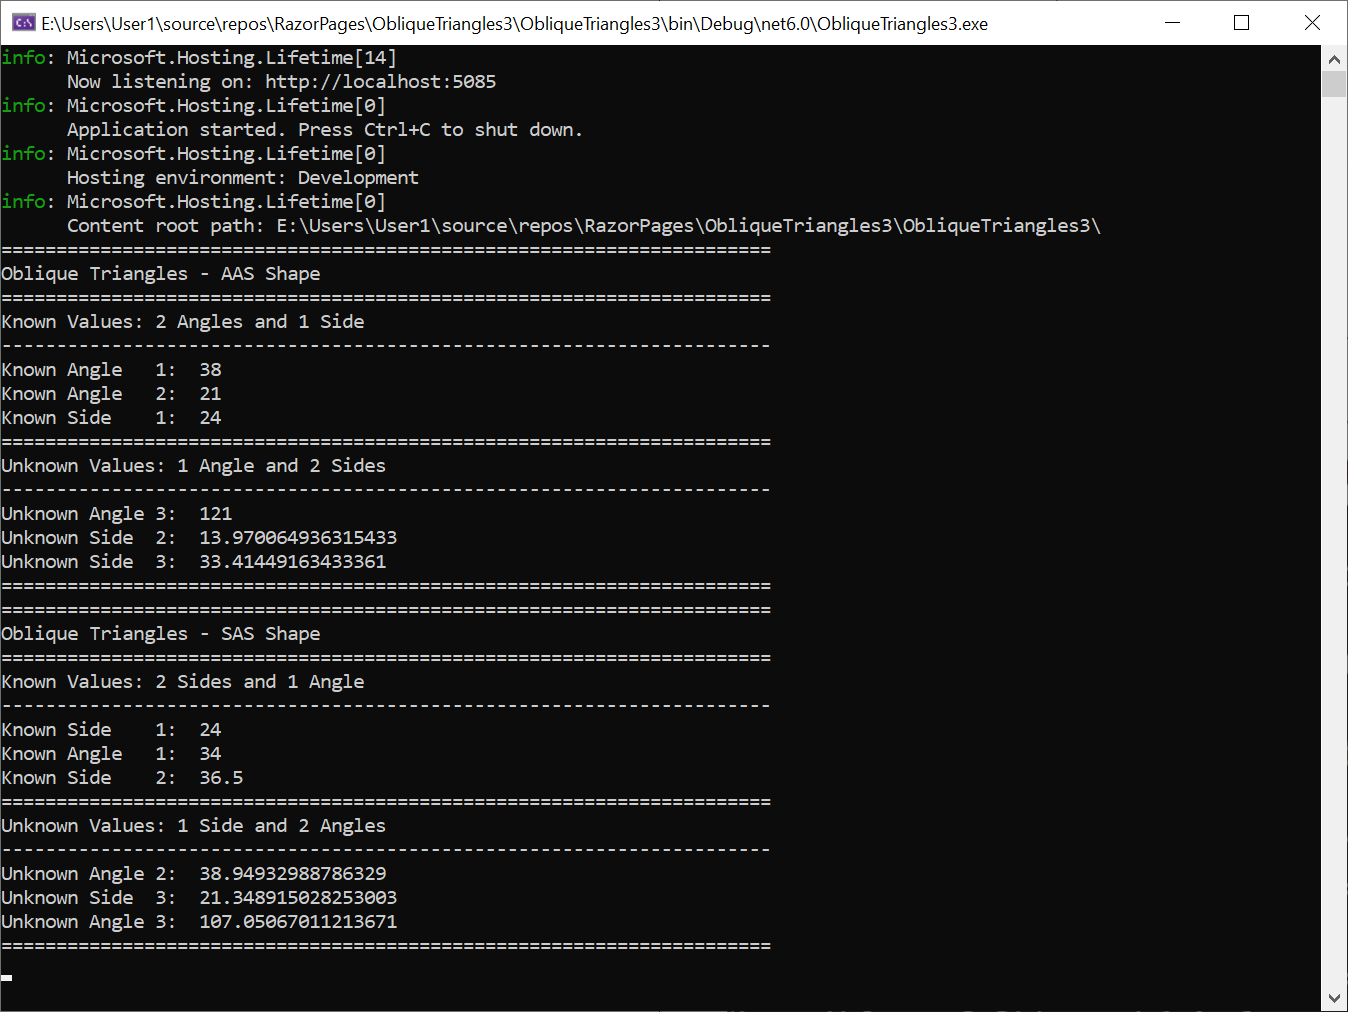

Statically Using a Namespace
Remember that, to access a static method, you can include using static followed by the name of the class in the top section of the document. If you are writing your code in a razor page, after the @page and the other top lines, type @using static System.Console. After applying one of those options, where needed, you can access one the static members of the Console class.
![]() Practical Learning: Using a Namespace
Practical Learning: Using a Namespace
@page
@model ObliqueTriangles3.Pages.ASAModel
@using static System.Console
@{
double side1 = 0.00, side2 = 0.00, side3 = 0.00;
double angle1 = 0.00, angle2 = 0.00, angle3 = 0.00;
if (Request.HasFormContentType)
{
try
{
angle1 = double.Parse(Request.Form["txtASAAngle1"]);
}
catch (FormatException)
{
WriteLine("You must type a value for one of the known angles of the ASA shape.");
}
try
{
side1 = double.Parse(Request.Form["txtASASide1"]);
}
catch (FormatException)
{
WriteLine("You must type a value for the side that is between the angles whose values are about the ASA shape.");
}
try
{
angle2 = double.Parse(Request.Form["txtASAAngle2"]);
}
catch (FormatException)
{
WriteLine("You must type a value for the other known angle of the ASA oblique triangle.");
}
// Here, we use the law of sines
angle3 = 180 - (angle1 + angle2);
side2 = side1 * Math.Sin(angle2 * Math.PI / 180) / Math.Sin(angle1 * Math.PI / 180);
side3 = side1 * Math.Sin(angle3 * Math.PI / 180) / Math.Sin(angle1 * Math.PI / 180);
WriteLine("======================================================================");
WriteLine("Oblique Triangles - ASS Shape");
WriteLine("======================================================================");
WriteLine("Known Values: 2 Angles and 1 Side joining them");
WriteLine("----------------------------------------------------------------------");
WriteLine("Known Angle 1: " + angle1.ToString());
WriteLine("Known Side 1: " + side1.ToString());
WriteLine("Known Angle 2: " + angle2.ToString());
WriteLine("======================================================================");
WriteLine("Unknown Values: 2 Sides and 1 Angle between them");
WriteLine("----------------------------------------------------------------------");
WriteLine("Unknown Side 2: " + side2.ToString());
WriteLine("Unknown Angle 3: " + angle3.ToString());
WriteLine("Unknown Side 3: " + side3.ToString());
WriteLine("======================================================================");
}
}
<div class="delimiter common-font">
<h2 class="text-center bold">Oblique Triangles - ASA Shape</h2>
<hr />
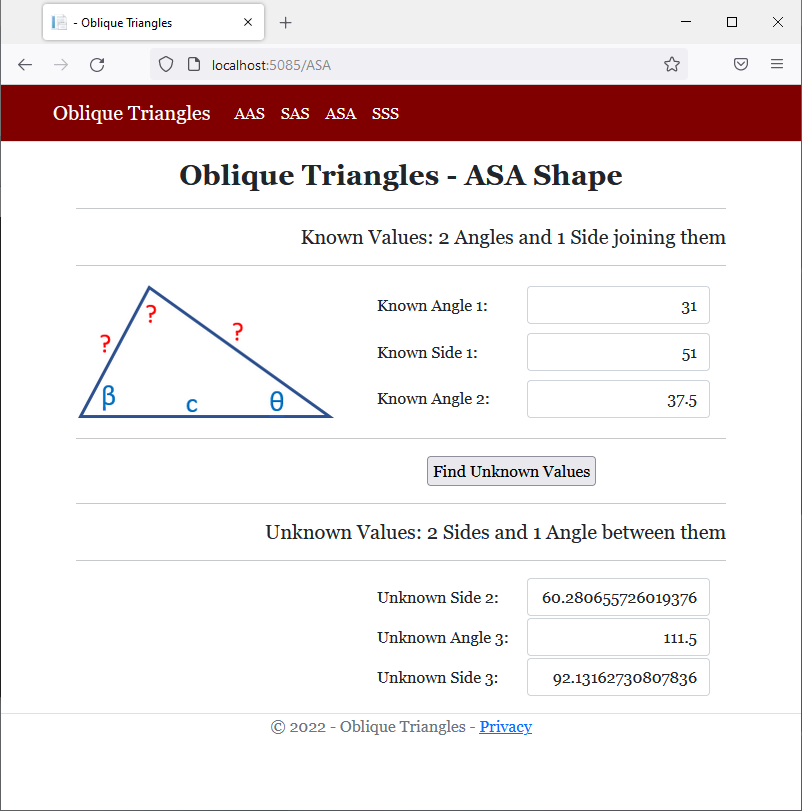
<h5 class="text-right">Known Values: 2 Angles and 1 Side joining them</h5>
<hr />
<form name="frmGeometry" method="post">
<table>
<tr>
<td style="width: 300px" rowspan="3">
<img src="~/images/asa.png" width="260" height="138" alt="Oblique Triangles - SAS Shape">
</td>
<td style="width: 150px">Known Angle 1:</td>
<td>@Html.TextBox("txtASAAngle1", @angle1, new { @class = "form-control text-right" })</td>
</tr>
<tr>
<td>Known Side 1:</td>
<td>@Html.TextBox("txtASASide1", @side1, new { @class = "form-control text-right" })</td>
</tr>
<tr>
<td>Known Angle 2:</td>
<td>@Html.TextBox("txtASAAngle2", @angle2, new { @class = "form-control text-right" })</td>
</tr>
</table>
<hr />
<table>
<tr>
<td style="width: 350px"> </td>
<td style="text-align: center"><input type="submit" name="btnSubmit" value="Find Unknown Values" /></td>
</tr>
</table>
</form>
<hr />
<h5 class="text-right">Unknown Values: 2 Sides and 1 Angle between them</h5>
<hr />
<table>
<tr>
<td style="width: 300px"> </td>
<td style="width: 150px">Unknown Side 2:</td>
<td>@Html.TextBox("txtASASide2", @side2, new { @class = "form-control text-right" })</td>
</tr>
<tr>
<td> </td>
<td>Unknown Angle 3:</td>
<td>@Html.TextBox("txtASAAngle3", @angle3, new { @class = "form-control text-right" })</td>
</tr>
<tr>
<td> </td>
<td>Unknown Side 3:</td>
<td>@Html.TextBox("txtASASide3", @side3, new { @class = "form-control text-right" })</td>
</tr>
</table>
</div>@page
@model ObliqueTriangles3.Pages.SSSModel
@using static System.Console
@{
double side1 = 0.00, side2 = 0.00, side3 = 0.00;
double angle1 = 0.00, angle2 = 0.00, angle3 = 0.00;
if (Request.HasFormContentType)
{
try
{
side1 = double.Parse(Request.Form["txtSSSSide1"]);
}
catch (FormatException)
{
WriteLine("You must type a value for one of the known sides of the SSS shape.");
}
try
{
side2 = double.Parse(Request.Form["txtSSSSide2"]);
}
catch (FormatException)
{
WriteLine("You must type a value for another side of the SSS triangle.");
}
try
{
side3 = double.Parse(Request.Form["txtSSSSide3"]);
}
catch (FormatException)
{
WriteLine("You must type a value for the remaining known side of the SSS oblique triangle.");
}
// Here, we use the law of cosines
angle1 = Math.Acos(((side3 * side3) +
(side2 * side2) -
(side1 * side1)) /
(2 * side3 * side2)) * 180 / Math.PI;
angle2 = Math.Acos(((side3 * side3) +
(side1 * side1) -
(side2 * side2)) /
(2 * side3 * side1)) * 180 / Math.PI;
angle3 = 180 - (angle1 + angle2);
WriteLine("======================================================================");
WriteLine("Oblique Triangles - SSS Shape");
WriteLine("======================================================================");
WriteLine("Known Values: All 3 Sides");
WriteLine("----------------------------------------------------------------------");
WriteLine("Known Side 1: " + side1.ToString());
WriteLine("Known Side 2: " + side2.ToString());
WriteLine("Known Side 3: " + side3.ToString());
WriteLine("======================================================================");
WriteLine("Unknown Values: All 3 Angles");
WriteLine("----------------------------------------------------------------------");
WriteLine("Unknown Angle 1: " + angle1.ToString());
WriteLine("Unknown Angle 2: " + angle2.ToString());
WriteLine("Unknown Angle 3: " + angle3.ToString());
WriteLine("======================================================================");
}
}
<div class="delimiter common-font">
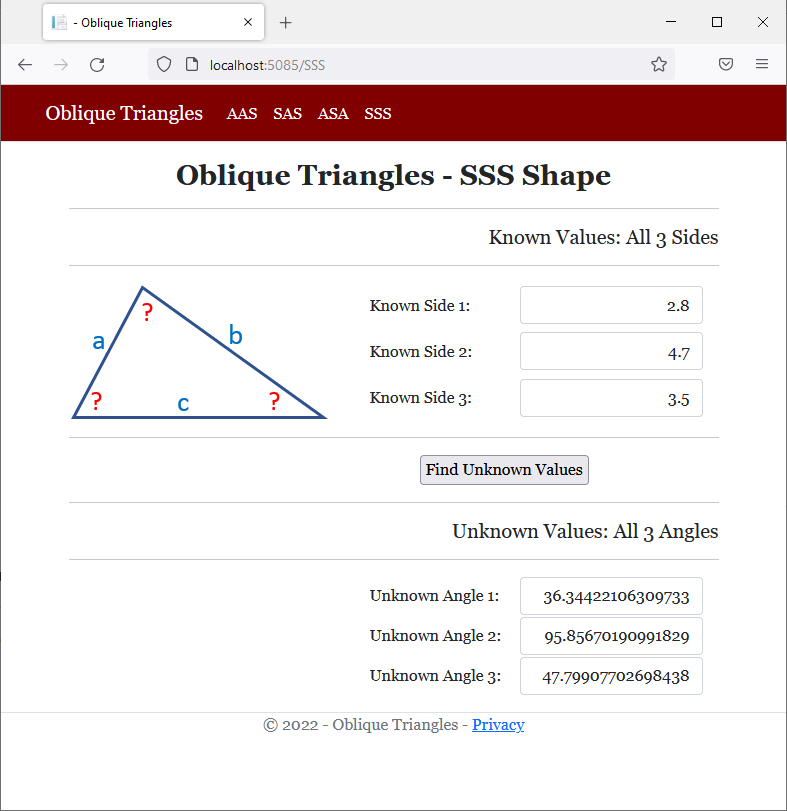
<h2 class="text-center bold">Oblique Triangles - SSS Shape</h2>
<hr />
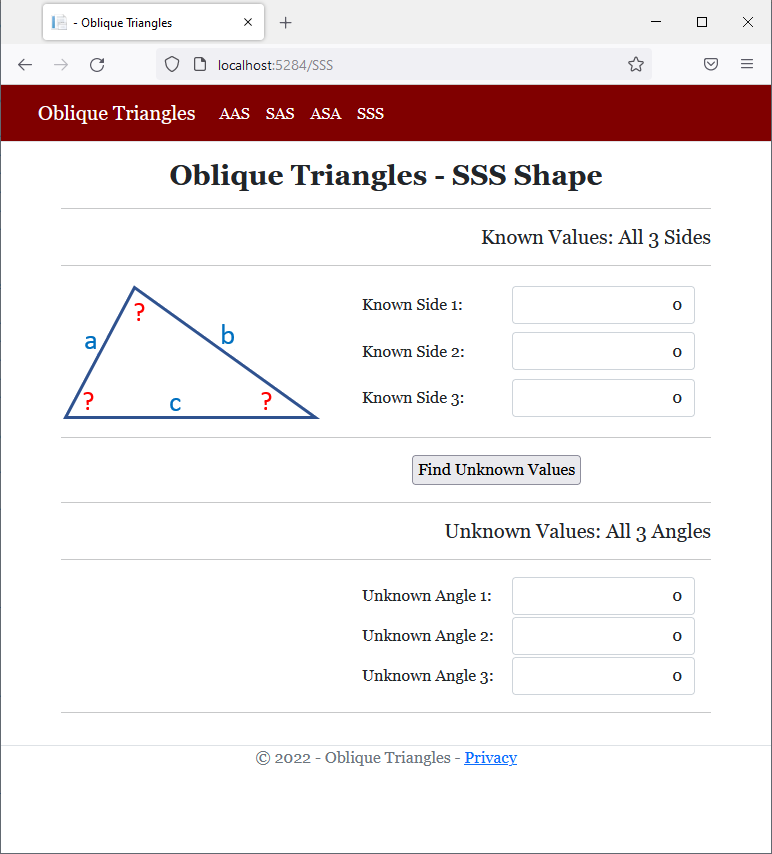
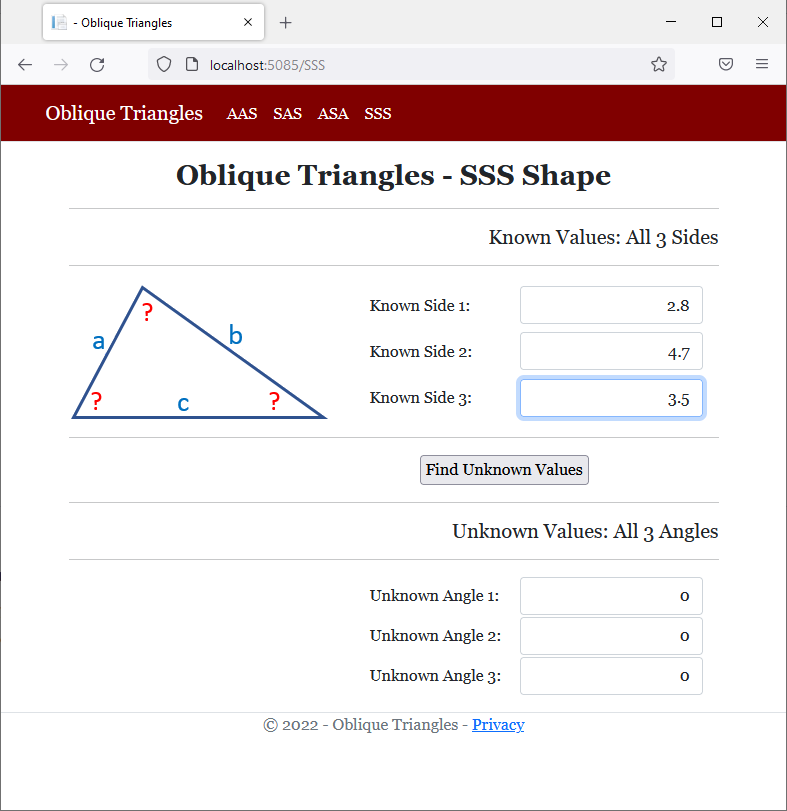
<h5 class="text-right">Known Values: All 3 Sides</h5>
<hr />
<form name="frmGeometry" method="post">
<table>
<tr>
<td style="width: 300px" rowspan="3">
<img src="~/images/sss.png" width="259" height="137" alt="Oblique Triangles - SSS Shape">
</td>
<td style="width: 150px">Known Side 1:</td>
<td>@Html.TextBox("txtSSSSide1", @side1, new { @class = "form-control text-right" })</td>
</tr>
<tr>
<td>Known Side 2:</td>
<td>@Html.TextBox("txtSSSSide2", @side2, new { @class = "form-control text-right" })</td>
</tr>
<tr>
<td>Known Side 3:</td>
<td>@Html.TextBox("txtSSSSide3", @side3, new { @class = "form-control text-right" })</td>
</tr>
</table>
<hr />
<table>
<tr>
<td style="width: 350px"> </td>
<td style="text-align: center"><input type="submit" name="btnSubmit" value="Find Unknown Values" /></td>
</tr>
</table>
</form>
<hr />
<h5 class="text-right">Unknown Values: All 3 Angles</h5>
<hr />
<table>
<tr>
<td style="width: 300px"> </td>
<td style="width: 150px">Unknown Angle 1:</td>
<td>@Html.TextBox("txtSSSAngle1", @angle1, new { @class = "form-control text-right" })</td>
</tr>
<tr>
<td> </td>
<td>Unknown Angle 2:</td>
<td>@Html.TextBox("txtSSSAngle2", @angle2, new { @class = "form-control text-right" })</td>
</tr>
<tr>
<td> </td>
<td>Unknown Angle 3:</td>
<td>@Html.TextBox("txtSSSAngle3", @angle3, new { @class = "form-control text-right" })</td>
</tr>
</table>
</div>
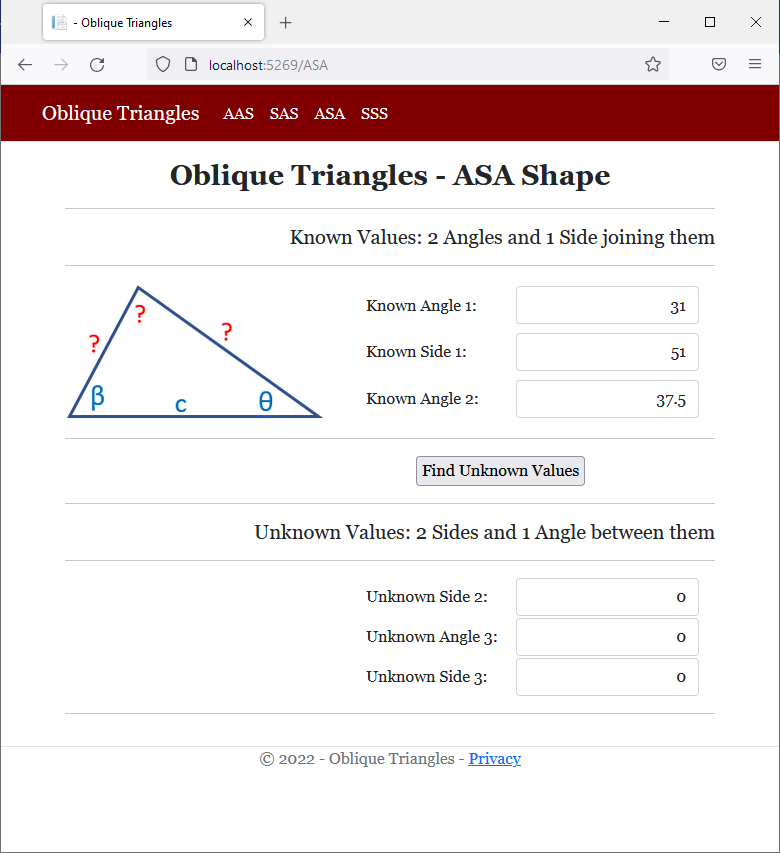

body {
}

.bold        { font-weight:      bold;  }
.text-right  { text-align:       right  }
.delimiter   { margin:           auto;
               width:            650px; }
.top-bar     { border-bottom:    6px solid blue;
               background-color: #5f2c19 !important; }
.common-font { font-family:      Georgia, Garamond, 'Times New Roman', serif; }
.navbar-light .navbar-brand       { color:       white;  }
.navbar-light .navbar-brand:hover { color:       yellow; }
.navbar-light .navbar-brand:focus { color:       khaki;  }
.navbar-light .navbar-brand       { font-family: Georgia, Garamond, 'Times New Roman', serif; }
.nav-link { font-family: Georgia, Garamond, 'Times New Roman', serif; }<!DOCTYPE html>
<html lang="en">
<head>
<meta charset="utf-8" />
<meta name="viewport" content="width=device-width, initial-scale=1.0" />
<title>@ViewData["Title"] - Compound Interest</title>
<link rel="stylesheet" href="~/lib/bootstrap/dist/css/bootstrap.min.css" />
<link rel="stylesheet" href="~/css/site.css" asp-append-version="true" />
<link rel="stylesheet" href="~/css/CompoundInterest.css" asp-append-version="true" />
</head>
<body>
<header>
<nav class="navbar navbar-expand-sm navbar-toggleable-sm navbar-light bg-white border-bottom box-shadow mb-3 top-bar">
<div class="container">
<a class="navbar-brand" asp-area="" asp-page="/Index">Compound Interest</a>
<button class="navbar-toggler" type="button" data-bs-toggle="collapse" data-bs-target=".navbar-collapse" aria-controls="navbarSupportedContent"
aria-expanded="false" aria-label="Toggle navigation">
<span class="navbar-toggler-icon"></span>
</button>
<div class="navbar-collapse collapse d-sm-inline-flex justify-content-between">
<ul class="navbar-nav flex-grow-1">
<li class="nav-item">
<a class="nav-link text-white" asp-area="" asp-page="/Index">Home</a>
</li>
<li class="nav-item">
<a class="nav-link text-white" asp-area="" asp-page="/Privacy">Privacy</a>
</li>
</ul>
</div>
</div>
</nav>
</header>
<div class="container">
<main role="main" class="pb-3">
@RenderBody()
</main>
</div>
<footer class="border-top footer text-muted">
<div class="container">
<p class="text-center common-font">© 2022 - Compound Interest - <a asp-area="" asp-page="/Privacy">Privacy</a></p>
</div>
</footer>
<script src="~/lib/jquery/dist/jquery.min.js"></script>
<script src="~/lib/bootstrap/dist/js/bootstrap.bundle.min.js"></script>
<script src="~/js/site.js" asp-append-version="true"></script>
@await RenderSectionAsync("Scripts", required: false)
</body>
</html>Clearing the Console
If the console screen is filled with text you don't need anymore, you can empty it. To allow you to clear the screen, the Console class is equipped with a method named Clear. It syntax is:
public static void Clear();
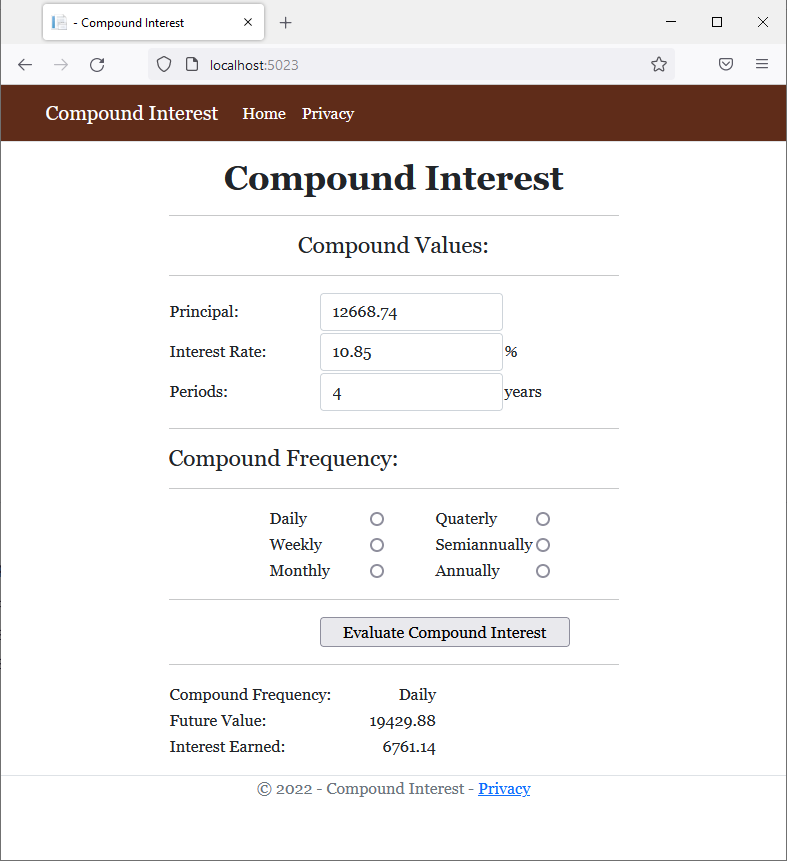
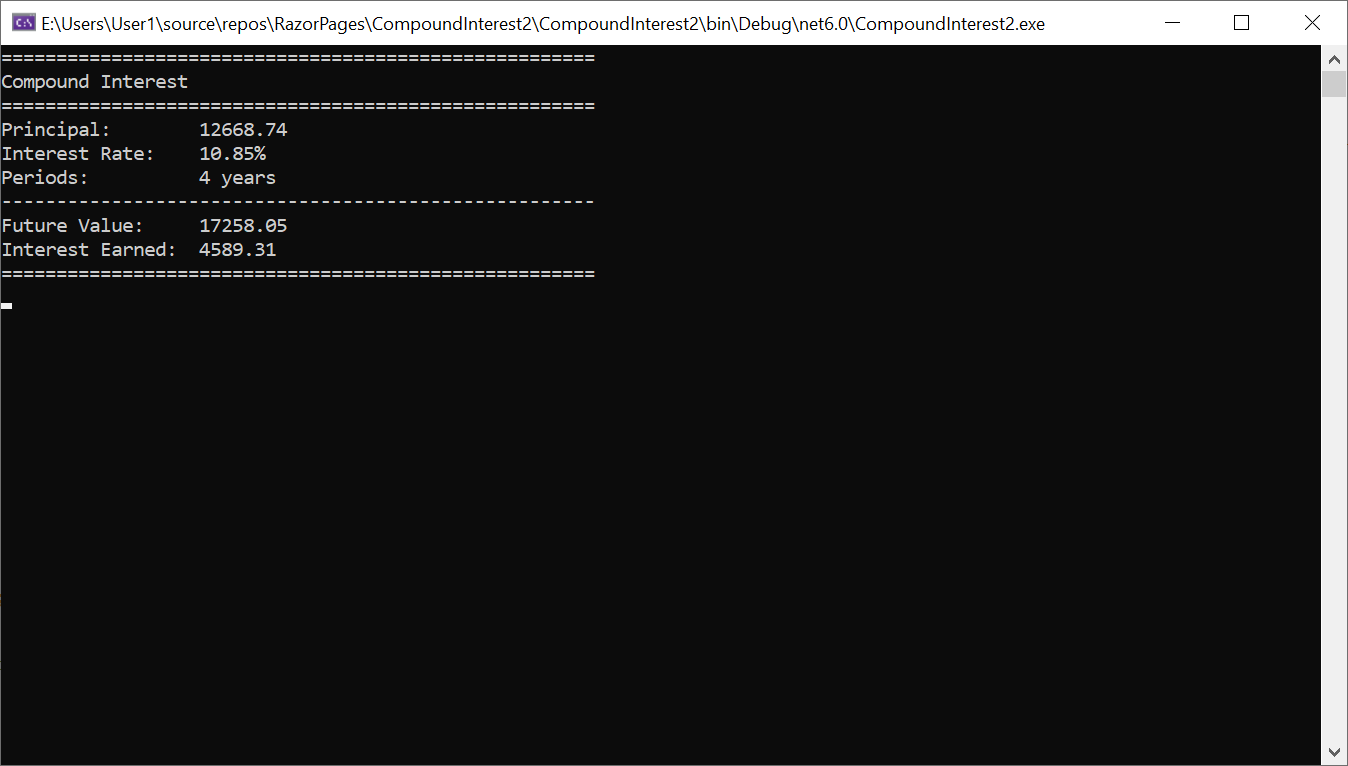
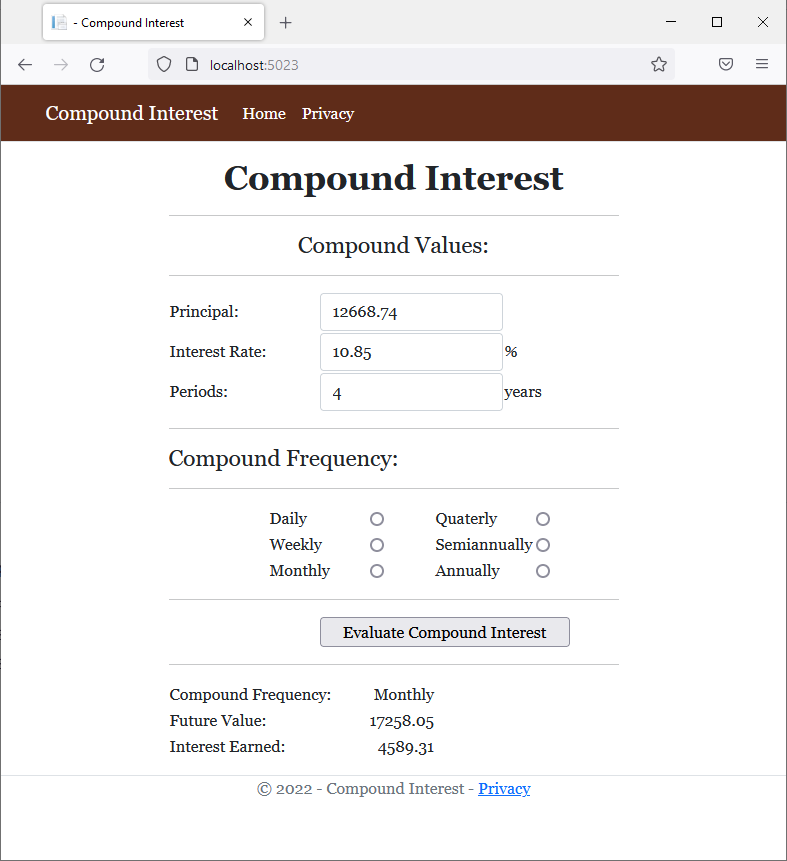
![]() Practical Learning: Clearing the Console
Practical Learning: Clearing the Console
@page
@model IndexModel
@{
string strError = "";
string strFrequency = "";
double periods = 0.00;
double principal = 0.00;
double interestRate = 0.00;
string strFutureValue = "0.00";
string strInterestEarned = "0.00";
if (Request.HasFormContentType)
{
try
{
principal = double.Parse(Request.Form["txtInitialValue"]);
}
catch(FormatException fe)
{
strError = "There was an error related to the Principal. The error is as follows: " +
Environment.NewLine + fe.Message;
}
try
{
interestRate = double.Parse(Request.Form["txtInterestRate"]);
}
catch (FormatException fe)
{
strError = "The program produced an error related to the interest rate. The error was as follows: " +
Environment.NewLine + fe.Message;
}
try
{
periods = double.Parse(Request.Form["txtPeriods"]);
}
catch (FormatException fe)
{
strError = "An error resulted from the value meant for the period. Please report the error as follows: " +
Environment.NewLine + fe.Message;
}
double frequency = 12.00;
strFrequency = Request.Form["rdoFrequency"];
switch (strFrequency)
{
case "Daily":
frequency = 365.00;
break;
case "Weekly":
frequency = 52.00;
break;
case "Monthly":
frequency = 12.00;
break;
case "Quaterly":
frequency = 4.00;
break;
case "Semiannually":
frequency = 2.00;
break;
case "Annually":
frequency = 1.00;
break;
}
double per = periods / 100;
double futureValue = principal * Math.Pow((1.00 + (interestRate / frequency)), frequency * per);
double interestEarned = futureValue - principal;
strFutureValue = $"{futureValue:F}";
strInterestEarned = $"{interestEarned:F}";
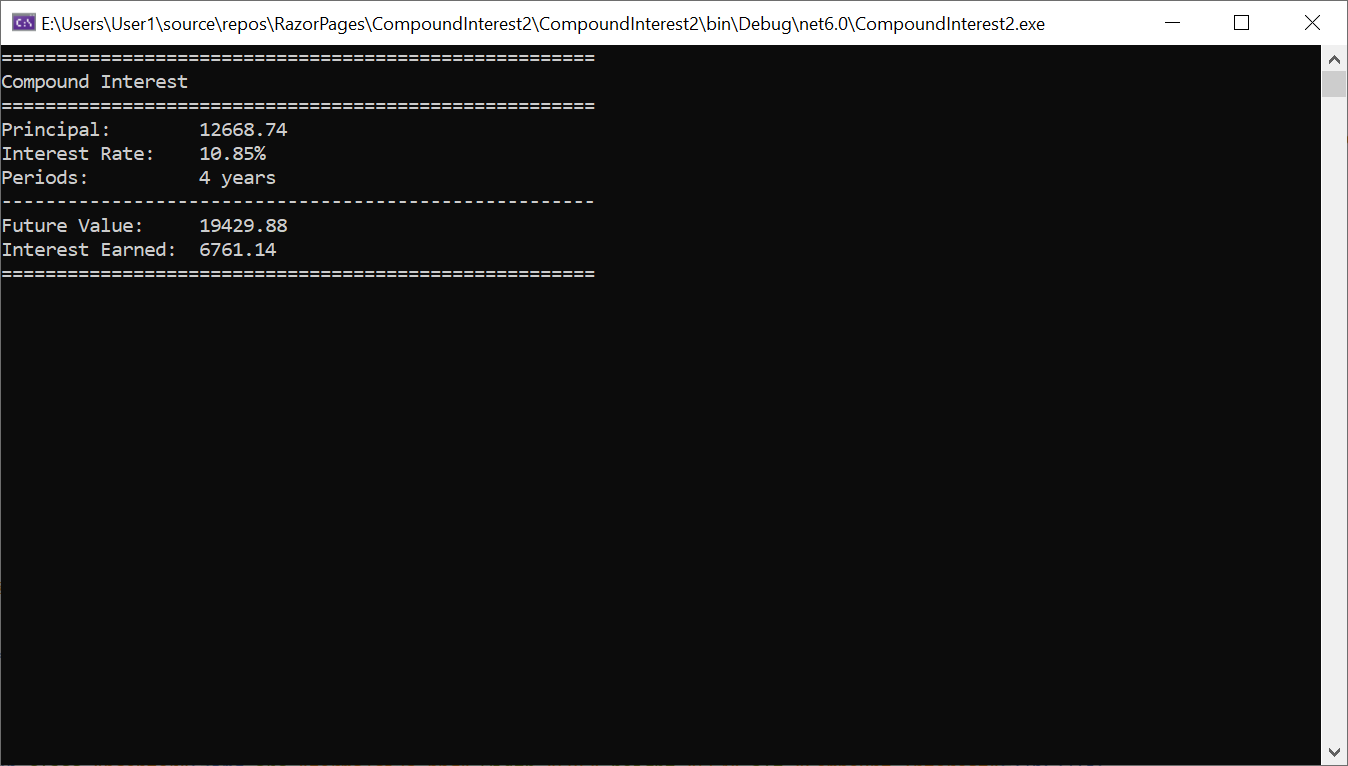
System.Console.Clear();
System.Console.WriteLine("======================================================");
System.Console.WriteLine("Compound Interest");
System.Console.WriteLine("======================================================");
System.Console.WriteLine("Principal: {0:f}", principal);
System.Console.WriteLine("Interest Rate: {0:f}%", interestRate);
System.Console.WriteLine("Periods: {0} years", periods);
System.Console.WriteLine("------------------------------------------------------");
System.Console.WriteLine("Future Value: {0:f}", futureValue);
System.Console.WriteLine("Interest Earned: {0:f}", interestEarned);
System.Console.WriteLine("======================================================");
}
}
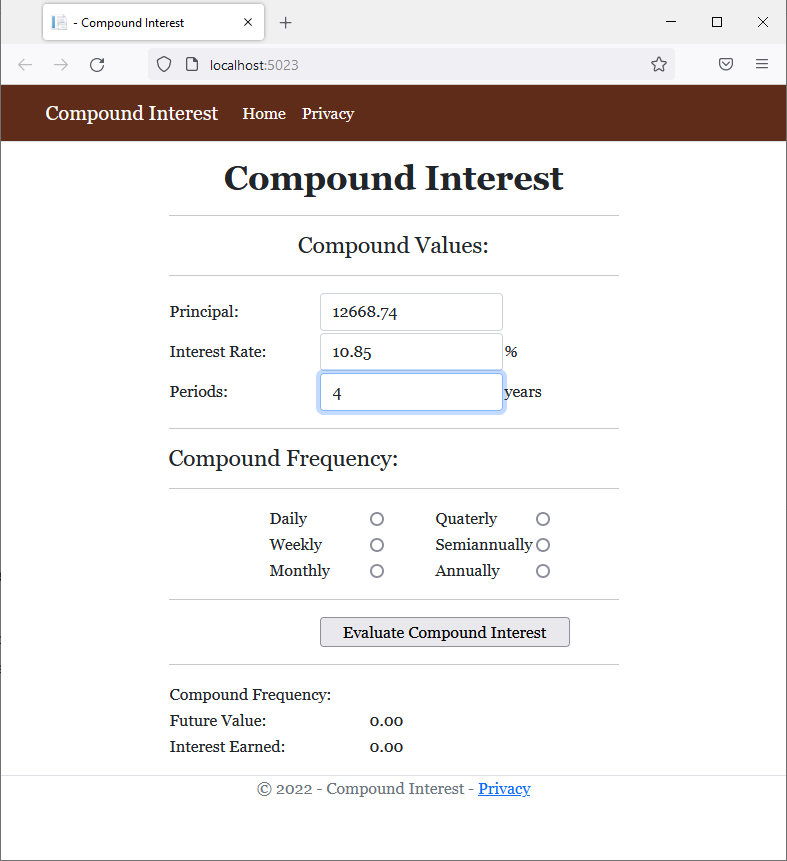
<h1 class="common-font text-center bold">Compound Interest</h1>
<hr />
<form name="PayrollEvaluation" method="post" class="common-font delimiter">
<h4>Compound Values:</h4>
<hr />
<table>
<tr>
<td style="width: 150px">@Html.Label("txtInitialValue", "Principal:", new { @class = "bold" })</td>
<td>@Html.TextBox("txtInitialValue", @principal, new { @class = "form-control" })</td>
<td> </td>
</tr>
<tr>
<td>@Html.Label("txtInterestRate", "Interest Rate:", new { @class = "bold" })</td>
<td>@Html.TextBox("txtInterestRate", @interestRate, new { @class = "form-control" })</td>
<td>%</td>
</tr>
<tr>
<td>@Html.Label("txtPeriods", "Periods:", new { @class = "bold" })</td>
<td>@Html.TextBox("txtPeriods", @periods, new { @class = "form-control" })</td>
<td>years</td>
</tr>
</table>
<hr />
<h4>Compound Frequency:</h4>
<hr />
<table>
<tr>
<td style="width: 100px"><label for="rdoDaily">Daily</label></td>
<td><input type="radio" id="rdoDaily" name="rdoFrequency" value="Daily" /></td>
<td style="width: 50px"> </td>
<td style="width: 100px"><label for="rdoQuaterly">Quaterly</label></td>
<td><input type="radio" id="rdoQuaterly" name="rdoFrequency" value="Quaterly" /></td>
</tr>
<tr>
<td><label for="rdoWeekly">Weekly</label></td>
<td><input type="radio" id="rdoWeekly" name="rdoFrequency" value="Weekly" /></td>
<td> </td>
<td><label for="rdoSemiannually">Semiannually</label></td>
<td><input type="radio" id="rdoSemiannually" name="rdoFrequency" value="Semiannually" /></td>
</tr>
<tr>
<td><label for="rdoMonthly">Monthly</label></td>
<td><input type="radio" id="rdoMonthly" name="rdoFrequency" value="Monthly" /></td>
<td> </td>
<td><label for="rdoAnnually">Annually</label></td>
<td><input type="radio" id="rdoAnnually" name="rdoFrequency" value="Annually" /></td>
</tr>
</table>
<hr />
<table>
<tr>
<td style="width: 150px"> </td>
<td><input type="submit" value="Evaluate Compound Interest" name="btnCalculate" style="width: 250px" /></td>
</tr>
</table>
<hr />
<table>
<tr>
<td style="width: 200px" class="bold">Compound Frequency:</td>
<td style="text-align: right">@strFrequency</td>
</tr>
<tr>
<td class="bold">Future Value:</td>
<td style="text-align: right">@strFutureValue</td>
</tr>
<tr>
<td class="bold">Interest Earned:</td>
<td style="text-align: right">@strInterestEarned</td>
</tr>
</table>
</form>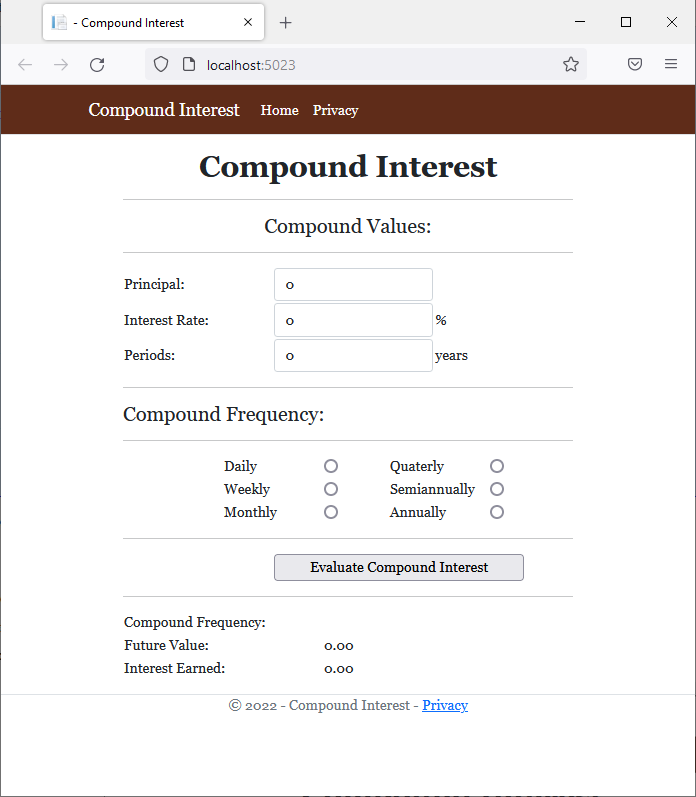
Formatting Data Display
Introduction
Instead of using two Write() methods or a combination of theWrite() and the WriteLine() methods to display data, you can convert a value to a string and display it directly. To do this, you can provide two sections to the Write() or the WriteLine() methods and separate them with a comma:
Here are examples:
@{
    var fullName = "Anselme Bogos";
    var age = 15;
    var hSalary = 22.74;

    Console.WriteLine("Full Name: {0}", fullName);
    Console.WriteLine("Age: {0}", Age);
    Console.WriteLine("Distance: {0}", hSalary);
}
This would produce:
Full Name: Anselme Bogos
Age: 15
Distance: 22.74
As mentioned already, the numeric value typed in the curly brackets of the first part is an ordered number. If you want to display more than one value, provide each incremental value in its curly brackets. The syntax used is:
Write("To Display {0} {1} {2} {n}", First, Second, Third, nth);
You can use the sections between a closing curly bracket and an opening curly bracket to create a meaningful sentence.
We mentioned earlier that everything the user types using the keyboard is primarily a string and it's your job to convert it to the appropriate type. In reverse, if you have a value that is not a string, you can easily convert it to a string. To support this, the .NET Framework structure of each data type is equipped with a method named ToString. Normally, in C#, as we have done so far, this conversion is automatically or transparently done by the compiler. In some cases, you will need to perform the conversion yourself.
To convert a value of a primitive data type to a string, type the name of the variable, followed by a period, followed by ToString(). Here is an example:
@{
    string fullName = "Anselme Bogos";
    int age = 15;
    double hSalary = 22.74;

    Console.WriteLine("Full Name: {0}", fullName);
    Console.WriteLine("Age: {0}", age.ToString());
    Console.WriteLine("Distance: {0}", hSalary.ToString());
}
In some cases, you will type something in the parentheses of ToString().
To properly display data in a friendly and most familiar way, you can format it. Formatting tells the compiler what kind of data you are using and how you want the compiler to display it to the user.
The System namespace provides a specific letter you can use in the Write() or WriteLine()'s placeholder for each category of data to display. To format a value, in the placeholder of the variable or value, after the number, type a colon and one of the appropriate letters from the following table. If you are using ToString(), then, in the parentheses of ToString(), you can include a specific letter or combination inside of double-quotes. The letters and their meanings are:
| Character | Description | |
| c | C | Currency values |
| d | D | Decimal numbers |
| e | E | Scientific numeric display such as 1.45e5 |
| f | F | Fixed decimal numbers |
| d | D | General and most common type of numbers |
| n | N | Natural numbers |
| r | R | Roundtrip formatting |
| s | S | Hexadecimal formatting |
| p | P | Percentages |
Here are examples:
@{
    var Distance = 248.38782;
    var age = 15;
    var NewColor = 3478;
    var hSalary = 22.74;
    var HoursWorked = 35.5018473;
    var WeeklySalary = hSalary * HoursWorked;

    Console.WriteLine("Distance: {0}", Distance.ToString("E"));
    Console.WriteLine("Age: {0}", age.ToString());
    Console.WriteLine("Color: {0}", NewColor.ToString("X"));
    Console.WriteLine("Weekly Salary: {0} for {1} hours",
                          WeeklySalary.ToString("c"),
              		      HoursWorked.ToString("F"));
}
This would produce:
Distance: 2.483878E+002
Age: 15
Color: D96
Weekly Salary: $807.31 for 35.50 hours
As you may have noticed, if you leave the parentheses of ToString() empty, the compiler would use a default formatting to display the value.
As opposed to calling ToString(), you can use the above letters in the curly brackets of the first part of Write() or WriteLine(). In this case, after the number in the curly brackets, type the colon operator followed by the letter.
Line Formatting
In the above programs, to display a line of text, we easily used Write() or WriteLine(). To position text of different lengths one above the other, we had to "corrupt" a string by including extra-empty spaces. Such a technique is uncertain and less professional. Fortunately, you can format how a string or a line of text should display. The .NET Framework provides mechanisms to control the amount of space used to display a string of text and how to align that string on its line.
To specify the amount of space used to display a string, you can use its placeholder in Write() or WriteLine(). To do this, in the placeholder, type the number or the variable in the curly brackets. Then, type a comma followed by the number of characters equivalent to the desired width. Here are examples:
@{
    string fullName = "Anselme Bogos";
    int age = 15;
    double hSalary = 22.74;

    Console.WriteLine("Full Name: {0,20}", fullName);
    Console.WriteLine("Age:{0,14}", age.ToString());
    Console.WriteLine("Distance: {0:C,8}", hSalary.ToString());
}
This would produce:
Full Name:        Anselme Bogos
Age:            15
Distance: 22.74
The sign you provide for the width is very important. If it is positive, the line of text is aligned to the right. This should be your preferred alignment for numeric values. If the number is negative, then the text is aligned to the left.
![]() Practical Learning: Ending the Lesson
Practical Learning: Ending the Lesson
|
|
|||
| Previous | Copyright © 2001-2022, FunctionX | Friday 26 November 2021 | Next |
|
|
|||