Microsoft Access Database Development With VBA

Date and Time Values in Records


Date/Time Fields


Introduction

When creating a column of a table, you may want it to hold date and/or time values. To create a field that would hold date and/or time values and if you are using a SQL statement, set the column's data type to either the DATE or the DATETIME types. Here are examples:

Private Sub cmdTable_Click()
    DoCmd.RunSQL "CREATE TABLE Employees(" & _
                 "	FullName Text, " & _
                 "	DateHired Date, " & _
                 "	DateLastReviewed DateTime);"
                 
    MsgBox "A table named Employees has been created."
End Sub

Both data types have the same effect in Microsoft Access.

Practical LearningPractical Learning: Introducing Date/Time Controls

  1. Start Microsoft Access
  2. Open the WattsALoan1 database from the previous lesson
  3. On the Ribbon, click Create
  4. In the Queries section, click Query Design
  5. On the Show Table dialog box, click Close
  6. Right-click the middle of the window and click SQL View
  7. Delete the default text in the window
  8. Type the following:
    CREATE TABLE Customers
    (
        AccountNumber varchar(20) not null,
        DateCreated Date,
        FirstName varchar(24) null,
        MiddleName varchar(24),
        LastName varchar(24) not null,
        Address varchar(50),
        City varchar(40) null,
        State varchar(40),
        ZIPCode varchar(24) not null,
        Country varchar(40),
        PhoneNumber text(20) null,
        WorkPhone text(20) null,
        EmailAddress text(30),
        Notes LONGTEXT,
        CONSTRAINT PK_Customers PRIMARY KEY(AccountNumber)
    );
  9. To execute the statement, in the Results section of the Ribbon, click the Run botton Run
  10. Delete the whole code in the Query1 window
  11. To create another table, type the following:
    CREATE TABLE Payments
    (
        ReceiptNumber COUNTER(1001, 1) NOT NULL,
        PaymentDate Date,
        EmployeeNumber text(10),
        LoanNumber Long,
        AmountPaid Double,
        Balance Double,
        Notes NOTE,
        Constraint PK_Payments Primary Key(ReceiptNumber)
    );
  12. To execute the statement, in the Results section of the Ribbon, click the Run botton Run
  13. Delete the whole code in the Query1 window
  14. To modify the LoansAllocations table, type the following:
    ALTER TABLE LoansAllocations
    ADD COLUMN DateAllocated Date;
  15. To execute the statement, in the Results section of the Ribbon, click the Run botton Run
  16. To specify the date of the first payment of a loans, change the statement as follows:
    ALTER TABLE LoansAllocations
    ADD COLUMN PaymentStartDate Date;
  17. To execute the statement, in the Results section of the Ribbon, click the Run botton Run
  18. To specify the customer whose is being processed, change the statement as follows:
    ALTER TABLE LoansAllocations
    ADD COLUMN AccountNumber varchar(20);
  19. To execute the statement, in the Results section of the Ribbon, click the Run botton Run
  20. Close the Query1 window
  21. When asked whether you want to save, click No
  22. On the Ribbon, click Create and, in the Queries section, click Query Design
  23. In the Show Table dialog box, double-click Customers and LoansAllocations
  24. Click Close.
    If Microsoft Access did not draw a line between both tables, from the Customers section, drag AccountNumber and drop it on top of AccountNumber is the LoansAllocations section
  25. From the LoansAllocations section, drag LoanNumber and drop it in the first empty column of the bottom section of the window
  26. Set the second Field value as Customer: [LastName]+', '+[FirstName]
  27. Right-click the title bar of the Query1 window and click Save
  28. Set the Query Name to LoansCustomers
  29. Click OK
     
    Watts A Loan - Loans Customers
  30. Close the Query window
  31. On the Ribbon, click Create
  32. In the Forms section, click Form Design
  33. Using the Properties window, set the Record Source field to Customers
  34. Design the form as follows:
     
    Watts A Loan - Customers - Form Design
  35. Using the Properties window, set the Format of the DateCreated text box to Long Date
  36. Close the form
  37. When asked whether you want to save it, click Yes
  38. In the Navigation Pane, right-click the LoansAllocations form and click Design View
  39. In the Controls section of the Ribbon, click the Text box Text Box and click the form
  40. Delete its accompanying label
  41. Using the Properties window, change its Name to txtCustomerName
  42. Change the design of the form as follows:
     
    Watts A Loan - Loans Allocations - Form Design
  43. Close the form
  44. When asked whether you want to save, click Yes
  45. In the Navigation Pane, double-click the Customers form
  46. Create accounts for a few customers
  47. Close the form
  48. On the Ribbon, click Create
  49. In the Forms section, click Form Design
  50. Using the Properties window, set the Record Source field to Payments
  51. Using the Properties window, set the Format of the PaymentDate text box to Long Date
  52. From the Controls section of the Ribbon, add a text box to the form and delete its accompanying label
  53. Using the Properties window, change its Name to txtEmployeeName
  54. Once again, from the Controls section of the Ribbon, add a text box to the form and delete its accompanying label
  55. Using the Properties window, change its Name to txtCustomerName
  56. Complete the design of the form as follows:
     
    Watts A Loan - Payments - Form Design
  57. Close the form
  58. When asked whether you want to save it, click Yes
  59. Open the KoloBank1 database from Lesson 14
  60. On the Ribbon, click Create
  61. In the Forms section, click Form Design
  62. In the Controls section of the Ribbon, click the Button Button
  63. Click the Detail section of the form.
    If the Button Wizard starts, click Cancel
  64. On the form, double-click the button to access its Properties window.
    Change its Name to cmdCreateTimeSheetTable
  65. Change its Caption to Create Time Sheet Table
  66. Right-click the Create Time Sheet Table button and click Build Event...
  67. In the Choose builder dialog box, double-click Code Builder
  68. Implement the event as follows:
    Private Sub cmdCreateTimeSheetTable_Click()  
        DoCmd.RunSQL "CREATE TABLE TimeSheets(" & _
                     "TimeSheetID AutoIncrement(1, 1) " & _
                     "           primary key not null, " & _
                     "EmployeeNumber varchar(10)," & _
                     "StartDate varchar(40), EndDate varchar(40), " & _
                     "TimeSheetCode varchar(20), " & _
                     "Week1Monday double, Week1Tuesday double, " & _
                     "Week1Wednesday double, Week1Thursday double, " & _
                     "Week1Friday double, Week1Saturday double, " & _
                     "Week1Sunday double, Week2Monday double, " & _
                     "Week2Tuesday double, Week2Wednesday double, " & _
                     "Week2Thursday double, Week2Friday double, " & _
                     "Week2Saturday double, Week2Sunday double, " & _
                     "Notes Memo);"
        MsgBox "A table named TimeSheets has been created."
        
        DoCmd.RunSQL "CREATE TABLE Payrolls(" & _
                     "PayrollID AutoIncrement(1, 1) " & _
                     "           primary key not null, " & _
                     "StartDate varchar(40), EndDate varchar(40), " & _
                     "PayDate varchar(40), TimeSheetCode varchar(20), " & _
                     "EmployeeNumber varchar(10), " & _
                     "EmployeeName varchar(84), HourlySalary double, " & _
                     "RegularTime double, RegularPay double, " & _
                     "OvertimeTime double, OvertimePay double, " & _
                     "GrossPay double, " & _
                     "FederalTax double, SocSecurityTax double, " & _
                     "MedicareTax double, StateTax double, " & _
                     "NetPay double, Notes Memo);"
        MsgBox "A table named Payrolls has been created."
    End Sub
  69. Return to Microsoft Access
  70. Switch the form to Form View and click the button
  71. Click OK each time to create the table and create its records
  72. Close the form
  73. When asked whether you want to save it, click No
  74. In the Navigation Pane, right-click the NewCustomer form and click Design View
  75. Right-click the Reset button and click Build Event
  76. In the Choose Builder dialog box, click Code Builder and click OK
  77. Implement the event as follows:
    Private Sub cmdReset_Click()
        txtEmployeeNumber = ""
        txtAccountNumber = ""
        txtDateCreated = ""
        cbxAccountTypes = "Checking"
        txtCustomerName = ""
        txtAddress = ""
        txtCity = ""
        txtState = ""
        txtZIPCode = ""
        txtCountry = "USA"
        txtHomePhone = ""
        txtWorkPhone = ""
        txtEmailAddress = ""
        txtUsername = ""
        txtPassword = "Password1"
        txtNotes = ""
    End Sub

Date/Time Data Entry in SQL

In the SQL, to perform data entry on a date or time field, you should/must use an appropriate formula with the year represented by 2 or 4 digits. You should also include the date between # and #. If you want to specify the year with 2 digits, use the formula:

#mm-dd-yy#

Or

#mm/dd/yy#

You can use the dash symbol "-" or the forward slash "/" as the date separator. The year, the month, and the day can each be specified with a single digit. Here is an example:

Private Sub cmdCreateRecord_Click()
    DoCmd.RunSQL "INSERT INTO Employees VALUES('Annette Schwartz', #22-10-09#, #11/22/09#)"
    MsgBox "A record has been added to the Employees table."
End Sub

When the year is specified with 1 digit, its number is added to the current decade. For example, a year with 6 is represented as 2006. The 1-year digit formula is suitable for a date that occurs in the current decade. As you may guess, it is better to represent a date with at least two digits, including a leading 0. The 2-year digit formula is suitable for a date that occurs in the current century.

An alternative to representing a year is with 4 digits. In this case, you would use the formulas:

#yyyy-mm-dd#

Or

#yyyy/mm/dd#

Here are examples:

Private Sub cmdCreateRecord_Click()
    DoCmd.RunSQL "INSERT INTO Employees VALUES('Mark Drowns', #2009-06-02#, #2009/06/28#)"
    MsgBox "A record has been added to the Employees table."
End Sub

When performing data entry in the SQL, you can also include a date or time value in single-quotes. Here are examples:

Private Sub cmdCreateRecord_Click()
    DoCmd.RunSQL "INSERT INTO Employees " & _
                 "VALUES('Spencer Harland', '03-08-09', '03/28/09')"
    MsgBox "A record has been added to the Employees table."
    
    DoCmd.RunSQL "INSERT INTO Employees " & _
                 "VALUES('Kevin Sealans', '2009-07-20', '2009/08/18')"
    MsgBox "A record has been added to the Employees table."
End Sub

You can also include the 4-year digit as the last part of the value. Here are examples:

Private Sub cmdCreateRecord_Click()
    DoCmd.RunSQL "INSERT INTO Employees " & _
                 "VALUES('Anselme Bows', #09-13-2009#, '10/10/2009')"
    MsgBox "A record has been added to the Employees table."
    
    DoCmd.RunSQL "INSERT INTO Employees " & _
                 "VALUES('Jeremy Huissey', '07-20-2009', #08/18/2009#)"
    MsgBox "A record has been added to the Employees table."
End Sub

Introduction to Date/Time Related Operations


A Date/Time Variable

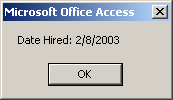
We know that the Visual Basic language has a strong support for date values starting with a data type named Date. We saw that, to declare a date variable, you use the Date data type. To initialize date or time variable, you must include its value between two # signs but following the rules of a date format from the Regional Settings of Control Panel. Here is an example:

Private Sub cmdDateTime_Click()
    Dim DateHired As Date

    DateHired = #2/8/2003#

    MsgBox "Date Hired: " & DateHired
End Sub

This would produce:

Date

Dates Formats

In US English, to express a date value, you can use one of the following formats:

  • mm-dd-yy
  • mm-dd-yyyy

You must start the date with a number that represents the month (a number from 1 to 12). After the month value, enter -. Then type the day value as a number between 1 and 28, 29, 30, or 31 depending on the month and the (leap) year. Follow it with -. End the value with a year in 2 or 4 digits. Here are examples 06-12-08 or 10-08-2006.

You can also use one of the following formats:

  • dd-mmm-yy
  • dd mmm yy
  • dd-mmmm-yy
  • dd mmmm yy
  • dd-mmm-yyyy
  • dd mmm yyyy
  • dd-mmmm-yyyy
  • dd mmmm yyyy

This time, enter the day value followed either by an empty space or -. Follow with the short name of the month in the mmm placeholder or the complete name of the month for the mmmm placeholder, followed by either an empty space or -. End the value with the year, using 2 or 4 digits.

As you may know already, in US English, you can start a date with the month. In this case, you can use one of the following formats:

  • mmm dd, yy
  • mmm dd, yyyy
  • mmmm dd, yy
  • mmmm dd, yyyy

As seen with the previous formats, mmm represents the short name of a month and mmmm represents the full name of a month. As mentioned already, the dd day can be expressed with 1 or 2 digits and the single digit can have a leading 0. After the day value, (you must) enter a comma followed by the year either with 2 or 4 digits.

The Parts of a Date Value

When you compose a date value, you must follow some rules. The rules depend on the language you are using. We will review those of the US English.

In a year, a month is recognized by an index in a range from 1 to 12. A month also has a name. The name of a month is given in two formats: complete or short. These are:

Month Index Full Name Short Name
1 January Jan
2 February Feb
3 March Mar
4 April Apr
5 May May
6 June Jun
7 July Jul
8 August Aug
9 September Sep
10 October Oct
11 November Nov
12 December Dec

A week is a combination of 7 consecutive days of a month. Each day can be recognized by an index from 1 to 7 (1, 2, 3, 4, 5, 6, 7). The day of each index is recognized by a name. In US English, the first day has an index of 1 is named Sunday while the last day with an index of 7 is named Monday. Like the months of a year, the days of a week have long and short names. These are:

US English Day Index Full Name Short Name
1 Sunday Sun
2 Monday Mon
3 Tuesday Tue
4 Wednesday Wed
5 Thursday Thu
6 Friday Fri
7 Saturday Sat

These are the default in US English. In most calculations, the Visual Basic language allows you to specify what day should be the first in a week.

The year is expressed as a numeric value.

Converting a Value to Date

If you have a value such as one provided as a string and you want to convert it to a date, you can call the CDate() function. Its syntax is:

Function CDate(Value As Variant) As Date

This function can take any type of value but the value must be convertible to a valid date. If the function succeeds in the conversion, it produces a Date value. If the conversion fails, it produces an error.

Checking for Valid Date/Time

To find out whether an expression holds a valid date, a valid, or not, you can call the IsDate() function. Its syntax is:

Public Function IsDate(ByVal Expression As Variant) As Boolean

This function takes an argument as the expression to be evaluated. If the argument holds a valid date and/or time, the function returns True. Here is an example:

Private Sub cmdDateTime_Click()
    Dim DateHired As Variant

    DateHired = "9/16/2001"
    MsgBox "Is 9/16/2001 a valid date? " & IsDate(DateHired)
End Sub

This would produce:

Is Date?

If the value of the argument cannot be evaluated to a valid date or time, the function returns False. Here is an example:

Private Sub cmdDateTime_Click()
    Dim DateHired As Variant

    DateHired = "Who Knows?"
    MsgBox "Is it a valid date? " & IsDate(DateHired)
End Sub

A Date Value

We have seen that, when creating a date, you can include its value between # signs. An alternative is to provide a date as a string. To support this, the Visual Basic language provides a function named DateValue. Its syntax is:

Function DateValue(ByVal StringDate As String) As Variant

When calling this function, provide a valid date as argument. The validity depends on the language of the operating system. If working in US English, you can use one of the formats we saw above. Here is an example:

Private Sub cmdDateTime_Click()
    Dim DateHired As Date

    DateHired = DateValue("22-Aug-2006")
        
    MsgBox "Date Hired: " & DateHired
End Sub

This would produce:

Date Value

A Serial Date

An alternative to initializing a date variable is to use a function named DateSerial. Its syntax is:

Function DateSerial(ByVal [Year] As Integer, _
   		    ByVal [Month] As Integer, _
   		    ByVal [Day] As Integer) As Variant

As you can see, this function allows you to specify the year, the month, and the day of a date value, of course without the # signs. When it has been called, this function returns a Variant value, which can be converted into a Date. Here is an example:

Private Sub cmdDateTime_Click()
    Dim DateHired As Date

    DateHired = DateSerial(2003, 2, 8)
    MsgBox "Date Hired: " & DateHired
End Sub

This would produce:

Date Serial

When passing the values to this function, you must restrict each component to the allowable range of values. You can pass the year with two digits from 0 to 99. Here is an example:

Private Sub cmdDateTime_Click()
    Dim DateHired As Date

    DateHired = DateSerial(3, 2, 8)
    MsgBox "Date Hired: " & DateHired
End Sub

If you pass the year as a value between 0 and 99, the interpreter would refer to the clock on the computer to get the century. At the time of this writing (in 2009), the century would be 20 and the specified year would be added, which would produce 2003. To be more precise and reduce any confusion, you should always pass the year with 4 digits.

The month should (must) be a value between 1 and 12. If you pass a value higher than 12, the interpreter would calculate the remainder of that number by 12 (that number MOD 12 = ?). The result of the integer division would be used as the number of years and added to the first argument. The remainder would be used as the month of the date value. For example, if you pass the month as 18, the integer division would produce 1, so 1 year would be added to the first argument. The remainder is 6 (18 MOD 12 = 6); so the month would be used as 6 (June). Here is an example:

Private Sub cmdDateTime_Click()
    Dim DateHired As Date

    DateHired = DateSerial(2003, 18, 8)
    MsgBox "Date Hired: " & DateHired
End Sub

This would produce:

Date Serial

As another example, if you pass the month as 226, the integer division (226 \ 12) produces 18 and that number would be added to the first argument (2003 + 18 = 2021). The remainder of 226 to 12 (226 MOD 12 = 10) is 10 and that would be used as the month. Here is an example:

Private Sub cmdDateTime_Click()
    Dim DateHired As Date

    DateHired = DateSerial(2003, 226, 8)
    MsgBox "Date Hired: " & DateHired
End Sub

This would produce:

Date Serial

If the month is passed as 0, it is considered 12 (December) of the previous year. If the month is passed as -1, it is considered 11 (November) of the previous year and so on. If the month is passed as a number lower than -11, the interpreter would calculate its integer division to 12, add 1 to that result, use that number as the year, calculate the remainder to 12, and use that result as the month.

Depending on the month, the value of the day argument can be passed as a number between 1 and 28, between 1 and 29, between 1 and 30, or between 1 and 31. If the day argument is passed as a number lower than 1 or higher than 31, the interpreter uses the first day of the month passed as the second argument. This is 1.

If the day is passed as -1, the day is considered the last day of the previous month of the Month argument. For example, if the Month argument is passed as 4 (April) and the Day argument is passed as -1, the interpreter would use 31 as the day because the last day of March is 31.

If the Month argument is passed as 3 (March) and the Day argument is passed as -1, the interpreter would refer to the Year argument to determine whether the year is leap or not. This would allow the interpreter to use either 28 or 29 for the day value. The interpreter uses this algorithm for any day value passed as the third argument when the number is lower than 1.

If the Day argument is passed with a value higher than 28, 29, 30, or 31, the interpreter uses this same algorithm in reverse order to determine the month and the day.

The Components of a Date


Introduction

As seen so far, a date is a value made of three parts: the year, the month, and the day. The order of these components and how they are put together to constitute a recognizable date depend on the language and they are defined in the Language and Regional Settings in Control Panel.

The System Date

Microsoft Access and the Microsoft Visual Basic language are equipped with various functions used to manipulate date and time values. At the most basic level, you can use the Date() function to get the system date of the computer. To display the system date in a text box, you can enter =Date() in its Control Source property.

Practical Learning: Get the System Date and/or Time

  1. The KoloBank1 database should still be opened with Microsoft Visual Basic displaying.
    On the main menu of Microsoft Visual Basic, click View -> Immediate Window
  2. In the Immediate window, type ?Date and press Enter.
    Notice that the system date is displayed
  3. Return to Microsoft Access
  4. Close the form
  5. When asked whether you want to save, click Yes

The Year of a Date

The Visual Basic language supports the year of a date ranging from 1 to 9999. This means that this is the range you can consider when dealing with dates in your worksheets. In most operations, when creating a date, if you specify a value between 1 and 99, the interpreter would use the current century for the left two digits. This means that, at the time of this writing (2009), a year such as 4 or 04 would result in the year 2004. In most cases, to be more precise, you should usually or always specify the year with 4 digits.

If you have a date value whose year you want to find out, you can call the Visual Basic's Year() function. Its syntax is:

Public Function Year(ByVal DateValue As Variant) As Integer

As you can see, this function takes a date value as argument. The argument should hold a valid date. If it does, the function returns the numerical year of a date. Here is an example:

Private Sub cmdDateTime_Click()
    Dim DateHired As Date
    
    DateHired = #2/8/2004#
    MsgBox "In the job since " & Year(DateHired)
End Sub

This would produce:

Year

Practical Learning: Using the Year Function

  1. Make sure the KoloBank1 database is still opened.
    In the Navigation Pane, right-click the TimeSheet form and click Design View
  2. On the form, double-click the txtStartDate text box
  3. In the Properties window, click Event and double-click On Lost Focus
  4. Click its ellipsis button Ellipsis
  5. Create the following function on top of the code for the OnLostFocus event:
    ' This function is used to create a number we will name TimeSheetCode
    ' This number is used to uniquely identify each timesheet record
    ' This number holds the employee number (5 digits)
    ' and the start date (yyyymmdd) of the time sheet
    ' It is useful as it allows us to find out whether the employee
    ' had previously filled out a time sheet or not
    Private Function CreateTimeSheetCode(ByVal EmplNbr As String, _
                                         ByVal DateStart As Date)
        Dim strMonth As String
        Dim strDay As String
        Dim iMonth As Integer
        Dim iDay As Integer
        Dim strTimeSheetCode As String
        
        iMonth = Month(DateStart)
        iDay = Day(DateStart)
        
        If iMonth < 10 Then
            strMonth = CStr(Year(DateStart)) & "0" & CStr(iMonth)
        Else
            strMonth = CStr(Year(DateStart)) & CStr(iMonth)
        End If
        
        If iDay < 10 Then
            strDay = strMonth & "0" & CStr(iDay)
        Else
            strDay = strMonth & CStr(iDay)
        End If
        
        CreateTimeSheetCode = (EmplNbr & strDay)
    End Function
  6. Return to Microsoft Access
  7. Close the form
  8. When asked whether you want to save, click Yes

The Month of a Year

The month part of a date is a numeric value that goes from 1 to 12. When creating a date, you can specify it with 1 or 2 digits. If the month is between 1 and 9 included, you can precede it with a leading 0.

If you have a date value and want to get its month, you can call the Month() function. Its syntax is:

Function Month(ByVal DateValue As Variant) As Integer

This function takes a Date object as argument. If the date is valid, the function returns a number between 1 and 12 for the month. Here is an example:

Private Sub cmdDateTime_Click()
    Dim DateHired As Date
    
    DateHired = #2/8/2004#
    MsgBox "Month hired " & Month(DateHired)
End Sub

This would produce:

Month

Practical Learning: Creating a Date

  1. Re-open the WattsALoan1 database
  2. In the Navigation Pane, right-click the LoansAllocations form and click Design View
  3. On the form, double-click the DateAllocated text box
  4. In the Properties window, click Event and double-click After Update
  5. Click the ellipsis button Ellipsis to switch to Microsoft Visual Basic
  6. Implement the AfterUpdate event of the DateAllocated text box as follows:
    Private Sub DateAllocated_AfterUpdate()
        ' Consider the date on which this loan was processed.
        ' If the month of this date is December, ...
        If Month(DateAllocated) = 12 Then
            ' then the payments will start in January of the following year.
            ' That is, create a date that adds 1 year to the currrent year
            ' and use January (month = 1) for the month
            PaymentStartDate = DateSerial(Year(DateAllocated) + 1, 1, 1)
        Else
            ' Otherwise, and normally, the payments should start
            ' the following month of when this loan was processed.
            ' In this case, keep the same year but add 1 month to the current month
            PaymentStartDate = DateSerial(Year(DateAllocated), Month(DateAllocated) + 1, 1)
        End If
    End Sub
  7. Close Microsoft Visual Basic and return to Microsoft Access
  8. Close the form
  9. When asked whether you want to save, click Yes
  10. In the Navigation Pane, double-click the LoansAllocations form
  11. Create a few loans for the customers
  12. Close the form
  13. In the Navigation Pane, double-click the Payments form
  14. Make some payments for the loans
  15. Close the form

The Name of the Month

As mentioned already, the Month() function produces a numeric value that represents the month of a date. Instead of getting the numeric index of the month of a date, if you want to get the name of the month, you can call the Visual Basic function named MonthName. Its syntax is:

Function MonthName(ByVal Month As Integer, _
		   Optional ByVal Abbreviate As Boolean = False) As String

This function takes one required and one optional arguments. The required argument must represent the value of a month. If it is valid, this function returns the corresponding name. Here is an example:

Private Sub cmdDateTime_Click()
    Dim DateHired As Date

    DateHired = #2/8/2004#
    MsgBox "Day hired " & MonthName(Month(DateHired))
End Sub

This would produce:

Month Name

The second argument allows you to specify whether you want to get the complete or the short name. The default is the complete name, in which case the default value of the argument is False. If you want to get the short name, pass the second argument as True. Here is an example:

Private Sub cmdDateTime_Click()
    Dim DateHired As Date

    DateHired = #2/8/2004#

    MsgBox "Month hired " & MonthName(Month(DateHired), True)
End Sub

This would produce:

Month Name

The Day of a Month

The day is a numeric value in a month. Depending on the month (and the year), its value can range from 1 to 29 (February in a leap year), from 1 to 28 (February in a non-leap year), from 1 to 31 (January, March, May, July, August, October, and December), or from 1 to 30 (April, June, September, and November).

If you have a date value and you want to know its day in a year, you can call the Day() function. Its syntax is:

Function Day(ByVal DateValue As Variant) As Integer

This function takes a date as argument. If the date is valid, the function returns the numeric day in the month of the date argument. Here is an example:

Private Sub cmdDateTime_Click()
    Dim DateHired As Date

    DateHired = #2/8/2004#
    MsgBox "Day hired " & Day(DateHired)
End Sub

This would produce:

Day

The Day of a Week

To get the name of the day of a week, you can a function named WeekdayName. Its syntax is:

Function WeekdayName( _
   ByVal Weekday As Integer, _
   Optional ByVal Abbreviate As Boolean = False, _
   Optional ByVal FirstDayOfWeekValue As Integer = 0 _
) As String

This function takes one required and two optional arguments. The required argument must be, or represent, a value between 0 and 7. If you pass it as 0, the interpreter will refer to the operating system's language to determine the first day of the week, which in US English is Sunday. Otherwise, if you pass one of the indexes we saw above, the function would return the corresponding name of the day. Here is an example:

Private Sub cmdDateTime_Click()
    MsgBox "Day hired: " & WeekdayName(4)
End Sub

This would produce:

Week Day Name

If you pass a negative value or a value higher than 7, you would receive an error.

The second argument allows you to specify whether you want to get the complete or the short name. The default value of this argument is False, which produces a complete name. If you want a short name, pass the second argument as True. Here is an example:

Private Sub cmdDateTime_Click()
    MsgBox "Day hired: " & WeekdayName(4, True)
End Sub

As mentioned already, the Visual Basic language allows you to specify what days should be the first day of the week. This is the role of the third argument.


Formatting a Date Value


Introduction

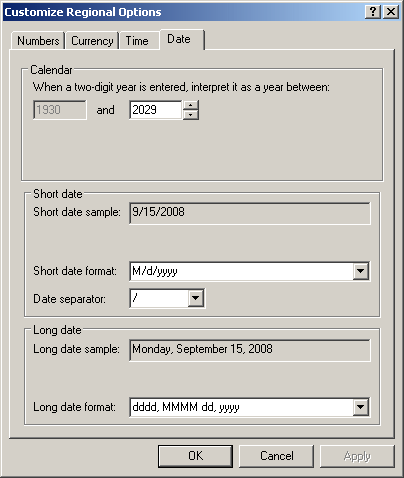
Formatting a date consists of specifying how the value would be displayed to the user. The Visual Basic language provides various options. The US English language supports two primary date formats known as long date and short date. You can check them in the Date property page of the Customize Regional Options accessible from the Regional Settings in Control Panel:

Date

To support these primary formats, the Visual Basic language provides a function named FormatDateTime. Its syntax is:

Function FormatDateTime(
   ByVal Expression As Variant,
   Optional ByVal NamedFormat As Integer = 0
) As String

The first argument of this function must be a valid Date value. The second argument is an integer. For a date, this argument can be 1 or 2. Here is an example:

Private Sub cmdDateTime_Click()
    Dim DateHired$

    DateHired$ = FormatDateTime("22-Aug-2006", 1)
    MsgBox "Date Hired: " & DateHired
End Sub

This would produce:

Long Format Date

Using the Format Function

To support more options, the Visual Basic language provides the Format() function that we saw in the previous lesson. We saw that its syntax was:

Function Format( _
   ByVal Expression As Object, _
   Optional ByVal Style As String = "" _
) As String

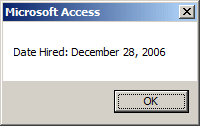
Remember that the first argument is the date that needs to be formatted. The second argument is a string that contains the formatting to apply. To create it, you use a combination of the month, day, and/or year characters we saw as date formats. Here is an example:

Private Sub cmdDateTime_Click()
    Dim DateHired As Date

    DateHired = #12/28/2006#
    MsgBox "Date Hired: " & Format(DateHired, "MMMM dd, yyyy")
End Sub

This would produce:

Date Format

Built-In Time Functions


Introduction

The Visual Basic language supports time values. To create a time value, you can declare a variable of type Date. To initialize the variable, create a valid value using the rules specified in the Regional and language Settings of Control Panel, and include that value between two # signs. Here is an example;

Private Sub cmdDateTime_Click()
    Dim DepositTime As Date

    DepositTime = #7:14:00 AM#
    MsgBox "Deposit Time: " & DepositTime
End Sub

This would produce:

Time

The Current Time

To get the current time of the computer, you can call the Time() function of the Visual Basic language. Here is an example:

Private Sub cmdDateTime_Click()
    MsgBox Time
End Sub

Creating a Time Value

Instead of including the time in # signs, you can also provide it as a string. To support this, the Visual Basic language provides a function named TimeValue. Its syntax is:

Function TimeValue(ByVal StringTime As String) As Variant

This function expects a valid time as argument. If that argument is valid, the function returns a time value. Here is an example:

Private Sub cmdDateTime_Click()
    Dim DepositTime As Date

    DepositTime = TimeValue("7:14")
    MsgBox "Deposit Time: " & DepositTime
End Sub

As an alternative to initializing a time variable, you can call a function named TimeSerial. Its syntax is:

Function TimeSerial(ByVal Hour As Integer, _
		    ByVal Minute As Integer, _
   		    ByVal Second As Integer) As Variant

This function allows you to specify the hour, the minute, and the second values of a time. If you pass valid values, the function returns a time. Here is an example:

Private Sub cmdDateTime_Click()
    Dim DepositTime As Date

    DepositTime = TimeSerial(7, 14, 0)
    MsgBox "Deposit Time: " & DepositTime
End Sub

The Components of a Time Value


The Hours of a Day

In US English, a time is made of various parts. The first of them is the hour. The time is a 24th spatial division of a day. It is represented by a numeric value between 0 and 23. When creating a time value, you specify the hour on the left side. To get the hour of a valid time, you can call a function named Hour. Its syntax is:

Function Hour(ByVal TimeValue As Variant) As Integer

This function takes a time value as argument. If a valid time is passed, the function returns the hour part.

The Minutes of an Hour

An hour is divided in 60 parts. Each part is called a minute and is represented by a numeric value between 0 and 59. If you have a time value and want to get its minute part, you can call a function named Minute. Its syntax is:

Function Minute(ByVal TimeValue As Variant) As Integer

When calling this function, pass it a time value. If the argument holds a valid value, the function returns a number between 0 and 59 and that represents the minutes.

The Seconds of a Minute

A minute is divided in 60 parts and each part is called a second. It is represented by a numeric value between 0 and 59. If you have a time value and want to extract a second part from it, you can call the Second() function named . Its syntax is:

Public Function Second(ByVal TimeValue As Variant) As Integer

If you call this function, pass a valid time. If so, the function would return a number represents the seconds part.

Operations on Date and Time Values


Introduction

Because dates and times are primarily considered as normal values, there are various operations you can perform on them. You can add or subtract a number of years or add or subtract a number of months, etc. The Visual Basic language provides its own mechanisms for performing such operations thanks to its vast library of functions.

Practical Learning: Introducing Operations on Date and Time Values

  1. Open the Georgetown Dry Cleaning Services2 database
  2. In the Navigation Pane, right-click the CleaningOrders form and click Design View

A Combination of System  Date and Time

To get a combination of the date and the time of the computer, you can call a function named Now. Here is an example:

Private Sub cmdDateTime_Click()
    MsgBox Now
End Sub

Adding a Value to a Date or a Time

To support the addition of a value to a date or a time, the Visual Basic language provides a function named DateAdd. Its syntax is:

Function DateAdd( _
   ByVal Interval As String, _
   ByVal Number As Double, _
   ByVal DateValue As Object _
) As Variant

This function takes three arguments that all are required.

The DateValue argument is the date or time value on which you want to perform this operation. It must be a valid Date value.

The Interval argument is passed as a string. It specifies the kind of value you want to add. This argument will be enclosed between double quotes and can have one of the following values:

Interval Used To Add
s Second
n Minute
h Hour
w Numeric Weekday
ww Week of the Year
d Day
y Numeric Day of the Year
m Month
q Quarter
yyyy Year

The Number argument specifies the number of Interval units you want to add to the DateValue value. If you set it as positive, its value will be added. Here are examples:

Private Sub cmdDateTime_Click()
    Dim LoanStartDate As Date
    Dim DepositTime As Date

    LoanStartDate = #6/10/1998#
    DepositTime = TimeValue("7:14:00")
    
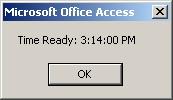
    MsgBox "Loan Length: " & DateAdd("yyyy", 5, LoanStartDate)
    MsgBox "Time Ready: " & DateAdd("h", 8, DepositTime)
End Sub

This would produce:

Date Add

Date Add

Practical Learning: Adding a Value to a Date or a Time

  1. On the form, click the DateDeposited text box
  2. In the Properties window, click Event and double-click After Update
  3. Click the ellipsis button Ellipsis to access Microsoft Visua Basic
  4. Implement the event as follows:
    Private Sub txtDateDeposited_AfterUpdate()
    On Error GoTo txtDateDeposited_AfterUpdateError
    
        Dim DateLeft As Date
        Dim TimeLeft As Date
        Dim Time9AM As Date
    
        DateLeft = CDate(txtDateDeposited)
        TimeLeft = CDate(txtTimeDeposited)
        Time9AM = TimeSerial(9, 0, 0)
        
        ' If the customer leaves clothes before 9AM...
        If Hour(TimeLeft) <= 9 Then
            ' ... then, regardless of the day,
            ' the clothes should be ready the same day after 5PM
            MsgBox "The clothes will be ready today after 5PM.", _
                   vbInformation Or vbOKOnly, _
                   "Georgetown Dry Cleaning Services"
            txtDateExpected = DateLeft
            txtTimeExpected = TimeSerial(17, 0, 0)
            ' DateSerial(Year(DateLeft), Month(DateLeft), Day(DateLeft))
        Else
            ' If the clothes are left after 9AM, ...
            ' if today is Saturday (the store is closed on Sunday),
            ' then the clothes will be ready on Monday after 8AM
            If Weekday(DateLeft) = vbSaturday Then
                MsgBox "The clothes will be ready on Monday after 5PM.", _
                       vbInformation Or vbOKOnly, _
                       "Georgetown Dry Cleaning Services"
                txtDateExpected = DateAdd("d", 2, DateLeft)
                txtTimeExpected = DateSerial(17, 0, 0)
            Else
                ' If today is a week (business) day, then the clothes will be ready tomorrow 8AM,
                MsgBox "The clothes will be ready tommorrow after 5M.", _
                       vbInformation Or vbOKOnly, _
                       "Georgetown Dry Cleaning Services"
                txtDateExpected = DateSerial(Year(DateLeft), Month(DateLeft), Day(DateLeft) + 1)
                txtTimeExpected = TimeSerial(17, 0, 0)
            End If
        End If
    
        Resume txtDateDeposited_AfterUpdateExit
        
    txtDateDeposited_AfterUpdateExit:
        Exit Sub
        
    txtDateDeposited_AfterUpdateError:
        If Err.Number = 94 Then
            MsgBox "Error #94 - Description: " & Err.Description & vbCrLf & _
                   "Make sure you enter the date deposited and the time deposited."
        Else
            MsgBox "Error #" & Err.Number & ": " & " - Description: " & Err.Description
        End If
        
        Resume Next
    End Sub
  5. In the Object combo box, select TimeDeposited
  6. In the Procedure combo box, select AfterUpdate
  7. Implement the event as follows:
    Private Sub txtTimeDeposited_AfterUpdate()
        txtDateDeposited_AfterUpdate
    End Sub
  8. Close Microsoft Visual Basic and return to Microsoft Access
  9. Close the form
  10. When asked whether you want to save, click Yes
  11. Re-open the KoloBank1 database
  12. In the Navigation Pane, right-click the TimeSheet form and click Design View
  13. On the form, double-click the StartDate text box
  14. In the Properties window, click Event and click the ellipsis button Ellipsis of On Lost Focus
  15. Implement the OnLostFocus event as follows:
    Private Sub txtStartDate_LostFocus()
        ' After the user has entered a start date,
        ' get that date
        If Not IsNull(txtStartDate) Then
            ' Add 14 days to the start date to get the end date
            txtEndDate = CStr(DateAdd("d", 13, CDate(txtStartDate)))
            ' Create a time sheet code
            txtTimeSheetCode = CreateTimeSheetCode(txtEmployeeNumber, _
                                                   CDate(txtStartDate))
        Else
            ' If the start date is empty, don't do anything
            Exit Sub
        End If
    End Sub
  16. Return to Microsoft Access
  17. Close the form
  18. When asked whether you want to save, click Yes
  19. Close Microsoft Access

Subtracting a Value From a Date or a Time

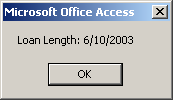
Instead of adding a value to a date or a time value, you may want to subtract. To perform this operation, pass the Number argument as a negative value. Here are examples:

Private Sub cmdDateTime_Click()
    Dim LoanPayDate As Date
    Dim TimeReady As Date

    LoanPayDate = #8/12/2008#
    TimeReady = TimeValue("17:05")
    
    MsgBox "Loan Length: " & DateAdd("m", -48, LoanPayDate)
    MsgBox "Time Deposited: " & DateAdd("n", -360, TimeReady)
End Sub

This would produce:

Date Add

Date Add

The Difference Between Two Date or Time Values

Another valuable operation performed consists of finding the difference between two date or time values. To help you perform this operation, the Visual Basic language provides a function named DateDiff. This function allows you to find the number of seconds, minutes, hours, days, weeks, months, or years from two valid date or time values. The DateDiff function takes 5 arguments, 3 are required and 2 are optional.

The syntax of the function is

Function DateDiff( _
    ByVal Interval As [ DateInterval | String ], _
    ByVal Date1 As Variant, _
    ByVal Date2 As Variant, _
    Optional ByVal DayOfWeek As Interger = 1, _
    Optional ByVal  WeekOfYear As Integer = 1 _
) As Long

This function takes five arguments, three of which are required and two are optional.

The Date1 argument can be the start date or start time. The Date2 argument can be the end date or end time. These two arguments can also be reversed, in which case the Date2 argument can be the start date or start time and the Date1 argument would be the end date or end time. These two values must be valid date or time values

The Interval argument specifies the type of value you want as a result. This argument will be enclosed between double quotes and can have one of the following values:

Interval Used To Get
s Second
n Minute
h Hour
w Numeric Weekday
ww Week of the Year
d Day
y Numeric Day of the Year
m Month
q Quarter
yyyy Year

Here is an example:

Private Sub cmdDateTime_Click()
    Dim LoanStartDate As Date
    Dim LoanEndDate As Date
    Dim Months As Long

    LoanStartDate = #8/12/2003#
    LoanEndDate = #10/5/2008#
    Months = DateDiff("m", LoanStartDate, LoanEndDate)
    
    MsgBox "Loan Start Date: " & vbTab & LoanStartDate & vbCrLf & _
           "Loan End Date: " & vbTab & LoanEndDate & vbCrLf & _
           "Loan Length: " & vbTab & Months & " months"
End Sub

This would produce:

Date Difference

By default, the days of a week are counted starting on Sunday. If you want to start counting those days on another day, supply the Option1 argument using one of the following values: vbSunday, vbMonday, vbTuesday, vbWednesday, vbThursday, vbFriday, vbSaturday. There are other variances to that argument.

If your calculation involves weeks or finding the number of weeks, by default, the weeks are counted starting January 1st. If you want to count your weeks starting at a different date, use the Option2 argument to specify where the function should start.

We saw that we could use the DateDiff() function to get the difference between two date or time values. The first argument can be specified as a string. A better idea is to use a member of the DateInterval enumeration. The members are:

Value Constant Value Description
vbUseSystemDayOfWeek 0 The interpreter will refer to the operating system to find out what day should be the first. In US English, this should be Sunday
vbSunday 1 Sunday (the default in US English)
vbMonday 2 Monday
vbTuesday 3 Tuesday
vbWednesday 4 Wednesday
vbThursday 5 Thursday
vbFriday 6 Friday
vbSaturday 7 Saturday

By default, the first week of a year is the one that includes January 1st of that year. This is how it is considered in the regular date-based calculations. If you want to change this default setting, you can use the last argument of the DateDiff() function. The value of this argument can be:

Value Constant Value Description
vbUseSystem 0 The interpreter will refer to the operating system to find out what day should be the first. This should be the week that includes January 1st
vbFirstJan1 1 This will be the week that includes January 1st
vbFirstFourDays 2 This will be the first week that includes at least the first 4 days of the year
vbFirstFullWeek 3 This will be the first week that includes the first 7 4 days of the year


Previous Copyright © 2002-2015, FunctionX, Inc. Next