|
Microsoft Visual Basic Fundamentals |
|
|
|
Microsoft
Excel is a spreadsheet application that provides simple to advanced means of creating and managing any type
of list. To enhance it beyond its default function, it ships with a
language called Microsoft Visual Basic or simply Visual Basic.
Microsoft Visual Basic for Applications (VBA) is a computer
language based on Microsoft Visual Basic. It allows you to write code that can
automatically perform actions on a document and/or its content. When using
that language, you write pieces of code, using an external environment.
|
Microsoft
Visual Basic is a programming environment that gets automatically installed when
you setup Microsoft Excel. It stays apart because most people would not need or
use it. This means that, if you want to use the Microsoft Visual Basic
programming environment that ships with Microsoft
Excel, you must ask for it, which can be easily done.
|
Launching Microsoft Visual Basic
|
|
In our lessons, we will learn how to use both Microsoft
Excel and Microsoft Visual Basic to create and manage spreadsheets. The
Microsoft Visual Basic programming environment we will use depends on Microsoft
Excel. As a result, to use Microsoft Visual Basic, you must first open Microsoft
Excel. Then, to write code, you must open Microsoft Visual Basic. There
are various ways you can do this, depending on your intention.
Before using code, you should add a new tab, the
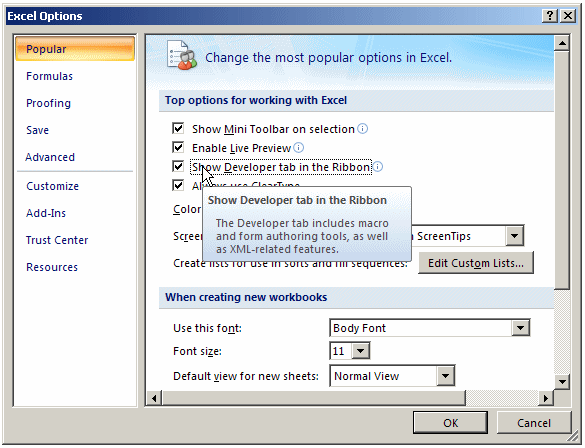
Developer tab, to the Ribbon. To do this, you can click the Office Button and click Excel Options.
In the Excel Options dialog box, click the Show Developer tab in the Ribbon
check box and click OK. The Ribbon would become equipped with a new tab:

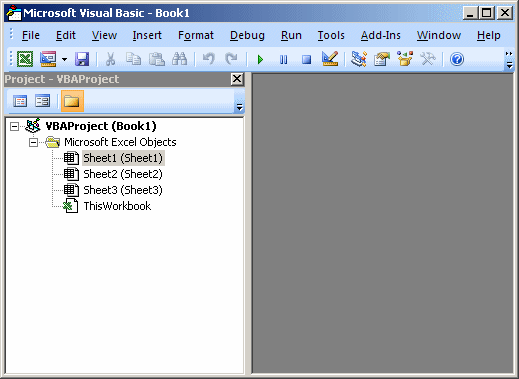
From the Developer tab of the Ribbon, to launch Microsoft
Visual Basic, you can click the Visual Basic button.
|
 Practical
Learning: Starting Microsoft Visual Basic Practical
Learning: Starting Microsoft Visual Basic
|
|
- Start Microsoft Excel
- Click the Office Button and click Excel Options
- In the Excel Options dialog box, click the Show Developer tab in the
Ribbon check box:
- Click OK
- In the Code section of the Developer tab of the Ribbon, to launch
Microsoft Visual Basic, click Visual Basic:
|
The Microsoft Visual Basic Interface |
|
When it opens, like any regular Windows application,
Microsoft Visual Basic displays a title bar in the top section. Under the title bar, the application displays a menu, followed
by a Standard toolbar.
To assist you with your development, Microsoft Visual Basic
can display various
windows.
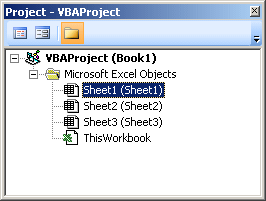
The Project Explorer window shows a list of the
code segments that are available to your worksheet. It is usually
available whenever you open Microsoft Visual Basic. It is usually positioned in the top-left section.
If it is not present, to display it, on the main menu of Microsoft Visual Basic,
you can click View -> Project Explorer. To close it, you can click its Close
button  .
.
You can move the Project Explorer to another section of the
interface. To do this, click its title bar and drag it away it
from there:
To put the window back where it was previously, you
can double-click its title bar.
The Properties window is usually positioned in the bottom-left section of
the screen. When it does not appear, to display it, on the main menu,
click View -> Properties Window:
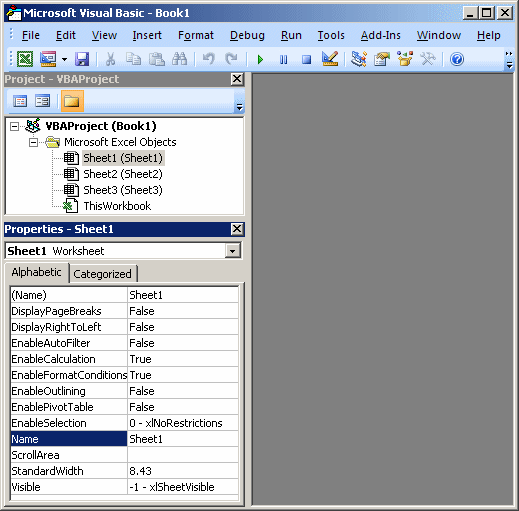
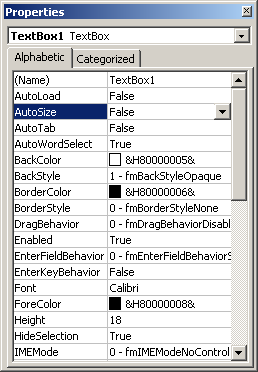
The Properties Window shows the characteristics of an object that is selected. Like
any other window, to move the Properties window from its position, drag
its title bar:
The main area of Microsoft Visual Basic uses a gray
background. This area is gray because, in reality, Microsoft Visual Basic is a multiple
document interface (MDI) that can
be used to display various windows at the same time. At times, this gray
area will be occupied with other windows.
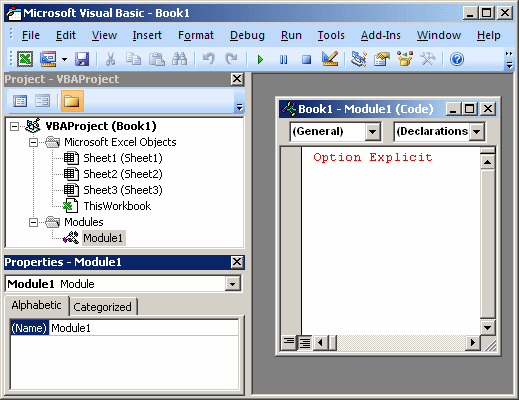
A module is a blank window that resembles a piece of
paper on which you write code. When you use Microsoft Excel and work on a
document, a default module is automatically allocated for it, whether you
use it or not. You can also create a module that is independent of any
worksheet.
To create a module, on the main menu of Visual Basic,
you can click Insert -> Module.
|
 Practical
Learning: Creating a Module Practical
Learning: Creating a Module
|
|
- On the main menu of Microsoft Visual Basic, click Insert -> Module
- Notice that a blank window with a blinking caret appears
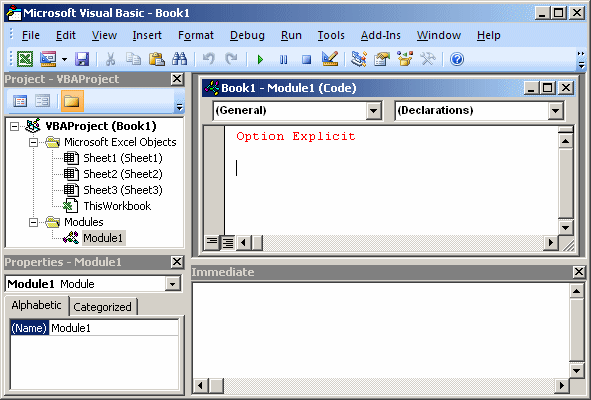
To help you test code, Microsoft Visual Basic provides
a special window called the Immediate Window. To display it, on the main menu of
Microsoft Visual Basic, you can click View -> Immediate Window.
|
 Practical
Learning: Displaying the Immediate Window Practical
Learning: Displaying the Immediate Window
|
|
- To display the Immediate Window, on the main menu of Visual Basic, click
View -> Immediate Window
- Notice that a window with an Immediate title bar appears at the bottom
with a blinking caret
- To return to Microsoft Excel, on the Standard toolbar of Visual Basic,
click the View Microsoft Excel button
- To close Microsoft Visual Basic, on the main menu, click File
-> Close and Return to Microsoft Excel
In the spreadsheet you will create, you use Microsoft Excel
to create normal documents using the default settings of the application. To
apply some advanced features to a spreadsheet, you can use Microsoft Visual Basic that is automatically installed with
Microsoft Excel.
To create a spreadsheet with functionality beyond the
defaults, you write code. Microsoft Visual Basic is a programming
environment that uses a computer language. That language is called Visual Basic for Applications (VBA). Although
VBA is a language of its own, it is in reality derived from the big
Visual Basic computer language developed by Microsoft. In our lessons, we
will learn how to use VBA in Microsoft Excel.
To take advantage of the functionalities of the
Microsoft Visual Basic environment, there are many suggestions you can use
or should follow. Because VBA is normal computer language, there are
various rules you must follow for the language to work.
In our lessons, we will use the word VBA sometimes but
most of the time, we use the expression "Visual Basic Language".
When we use "Visual Basic language", we refer to a concept that
is recognized by all child languages of Visual Basic, including VBScript
and VBA. When we will use the word VBA, we refer to a concept that either
is proper to VBA as a language and is not necessarily applied to some
other flavors of Visual Basic, or to the way the Visual Basic language is
used in Microsoft Excel. For example, the word String is used in all
Visual Basic languages but the word Variant is not used in the
2008 version of the Visual
Basic language.
To
launch Microsoft Visual Basic using the default installation of Microsoft Excel
and launching from a macro:
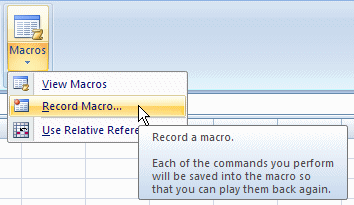
- On
the Ribbon, you can click View. In the Macros section, click the arrow
under the Macros button and click Record a Macro:
- Click Developer. In the Code section, click the Record Macro button

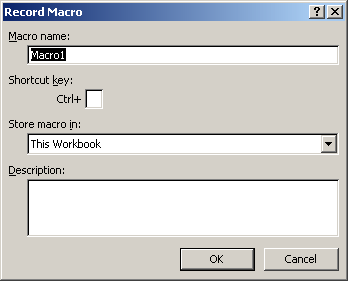
In each case, the Record Macro dialog box would come
up:
On
the Record Macro dialog box, accept or enter a name for the macro. As
an option, you can type a description of the macro in the bottom text box.
Once you are ready, click OK. This would bring you to the document in
Microsoft Excel where you can do what you want.
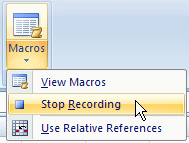
After doing what is
necessary, to end the creation of the macro, on the Ribbon:
- Click View. In the Macros section, click the the arrow of the Macros
button and click Stop Recording:
- Click Developer. In the Code section, click the Stop Recording button

|
 Practical
Learning: Creating a Macro Practical
Learning: Creating a Macro
|
|
- Start Microsoft Excel
- On the Ribbon, click Developer.
In the Code section, click Record Macro
- Set the Name of the macro as Variables
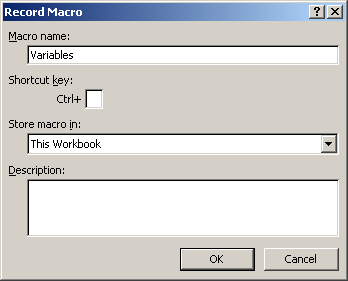
- Click OK
- In the document, whatever box is selected (don't click any), type =2
- On the Formula Bar, click the Enter button

- In the Code section of the Ribbon, click Stop Recording
|
The Skeleton Code of a Macro |
|
When you create a macro, skeleton code is generated for you. To access the
code generated for a macro, on the Ribbon:
- Click View. In the Macros section, click Macros
 or click the the arrow of the Macros button and click View Macros
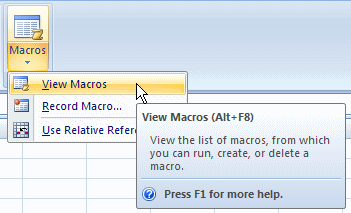
- Click Developer. In the Code section, click the Macros button

Any of these actions would open the Macros dialog box that would display
the list of macros in the current document:
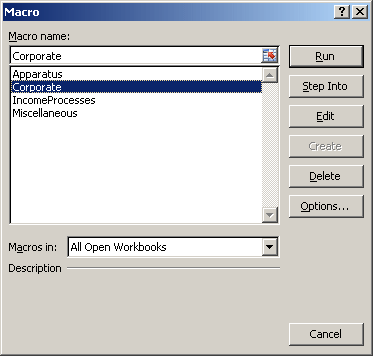
To see the code of a macro, click its name and click Edit.
|
 Practical
Learning: Viewing the Code of a Macro Practical
Learning: Viewing the Code of a Macro
|
|
- To open Microsoft Visual Basic, in the Code section of
the Ribbon, click Macros
- In the Macros dialog box, make sure Exercise1 is
selected and click Edit