Form Design
|
|
Form Design |
|
The Location of a Control on a Form |
|
Introduction |
|
In the previous lesson, we saw that a characteristic, also called a property, of a control is information used to describe or define an object. The description can be done visually or programmatically. Some of the visual description is done by designing the object; that is, by changing its aspects using the mouse, the keyboard, and the tools provided by Microsoft Excel and Microsoft Visual Basic. |
|
|
|
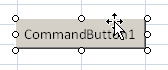
When you add a control to the work area in Microsoft Excel or to a form in Microsoft Visual Basic, it assumes a position on its container. If you want, you can change that location by moving the control. To move a control, click it and drag in the direction of your choice. To move a group of controls, first select them. Click it and drag the selection in the direction of your choice When a control has been selected, as your mouse moves over it, its pointer displays a different cursor. One of these cursors can be used to move a control. This cursor is represented as a cross with four arrows:
To move a control, click its border and hold the mouse down, drag in the direction of your choice. When you get to the desired location, release the mouse.
You can also position one or more controls in the middle of the form. To do that, select the control, then, on the main menu of Visual Basic, click Format -> Center In Form -> Vertically.
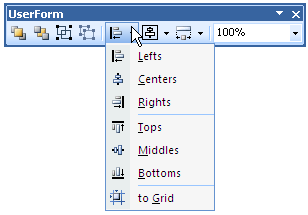
When many controls are selected on a form, one of the controls has dark handles:  In our descriptions, the control with the dark handles will be referred to as the base control. During form design, to better position the controls, you can use the main menu with the Format group. Microsoft Visual Basic also provides the UserForm toolbar to assist you. To display the UserForm toolbar, on the main menu of Microsoft Visual Basic, you can click View -> Toolbars -> UserForm. If you have a certain control on the form and want to position it exactly at equal distance between the left and the right borders of the form, select the control, then, on the main menu of Microsoft Visual Basic, click Format -> Center in Form -> Horizontally. To get the same option, on the UserForm toolbar, click the arrow of the Center button and click Horizontally: 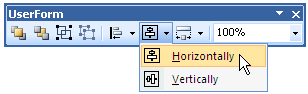 Horizontal alignment affects controls whose distance from the left border of the form must be the same. To perform this type of alignment, you can use the main menu where you would click Format -> Align, and select one of the following options:
To get the same options using the UserForm toolbar, click the arrow of the Align button and select the desired option: Lefts, Centers, or Rights:
Another option you have consists of moving controls up or down for better alignment. Once again you must first select the controls. Then, on the main menu, click Format -> Align, and click one of the following options:
To get the same options using the UserForm toolbar, click the arrow of the Align button and select the desired option: Tops, Middles, or Bottoms.
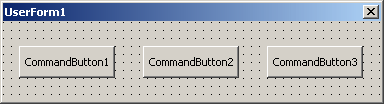
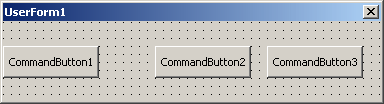
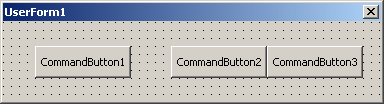
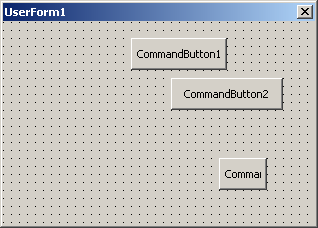
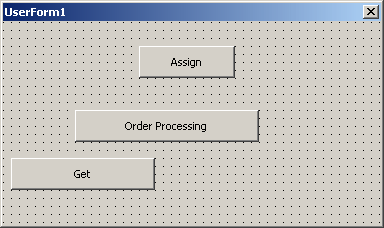
Suppose you have a group of horizontally aligned controls as follows: 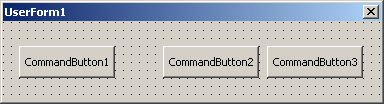 Obviously the controls on this form are not enjoying the most professional look. The Format group of the main menu allows you to specify a better horizontal alignment of controls with regards to each other. To use it, first select the controls. Then, on the main menu of Microsoft Visual Basic, click Format -> Horizontal Spacing, and click one of the following options:
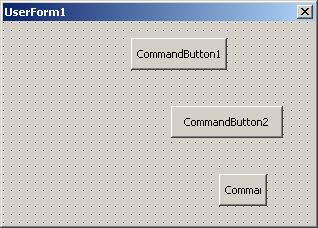
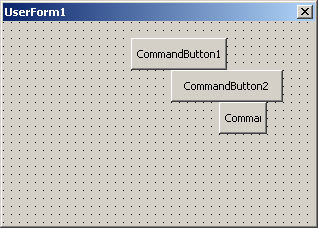
Suppose you have a group of horizontally aligned controls as follows: 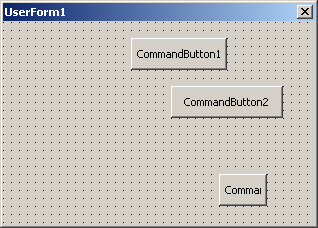 The controls on this form are not professionally positioned with regards to each other. Once again, the Format group of the main menu allow you to specify a better vertical alignment of controls relative to each other. To align them, on the main menu of Microsoft Visual Basic, click Format -> Vertical Spacing and click one of the following options:
If you click a control�s button on the Toolbox and click a UserForm, the control assumes a default width. The width of a control is the distance from its left to its right borders. To visual specify the width of a control, click it, position
the mouse on one of its left or right handle until the mouse cursor appears with
a horizontal bar with two arrows The distance from the left border to the right border of a control is referred to as its Width property. Therefore, to specify the width of a control with precision, click the control. In the Properties window, click Width and type the desired value. To programmatically specify the width of a control, access it using its name, type the period, followed by Width, the assignment operator, and the desired value. If a control displays or contains text, such as the caption of a button, click the control. On the main menu of Microsoft Visual Basic, click Format and click Size to Fit.
Instead of one, you can also resize a group of controls at
the same time. To enlarge or shrink many controls, select them.
Position the mouse on the left or right handle of one of the selected controls to get the
desired cursor Consider the following form:
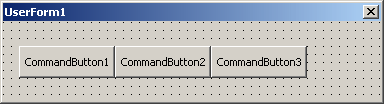
Imagine you would like each of these buttons to have just enough space to accommodate its caption. First select the controls that will be resized. To resize the controls, on the main menu of Microsoft Visual Basic, click Format and click Size to Fit. If you do, the controls will be resized based on the contents of their value:
If all the controls are text boxes, their widths would be reduced to be able to hold a character. Consider the following form:
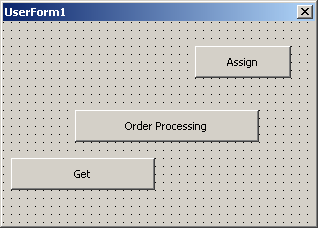
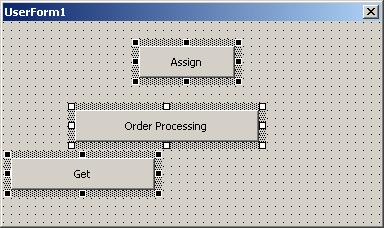
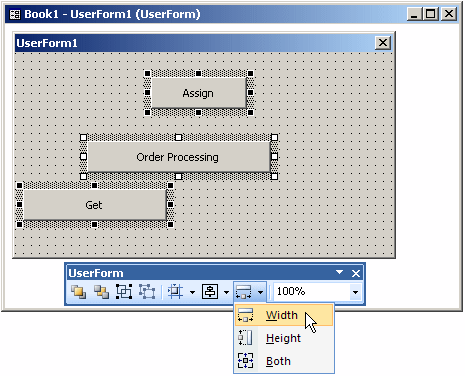
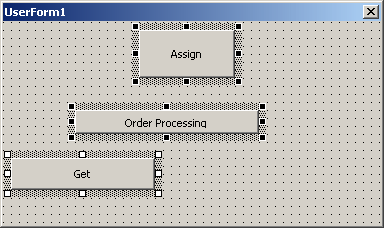
Imagine one of the controls has a certain width and you want to apply that width to the other controls. Select the controls but make as the base control the object that has the width you want. Here is an example where the button labeled Order Processing is selected as the base:
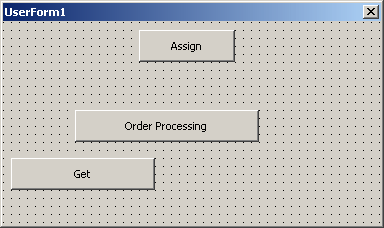
On the main menu, you can click Format -> Make Same Size -> Width. Alternatively, on the UserForm toolbar, you can click the arrow of the right button and click Width:
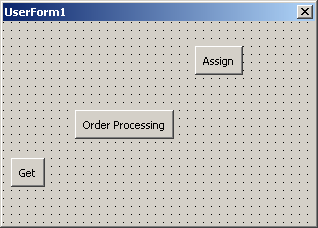
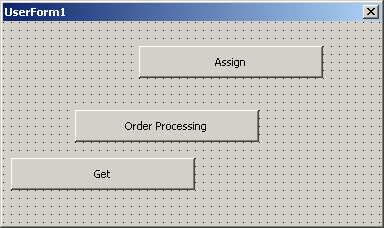
After doing this, the controls would be enlarged or narrowed based on the width of the control that was set as the base:
|
|
The height of a control is the distance from its top to its bottom borders. This can be illustrated as follows: 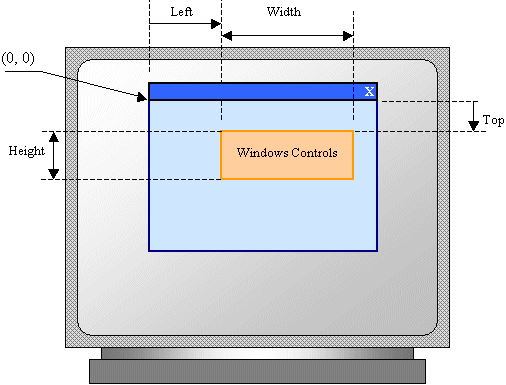
To visual specify the height of a control, click it, position
the mouse on one of its top or bottom handle until the mouse cursor appears with
a vertisal bar with two arrows To specify the width of a control with precision, click the control. In the Properties window, click Height and type the desired value. To programmatically specify the height of a control, access it using its name, type the period, followed by Height, followed by =, and the desired value. If a control displays or contains text, such as the caption of a button, click the control. On the main menu of Microsoft Visual Basic, click Format and click Size to Fit. To programmatically specify the height of a control, type its name, access its Height property and assign the desired value.
You can resize many controls at the same time. To do this,
select the controls.
Position the mouse on the top or bottom handle of one of the selected controls to get the
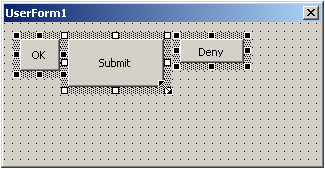
desired cursor You can shrink or heighten many controls based on the height of one of the controls. To start, select the controls but use as base the control that has the height you would like to apply on the other controls. Here is an example where the button labeled Get is set as the base:
On the main menu, you can click Format -> Make Same Size -> Height. Or, on the UserForm toolbar, you can click the arrow of the right button and click Height. After doing this, the controls would get shrunk or tall based on the width of the control that was set as the base:
Instead of separately setting the width or the height of a control or a group of controls, you can specify both pieces of information at the same time. To visually specify both the width and the height of a control:
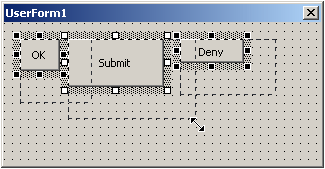
When you get to the desired position, release the mouse. To resume, to resize a control, click it to select it. Position the mouse on a border, a handle, or a corner of the selected control. Use the appropriate mouse cursor:
Imagine you have added three controls to a form and the design appears as follows: 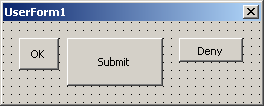 To visually resize various controls, first select them. Position the mouse on the border or corner of one of the selected controls until you get the cursor that would resize to the direction of your choice:
Click and drag in the direction of your choice:
Once you get the desired size, release the mouse. To precisely change the sizes of various controls at the same time, first select them. Then, in the Properties window, change the values of the Width and Height properties. The new value would be applied to all selected controls. Alternatively, Microsoft Visual Basic provides tools to automatically do this for you.
If you had applied some design on a control and you want to replicate that design, you can copy the control. This is mostly a simple operation of copy n' paste. You can copy a control on the work area or on a form and paste it on the same container (you are not allowed to copy a control from the work area to a form and vice versa). You can also copy a control from one work area and paste it in another work area. You can copy a control from one form and paste it in another form. When you copy and paste a control, there are some characteristics it would retain and some others it would loose. Normally, it would keep its aesthetic characteristics (such as the color) and its size but it will loose some others (such as its location and its programmatic characteristics such as its name. To copy a control:
To copy a group of controls, first select the controls:
To paste the copied controls, in the work area or on a form:
If you have added a control to the work area or a form but you don't need it anymore, you can remove it
from the container. You can also delete a group of controls in one step.
To remove a group of controls, select them:
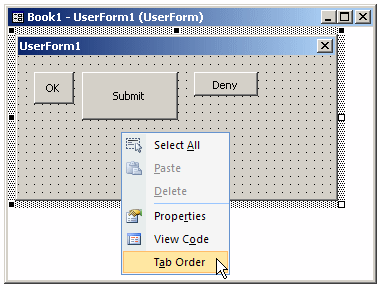
When using the controls of a form, you can press Tab to move from one control to another. For example, after entering a value in a text box of a form, if there is another text box on the right side, when you press Tab, the caret should move to that right control. If there is no control on the right side, the caret should move to the control under the one previously used. If the caret or focus is in the last bottom control on a form and you press Tab, the caret should move back to the first record. This follows the arranged sequence of the controls on the form. For this reason, the controls on a form should be aligned in the order of a logical sequence. When you add a control to a form that already has other controls, it is sequentially positioned at the end of the existing controls. The sequence of controls navigation is set using the Tab Order dialog box. To access the Tab Order dialog box:
|
|
|||||||||||||||||||||||||||||||||
|
|
|
|
||
| Previous | Copyright © 2004-2009 FunctionX | Next |
|
|
||