
DataGrid Binding
 |
DataGrid Binding |
From the user's point of view, data navigation consists of moving from one piece of information of a database to another. This could be done from one control to another or from one record to another. To support the various scenarios of data navigation, there are three main categories of data display the user will face. Put it another way, there are three types of scenarios you as the database developer will present to the user.
There are three main ways you display data to the user: Datasheet Display: A datasheet displays its information in series of columns and rows, the intersections of which are called cells. A datasheet is meant to display as many records as possible all at once in the same view: 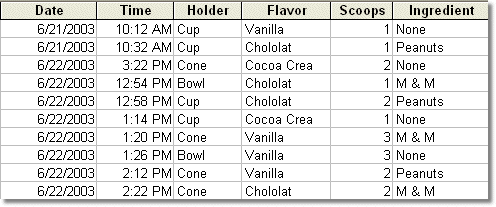 To navigate among cells of a datasheet, the user can click a value and click another as desired. Alternatively, the user can press Tab continuously to move from one cell to another. Some datasheet controls also allow pressing Enter to move from one cell to another. In some cases, some cells can be made to display controls such as check or combo boxes. Windows Controls Display: While a datasheet displays its information in cells, you may prefer to use more elaborate controls to display data. This means that you can use edit boxes, list-based controls, button-based controls (such as radio buttons or check boxes), etc. Here is an example: 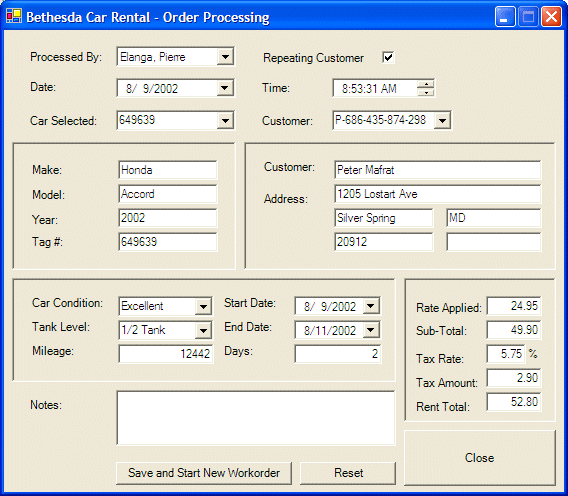 To navigate from one control to another, the user can click continuously. In most cases, the user can also press Tab to move among records. An alternative to this scenario is to add a datasheet portion to the form, combined with other controls, in what is referred to as master/detail. Record Navigation: A datasheet is meant to display all of its records or as many records as possible. The above display of various controls is used display one record at a time. When the user has finished using the record, such as during data entry, you must provide the user with a way to restart. An alternative is to allow the user to move from one record to another. Of course, this is taken care of by the datasheet. If there are many fields for each record, a datasheet may not be suitable. Therefore, you can display one record at a time in one view but allow the user to navigate to the next or the previous record. This can be done by creating appropriate menu items or by adding navigation buttons on the form. You can position such buttons in the bottom section of the form as follows: 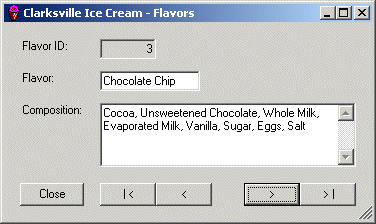 In this case, to navigate among records, the user can click the appropriate button. To implement any other these scenarios, you must appropriately bind the database fields and records to the desired control(s). |
|
|
Datasheet Binding |
|
Introduction |
|
Although you will create your databases as SQL files, to provide a friendlier environment, you create forms and other graphical accessories that allow the users to access and view information. In Visual Studio, you would create a Windows application. ADO.NET provides various ways to connect to a database, the simplest consists of using a SqlDataAdapter variable because this gives you direct access to the SQL Server database. With other techniques, or as traditionally done, you would have to create an ODBC Data Source. The Microsoft Visual Studio .NET programming environment is so close to SQL Server that you can create and manage a database as if you were using a single application to take care of me. |
|
|
|
|
Introduction to Data Sets |
|
The information stored in an object such as a database table is called a set, which is simply the group of its records. Because information is in fact referred to as data, the group of records in a table is also called a data set. To identify and manage the set of records, or data set, of a table, the Microsoft .NET Framework provides a class called DataSet. After getting a connection to a database, you are ready to process it. You can use the data directly or, to better manage it, you can pass it to DataSet variable. |
|
|
|
|
The DataGrid Control |
|
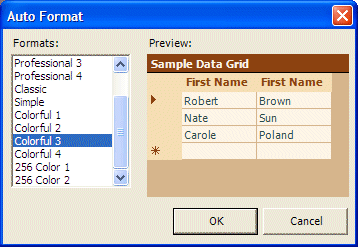
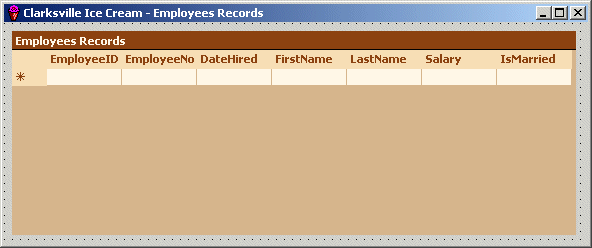
Data of a table is represented as a series of columns and rows. The columns are horizontal and hold the categories of information. A row contains entries various columns. The intersection of a column and a row is called a cell. The group of values stored in cells of a particular row is called a record. To display information of a table, in the Server Explorer, you can just double-click it. Instead of using a table to display data in cells, the Microsoft .NET Framework provides a control called DataGrid. This object also organizes its information in series of columns and rows whose intersections, called cells, hold the data of a table. To use a DataGrid, click it in the Toolbox and click the form. After doing this, you can specify that the information that displays in the cells will come from a DataSet. To do this, you can set the DataSource property of the DataGrid to the DataSet you have created. To actually display data in the DataGrid, you can call the Fill() method of the data adapter you are using. |
|
|
Private Sub Employees_Load(ByVal sender As System.Object, ByVal e As System.EventArgs) Handles MyBase.Load
        Me.SqlDataAdapter1.Fill(Me.DsIceCream1)
 End Sub
|
Private Sub btnEmployees_Click(ByVal sender As System.Object, ByVal e As System.EventArgs) Handles btnEmployees.Click
        Dim frmEmpl As Employees = New Employees
        frmEmpl.ShowDialog()
End Sub
|

|
|
||
| Previous | Copyright © 2004-2010 FunctionX, Inc. | Next |
|
|
||