|
Introduction to List Boxes
|
|
|
|
A list box presents a list of items to choose from. Each
item displays on a line. The user makes a selection by clicking in the list.
Once clicked, the item or line on which the mouse landed becomes
highlighted, indicating that it is the current choice. Here is an example:
|
After an item has been selected, to make a different
selection, the user would click another. The new clicked item becomes
selected or highlighted; the previously selected item looses its
highlighting attribute. The user can also change the selection by pressing
the up or down arrow keys.
List boxes are categorized in two types: single and
multi-selection. The second category allows a user to select more than one
item by pressing Ctrl to select items at random or by pressing Shift to
select items in a range.
One of the main reasons for using a list box is to
display a list of items to the user. Sometimes the list would be very
large. If the list is longer than the available client area of the
control, the control would be equipped with a scroll bar that allows the
user to navigate up and down to access all items of the list. You will
have the option of deciding how many items to display on the list.
|
 Practical
Learning: Introducing List Boxes Practical
Learning: Introducing List Boxes
|
|
- Start Microsoft Visual Studio
- To start a new project, on the main menu, click File -> New
Project...
- In the middle list, click Windows Forms Application
- Set the Name to SQLTutorial1
- Click OK
To support list boxes, the .NET Framework provides the
ListBox class. At design time, to add a list box to an application,
from the Common Controls section of the Toolbox, click the ListBox control
and click the form or the control that will host it. To programmatically
create a list box, declare a variable of type ListBox, use the new
operator to allocate memory it, and add it to the Controls property of its
eventual parent.
#include <windows.h>

#using <System.dll>
#using <System.Drawing.dll>
#using <System.Windows.Forms.dll>

using namespace System;
using namespace System::Drawing;
using namespace System::Windows::Forms;

public ref class CExercise : public Form
{
private:
    ListBox ^ lbxFamily;

public:
    CExercise()
    {
	InitializeComponent();
    }

private:
    void InitializeComponent()
    {
	lbxFamily = gcnew ListBox;

        Text = "Exercise";
        Size = System::Drawing::Size(452, 150);
        StartPosition = FormStartPosition::CenterScreen;
        Controls->Add(lbxFamily);
    }
};

int APIENTRY WinMain(HINSTANCE hInstance,
		     HINSTANCE hPrevInstance,
		     LPSTR lpCmdLine,
		     int nCmdShow)
{
    Application::Run(gcnew CExercise);

    return 0;
}
 |
In our applications, the names of the
list-based controls will be in plural. This is not a rule and it
is not based on any preconceived standard.
|
|
 Practical
Learning: Adding a List Box Practical
Learning: Adding a List Box
|
|
- In the Common Controls section of the Toolbox, click ListBox and
click the form
Like every control, when creating a list box, make
sure you give it a name. Once the list box is positioned on a container,
as done with other controls, you can move it by clicking and dragging the
control. You can also resize it using any of the techniques we learned to
add, position, move, and resize controls. If the list will cover many
items, design it so its height can display 8 items at a time. Otherwise,
for a list of 8 or less items, use only the necessary height that would
accommodate all of the items.
|
Visually Adding Items to a List Box
|
|
The most important characteristic of a list box is the
list of items it contains. This list is represented by the Items property.
The Items list is created and managed by a ListBox-nested class
named ObjectCollection. ObjectCollection is a collection
class that implements the IList, the ICollection, and the
IEnumerable interfaces.
At design time, to create a list of items, access the
Properties window of the list box and click the ellipsis button of the
Items field. This would open the String Collection Editor:
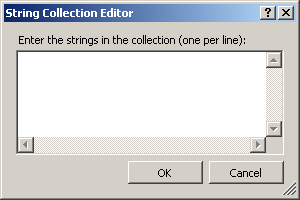
In the empty window, you can type an item, press
Enter, add another, and so on. After creating the list, you can click OK.
|
 Practical
Learning: Visually Adding Items to a List Box Practical
Learning: Visually Adding Items to a List Box
|
|
- On the form, right-click the list box and click Edit Items...
- In the String Collection Editor, type the following:
CREATE TABLE
Products
(
ProductID int,
Name varchar(50)
);
- To test the application, on the main menu, click Debug -> Start
Debugging
- Close the form and return to your programming environment
|
Programmatically Adding Items to a List Box
|
|
To programmatically add an item to the list, access the Items
property, call its Add() member function, and pass the new item.
You can do this continually for each item. Here are examples:
void InitializeComponent()
{
    lbxFamily = gcnew ListBox;
    lbxFamily->Location = Point(12, 12);

    lbxFamily->Items->Add("Son");
    lbxFamily->Items->Add("Daughter");
    lbxFamily->Items->Add("Father");
    lbxFamily->Items->Add("Mother");

    Text = "Exercise";
    Size = System::Drawing::Size(452, 150);
    StartPosition = FormStartPosition::CenterScreen;
    Controls->Add(lbxFamily);
}
This would produce:

You can also first create an array of items and then
add that array to the collection. To support this, the ObjectCollection
class provides the AddRange() member function. Here is an example:
void InitializeComponent()
{
    lbxFamily = gcnew ListBox;
    lbxFamily->Location = Point(12, 12);

    lbxFamily->Items->Add("Son");
    lbxFamily->Items->Add("Daughter");
    lbxFamily->Items->Add("Father");
    lbxFamily->Items->Add("Mother");

    array<String ^> ^ strMembers = { "Niece", "Nephew", "Uncle" };
    lbxFamily->Items->AddRange(strMembers);

    Size = System::Drawing::Size(452, 150);
    StartPosition = FormStartPosition::CenterScreen;
    Controls->Add(lbxFamily);
}
This would produce:

If you use either the Add() or the
AddRange() member function to add an item or a group of items, the
item or the group would be added to the end of the list, if a list exists
already. To insert a new item somewhere inside of the list, call the
Insert() member function.
|
 Practical
Learning: Programmatically Adding Items to a List Box Practical
Learning: Programmatically Adding Items to a List Box
|
|
- Double-click an unnoccupied area of the form
- Implement the Load event as follows:
System::Void Form1_Load(System::Object^  sender, System::EventArgs^  e)
{
    array<String ^> ^ code = {
		"CREATE TABLE", "Products", "(",
		"ProductID int,", "Name varchar(50)", ");" };

    listBox1->DataSource = code;
}
- Press F5 to test the form
- Close the form and return to your programming environment
- On the form, click the list box and press Delete
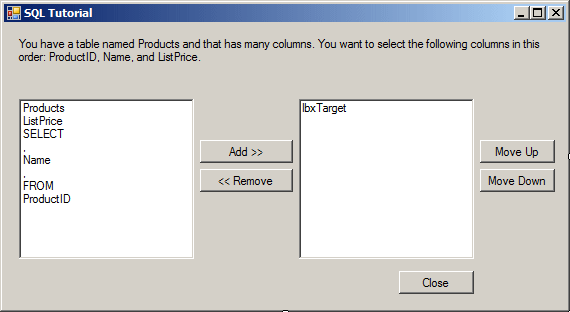
- Design the form as follows:
 |
| Control |
Text |
Name |
Other Properties |
| Label |
 |
You have a table named Products and that has many
columns. You want to select the following columns in
this order: ProductID, Name, and ListPrice. |
|
|
| ListBox |
 |
|
lbxSource |
Items:
Products
ListPrice
SELECT
,
Name
,
FROM
ProductID |
| Button |
 |
Add >> |
btnAdd |
Enabled: False |
| Button |
 |
<< Remove |
btnRemove |
Enabled: False |
| ListBox |
 |
|
lbxTarget |
|
| Button |
 |
Move Up |
btnMoveUp |
Enabled: False |
| Button |
 |
Move Down |
btnMoveDown |
Enabled: False |
| Button |
 |
Close |
btnClose |
|
|
|
Selecting an Item in a List Box
|
|
To use an item from a list box, the user must locate
and click the desired item. That item is said to have been selected. To
programmatically select an item, you can assign the index of the desired
item to the ListBox::SelectedIndex property. The indices of the
items of a list box are stored in a zero-based array. This means that the
first item has an index of 0, the second has an index of 1, and so on.
Here is an example that will select the fourth item of the list:
void InitializeComponent()
{
    lbxFamily = gcnew ListBox;
    lbxFamily->Location = Point(12, 12);

    lbxFamily->Items->Add("Son");
    lbxFamily->Items->Add("Daughter");
    lbxFamily->Items->Add("Father");
    lbxFamily->Items->Add("Mother");

    array<String ^> ^ strMembers = { "Niece", "Nephew", "Uncle" };
    lbxFamily->Items->AddRange(strMembers);

    Size = System::Drawing::Size(452, 150);
    StartPosition = FormStartPosition::CenterScreen;
    Controls->Add(lbxFamily);

    lbxFamily->SelectedIndex = 3;
}
This would produce:
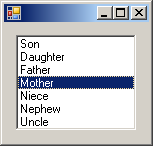
After an item has been selected, to find out the index
of the item that is currently selected, get the value of the
ListBox::SelectedIndex property.
To select an item, the user can click it in the list
box. When an item has been clicked, the list box fires a
SelectedIndexChanged event. Because selecting an item is the most
regularly performed operation on a list box, SelectedIndexChanged
is the default event of a list box. This event is of type EventArgs
which means that it does not provide any significant information other
than to let you know that an item has been selected. Nonetheless, this
event allows you to easily check if an item has been selected and what
item has been selected.
To fire a SelectedIndexChanged event and
to test what item has been selected in the list, you can double-click the
list box.
The ListBox::SelectedIndex property allows you
either to select an item or to find out what item is selected, using its
index, that is, the numeric position of the item in the list. If you know
the identity, such as the name, of the item you want to select, or if you
want to identify the selected item based on its name, you can use the
ListBox::SelectedItem property instead. This member identifies the
item instead of locating it.
By default, the user can select only one item in the
list. If you want the user to be able to select more than one item, change
the value of the SelectionMode property. This property is based on
the SelectionMode enumeration. After the user has selected more
than one item, to get the indexes of the items that are selected, you can
access the ListBox::SelectedIndices property which holds that list.
|
 Practical
Learning: Using a Selected Item From a List Box Practical
Learning: Using a Selected Item From a List Box
|
|
- On the form, double-click the left list box
- Implement its event as follows:
System::Void lbxSource_SelectedIndexChanged(System::Object^  sender,
			System::EventArgs^  e)
{
    if( lbxSource->SelectedItems->Count > 0 )
    {
        btnAdd->Enabled = true;
    }
}
- Return to the form
- Double-click the right list box
- Implement the event as follows:
System::Void lbxTarget_SelectedIndexChanged(System::Object^  sender, System::EventArgs^  e)
{
    // If the target list box has at least one item, enable the Remove button
    if( lbxTarget->SelectedItems->Count > 0 )
        btnRemove->Enabled = true;

    // If the target list box has more than one item...
    if( lbxTarget->Items->Count > 1 )
    {
	// if the top item is selected ...
	if( lbxTarget->SelectedIndex == 0 )
	{
		// ... disable the Move Up button
		btnMoveUp->Enabled = false;
		// ... and enable the Move down button.
		btnMoveDown->Enabled = true;
	}
	else if( lbxTarget->SelectedIndex == lbxTarget->Items->Count - 1 )
	{
		btnMoveUp->Enabled = true;
		btnMoveDown->Enabled = false;
	}
	else
	{
		// If an item in the middle of the list is selected, enable both buttons
		btnMoveUp->Enabled = true;
		btnMoveDown->Enabled = true;
	}
    }
}
- Return to the form and click the left list box
- In the Properties window, click the Events button and double-click
DoubleClick
- Implement the event as follows:
System::Void lbxSource_DoubleClick(System::Object^ sender,
		  		   System::EventArgs^  e)
{
    // When  the user double-clicks an item from the source,
    // behave as if the user had clicked the Add button
    btnAdd_Click(sender, e);
}
- Return to the form and click the right list box
- In the Properties window, click the Events button and double-click
DoubleClick
- Implement the event as follows:
System::Void lbxTarget_DoubleClick(System::Object^ sender,
		  		   System::EventArgs^  e)
{
	btnRemove_Click(sender, e);
}
- Return to the form
- Double-click the Move Up button
- Implement its Click event as follows:
System::Void btnMoveUp_Click(System::Object^  sender, System::EventArgs^  e)
{
	// Get the index of the currently selected item
	int indexSelected = lbxTarget-<SelectedIndex;
	// Get a reference to the item above the selected one
	Object ^ itemAbove = lbxTarget-<Items[indexSelected - 1];

	// Move the selected item up by decreasing its index
	lbxTarget-<Items[indexSelected - 1] = lbxTarget-<Items[indexSelected];
	// Put the selected item where the other item was
	lbxTarget-<Items[indexSelected] = itemAbove;
}
- Return to the form
- Double-click the Move Down button
- Implement its Click event as follows:
System::Void btnMoveDown_Click(System::Object^  sender, System::EventArgs^  e)
{
	int indexSelected = lbxTarget-<SelectedIndex;
	int targetIndex = indexSelected + 1;

	Object ^ itemSelected = lbxTarget-<Items[indexSelected];
	Object ^ itemNext = lbxTarget-<Items[indexSelected + 1];

	lbxTarget-<Items[indexSelected] = itemNext;
	lbxTarget-<Items[targetIndex] = itemSelected;
}
|
Removing Items From a List Box
|
|
If you have an undesired item in a list box, you can
remove it. To To support this operation, the ObjectCollection class
provides the Remove() member function. When calling it, pass the
name of the item as argument. This means that you must know the item you
are trying to delete. If you call this member function, the compiler would
look for the item in the list. If the item is found, it would be deleted.
Instead of removing an item by its name or
identification, you can use its position. To do that, you can call the
RemoveAt() member function and pass the zero-based index of the
undesired item. If the index is valid, the item would be deleted from the
list.
To remove all items from the list, you can call the
Clear() member function.
|
 Practical
Learning: Removing Items From a List Box Practical
Learning: Removing Items From a List Box
|
|
- Return to the form
- Double-click the Add button
- Implement its Click event as follows:
System::Void btnAdd_Click(System::Object^  sender, System::EventArgs^  e)
{
    // First check that the user had selected an item.
    // If no item is selected, let the user know and do nothing else.
    if( lbxSource->SelectedItems->Count == 0 )
    {
    MessageBox::Show("You must first select an item from the source list box.",
                            "SQL Tutorial",
                           MessageBoxButtons::OK, MessageBoxIcon::Information);
            return;
    }

    // Since an item is selected in the Source list box,
    // you will add it to the target list box.
    // First check if that item exists already in the Target list box.
    // If the item doesn't exist, add it
    if( !lbxTarget->Items->Contains(lbxSource->SelectedItems[0]) )
        lbxTarget->Items->Add(lbxSource->SelectedItems[0]);
}
- Return to the form
- Double-click the Remove button
- Implement the event as follows:
System::Void btnRemove_Click(System::Object^  sender, System::EventArgs^  e)
{
	// First check that the user had selected an item.
    // If no item is selected, let the user know and do nothing else.
    if( lbxTarget->SelectedItems->Count == 0 )
    {
    MessageBox::Show("You must first select an item from the target list box.",
                             "SQL Tutorial",
                         MessageBoxButtons::OK, MessageBoxIcon::Information);
            return;
    }

    // Remove the item that is selected
    lbxTarget->Items->Remove(lbxTarget->SelectedItems[0]);

	// Don't select any item
	lbxTarget->SelectedIndex = -1;
	// Disable the buttons
	btnRemove->Enabled = false;
	btnMoveUp->Enabled = false;
	btnMoveDown->Enabled = false;
}
- Execute the application to test the form
- Click items from the left list box and click the Add button
- If available, click items from the right list box and click Remove
- Close the form and return to your programming environment
|
Characteristics of a List Box
|
|
After creating the list, by default, each item assumes
the position it received when it was added. If you want, you can rearrange
them in ascending order. To do this, set the ListBox::Sorted
Boolean property to True. If you create an unsorted list, then at
one time get it sorted (for example, you can give the user the ability to
sort the list, by clicking a button), the list would be sorted. If an item
is added to the sorted list, the compiler would automatically insert it to
the right position following the alphabetical, ascending or chronological
order. If at another time you allow the user to "unsort"ť the list, the
list would keep its current order. If another item is added when the list
is not sorted, the item would be positioned at the end of the list. If you
want the list to have its original state, you would have to reset it
through code.
If you provide a longer list than the list box' height
can display, it would have a vertical scroll bar. Here is an example:
#include <windows.h>

#using <System.dll>
#using <System.Drawing.dll>
#using <System.Windows.Forms.dll>

using namespace System;
using namespace System::Drawing;
using namespace System::Windows::Forms;

public ref class CExercise : public Form
{
private:
    ListBox ^ lbxFamily;

public:
    CExercise()
    {
	InitializeComponent();
    }

private:
    void InitializeComponent()
    {
        lbxFamily = gcnew ListBox;
        lbxFamily->Location = Point(12, 12);
        lbxFamily->Items->Add("Son");
        lbxFamily->Items->Add("Daughter");
        lbxFamily->Items->Add("Father");
        lbxFamily->Items->Add("Mother");

        array<String ^> ^  strMembers =
        {
            "Niece", "Nephew", "Uncle", "Aunt",
            "Grand Father", "Grand Mother"
        };
        lbxFamily->Items->AddRange(strMembers);

        Controls->Add(lbxFamily);
    }
};

int APIENTRY WinMain(HINSTANCE hInstance,
		     HINSTANCE hPrevInstance,
		     LPSTR lpCmdLine,
		     int nCmdShow)
{
    Application::Run(gcnew CExercise);

    return 0;
}
This would produce:
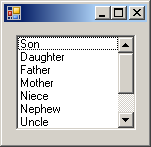
At design time, if just one or a few items are hidden
by the scroll bar, you can heighten it if the form provides more space.
Consider the following example:
#include <windows.h>

#using <System.dll>
#using <System.Drawing.dll>
#using <System.Windows.Forms.dll>

using namespace System;
using namespace System::Drawing;
using namespace System::Windows::Forms;

public ref class CExercise : public Form
{
private:
    ListBox ^ lbxBook;
    Label   ^ lblTitle;

public:
    CExercise()
    {
	InitializeComponent();
    }

private:
    void InitializeComponent()
    {
        lblTitle = gcnew Label;
        lblTitle->Text = "Book Titles";
        lblTitle->Location = Point(12, 12);

        lbxBook = gcnew ListBox;
        lbxBook->Location = Point(12, 36);
        lbxBook->Items->Add("College Algebra");;
        lbxBook->Items->Add("Finite Mathematics");
        lbxBook->Items->Add("Mathematical Structures");
        lbxBook->Items->Add("MCAD 70-316 Training Guide");
        lbxBook->Items->Add("C++ Builder 6 Developer's Guide");

        Controls->Add(lblTitle);
        Controls->Add(lbxBook);
    }
};

int APIENTRY WinMain(HINSTANCE hInstance,
		     HINSTANCE hPrevInstance,
		     LPSTR lpCmdLine,
		     int nCmdShow)
{
    Application::Run(gcnew CExercise);

    return 0;
}
This would produce:
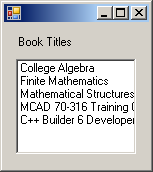
If at least one of the items of the list box is wider
than the width of the control, the right side(s) of that (those) may
disappear. To allow the user to see the hidden part of the item(s), you
should display a horizontal scroll bar. To support this, the ListBox
class is equipped with a Boolean property named HorizontalScrollbar.
To make a list box display a horizontal scroll bar, at design time, access
the Properties window for the list box and set its HorizontalScrollbar
property to True. You can also do this programmatically. Here is an
example:
void InitializeComponent()
{
    lblTitle = gcnew Label;
    lblTitle->Text = "Book Titles";
    lblTitle->Location = Point(12, 12);

    lbxBook = gcnew ListBox;
    lbxBook->Location = Point(12, 36);
    lbxBook->Items->Add("College Algebra");;
    lbxBook->Items->Add("Finite Mathematics");
    lbxBook->Items->Add("Mathematical Structures");
    lbxBook->Items->Add("MCAD 70-316 Training Guide");
    lbxBook->Items->Add("C++ Builder 6 Developer's Guide");

    lbxBook->HorizontalScrollbar = true;

    Controls->Add(lblTitle);
    Controls->Add(lbxBook);
}
This property allows the operating system to find the
widest item in the list and provide a horizontal scroll bar that is long
enough to display each item when the user scrolls to the right. The above
code would produce:
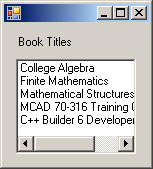
If the list of items requires it, the list box would
display both the vertical and the horizontal scroll bars. Here is an
example:
#include <windows.h>

#using <System.dll>
#using <System.Drawing.dll>
#using <System.Windows.Forms.dll>

using namespace System;
using namespace System::Drawing;
using namespace System::Windows::Forms;

public ref class CExercise : public Form
{
private:
    ListBox ^ lbxBook;
    Label   ^ lblTitle;

public:
    CExercise()
    {
	InitializeComponent();
    }

private:
    void InitializeComponent()
    {
        lblTitle = gcnew Label;
        lblTitle->Text = "Book Titles";
        lblTitle->Location = Point(12, 12);

        lbxBook = gcnew ListBox;
        lbxBook->Location = Point(12, 36);
        lbxBook->Items->Add("College Algebra");;
        lbxBook->Items->Add("Finite Mathematics");
        lbxBook->Items->Add("Mathematical Structures");
        lbxBook->Items->Add("MCAD 70-316 Training Guide");
        lbxBook->Items->Add("C++ Builder 6 Developer's Guide");
        lbxBook->Items->Add("La Bible de Jérusalem");
        lbxBook->Items->Add("Patterns for a Purpose");
        lbxBook->HorizontalScrollbar = true;

        Controls->Add(lblTitle);
        Controls->Add(lbxBook);
    }
};

int APIENTRY WinMain(HINSTANCE hInstance,
		     HINSTANCE hPrevInstance,
		     LPSTR lpCmdLine,
		     int nCmdShow)
{
    Application::Run(gcnew CExercise);

    return 0;
}
This would produce:
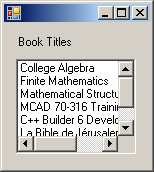
If you prefer to decide how much width should be
allowed, then set the desired value in the HorizontalExtent
property.
|
 Practical
Learning: Using Scroll Bars Items to a List Box Practical
Learning: Using Scroll Bars Items to a List Box
|
|
- Change the design of the form as follows (you will change the text
of the top label and the items of the left list box):
 |
| Control |
Text |
Name |
Other Properties |
| Label |
 |
You have a table named Products and that has many
columns. You want to select the following columns in
this order: ProductID, Name, and ListPrice. You want
to arrange the list based on the ListPrice column but
the list must have only products whose price is higher
than $40. Select items from the left list and add them
to the right list to get the statement. |
|
|
| ListBox |
 |
|
lbxSource |
Items:
$40
FROM
Products
ORDER BY
,
Name
Orders
>
ListPrice
ProductID
WHERE
Employees
SELECT |
|
When you create a list of items, they appear in one
column. If the number of items exceeds the height, a scrollbar would
appear on the control. An alternative you can use is to span the list to
more than one column. To support this, the ListBox class is equipped with
the MultiColumn Boolean property. At design time, you can set this
characteristic in the Properties window. By default, the MultiColumn
value is set to False, which means the items appear in one column. If
you set this property to True, then the compiler would decide if or when
the control needs the columns, based on the number of items in the list.
You can then specify the width of each column using the ColumnWidth
property.