Home

Contextual Menus


Introduction

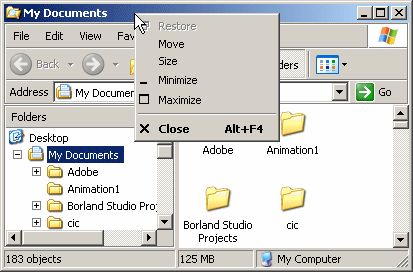
We know that, to access a main menu, the user clicks one of its categories. A contextual menu is one that appears when the user right-clicks an area of an application or form. In most applications, when the user right-clicks a title bar, the operating system is configured to display a system menu. Here is an example:

Here is an example:

Operating system's title bar menu

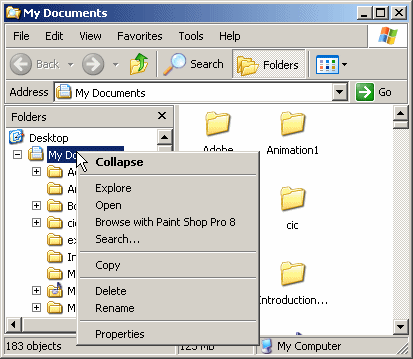
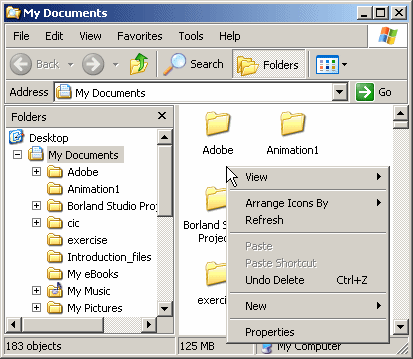
A menu is considered, or qualifies as, popup if, or because, it can appear anywhere on the form as the programmer wishes. Such a menu is also referred to as context-sensitive or contextual because its appearance and behavior depend on where it displays on the form or on a particular control. The person who creates the application decides if or where the contextual menu would appear. Because this characteristic is up to the programmer, the same application can display different types of popup menus depending on where the user right-clicks. Here are examples:

Context-sensitive menu


Contextual menu

The first difference between a main menu and a popup menu is that a popup menu appears as one category or one list of items and not like a group of categories of menus like a main menu. Secondly, while a main menu by default is positioned on the top section of a form, a popup menu doesn't have a specific location on the form.

Creating a Contextual Menu

To support the creation and management of contextual menus, the .NET Framework provides the ContextMenuStrip class. This class is derived from ToolStripDropDownMenu, which itself is based on the ToolStripDropDown class. The ToolStripDropDown class is derived from ToolStrip.

To visually create a contextual menu, in the Menus & Toolbars section of the Toolbox, click the ContextMenuStrip button and click the form. Once you have a ContextMenuStrip object, you can create its menu items. To do this, as mentioned for the MenuStrip, you can click the first Type Here line, type a string, press Enter, and continue creating the other menu items in the same way.

Unlike a main menu, a popup menu provides a single list of items. If you want different popup menus for your form, you have two options. You can create various popup menus or programmatically change your single popup menu in response to something or some action on your form.

To programmatically create a contextual menu, start by declaring a handle to ContextMenuStrip. Here is an example:

public ref class CExercise : public Form
{
public:
    CExercise()
    {
	InitializeComponent();
    }

    void InitializeComponent()
    {
	System::Windows::Forms::ContextMenuStrip ^ context =
		gcnew System::Windows::Forms::ContextMenuStrip;
    }
};

To assist you with each item of a contextual menu, ToolStrip, the ancestor to the ContextMenuStrip class, is equipped with a property named Items. This property is of type ToolStripItemCollection, which is a collection-based class. The ToolStripItemCollection class implements the IList, the ICollection, and the IEnumerable interfaces.

To create one or more menu items, you can use the various techniques we reviewed for the main menu. Here are examples:

public ref class CExercise : public Form
{
public:
    CExercise()
    {
	InitializeComponent();
    }

    void InitializeComponent()
    {
	System::Windows::Forms::ContextMenuStrip ^ context =
		gcnew System::Windows::Forms::ContextMenuStrip;
 
        ToolStripMenuItem ^ mnuCut	 = gcnew ToolStripMenuItem(L"Cut");
	array<ToolStripMenuItem ^> ^ mnuEdit = {
			gcnew ToolStripMenuItem(L"Copy"),
		        gcnew ToolStripMenuItem(L"Paste") };
    }
};

After creating a menu item, to add it to the contextual menu, you can call the ToolStripItemCollection::Add() method. To add an array of items, you can call the create ToolStripItemCollection::AddRange() method. Here are examples:

public ref class CExercise : public Form
{
public:
    CExercise()
    {
	InitializeComponent();
    }

    void InitializeComponent()
    {
	System::Windows::Forms::ContextMenuStrip ^ context =
		gcnew System::Windows::Forms::ContextMenuStrip;
 
        ToolStripMenuItem ^ mnuCut	 = gcnew ToolStripMenuItem(L"Cut");
	array<ToolStripMenuItem ^> ^ mnuEdit = {
			gcnew ToolStripMenuItem(L"Copy"),
		        gcnew ToolStripMenuItem(L"Paste") };

	context->Items->Add(mnuCut);
	context->Items->AddRange(mnuEdit);
    }
};


Using a Contextual Menu

By default, a newly created contextual menu is attached neither to the form nor to any control on it. In order to display a context menu, you must assign its name to the control. To support this, Control, the ancestor to all visual controls of the .NET Framework, is equipped, and provides to its children, a property named ContextMenuStrip, which is of type ContextMenuStrip.

To visually assign a contextual menu to a control during design, click the control. In the Properties window, click the ContextMenuStrip field, then click the arrow of its combo box, and select the menu. If you had created more than one contextual menu, the combo box would show all of them and you can choose the one you want to use as default.

To programmatically specify the contextual menu of a control, assign a ContextMenuStrip object to its ContextMenuStrip property. Here is an example:

#include <windows.h>

#using <System.dll>
#using <System.Drawing.dll>
#using <System.Windows.Forms.dll>

using namespace System;
using namespace System::Drawing;
using namespace System::Windows::Forms;

public ref class CExercise : public Form
{
public:
    CExercise()
    {
	InitializeComponent();
    }

    void InitializeComponent()
    {
	System::Windows::Forms::ContextMenuStrip ^ context =
		gcnew System::Windows::Forms::ContextMenuStrip;
 
        ToolStripMenuItem ^ mnuCut	 = gcnew ToolStripMenuItem(L"Cut");
	array<ToolStripMenuItem ^> ^ mnuEdit = {
			gcnew ToolStripMenuItem(L"Copy"),
		        gcnew ToolStripMenuItem(L"Paste") };

	context->Items->Add(mnuCut);
	context->Items->AddRange(mnuEdit);

        ContextMenuStrip = context;
    }
};

int APIENTRY WinMain(HINSTANCE hInstance,
		     HINSTANCE hPrevInstance,
		     LPSTR lpCmdLine,
		     int nCmdShow)
{
    Application::Run(gcnew CExercise());

    return 0;
}

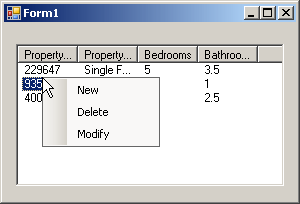
After assigning a ContextMenuStrip object to a control, when you right-click (actually when the user right-clicks) the control, the contextual menu would display. The above code would produce:

Practical LearningPractical Learning: Creating a Context Menu

  1. Start a new Windows Forms Application named spr2 (spr stands for Solas Property Rental)
  2. In the Menus & Toolbars section of the Toolbox, click the ContextMenuStrip button and click the form
  3. Under the form, click the ContextMenuStrip object.
    In the Properties window, click (Name) and type mnuProperties
  4. On the form, click the Type Here box, type New, and press Enter
  5. Under New, click Type Here, type Delete and press Enter
  6. Under Delete, click Type Here, type Modify and press Enter
  7. In the Common Controls section of the Toolbox, click ListView and click the form
  8. While the list view is still selected, in the Properties window, change the following characteristics
    (Name): lvwProperties
    View: Details
  9. Still in the Properties window, click Columns and click its ellipsis button
  10. In the ColumnHeader Collection Editor, click Add
  11. In the right list, click Text and type Property #
  12. Click Add.
    In the right list, click Text and type Property Type
  13. Click Add.
    In the right list, click Text and type Bedrooms
  14. Click Add.
    In the right list, click Text and type Bathrooms
  15. Click OK
  16. Still in the Properties window, click Items and click its ellipsis button
  17. In the ListViewItem Collection Editor, click Add
  18. In the right list, click Text and type 229647
  19. Click Add.
    In the right list, click Text and type 935774
  20. Click Add.
    In the right list, click Text and type 400759
  21. In the Members list, click the first item and, in the right list, click SubItems
  22. Click Add.
    In the right list, click Text and type Single Family
  23. Click Add.
    In the right list, click Text and type 5
  24. Click Add.
    In the right list, click Text and type 3.5
  25. Click OK
  26. In the Members list, click the second item and, in the right list, click SubItems
  27. Click Add.
    In the right list, click Text and type Apartment
  28. Click Add.
    In the right list, click Text and type 1
  29. Click Add.
    In the right list, click Text and type 1
  30. Click OK
  31. In the Members list, click the second item and, in the third list, click SubItems
  32. Click Add.
    In the right list, click Text and type Townhouse
  33. Click Add.
    In the right list, click Text and type 3
  34. Click Add.
    In the right list, click Text and type 2.5
  35. Click OK and click OK
  36. While the list view is still selected on the form, in the Properties window, click ContextMenuStrip, click the arrow of its combo box and select mnuProperties
  37. Execute the application
  38. Right-click the list view to see the contextual menu
     
  39. Right-click away from the list view, on the form and notice that the contextual menu doesn't come up
  40. Close the form

Coding Contextual Menus

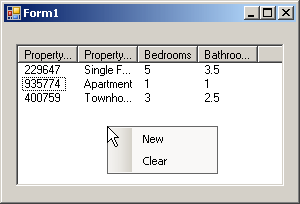
In your application, you can create as many contextual menus as you want. If you have different controls, each can have its own contextual menu or many can share a contextual menu. Also, you can use different contextual menus for a control and decide what menu to display when/why.

There is nothing particularly specific with writing code for a popup menu item. You approach it exactly as if you were dealing with a menu item of a main menu. You can write code for an item of a popup menu independent of any other item of a main menu. If you want an item of a popup menu to respond to the same request as an item of a main menu, you can write code for one of the menu items (either the item on the main menu or the item on the popup menu) and simply call its Click event in the event of the other menu item.

Practical LearningPractical Learning: Using Various Contextual Menus

  1. In the Menus & Toolbars section of the Toolbox, click the ContextMenuStrip button and click the form
  2. Under the form, click the new ContextMenuStrip object.
    In the Properties window, click (Name) and type mnuNoProperty
  3. On the form, click the Type Here box, type New, and press the down arrow key
  4. Type Clear and press Enter
  5. On the form, click the list view
  6. In the Properties window, click ContextMenuStrip, click the arrow of its combo box and select None
  7. Right-click the form and click View Code
  8. In the class, just above public:, declare a variable as follows:
     
    ListViewItem ^ prpCurrentlySelected;
  9. Return to the form and double-click an area outside of the list view
  10. Implemented the event as follows:
    System::Void Form1_Load(System::Object^  sender,
    			 System::EventArgs^  e)
    {				 
        prpCurrentlySelected = gcnew ListViewItem;
    }
  11. Return to the form and click the list view
  12. In the Properties window, click the Events button Events and double-click MouseDown
  13. Implement the event as follows:
    System::Void lvwProperties_MouseDown(System::Object^  sender,
    			 System::Windows::Forms::MouseEventArgs^  e)
    {
        if( e->Button == System::Windows::Forms::MouseButtons::Right )
        {
    	 if( lvwProperties->SelectedItems->Count > 0 )
    	     prpCurrentlySelected = lvwProperties->SelectedItems[0];
    	 else
    	     prpCurrentlySelected = nullptr;
        }
    }
  14. Return to the form and click the list view
  15. In the events section of the Properties window, double-click ItemSelectionChanged
  16. Implement the event as follows:
    System::Void lvwProperties_ItemSelectionChanged(System::Object^  sender,
    	 System::Windows::Forms::ListViewItemSelectionChangedEventArgs^  e)
    {
        if( e->Item == prpCurrentlySelected )
    	 lvwProperties->ContextMenuStrip = mnuNoProperty;
        else
    	 lvwProperties->ContextMenuStrip = mnuProperties;
    }
  17. Execute the application
     
    Using context-sensitive help Using various contextual menus
  18. Close the form and return to your programming environment


Home Copyright © 2011 FunctionX, Inc.