|
|
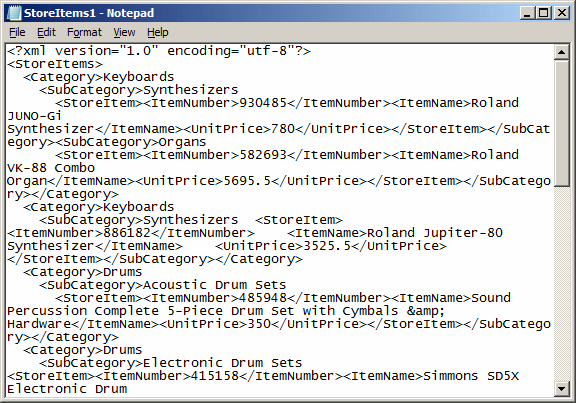
A single-document interface, SDI, is an application
primarily made of a form equipped with a menu. An example is Notepad:
|
In some cases, an SDI can also have a toolbar and/or a
status bar. Here is an example from Microsoft Works Spreadsheet:
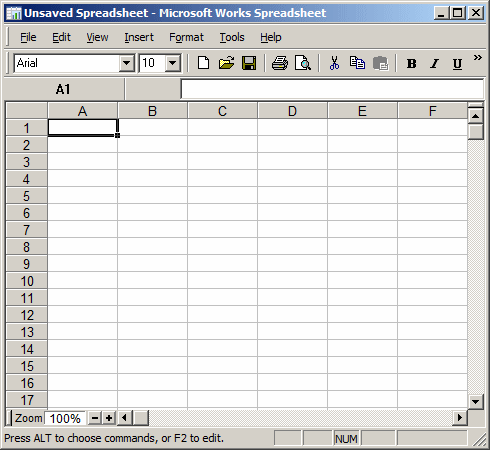
All these features are left to the programmer to add
and configure.
Although Notepad is text-based, an SDI can be any type
of application: text, graphics, spreadsheet, anything. Therefore, to
create an SDI, start from a normal form, add a menu to it, and configure
it to do what you want.
To create a document using an SDI, the user launches
the application. The SDI then presents a rectangular window with one frame
and the inside is the document the user will use. In most cases, the
application itself creates the document. The user can work on it and do
whatever the application allows. To create another document of the same
type, the user must open another instance of the application.
|
 Practical Learning: Introducing MDI Applications Practical Learning: Introducing MDI Applications
|
|
- Start Microsoft Visual Studio
- To create a new application, on the main menu, click File -> New
Project...
- In the middle list, click Windows Forms Application
- Change the Name to Notice2 and click OK
- From the Dialogs section of the Toolbox, click the OpenFileDialog
button
 and click the form
- In the Properties window, click (Name) and type
dlgFileOpen
- From the Menus & Toolbars section of the Toolbox, click the
MenuStrip button
 and click the form
- In the Properties window, change its (Name) to mnuMain
- On the form, right-click the menu strip and click Insert Standard
Items
- In the File group, click Type Here, type Close
and press Enter
- On the form, click the Close menu item and, in the Properties
window, double-click Enabled to set it to False
- Move that new menu item and position it under Open
- Under the form, click mnuMain. In the Properties window, click
Items and click its browse button
- Change the names of the items as follows:
| Top Menu Item |
DropDownItems |
| Old Name |
New Name |
Old Name |
New Name |
| fileToolStripMenuItem |
mnuFile |
|
|
| |
|
newToolStripMenuItem |
mnuFileNew |
| |
|
openToolStripMenuItem |
mnuFileOpen |
| |
|
closeToolStripMenuItem |
mnuFileClose |
| |
|
|
Separator |
| |
|
saveToolStripMenuItem |
mnuFileSave |
| |
|
saveAsToolStripMenuItem |
mnuFileSaveAs |
| |
|
|
Separator |
| |
|
printToolStripMenuItem |
mnuFilePrint |
| |
|
printPreviewToolStripMenuItem |
mnuFilePrintPreview |
| |
|
|
Separator |
| |
|
exitToolStripMenuItem |
mnuFileExit |
| editToolStripMenuItem |
mnuEdit |
|
|
| |
|
undoToolStripMenuItem |
mnuEditUndo |
| |
|
redoToolStripMenuItem |
mnuEditRedo |
| |
|
|
Separator |
| |
|
cutToolStripMenuItem |
mnuEditCut |
| |
|
copyToolStripMenuItem |
mnuEditCopy |
| |
|
pasteToolStripMenuItem |
mnuEditPaste |
| |
|
|
Separator |
| |
|
selectAllToolStripMenuItem |
mnuEditSelectAll |
| toolsToolStripMenuItem |
mnuTools |
|
|
| |
|
customizeToolStripMenuItem |
mnuToolsCustomize |
| |
|
optionsToolStripMenuItem |
mnuToolsOptions |
| helpToolStripMenuItem |
mnuHelp |
|
|
| |
|
contentsToolStripMenuItem |
mnuHelpContents |
| |
|
indexToolStripMenuItem |
mnuHelpIndex |
| |
|
searchToolStripMenuItem |
mnuHelpSearch |
| |
|
|
Separator |
| |
|
aboutToolStripMenuItem |
mnuHelpAbout |

- Click OK and OK
- From the Menus & Toolbars section of the Toolbox, click ToolStrip
 and click the form
- While the tool strip is still selected, in the Properties window,
change its Name to tbrStandard
- On the form, right-click the tool strip and click Insert Standard
Items
- Under the form, click tbrStandard. Under the Properties window,
click Edit Items
- Change the names of the items as follows:
| Old Name |
New Name |
| newToolStripButton |
tbrStandardNew |
| openToolStripButton |
tbrStandardOpen |
| saveToolStripButton |
tbrStandardSave |
| printToolStripButton |
tbrStandardPrint |
| Separator |
|
| cutToolStripButton |
tbrStandardCut |
| copyToolStripButton |
tbrStandardCopy |
| pasteToolStripButton |
tbrStandardPaste |
| Separator |
|
| helpToolStripButton |
tbrStandardHelp |
- Click OK
- From the Menus & Toolbars section of the Toolbox, click
StatusStrip
 and click the form
- While the tool strip is still selected, in the Properties window,
change its Name to stbAppStatus
- Set its AutoSize to False
- Click the + button of Size and change the Width to 28
- On the form, to create a section, click the button that displays
- While the new label is still selected, in the Properties window,
change the following characteristics:
(Name): pnlMessage
AutoSize: False
BorderSides: All
BorderStyle: Sunken
DisplayStyle: None
Size -> Width: 200
- On the form, click the new button on the right side of the
previous label
- While the new label is still selected, in the Properties window,
change the following characteristics:
(Name): pnlStatus
AutoSize: False
BorderSides: All
BorderStyle: Raised
DisplayStyle: None
Size -> Width: 150
- On the form, click the new button on the right side of the
previous label
- While the new label is still selected, in the Properties window,
change the following characteristics:
(Name): pnlZoom
BorderSides: All
BorderStyle: SunkenOuter
DisplayStyle: None
Spring: True
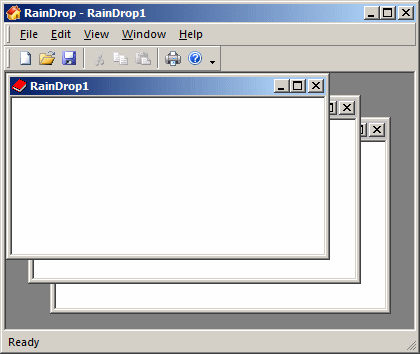
A multiple-document interface (MDI) is an application
that primarily has a form and a menu. Some, if not most, MDIs also have
one or more toolbars and/or a status bar. Here is an example:
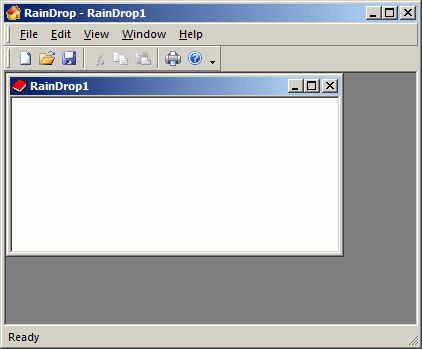
Like a normal application, to use an MDI, the user
must launch it. In some cases, when the application starts, it is empty;
that is, no document is created and the title bar displays a caption,
usually the name of the application.
Usually, there are steps the user must follow to
create a document. In some other cases, when the application is launched,
it automatically creates a document. A document resides inside the parent
frame of the application. That is, a child document can use only the area
reserved for it. The child document has its own system icon, its own title
bar, and its system buttons (Minimize, Maximize/Restore, and Close).
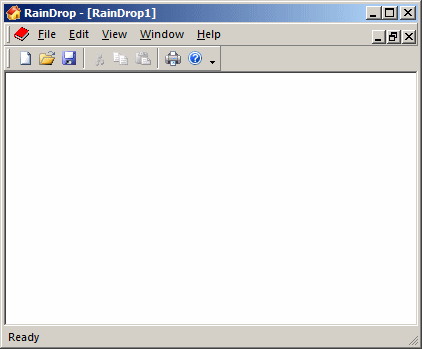
To use the whole area, the user can maximize the child
document. When this is done, the child merges its title bar with the
parent's. The new caption of the title bar becomes made of the text of the
parent, followed by -, and followed by the caption the child window was
using. The system buttons of the child document display under those of the
parent frame:
Once a document has been created, the user can use it.
Normalement, the application must give the user the
ability to create other documents while still using the application. If
many documents have been created, all of them are confined in the frame of
the Topic Applied:
The user can maximize the child forms. If so, the
document that was in front occupies the whole area devoted to
child documents. The other child forms stay in the back but become
invisible.
One of the differences between an SDI and an MDI is
that, because the document and the application don't
share a frame, the user can close the document
and keep the application open.
|
Creating an MDI Application
|
|
As mentioned already, there is nothing magical with
creating an SDI. You start with a form, add a menu to it, and specify what
the application should allow a user to do with a document. As we will see,
an MDI requires more steps.
You start an MDI application with a normal form. You
can create a Windows Forms Application using Microsoft Visual Studio or
derive a class from Form. Here is an example:
#include <windows.h>

#using <System.dll>
#using <System.Windows.Forms.dll>

using namespace System;
using namespace System::Windows::Forms;

public ref class CCommonParent : public Form
{
public:
    CCommonParent()
    {
	InitializeComponent();
    }

private:
    void InitializeComponent()
    {
        Text = L"Exercise";
        StartPosition = FormStartPosition::CenterScreen;
    }
};

int APIENTRY WinMain(HINSTANCE hInstance,
		     HINSTANCE hPrevInstance,
		     LPSTR lpCmdLine,
		     int nCmdShow)
{
    Application::Run(gcnew CCommonParent);

    return 0;
}
The primary form of an MDI application is referred to
as the parent or MDI container. It provides the frame inside of which the
documents will reside. To provide this functionality, the Form
class is equipped with a Boolean property named IsMdiContainer.
Therefore, after creating the first form of your application, to indicate
that it acts as the main frame, set this property to true. You can do this
in the Properties window if you are visually creating your application, or
programmatically. Here is an example:
public ref class CCommonParent : public Form
{
public:
    CCommonParent()
    {
	InitializeComponent();
    }

private:
    void InitializeComponent()
    {
	IsMdiContainer = true;

        Text = L"Exercise";
        StartPosition = FormStartPosition::CenterScreen;
    }
};
This would produce:
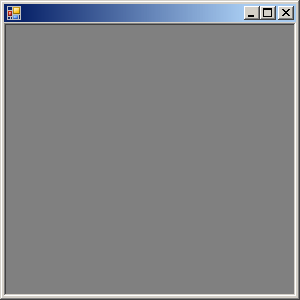
The primary characteristic of an MDI is that it
contains other forms. These forms must be created and made available to
the parent. Each form can be created using a predefined form or you can
programmatically create one by declaring an object of type Form.
To allow you to specify that a form has a parent and will act as a child,
the Form class is equipped with a property named
MdiParent. This is a read-write property. The set accessor
indicates what form acts as this one's parent. To provide this
information, assign the main form this form's MdiParent.
After doing this, you can display the form when you are ready, by calling
its Show() member function. Here is an example:
public ref class CCommonParent : public Form
{
public:
    CCommonParent()
    {
	InitializeComponent();
    }

private:
    void InitializeComponent()
    {
	IsMdiContainer = true;

        Form ^ frmChild = gcnew Form;
        frmChild->MdiParent = this;

        frmChild->Show();

        Text = L"Exercise";
        StartPosition = FormStartPosition::CenterScreen;
    }
};
This would produce:

|
 Practical Learning: Creating an MDI Application Practical Learning: Creating an MDI Application
|
|
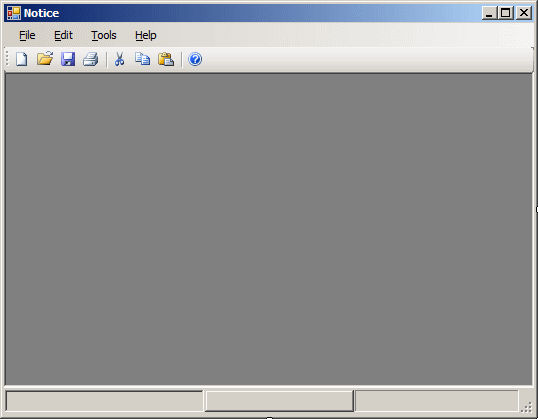
- Click the form to give it focus
- In the Properties window, change the following characteristics:
IsMdiContainer: True
StartPosition: CenterScreen
Text:
Notice
- To add a new form, on the main menu, click Project -> Add Windows
Form...
- Set the Name to SingleDocument
- Click Add
- From the Common Controls section of the Toolbox, click RichTextBox
 and click the form
- In the Properties window, change the following characteristics:
(Name): rtbNotice
Dock: Fill
Modifiers: Public
- Display the first form
- On the form, click File and double-click New
- In the top section of the file, include the SingleDocument.h
header file:
#pragma once

#include "SingleDocument.h"

namespace Notice2 {
- Scroll down and implement the event as follows:
System::Void mnuFileNew_Click(System::Object^  sender, System::EventArgs^  e)
{
    SingleDocument ^ document = gcnew SingleDocument;
    document->Text = "Untitled";

    document->MdiParent = this;
    document->Show();

    mnuFileClose->Enabled = true;
}
- Return to the form
- On its toolbar, click the first button (New)
- Click the Events button
 of the Properties window. Click the Click field and, on the right
side, select mnuFileNew_Click
- On the form, click File and double-click Open
- Implement the event as follows:
System::Void mnuFileOpen_Click(System::Object^  sender, System::EventArgs^  e)
{
    if( dlgFileOpen->ShowDialog() == System::Windows::Forms::DialogResult::OK )
    {
        for each( String ^ strFile in dlgFileOpen->FileNames )
        {
            SingleDocument ^ document = gcnew SingleDocument;

            document->rtbNotice->LoadFile(strFile);

            document->MdiParent = this;
            document->Show();
        }
    }
}
- Return to the form
- On its toolbar, click the second button (Open)
- Click the Events button
 of the Properties window. Click the Click field and, on the right
side, select mnuFileOpen_Click
- Return to the form