XML and Text-Based Controls
|
XML and Text-Based Controls |
|
|

<?xml version="1.0" encoding="utf-8"?>
<fullrecord>
  <employee>
    <fullname>Sylvie Aronson</fullname>
    <title>Accountant</title>
    <emailaddress>aronsons@bastia.edu</emailaddress>
    <maritalstatus>Married</maritalstatus>
  </employee>
  <employee>
    <fullname>Bertrand Yamaguchi</fullname>
    <title>Junior Programmer</title>
    <emailaddress>yamob1250@yahoo.com</emailaddress>
    <maritalstatus>Married</maritalstatus>
  <employee>
  </employee>
    <fullname>Anselme Bean</fullname>
    <title>Sales Representative</title>
    <emailaddress>binama@hotmail.com</emailaddress>
    <maritalstatus>Widow</maritalstatus>
  </employee>
  <employee>
    <fullname>Mauricette Thomas</fullname>
    <title>Communications Director</title>
    <emailaddress>youngintern@netscape.net</emailaddress>
    <maritalstatus>Divorced</maritalstatus>
  </employee>
  <employee>
    <fullname>Hermine Gray</fullname>
    <title>Sales Representative</title>
    <emailaddress>graynotdavis@emailcity.net</emailaddress>
    <maritalstatus>Single</maritalstatus>
  </employee>
</fullrecord>
|
 |
|||||||||||||||||||||||||||
|
#pragma once


namespace IntroXML2
{
	using namespace System;
	using namespace System::ComponentModel;
	using namespace System::Collections;
	using namespace System::Windows::Forms;
	using namespace System::Data;
	using namespace System::Drawing;

	/// <summary>
	/// Summary for Form1
	///
	/// WARNING: If you change the name of this class, you will need to change the
	///          'Resource File Name' property for the managed resource compiler tool
	///          associated with all .resx files this class depends on.  Otherwise,
	///          the designers will not be able to interact properly with localized
	///          resources associated with this form.
	/// </summary>
	public __gc class Form1 : public System::Windows::Forms::Form
	{
	public:
		Form1(void)
		{
			InitializeComponent();
		}

	protected:
		void Dispose(Boolean disposing)
		{
			if (disposing && components)
			{
				components->Dispose();
			}
			__super::Dispose(disposing);
		}
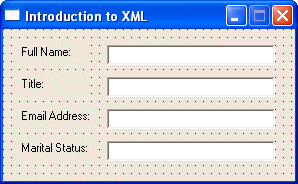
	private: System::Windows::Forms::Label *  label1;
	private: System::Windows::Forms::Label *  label2;
	private: System::Windows::Forms::Label *  label3;
	private: System::Windows::Forms::Label *  label4;
	private: System::Windows::Forms::TextBox *  txtFullName;
	private: System::Windows::Forms::TextBox *  txtTitle;
	private: System::Windows::Forms::TextBox *  txtMaritalStatus;
	private: System::Windows::Forms::TextBox *  txtEmailAddress;

	private:
		/// <summary>
		/// Required designer variable.
		/// </summary>
		System::ComponentModel::Container * components;
		DataSet __gc *dsEmployees;

		/// <summary>
		/// Required method for Designer support - do not modify
		/// the contents of this method with the code editor.
		/// </summary>
		void InitializeComponent(void)
		{
			. . .


		}
private: System::Void Form1_Load(System::Object *  sender, System::EventArgs *  e)
	 {
		dsEmployees = __gc new DataSet("employees");

		dsEmployees->ReadXml(S"employees.xml");

		this->txtFullName->DataBindings->Add(new System::Windows::Forms::Binding(S"Text", this->dsEmployees, S"employee.fullname"));
		this->txtTitle->DataBindings->Add(new System::Windows::Forms::Binding(S"Text", this->dsEmployees, S"employee.title"));
		this->txtEmailAddress->DataBindings->Add(new System::Windows::Forms::Binding(S"Text", this->dsEmployees, S"employee.emailaddress"));
		this->txtMaritalStatus->DataBindings->Add(new System::Windows::Forms::Binding(S"Text", this->dsEmployees, S"employee.maritalstatus"));
	 }
};
}
|

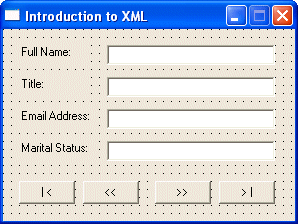
private: System::Void btnFirstRecord_Click(System::Object *  sender, System::EventArgs *  e)
{
    this->BindingContext->get_Item(this->dsEmployees, S"employee")->Position = 0;
}

private: System::Void btnPreviousRecord_Click(System::Object *  sender, System::EventArgs *  e)
{
    this->BindingContext->get_Item(this->dsEmployees, S"employee")->Position = this->BindingContext->get_Item(this->dsEmployees, S"employee")->Position - 1;
}

private: System::Void btnNextRecord_Click(System::Object *  sender, System::EventArgs *  e)
{
    this->BindingContext->get_Item(this->dsEmployees, S"employee")->Position = this->BindingContext->get_Item(this->dsEmployees, S"employee")->Position + 1;
}

private: System::Void btnLastRecord_Click(System::Object *  sender, System::EventArgs *  e)
{
    this->BindingContext->get_Item(this->dsEmployees, S"employee")->Position = this->BindingContext->get_Item(this->dsEmployees, S"employee")->Count - 1;
}
|
|
|
||
| Home | Copyright © 2004-2010 FunctionX, Inc. | |
|
|
||