.NET Controls: The Button
 |
.NET Controls: The Button |
For a user, the most important aspects of a button are the message it displays and the action it performs. Therefore, the default property of a button is the Text: this is the word or group of words that displays on top of the control, showing the message that would direct the user as to what the button is used for. The most popular strings that buttons display are OK and Cancel. The OK caption is set for a form or a dialog box that informs the user of an error, an intermediary situation, or an acknowledgement of an action that was performed on the dialog that hosts the button. The Cancel caption is useful on a button whose main parent (the form or the dialog box) would ask a question or request a follow-up action from the user. Whenever a dialog box allows the user to dismiss it without continuing the action, you should provide a button with a Cancel caption. If you create a dialog box with more than one button, you should designate one of them as the default. A default button is one that would apply its behavior if the user presses Enter after using it. Most of the time, a default button has a thicker border. After adding a button to a form (by design or with code), you can change its caption with code by assigning the desired string to the Text property. For example, you can change the caption of a button as follows: button1.Text = "Let it Go!"; After specifying the Text of a button, by default, it's positioned in the middle center of the button: The position of the text of a button is controlled through the TextAlign property which is a value of the ContentAlignment enumerator. The possible values are:
Here is an example:
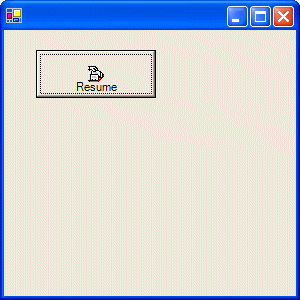
Besides, or instead of, a caption, a button can display a picture on top. If you want a button to display a picture, you should first create or have a bitmap. Then, in the Properties window, use the Image field to select a bitmap or an icon. You can also programmatically assign an Image object to the Image property. Here is an example: |
|
private void InitializeComponent()
{
	btnResume = new Button();
	btnResume.Text = "Resume";
	btnResume.Location = new Point(32, 20);
	btnResume.Size = new System.Drawing.Size(120, 48);

	btnResume.Image = Image.FromFile("C:\\Program Files\\Microsoft Visual Studio .NET 2003\\Common7\\Graphics\\icons\\Office\\CRDFLE12.ICO");

	btnResume.TextAlign = ContentAlignment.BottomCenter;

	this.Controls.Add(btnResume);
}
This would produce:

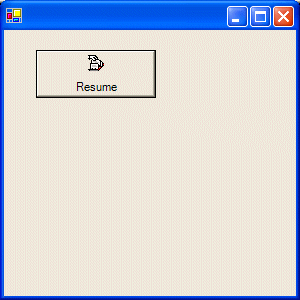
After specifying the image for the button, you can use the ImageAlign property to specify the alignment of the image with regards to the Text of the button. You can do this at design time in the Properties window or programmatically as follows:
private void InitializeComponent()
{
	btnResume = new Button();
	btnResume.Text = "Resume";
	btnResume.Location = new Point(32, 20);
	btnResume.Size = new System.Drawing.Size(120, 48);

	btnResume.Image = Image.FromFile("C:\\Program Files\\Microsoft Visual Studio .NET 2003\\Common7\\Graphics\\icons\\Office\\CRDFLE12.ICO");
	btnResume.ImageAlign = ContentAlignment.TopCenter;

	btnResume.TextAlign = ContentAlignment.BottomCenter;

	this.Controls.Add(btnResume);
}
This would produce:

Instead of using the Image property, you can first create an image list and add some pictures to it. Then, using the ImageList property, assign it to the button. Use the ImageIndex property to specify what picture would be displayed on the button.
After assigning a bitmap to the button, by default, it is positioned in the middle center of the button. If the button is not equipped with a caption, this position can be ideal. If you are using both the caption and the picture, you can use the ImageAlign property, possibly in combination with the TextAlign property, to specify how the picture would be positioned with regards to the caption. The ImageAlign property also is based on the ContentAlignment enumerator.
A regular button displays with raised borders as originally set by the operating system. To give your button a fancy look and behavior, you can use the FlatStyle property. The FlatStyle property is based on an enumerator of the same name. It provides 4 values that are:
Flat: The button appears flat. When the mouse is over it, it becomes highlighted
Popup: The button appears flat. When the mouse is over it, the borders of the button are raised
Standard: The buttons appears and behave like all regular buttons you have seen
System: The appearance of the button depends on the operating system using it
When the user clicks a button to close a dialog box, you must always know what button was clicked. The .NET Framework provides a mechanism to help identify such a button. This is done through the DialogResult property. This property is based on the DialogResult enumerator. To set the desired value, after adding a button to a dialog box and while the button is selected, in the Properties window, click the DialogResult field and select the desired value. The possible values of this property are: None, OK, Cancel, Abort, Retry, Ignore, Yes, and No.
|
Button Events |
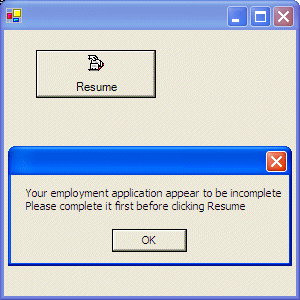
Obviously the most important and the most intuitive event of a button occurs when clicked. This event is of type EventArgs, which indicates that it doesn't provide nor does it need any formal details about what is going on. To launch this event, you can double-click the button on the form. To create this event programmatically, first implement the method that would carry its assignment, then increment-add (with the += operator) it to the Click property of the button by assigning it the EventHandler constructor. Here is an example:
using namespace System;
using namespace System::Drawing;
using namespace System::Windows::Forms;

class Exercise : Form
{
	Button btnResume;

	public Exercise()
	{
		this.InitializeComponent();
	}

	private void InitializeComponent()
	{
		btnResume = new Button();
		btnResume.Text = "Resume";
		btnResume.Location = new Point(32, 20);
		btnResume.Size = new System.Drawing.Size(120, 48);

		btnResume.Image = Image.FromFile("C:\\Program Files\\Microsoft Visual Studio .NET 2003\\Common7\\Graphics\\icons\\Office\\CRDFLE12.ICO");
		btnResume.ImageAlign = ContentAlignment.TopCenter;

		btnResume.TextAlign = ContentAlignment.BottomCenter;

		btnResume.Click += new EventHandler(btnResume_Click);
		this.Controls.Add(btnResume);
	}

	private void btnResume_Click(object sender, EventArgs e)
	{
		MessageBox.Show("Your employment application appear to be incomplete" +
						"\nPlease complete it first before clicking Resume");
	}

	static void Main()
	{
		Application.Run(new Exercise());
	}
}
This would produce:

|
|
||
| Home | Copyright © 2004-2010 FunctionX, Inc. | |
|
|
||