Introductory Options on Bitmaps

Introductory Options on Bitmaps
Bitmaps and Windows Controls
Introduction
To make it easy to use pictures in an application, many graphical controls are equipped to easily acquire and display pictures.
The Image of a Control
One of the ways a control uses a picture is to display one on a part of its body. The classes of the controls that display a picture have a property named Image:
public System.Drawing.Image? Image { get; set; }
Notice that this property is of type Image. This means that the property supports the characteristics and operations of that class.
To visually make a control display a picture, after adding the control to a form, while the control is selected on the form, in the Properties window, click the Image field, then click its ellipsis button. This action would display the Select Resource dialog box:

On that dialog box, you can click the Import button, locate the picture you want, select it, and click Open. Back in the Select Resource dialog box, make sure you select the picture you wanted and click OK. After doing that, you can visually resize the control by dragging its borders.
The Alignment of an Image
A control that supports pictures allows you to indicate on which one of its sides it would display the picture. To support this aspect, the .NET Framework provides an enumeration named ContentAlignment. That enumeration has a member for each of the possible sides on which you can align a picture within a control. To allow you to choose the side to align a picture, the classes of the controls that support pictures are equipped with a property named ImageAlign:
public System.Drawing.ContentAlignment ImageAlign { get; set; }
To visually specify the alignment of the picture of a control, select the control on the form. In the Properties windows, click the ImageAlign adding it to a form or another control container, you may want to select the font by which the controls text will be painted. To do this, in the Properties window of the control, click the Font field, then click its ellipsis button. A dialog box would display. In the Font list box, select the desired font and click OK.
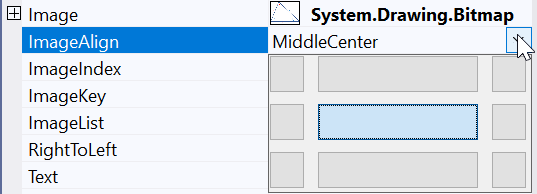
In that window, you can select the alignment option you want. The equivalent member of the ContentAlignment enumeration are BottomCenter, BottomLeft, BottomRight, MiddleCenter, MiddleLeft, MiddleRight, TopCenter, TopLeft, and TopRight.
![]() Practical Learning: Introducing Bitmaps
Practical Learning: Introducing Bitmaps
A Button
Although a button is primarily used for its clicking ability, a button can display only text, only a picture, or both a string and a picture in its client area. You have many options, based on your goal. To make it happen easily, after adding a button from the Toolbox to a form, and while the button is selected on the form, in the Properties window, use the Image field to select the desired picture.
Button, the class that manages a button, is derived from a class named ButtonBase:
public class Button : System.Windows.Forms.ButtonBase, System.Windows.Forms.IButtonControl
The ButtonBase class is equipped with an Image property.
You can use this property to specify the picture that the button would display. As an option, it may be a good idea to remove the text of the button so it would display only the picture. Of course, the button would still be clickable and apply its Click event.
A Label
By default, a label is made to display text. Fortunately, a label also supports images. To visually make a label display a picture, after adding a label to a form, while the laberl is selected on the form, in the Properties window for the label, use the Image field to access the Select Resource dialog box and use the Import button to select a picture. The other thing you should change on the label is to set its AutoSize property to False (by default, its value in the Properties window is set to True). If necessary, you can visually resize the label by dragging its borders. In most cases also, if you want to use the label only to display a picture, you should delete the value in the Text field to make sure the label doesn't display some text.
In the same way, you can programmatically create a label, access its Image property, and assign a picture file to it. Here is an example:

namespace WindowsControls
{
    public partial class Exercise : Form
    {
        public Exercise()
        {
            InitializeComponent();
        }

        private void Exercise_Paint(object sender, PaintEventArgs e)
        {
            // Create a label object
            Label lblPicture = new Label();

            // Create an image
            Image image = new Bitmap(Image.FromFile("C:\\Resources\\Plant.png"));

            lblPicture.Location = new Point(12, 12);

            // Assign the image object to the Image property of the label
            lblPicture.Image = image;
            lblPicture.Size = image.Size;
            lblPicture.BorderStyle = BorderStyle.FixedSingle;

            Controls.Add(lblPicture);
        }
    }
}
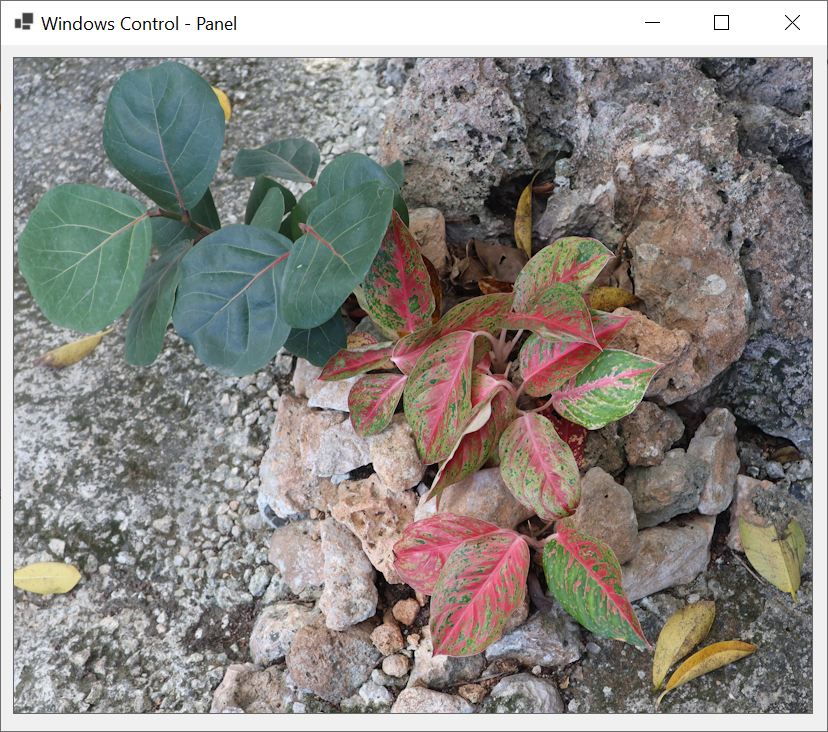
Here an example of what this would produce:
A Picture Box
Like its name suggests, a picture box is a control used to display a picture. Therefore, to display a picture on a form or an application, in the Common Controls section of the Toolbox, click the PictureBox and click the form or another controls container on a form. While the picture box is still selected, in the Properties window, click Image to select a picture of your choice.
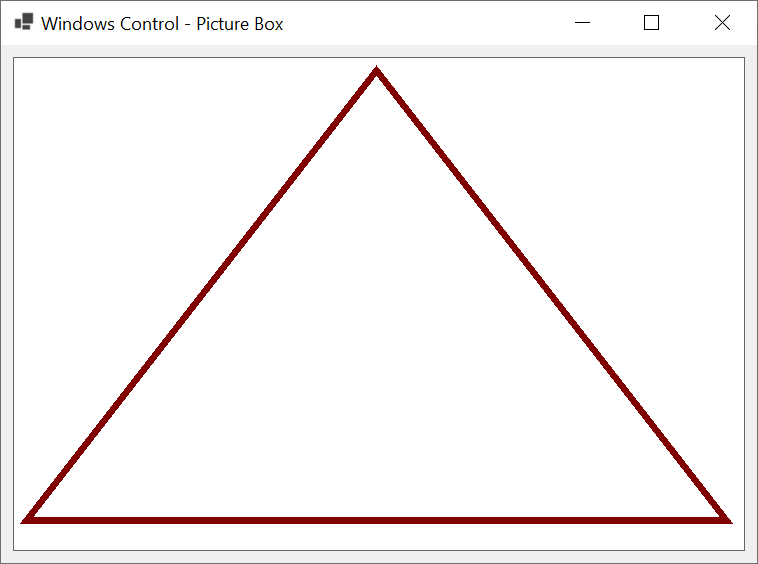
A picture box can be used for many things. As opposed to simply display a picture, a picture box is commonly used as a platform to draw some shapes such as geometric figures. You have many options. The primary way to use a picture box for this goal is to use its Paint event. Here is an example:
private void pbxCanvas_Paint(object sender, PaintEventArgs e)
{
    Point[] pts = { new( 12, 462),
                    new(362,  12),
                    new(712, 462) };

    Pen penCurrent = new Pen(Brushes.Maroon, 6.426F);

    e.Graphics.DrawPolygon(penCurrent, pts);
}
This would produce:
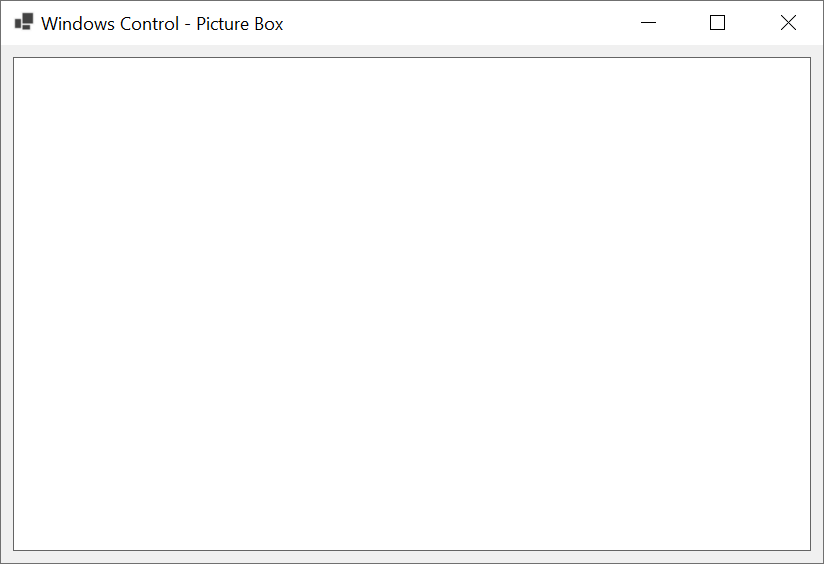
The main advantage of a Paint event is that it automatically provides a Graphics object. This makes it convenient to draw in a Paint event. In some cases, you need to draw a shape without using a Paint event. If you simply call a CreateGraphics() method to get a Graphics object and draw something, you may not see anything. Consider the following code:
private void Exercise_Load(object sender, EventArgs e)
{
    Graphics grapher = pbxCanvas.CreateGraphics();

    Point[] ptsFrontTriangle = { new( 15, 375), new(165, 100), new(330, 405) };
    Point[] ptsRightFace     = { new(330, 405), new(165, 100), new(585,  50), new(750, 335) };
    Point[] ptsBackLeft      = { new( 15, 375), new(165, 100), new(585,  50), new(435, 325) };
    Point[] ptsBackRight     = { new(435, 325), new(585,  50), new(750, 335) };

    Pen penVisibleLine       = new Pen(Brushes.Black, 6.225F);
    Pen penHiddenLine        = new Pen(Brushes.Silver, 2.525F);
    penHiddenLine.DashStyle  = DashStyle.Dash;

    grapher.DrawLine(penHiddenLine, ptsBackLeft[0].X, ptsBackLeft[0].Y, ptsBackLeft[3].X, ptsBackLeft[3].Y);
    grapher.DrawLine(penHiddenLine, ptsBackLeft[2].X, ptsBackLeft[2].Y, ptsBackLeft[3].X, ptsBackLeft[3].Y);
    grapher.DrawLine(penHiddenLine, ptsBackRight[0].X, ptsBackRight[0].Y, ptsBackRight[2].X, ptsBackRight[2].Y);
    grapher.DrawPolygon(penVisibleLine, ptsFrontTriangle);
    grapher.DrawPolygon(penVisibleLine, ptsRightFace);
}
This would produce:
To solve this problem, you can first create a bitmap and specify its size. Then create a Graphics object and initialize it with a call to the Graphics.FromImage() method to which you would pass the previously created bitmap. After doing that, you can perform your graphic operations on the graphic object you just created. Once the graphic object holds the items you wanted, you can assign to the Image property of your picture box. This can be done as follows:
using System.Drawing.Drawing2D;

namespace WindowsControls
{
    public partial class Exercise : Form
    {
        public Exercise()
        {
            InitializeComponent();
        }

        private void Exercise_Load(object sender, EventArgs e)
        {
            // Create a bitmap with the desired size
            Bitmap bmpCanvas = new(pbxCanvas.Width, pbxCanvas.Height);
            // Create a graphic initialized with the above bitmap
            Graphics grapher = Graphics.FromImage(bmpCanvas);

            Point[] ptsFrontTriangle = { new( 15, 375), new(165, 100), new(330, 405) };
            Point[] ptsRightFace     = { new(330, 405), new(165, 100), new(585,  20), new(750, 305) };
            Point[] ptsBackLeft      = { new( 15, 375), new(165, 100), new(585,  20), new(435, 295) };
            Point[] ptsBackRight     = { new(435, 295), new(585,  20), new(750, 305) };

            Pen penVisibleLine       = new Pen(Brushes.Black, 6.225F);
            Pen penHiddenLine        = new Pen(Brushes.Silver, 2.525F);
            penHiddenLine.DashStyle  = DashStyle.Dash;

            // Perform the desired operations on the graphic
            grapher.DrawLine(penHiddenLine, ptsBackLeft[0].X, ptsBackLeft[0].Y, ptsBackLeft[3].X, ptsBackLeft[3].Y);
            grapher.DrawLine(penHiddenLine, ptsBackLeft[2].X, ptsBackLeft[2].Y, ptsBackLeft[3].X, ptsBackLeft[3].Y);
            grapher.DrawLine(penHiddenLine, ptsBackRight[0].X, ptsBackRight[0].Y, ptsBackRight[2].X, ptsBackRight[2].Y);
            grapher.DrawPolygon(penVisibleLine, ptsFrontTriangle);
            grapher.DrawPolygon(penVisibleLine, ptsRightFace);

            // Once the graphic is complete, pass it to an object that will hold it
            pbxCanvas.Image = bmpCanvas;
        }
    }
}
This would produce:

A Background Image
Introduction
We saw that when a control supports the ability to display a picture, you can position that picture on one side or corner of the control. In some cases, you may want to cover a control completely with a certain picture.
The Background Image of a Control
To support background images, the Control class has a property named BackgroundImage:
public virtual System.Drawing.Image? BackgroundImage { get; set; }
As seen with the Image property, notice that the BackgroundImage property is of type Image. The classes of the controls that support the background image inherit the BackgroundImage property from the Control class.
To visually specify the background picture if a control, after adding the control to a form, in the Properties window, click the BackgroundImage field, then click its ellipsis button. This would display the Select Resource dialog box:
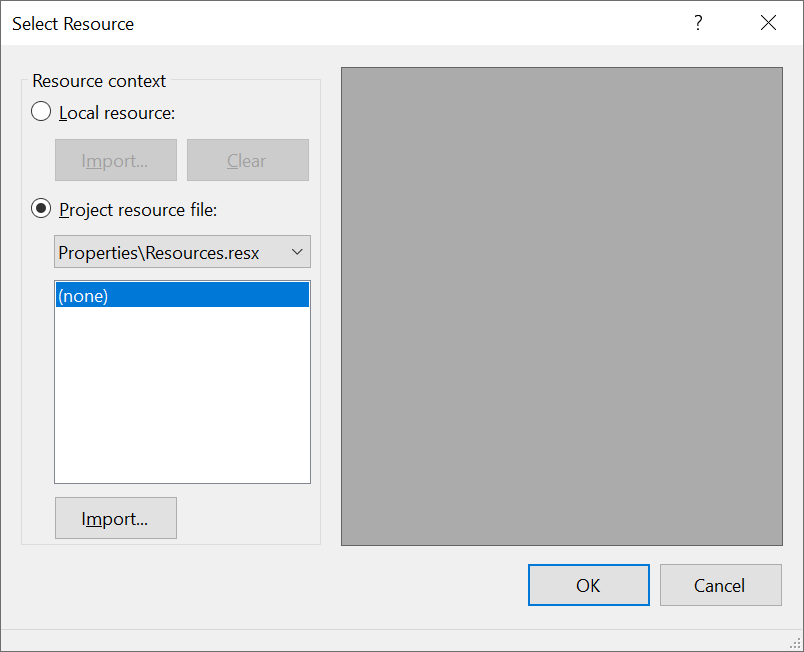
In the Select Resource dialog box, click the Import button. Locate the picture you want and select it. Click Open. In the Select Resource dialog box, make sure you select the picture you wanted and click OK.
The Background Layout of an Image
Normally, a background image is intended to completely cover a control. In most cases, the size of the picture is different from that of a control. When that happens, you can ask the compiler to cover the whole control or a certain side of your choice. To support this, the .NET Framework provides an enumeration named ImageLayout:
public enum ImageLayout
To support the layout of the background picture of a control, the Control class is equipped with a property named BackgroundImageLayout:
public virtual System.Windows.Forms.ImageLayout BackgroundImageLayout { get; set; }
The classes of the controls that support the background image inherit this property from the Control class. As a result, to visually specify the layout of the background image of a control, after adding the control to a form and after selecting its background image, in the Properties window, click BackgroundImageLayout and click its button
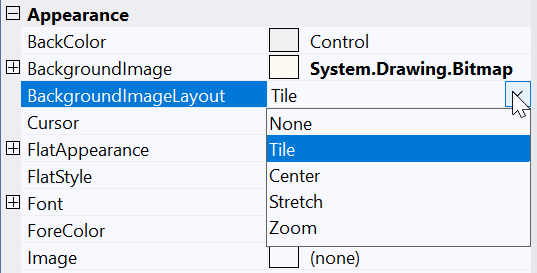
On that window, you can select an option, which corresponds to a member of the ImageLayout enumeration. The members of that enumeration are: Tile (which is the default), None, Center, Stretch, and Zoom.
A Panel
The panel is one of the controls used to display a picture. Unlike the label that draws a picture as one of its data displays, a panel can use a picture as its background. Panel, the class that manages the panel control, is based on the ScrollableControl class:
public class Panel : System.Windows.Forms.ScrollableControl
A panel can use a picture as its background because its class (Panel) inherits a property named BackgroundImage:
public virtual System.Drawing.Image? BackgroundImage { get; set; }
You can use this property programmatically to assign a picture as the background of a panel.
A Group Box
A group box is one of the most commonly used controls container. For your application design, you can paint a group box with a picture. This is possible because the Properties window of a group box is equipped with a BackgroundImage field you can use.
An Image List
Introduction
As its image suggests, an image list is a collection of pictures. Other Windows controls can use one or more of those pictures. An image list is not a visual control; it is just a way to gather various pictures under one name to make that whole collection available to any control that needs it.
To visually create an image list, in the Components section of the Toolbox, click ImageList and click a form. While the image list is selected below the form, in the Properties window, click Images, then click its ellipsis button. This action would open the Image Collection Editor:
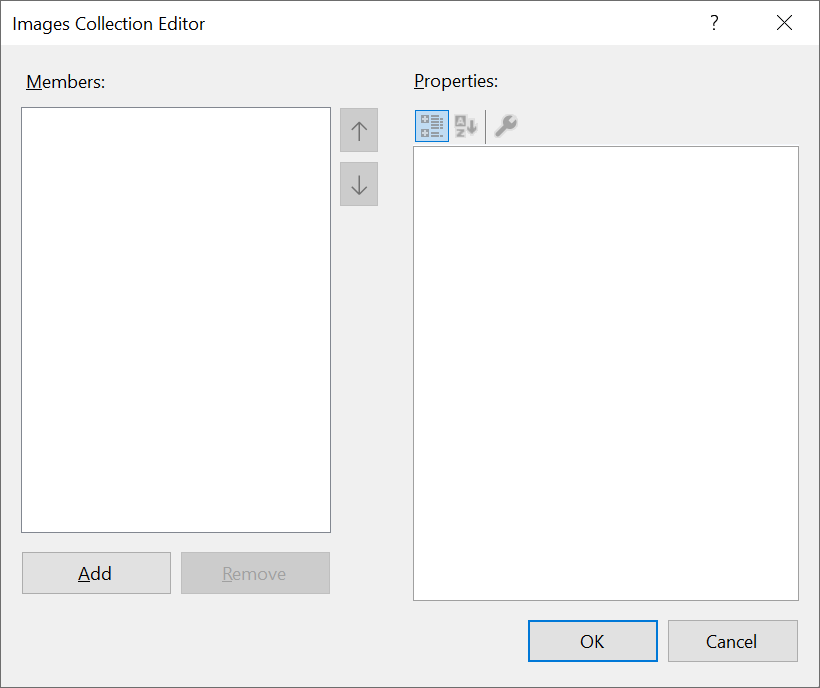
In the Images Collection Editor, keep clicking the Add button, locating the desired picture, selecting it, and clicking Open. Once you have selected the desired pictures, click OK. The pictures in an image list are set in order si that each picture occupies a position as its index.
The classes of the controls that can use an image list are equipped with a property named ImageList. To specify an image list for a control, after adding the control to a form and while the control is selected on the form, in the Properties window, click the ImageList field, click the arrow of its combo box and select the name of the image list. After that, you can configure the image(s) of the control.
Remember that an image list contains a collection of pictures. After assigning that image list to a control, some controls can use only one of the pictures in the collection and some controls can use many of those pictures.
A Button
One of the best characteristics of a button is that is can appear in many ways. One way is that a button can display a small icon on one of its sides and a string. To make this happen, you can add an image list to your form and then, in the Properties window, assign that image list to a button of your choice.
Remember that Button, the class that manages a clickable button, is derived from the ButtonBase class. The ButtonBase class is one of the objects that can use only one image at a time. Therefore, after assigning an image list to a button, to let you choose the image that the button will display, the ButtonBase class is equipped with a property named ImageIndex:
public int ImageIndex { get; set; }
To visually specifying a picture, after selecting the button on the form and assigning an image list to it, in the Properties window, click ImageIndex, then click the arrow of its combo box and select one of the pictures.
A Tab Control
As you may know already, a tab control is a controls container of many parts where each part is represented with a tab. To enhance the appearance of the tabs, you can make one, some, or all of them display a small icon on their tabs. To proceed, add an image list to a form and add the desired icons to it. Then add a tab control to your form. Assign the image list to the tab control. You can then specify the icon that a tab would use. To do that, on the tab control, click a tab page. In the Propertiws window, click the ImageIndex field, then click the arrow of its combo box and select the picture of your choice.
A Tree View
A tree view is a control that displays a list of items organized as a tree. The items of the control are referred to as node. Those nodes are organized on difference levels. To enhance the appearance of those nodes, they can be made to display some small icons. To start, create an image list. When selecting the pictures, select two for each level.
Saving a Picture File
Introduction
As far as the operating system is concerned, a picture is primarily a computer file like any other, but there are some details that must be taken care of to assist the operaing system to properly store, open, or display a picture. Fortunately, both the Bitmap class and the operating system are equipped ti handle their parts of the jobs.
To support the ability to save a picture as a computer file, the Bitmap class is equipped with an overloaded method named Save.
Saving a Bitmap
To provide a very easy and simple way to save a picture file, the Bitmap class is equipped with a version of its Save() method that takes a string as argument. Its syntax is:
public void Save(string filename);
This method takes a string as argument. That string must contain at least the name you want for the file, a period and an extension. As an option, you can/should provide a (complete) path for the file. The name and/or path of the file must follow the rules set by the operation system on which the application is used. To start, the user must provide a file name. If the user tries saving a file without providing a valid string, the compiler would conclude that the file name and/or path is null and it would throw an ArgumentNullException exception. To prepare for this issue, you create create a try...catch() exception handling section.
From your knowledge of file processing, you probably know already that if you are creating an application that will allow users to save a file, you will decide on the extension they will apply to the files of your application. Unlike those types of applications, if you are creating that application that will allow users to save picture files, the users must use only one of the already created extensions. Examples of extensions for picture files are bmp, png, jpg, jpeg, gif, tiff, and some others. You must make sure the user can use only one of those extensions. You have two primary options. You can create an application that allows users to save picture files and impose an extension of your choice. Here is an example:
namespace BitmapsOperations1
{
    public partial class Exercise : Form
    {
        private Bitmap? _bitmap;
        private Graphics? _graphics;

        public Exercise()
        {
            InitializeComponent();
        }

        private void Exercise_Load(object sender, EventArgs e)
        {
            _bitmap = new Bitmap(pbxCanvas.Width, pbxCanvas.Height);
            _graphics = Graphics.FromImage(_bitmap);
        }

        private void pbxCanvas_Paint(object sender, PaintEventArgs e)
        {
            _graphics!.DrawLine(new(Color.Blue), new(20, 20), new(725, 225));

            pbxCanvas.Image = _bitmap;
        }

        private void btnSave_Click(object sender, EventArgs e)
        {
            _bitmap!.Save("C:\\Exercises\\Line.png");
        }
    }
}
In most cases, you will allow the users to specify a file extension when saving a picture file. you have many options. You can provide an Open File Dialog box on which you would create a list of allowable file extensions and the user can select from that list. In some cases, you may let the users type a file extension. In this case, a user should provide a supported file extension. In reality, the .NET Framework trusts the user and assumes that a user would select an appropriate extension, and the Bitmap.Save() method would save the file without any problem; but then when it comes time to deal with the file as a picture-based object, some issues may arise. To prepare you for such eventualities, if the user provides a file extension that could create problems, the compiler would throw an ExternalException exception. Once again, you can create a try...catch() exception handling section to deal with it.
You should always prepare for bad occurrences in your application. There, whenever necessary, create at least a try...catch(Exception) section in your code to deal with genera exceptions.
An Image Format
File processing for pictures can be messy, especially if you allow users to specify a file extension of their choice when saving a picture. Fortunately, to assist you with official or common files types, the .NET Framework provides a class named ImageFormat:
public sealed class ImageFormat
The ImageFormat class is defined in the System.Drawing.Imaging namespace that is created in the System.Drawing.Common.dll library. The ImageFormat class is a small class that in fact resembles an enumeration. In fact, the ImageFormat class is mostly used for its properties. The class contains a static property for each picture file extension.
To let you indicate the file extension that your picture file should support, the Bitmap.Save() method is available in the following version:
public void Save(string filename, System.Drawing.Imaging.ImageFormat format);
The first argument, filename, follows the description we reviewed previously. The second argument is passed as a property of the ImageFormat class. The options you can choose are: ImageFormat.Bmp, ImageFormat.Bmp, ImageFormat.Png, ImageFormat.Gif, ImageFormat.Jpeg, ImageFormat.Tiff, ImageFormat.Wmf, ImageFormat.Emf, and ImageFormat.Icon. There are a few other properties/extensions available. Here is an example:
using System.Drawing.Imaging;
using System.Runtime.InteropServices;

namespace BitmapsOperations1
{
    public partial class Exercise : Form
    {
        private Bitmap? _bitmap;
        private Graphics? _graphics;

        public Exercise()
        {
            InitializeComponent();
        }

        private void Exercise_Load(object sender, EventArgs e)
        {
            _bitmap = new Bitmap(pbxCanvas.Width, pbxCanvas.Height);
            _graphics = Graphics.FromImage(_bitmap);
        }

        private void pbxCanvas_Paint(object sender, PaintEventArgs e)
        {
            _graphics!.DrawLine(new(Color.Blue), new(20, 20), new(725, 225));

            pbxCanvas.Image = _bitmap;
        }

        private void btnSave_Click(object sender, EventArgs e)
        {
            string documents = Environment.GetFolderPath(Environment.SpecialFolder.MyDocuments);

            label1.Text = Environment.CurrentDirectory;

            try
            {
                _bitmap!.Save(documents + "\\Line.jpg", ImageFormat.Jpeg);
            }
            catch (Exception ex) when (ex is ArgumentNullException ane)
            {
                 MessageBox.Show("Make sure you provide a name or path for the file." + Environment.NewLine +
                                 "The error produced is: " + ane.Message,
                                 "Bitmap Operations", MessageBoxButtons.OK, MessageBoxIcon.Information);
            }
            catch (Exception ex) when (ex is DirectoryNotFoundException dnfe)
            {
                MessageBox.Show("There was a problem with the name or path you provided." + Environment.NewLine +
                                "The error produced is: " + dnfe.Message,
                                "Bitmap Operations", MessageBoxButtons.OK, MessageBoxIcon.Information);
            }
            catch (Exception ex) when (ex is ExternalException ee)
            {
                MessageBox.Show("There was a problem with the file format you provided." + Environment.NewLine +
                                "The error produced is: " + ee.Message,
                                "Bitmap Operations", MessageBoxButtons.OK, MessageBoxIcon.Information);
            }
        }
    }
}
A File for a Steam
So far, we provided the file path of the file as a string. As an alternative, you can provide the file path as a stream. To support this, the Bitmap.Save() method is available in another version as follows:
public void Save(System.IO.Stream stream, System.Drawing.Imaging.ImageFormat format);
When calling this version of the Bitmap.Save() method, pass the first argument as an object of a class derived from the Stream class. Here is an example:
using System.Drawing.Imaging;
using System.Runtime.InteropServices;

namespace BitmapsOperations1
{
    public partial class Exercise : Form
    {
        private Bitmap? _bitmap;
        private Graphics? _graphics;

        public Exercise()
        {
            InitializeComponent();
        }

        private void Exercise_Load(object sender, EventArgs e)
        {
            _bitmap = new Bitmap(pbxCanvas.Width, pbxCanvas.Height);
            _graphics = Graphics.FromImage(_bitmap);
        }

        private void pbxCanvas_Paint(object sender, PaintEventArgs e)
        {
            _graphics!.DrawLine(new(Color.Blue), new(20, 20), new(725, 225));

            pbxCanvas.Image = _bitmap;
        }

        private void btnSave_Click(object sender, EventArgs e)
        {
            using (Stream stmPicture = new FileStream(Environment.CurrentDirectory + "\\Line4.tiff",
                                                      FileMode.OpenOrCreate, FileAccess.ReadWrite, FileShare.ReadWrite))
            {
                try
                {
                    _bitmap!.Save(stmPicture, ImageFormat.Tiff);
                }
                catch (Exception ex) when (ex is ArgumentNullException ane)
                {
                    MessageBox.Show("Make sure you provide a name or path for the file." + Environment.NewLine +
                                    "The error produced is: " + ane.Message,
                                    "Bitmap Operations", MessageBoxButtons.OK, MessageBoxIcon.Information);
                }
                catch (Exception ex) when (ex is DirectoryNotFoundException dnfe)
                {
                    MessageBox.Show("There was a problem with the name or path you provided." + Environment.NewLine +
                                    "The error produced is: " + dnfe.Message,
                                    "Bitmap Operations", MessageBoxButtons.OK, MessageBoxIcon.Information);
                }
                catch (Exception ex) when (ex is ExternalException ee)
                {
                    MessageBox.Show("There was a problem with the file format you provided." + Environment.NewLine +
                                    "The error produced is: " + ee.Message,
                                    "Bitmap Operations", MessageBoxButtons.OK, MessageBoxIcon.Information);
                }
            }
        }
    }
}
![]() Practical Learning: Ending the Lesson
Practical Learning: Ending the Lesson
|
|
|||
| Previous | Copyright © 2010-2024, FunctionX | Monday 20 May 2024 | Next |
|
|
|||