Introduction to Brushes
Introduction to Brushes
Fundamentals of Brushes
Introduction
After drawing a shape, probably the next step is to fill it out, which is equivalent to painting the interior of a shape. You have many options. At a minimum, you can fill a shape with a color. Even then, you have many options.
![]() Practical Learning: Introducing Brushes
Practical Learning: Introducing Brushes
Filling a Rectangle
A rectangle is one of the most fundamental closed geometric shapes. We already know how to draw a rectangle. After drawing a rectangle, you can fill it with a color. To support this, the Graphics class is equipped with an overloaded method named FillRectangle. One of the versions of this method uses the following syntax:
public void FillRectangle(System.Drawing.Brush brush, int x, int y, int width, int height);
As we will see, there are other Graphics methods used to fill out a shape. The first argument of all those methods is a System.Drawing.Brush object. In the above syntax, the x and the y arguments represent the coordinate of the top-left point of the rectangle. The width argument is the distance from the left to the right sides of the rectangle. The height argument is the distance from the top to the bottom sides of the rectangle. As a result, the above method could be callled as follows:
private void Exercise_Paint(object sender, PaintEventArgs e)
{
    e.Graphics.FillRectangle(some-brush, 20, 20, 200, 160);
}
Introduction to Solid Brushes
A Simple Brush
While a pen is an object used to create a line or the borders of a shape, a brush is an object used to fill out the interior of a closed shape such as a rectangle. There are various types of brushes you can use. The simplest type of brush is referred to as solid. To support solid brushes, the .NET Framework provides a class named SolidBrush. The SolidBrush class is derived from the abstract Brush:
public sealed class SolidBrush : System.Drawing.Brush
The SolidBrush class is defined in the System.Drawing namespace. In reality, to create a solid brush, you have many options.
A Brush as a Color
To let create a simple brush whose only information is a color, the .NET Framework provides a sealed class named Brushes:
public static class Brushes
This class contains only read-only properties. Each property is of type System.Drawing.Brush. The name of each property is the name of a color. Here are examples of those properties:
public static System.Drawing.Brush Green  { get; }
public static System.Drawing.Brush Orange { get; }
public static System.Drawing.Brush Red    { get; }
public static System.Drawing.Brush Blue   { get; }
public static System.Drawing.Brush Black  { get; }
To use one these properties as as a brush, you can declare a Brush variable, accest a known name of a color and qualify it on the Brushes class, and assign that property to your Brush variable. You can then pass that variable as the first argument of the FillRectangle() method. Here are examples:
namespace GraphicsAccessories
{
    public partial class Exercise : Form
    {
        public Exercise()
        {
            InitializeComponent();
        }

        private void Exercise_Paint(object sender, PaintEventArgs e)
        {
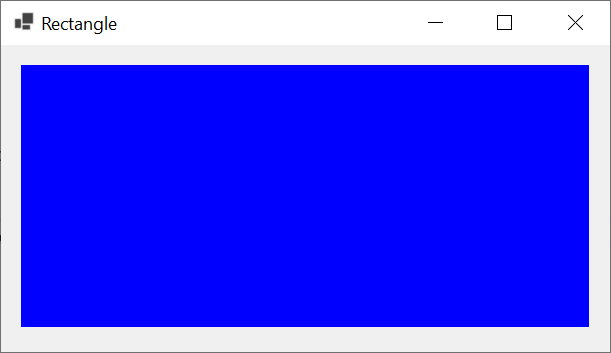
            Brush colorizer = Brushes.Blue;
            e.Graphics.FillRectangle(colorizer, 20, 20, 568, 262);
        }
    }
}
This would produce:
Instead of first declaring a Brush variable to simply hold a color, since you will hardly do anything with that brush, you can directly pass the Brushes property to a FillRectangle() method. Here are examples:
private void Exercise_Paint(object sender, PaintEventArgs e)
{
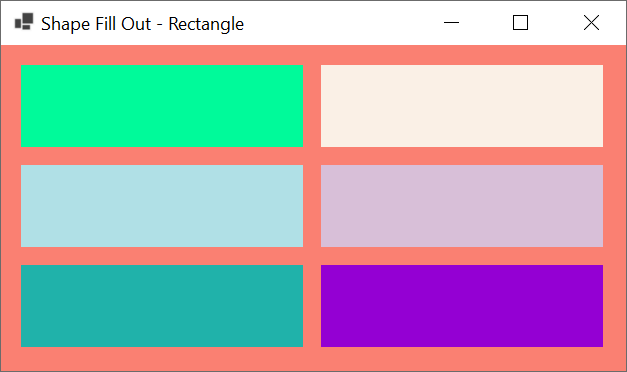
    BackColor = Color.Salmon;

    e.Graphics.FillRectangle(Brushes.MediumSpringGreen,  20,  20, 282, 82);

    e.Graphics.FillRectangle(Brushes.Linen,             320,  20, 282, 82);

    e.Graphics.FillRectangle(Brushes.PowderBlue,         20, 120, 282, 82);

    e.Graphics.FillRectangle(Brushes.Thistle,           320, 120, 282, 82);

    e.Graphics.FillRectangle(Brushes.LightSeaGreen,      20, 220, 282, 82);

    e.Graphics.FillRectangle(Brushes.DarkViolet,        320, 220, 282, 82);
}
This would produce:
The System Brushes
If you are developping your application to be used in Microsoft Windows computer, you may be interested in the colors those operating systems use. To help you get those colors, the .NET Framework provides a static class named SystemBrushes:
public static class SystemBrushes
The SystemBrushes class mostly contains only properties (it also contains one method). Every property of the SystemBrushes class is of type System.Drawing.Brush. Every one of those properties is the name a color used in Microsoft Windows. The example of a property is:
public static System.Drawing.Brush Control { get; }
Therefore, to access a Microsoft Windows color, type SystemBrushes. followed by the name of the property/color you want.
Details on Using a Solid Brush
The Color of a Brush
The primary role of a brush is to hold a color so it can use it to paint an object. To help you create a brush and specify its color, the SolidBrush class is equipped with one constructor that uses the following syntax:
public SolidBrush(Color color);
As you can see, the constructor of the SolidBrush class takes a color as argument. The color pargument must be a valid definition of a Color object. As a result, you can access a property/color from the Color structure. Here is an example:
private void Exercise_Paint(object sender, PaintEventArgs e)
{
    SolidBrush colorizer = new SolidBrush(Color.Blue);

    e.Graphics.FillRectangle(colorizer, 20, 20, 582, 268);
}
After creating a brush, at any time, you may want to change its color. To allow you to do this, the SolidBrush class is equipped with a property named Color:
public System.Drawing.Color Color { get; set; }
As you can see, SolidBrush.Color is a read-write property. As a result, one way you can use it is to apply a color, or to change the color, of a brush. To do this, type the name of your SolidBrush variable, a period, and the desired name of the color. Here are examples:
private void Exercise_Paint(object sender, PaintEventArgs e)
{
    BackColor = Color.Goldenrod;

    SolidBrush colorizer = new SolidBrush(Color.DeepPink);

    e.Graphics.FillRectangle(colorizer, 20, 20, 282, 82);

    colorizer.Color = Color.DimGray;
    e.Graphics.FillRectangle(colorizer, 320,  20, 282, 82);

    colorizer.Color = Color.Aqua;
    e.Graphics.FillRectangle(colorizer,  20, 120, 282, 82);

    colorizer.Color = Color.PeachPuff;
    e.Graphics.FillRectangle(colorizer, 320, 120, 282, 82);

    colorizer.Color = Color.LightSlateGray;
    e.Graphics.FillRectangle(colorizer,  20, 220, 282, 82);

    colorizer.Color = Color.Peru;
    e.Graphics.FillRectangle(colorizer, 320, 220, 282, 82);
}
Disposing of a Brush
Like most objects used in graphics programming, a brush consumes some computer resources. Therefore, after using it, you can free the resources it was using. To assist you with this, the Brush class implements the IDisposable interface. As a result, the Brush class is equipped with an overloaded Dispose() method. The simplest version uses the following syntax:
public void Dispose();
After usign a Brush-based object, you can simply call this method on the brush. Here is an example:
private void Exercise_Paint(object sender, PaintEventArgs e)
{
    Graphics grapher = e.Graphics;
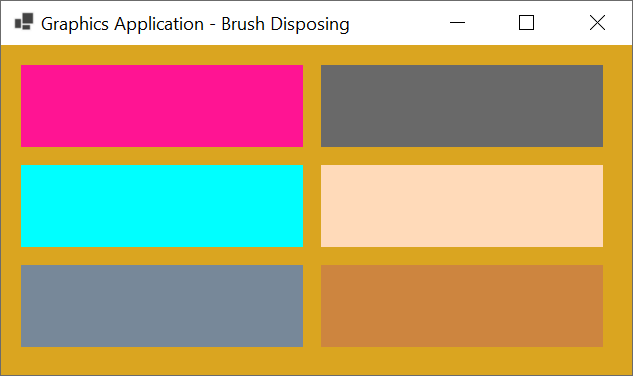
    BackColor = Color.Goldenrod;

    Pen pnBorder = new Pen(Color.GhostWhite, 2.227F);
    SolidBrush colorizer = new SolidBrush(Color.DeepPink);

    grapher.FillRectangle(colorizer, 20, 20, 282, 82);

    colorizer.Color = Color.DimGray;
    grapher.FillRectangle(colorizer, 320, 20, 282, 82);

    colorizer.Color = Color.Aqua;
    grapher.FillRectangle(colorizer, 20, 120, 282, 82);

    colorizer.Color = Color.PeachPuff;
    grapher.FillRectangle(colorizer, 320, 120, 282, 82);

    colorizer.Color = Color.LightSlateGray;
    grapher.FillRectangle(colorizer, 20, 220, 282, 82);

    colorizer.Color = Color.Peru;
    grapher.FillRectangle(colorizer, 320, 220, 282, 82);

    colorizer.Dispose();
}
This would produce:
Since the Brush class implements the IDisposable interface, instead of calling its Dispose() method, you can use the using() operator to indicate to the compiler that you have an object that is using some resources and those resources need to be freed when the brush stops doing its job.
![]() Practical Learning: Using a Solid Brush
Practical Learning: Using a Solid Brush
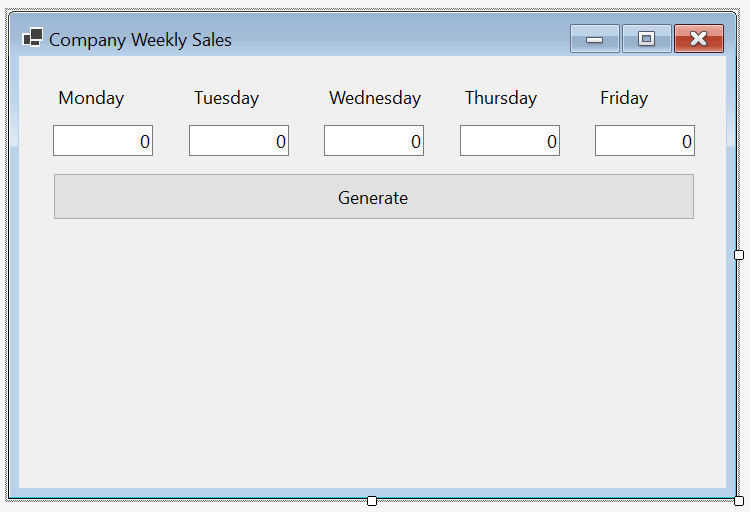
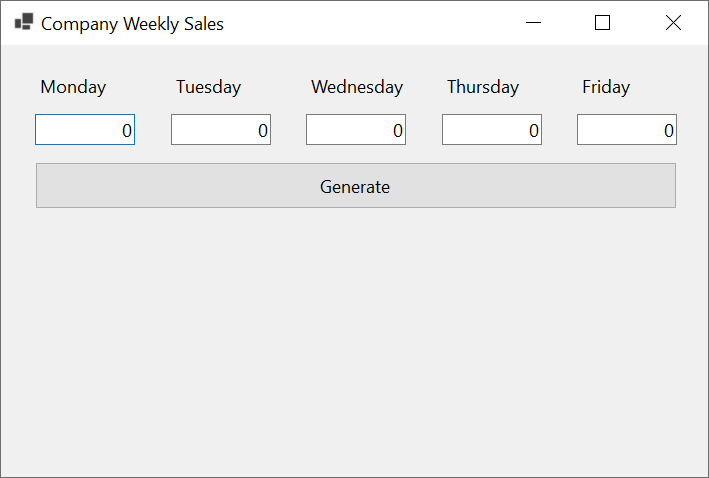
| Control | Name | Text | Other Properties | |
| Label | Monday | |||
| Label | Tuesday | |||
| Label | Wednesday | |||
| Label | Thursday | |||
| Label | Friday | |||
| TextBox | txtMonday | TextAlign: Right | ||
| TextBox | txtTuesday | TextAlign: Right | ||
| TextBox | txtWednesday | TextAlign: Right | ||
| TextBox | txtThursday | TextAlign: Right | ||
| TextBox | txtFriday | TextAlign: Right | ||
| Button | Generate | btnGenerate | ||
namespace WeeklySales2
{
    public partial class Exercise : Form
    {
        public Exercise()
        {
            InitializeComponent();
        }

        private void btnGenerate_Click(object sender, EventArgs e)
        {
            int monday = 0;
            int tuesday = 0;
            int wednesday = 0;
            int thursday = 0;
            int friday = 0;

            try
            {
                monday = int.Parse(txtMonday.Text) / 100;
            }
            catch (FormatException)
            {
                MessageBox.Show("Invalid value");
            }

            try
            {
                tuesday = int.Parse(txtTuesday.Text) / 100;
            }
            catch (FormatException)
            {
                MessageBox.Show("Invalid value");
            }

            try
            {
                wednesday = int.Parse(txtWednesday.Text) / 100;
            }
            catch (FormatException)
            {
                MessageBox.Show("Invalid value");
            }

            try
            {
                thursday = int.Parse(txtThursday.Text) / 100;
            }
            catch (FormatException)
            {
                MessageBox.Show("Invalid value");
            }

            try
            {
                friday = int.Parse(txtFriday.Text) / 100;
            }
            catch (FormatException)
            {
                MessageBox.Show("Invalid value");
            }

            CreateGraphics().Clear(BackColor);

            int bottomLine = 400;

            CreateGraphics().FillRectangle(new SolidBrush(Color.Red),    txtMonday.Left    + 35, bottomLine - monday,    40, monday   );
            CreateGraphics().DrawRectangle(new Pen(Color.Black),         txtMonday.Left    + 35, bottomLine - monday,    40, monday   );
            CreateGraphics().FillRectangle(new SolidBrush(Color.Blue),   txtTuesday.Left   + 25, bottomLine - tuesday,   40, tuesday  );
            CreateGraphics().DrawRectangle(new Pen(Color.Black),         txtTuesday.Left   + 25, bottomLine - tuesday,   40, tuesday  );
            CreateGraphics().FillRectangle(new SolidBrush(Color.Green),  txtWednesday.Left + 25, bottomLine - wednesday, 40, wednesday);
            CreateGraphics().DrawRectangle(new Pen(Color.Black),         txtWednesday.Left + 25, bottomLine - wednesday, 40, wednesday);
            CreateGraphics().FillRectangle(new SolidBrush(Color.Maroon), txtThursday.Left  + 25, bottomLine - thursday,  40, thursday );
            CreateGraphics().DrawRectangle(new Pen(Color.Black),         txtThursday.Left  + 25, bottomLine - thursday,  40, thursday );
            CreateGraphics().FillRectangle(new SolidBrush(Color.Orange), txtFriday.Left    + 25, bottomLine - friday,    40, friday   );
            CreateGraphics().DrawRectangle(new Pen(Color.Black),         txtFriday.Left    + 25, bottomLine - friday,    40, friday   );

            CreateGraphics().DrawLine(new Pen(Color.Black, 5.00F), 30, bottomLine, Width - 60, bottomLine);
        }
    }
}
Monday:    12000
Tuesday:   11000
Wednesday: 8500
Thursday:  16800
Friday:    17500

A Brush for a Pen
In previous lessons, we saw how to create a pen and specifying its color. As another way to pass a color to a pen, the Pen class is equipped with a constructor whose syntax is:
public Pen(System.Drawing.Brush brush);
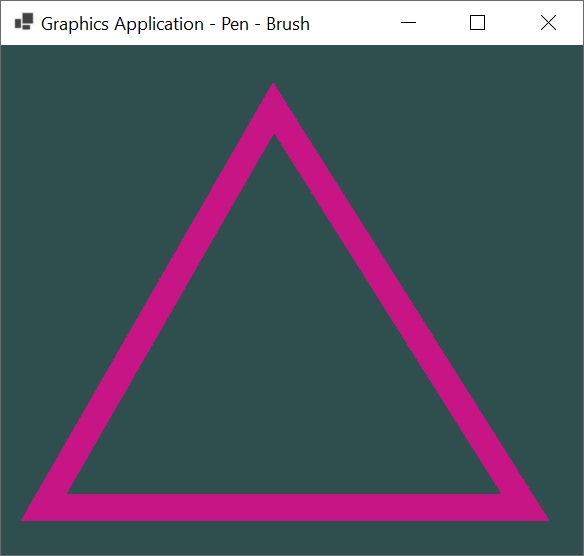
As you can see, this constructor takes a brush as argument. That argument would provide the color that the brush need. Here is an example:
private void Exercise_Paint(object sender, PaintEventArgs e)
{
    BackColor = Color.DarkSlateGray;

    Point[] pts = { new( 42,  462),
                    new(272,  62),
                    new(524, 462) };

    using(Brush painter = new SolidBrush(Color.MediumVioletRed))
    {
        Pen penCurrent = new Pen(painter, 26.426F);

        e.Graphics.DrawPolygon(penCurrent, pts);
    }
}
This would produce:
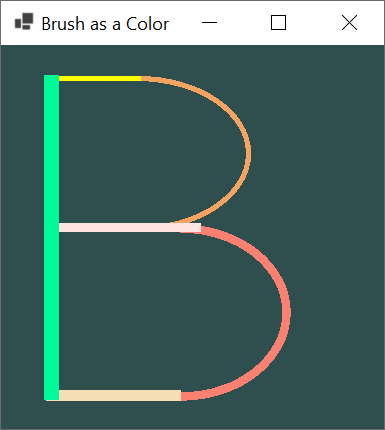
In the above example, we first defined a Brush object even though we were only interested in its color. As a result, you can access a Brushes object directly for the first argument of a Pen constructor and provide a color there. Here is an example:
private void Exercise_Paint(object sender, PaintEventArgs e)
{
    Graphics grapher = e.Graphics;

    BackColor        = Color.DarkSlateGray;

    Pen pnRound      = new(Brushes.SandyBrown, 5.225f);

    float startAngle = 270;
    float sweepAngle = 180;

    Rectangle rect   = new Rectangle(25, 33, 222, 150);
    e.Graphics.DrawArc(pen: pnRound, rect, startAngle, sweepAngle);

    Pen pnCharacter  = new(Brushes.Yellow, 5.225F);

    e.Graphics.DrawLine(pnCharacter, new(45, 33), new(140, 33));

    pnCharacter     = new(Brushes.MistyRose, 8.458F);

    // Updating a pen with a new color from a brush
    pnRound         = new(Brushes.Salmon, 8.458F);
    rect            = new Rectangle(73, 183, 212, 168);
    e.Graphics.DrawArc(pen: pnRound, rect, startAngle, sweepAngle);

    e.Graphics.DrawLine(pnCharacter, new(52, 182), new(200, 182));

    pnCharacter     = new(Brushes.Wheat, 10.449F);

    e.Graphics.DrawLine(pnCharacter, new(45, 350), new(180, 350));

    pnCharacter     = new(Brushes.MediumSpringGreen, 15.525f);

    Point ptStart   = new Point(50, 30);
    Point pnEnd     = new Point(50, 355);

    e.Graphics.DrawLine(pnCharacter, ptStart, pnEnd);
}
This would produce:
As you should know already, when creating a pen, you can provide a width for it. If you want to specify the color of the pen using a brush and you want to provide a width with a decimal value, to assist you with this, the Pen class is equipped with a version whose syntax is:
public Pen(System.Drawing.Brush brush, float width);
Adding Borders to a Shape
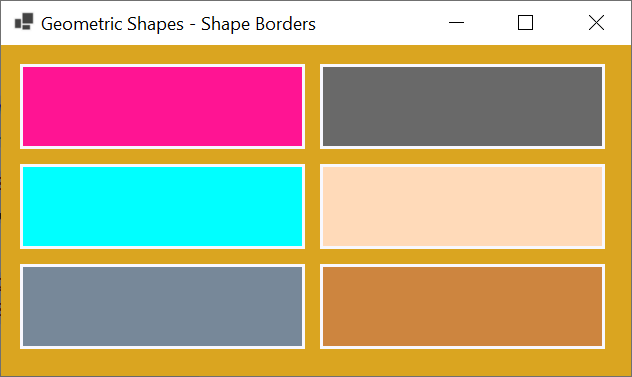
When drawing a shape for which you want to paint the interior, one way to make it fancy is to draw a border around the shape. This can easily be done by calling a Graphics.Draw...() method that uses the same values as the filling method. This can be done as follows:
private void Exercise_Paint(object sender, PaintEventArgs e)
{
    Graphics grapher = e.Graphics;
    BackColor = Color.Goldenrod;

    Pen pnBorder = new Pen(Color.GhostWhite, 2.227F);
    SolidBrush colorizer = new SolidBrush(Color.DeepPink);

    grapher.FillRectangle(colorizer, 20, 20, 282, 82);
    grapher.DrawRectangle(pnBorder, 20, 20, 282, 82);

    colorizer.Color = Color.DimGray;
    grapher.FillRectangle(colorizer, 320, 20, 282, 82);
    grapher.DrawRectangle(pnBorder, 320, 20, 282, 82);

    colorizer.Color = Color.Aqua;
    grapher.FillRectangle(colorizer, 20, 120, 282, 82);
    grapher.DrawRectangle(pnBorder, 20, 120, 282, 82);

    colorizer.Color = Color.PeachPuff;
    grapher.FillRectangle(colorizer, 320, 120, 282, 82);
    grapher.DrawRectangle(pnBorder, 320, 120, 282, 82);

    colorizer.Color = Color.LightSlateGray;
    grapher.FillRectangle(colorizer, 20, 220, 282, 82);
    grapher.DrawRectangle(pnBorder, 20, 220, 282, 82);

    colorizer.Color = Color.Peru;
    grapher.FillRectangle(colorizer, 320, 220, 282, 82);
    grapher.DrawRectangle(pnBorder, 320, 220, 282, 82);

    colorizer.Dispose();
}
This would produce:
A Brush as an Object
Introduction
As you may know already, the .NET Framework provides the Brush class as a generic (abstract) type for brushes, and we saw how to declare a brush variable. In the same way, yo can declare a Brush variable in the body of a class. Here is an example:
public record Painter
{
    Brush brush;
}
We also saw that, since Brush is an abstract class, if you use it to declare a variable, you must initiaze it with a class that derives from Brush, such as SolidBrush.Bitmap class. Here is an example:
public record Painter
{
    Brush brs;

    public Painter()
    {
        brs = new SolidBrush(Color.Black);
    }
}
Producing a Brush
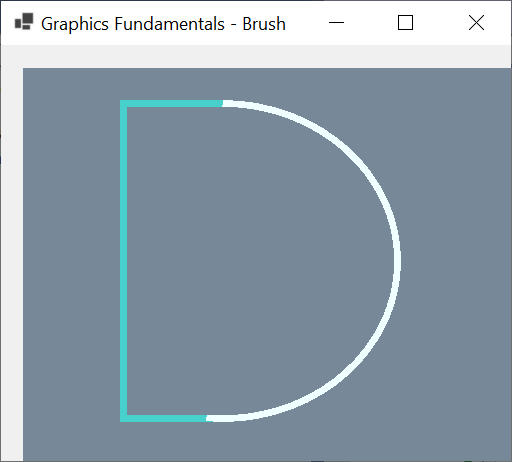
If you have a function or method that creates or manipulates a brush, if you want another procedure to use that brush, you can make the function or method return that brush. You can then call that function or method in another part of your program and get the brush it returns, and then ignore or use that brush. Here are examples of two simple functions that produce brushes:
namespace GraphicsExercises
{
    public partial class Exercise : Form
    {
        public Exercise()
        {
            InitializeComponent();
        }

        Brush Create()
        {
            Pen pn = new(Color.Azure, 1.005F);

            Color clr = pn.Color;

            Brush br = new SolidBrush(clr);

            return br;
        }

        SolidBrush Solidify()
        {
            return new SolidBrush(Color.MediumTurquoise);
        }

        private void Draw(Graphics graph)
        {
            Brush brush = Create();
            Pen pnColor = new(brush, 6.725f);
            float startAngle = 270.00F;
            float sweepAngle = 185.85F;

            Rectangle rect = new Rectangle(24, 35, 350, 315);

            Point[] pts = [ new(200, 35), new(100, 35), new(100, 350), new(200, 350) ];
            graph.DrawLines(new(Solidify(), 6.725f), pts);
            graph.DrawArc(pen: pnColor, rect, startAngle, sweepAngle);
        }

        private void pbxCanvas_Paint(object sender, PaintEventArgs e)
        {
            pbxCanvas.BackColor = Color.LightSlateGray;

            Draw(e.Graphics);
        }
    }
}
This would produce:
A Brush Argument
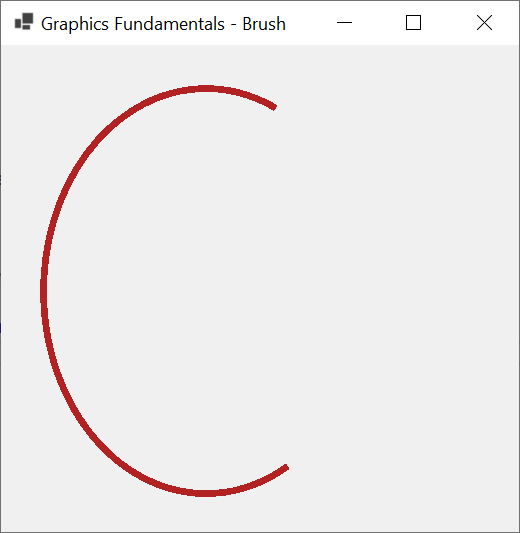
You can create a function or method that takes a brush as argument. In the body of the function or method, you can ignore or use the brush argument. Here is an example:
namespace GraphicsExercise
{
    public partial class Exercise : Form
    {
        public Exercise()
        {
            InitializeComponent();
        }

        private void Draw(Graphics graph, Brush brush)
        {
            Pen pnLiner = new(brush, 6.725f);

            float startAngle = 65.00F;
            float sweepAngle = 225.85F;

            Rectangle rect = new Rectangle(20, 20, 325, 405);
            graph.DrawArc(pen: pnLiner, rect, startAngle, sweepAngle);
        }

        private void pbxCanvas_Paint(object sender, PaintEventArgs e)
        {
            Brush br = new SolidBrush(Color.Firebrick);
            Draw(e.Graphics, br);
        }
    }
}
This would produce:
A Brush Property
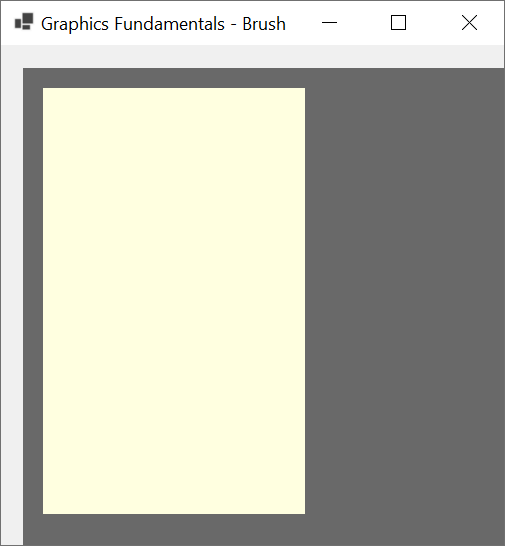
In a class, you can create a property that is a brush. If you want, you can create a complete property, in which case you would start with a private field of type Brush and then create a property of the same type with a get and a set clauses. Such a property can be created and used as follows:
namespace GraphicsExercises
{
    public partial class Exercise : Form
    {
        public Exercise()
        {
            InitializeComponent();
        }

        private void pbxCanvas_Paint(object sender, PaintEventArgs e)
        {
            pbxCanvas.BackColor = Color.DimGray;

            Brush colorizer = Brushes.LightYellow;
            Rectangle rect = new(20, 20, 262, 426);

            Painter paint = new Painter(colorizer, rect);

            paint.Fill(e.Graphics);
        }
    }

    public record Painter
    {
        Brush brs;

        public Painter(Brush brush, Rectangle rect)
        {
            (brs, Rectangle) = (brush, rect);
        }

        public Rectangle Rectangle { get; set; }

        public Brush Applier
        {
            get
            {
                return brs;
            }
            set
            {
                brs = value;
            }
        }

        public void Fill(Graphics graph)
        {
            graph.FillRectangle(brs, Rectangle);
        }
    }
}
This would produce:
If you want a simple property, you can create it as an automatic one.
![]() Practical Learning: Ending the Lesson
Practical Learning: Ending the Lesson
|
|
|||
| Previous | Copyright © 2010-2024, FunctionX | Monday 20 May 2024, 12:25 | Next |
|
|
|||