Options on Drawing Text

Options on Drawing Text
Formatting Text
Introduction
One way to format the appearance of your text is to apply some textual attributes to it. To assist you with this, the .NET Framework provides an enumeration named StringFormatFlags:
[System.Flags]
public enum StringFormatFlags
The StringFormatFlags enumeration contains members from which you can select the format you want. Once you have selected the desired member(s), you can build a format you will apply to your text piece. To assist you in building such a format, the .NET Framework provides a sealed class named StringFormat:
public sealed class StringFormat : MarshalByRefObject, ICloneable, IDisposable
This class is equipped with many constructors, including a default. As a result, you can declare a variable of this class, provide the characteristics you want, and then apply its format to a text piece. One of the constructors of the StringFormat class uses the following constructor:
public StringFormat(System.Drawing.StringFormatFlags options);
This constructor takes one argument as a StringFormatFlags member. If you already have a StringFormat object, that class is equipped with a copy constructor that allows you to pass that object to another StringFormat object. That copy constructor uses the following syntax:
public StringFormat(System.Drawing.StringFormat format);
This StringFormat constructor takes another StringFormat object as argument.
After creating a string format, you can apply it to the text you are trying to draw. To help you do this, the Graphics.DrawString() method comes with additional versions. One of the versions uses the following syntax:
public void DrawString(string? s,
                       System.Drawing.Font font,
                       System.Drawing.Brush brush,
                       float x,
                       float y,
                       System.Drawing.StringFormat? format);
When calling this method, pass the text piece to draw as the first argument, the font information as the second argument, a brush (or color) as the third argument, and the coordinate of the text as the fourth and the fifth arguments. Finally pass a text format as the last argument.
![]() Practical Learning: Introducing .NET Framework Collections
Practical Learning: Introducing .NET Framework Collections
Not Wrapping Text
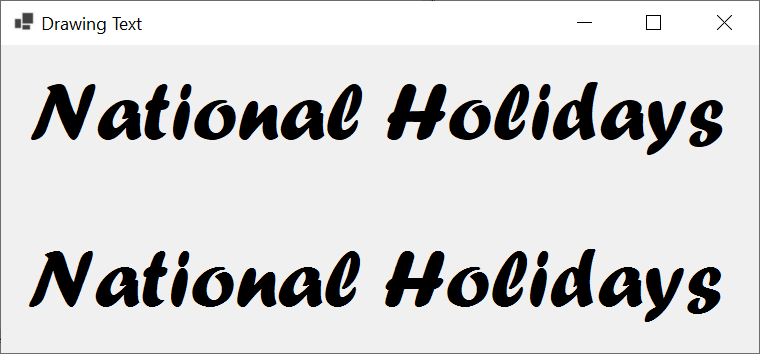
If you are not planning to format the text you want to display, to make this possible, the StringFormatFlags enumeration has a member named NoWrap. Use that member to simply draw a string. Here is an example:
namespace DrawingStrings
{
    public partial class Exercise : Form
    {
        private string? strDisplay = "National Holidays";
        private Font? fntWrite = new Font("Forte", 41.275F, FontStyle.Regular);

        public Exercise()
        {
            InitializeComponent();
        }

        private void Exercise_Load(object sender, EventArgs e)
        {
            Label lblTitle = new Label();

            lblTitle.Text = strDisplay;
            lblTitle.AutoSize = true;
            lblTitle.Location = new Point(12, 22);
            lblTitle.Font = fntWrite;
            Controls.Add(lblTitle);
        }

        private void Exercise_Paint(object sender, PaintEventArgs e)
        {
            StringFormat format = new StringFormat(StringFormatFlags.NoWrap);

            e.Graphics.DrawString(strDisplay, fntWrite!,
                                  Brushes.Black, 12.00F, 108.824F, format);
        }
    }
}
This would produce:
Vertical Text
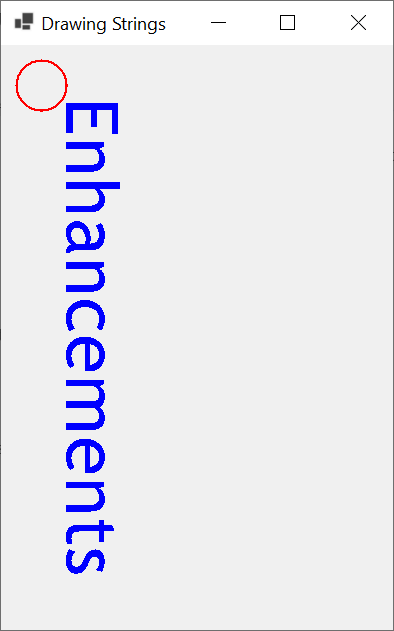
So far, we have displayed our text pieces horizontally. As an alternative, to let you display text Vertically, the StringFormatFlags enumeration is equipped with a member named DirectionVertical. Here is an example of drawing text vertically:
using System.Drawing.Drawing2D;

namespace DrawingStrings
{
    public partial class Exercise : Form
    {
        public Exercise()
        {
            InitializeComponent();
        }

        private void Exercise_Paint(object sender, PaintEventArgs e)
        {
            Graphics graph = e.Graphics;
            PointF origin = new(40.00F, 40.00F);

            StringFormat sf = new StringFormat(StringFormatFlags.DirectionVertical);

            FontFamily family = new FontFamily("Trebuchet MS");
            Font fntWrite = new Font(family, 36.00F, FontStyle.Regular);

            graph.DrawEllipse(new Pen(Color.Red, 2.215F), origin.X - 25, origin.Y - 25, 50, 50);
            graph.DrawString("Enhancements", fntWrite, Brushes.Blue, origin.X, origin.Y, sf);

        }
    }
}
This would produce:
Options on Formatting Drawn Text
Drawing Formatted Text from a Point
In the above examples, we drew the strings from a left and top coordinates. As an alternative, you can provide a point from which to ddraw the text. To assist you with this, the Graphics class provides another version of its DrawString() method. Its syntax is:
public void DrawString(string? s,
                       System.Drawing.Font font,
                       System.Drawing.Brush brush,
                       System.Drawing.PointF point,
                       System.Drawing.StringFormat? format);
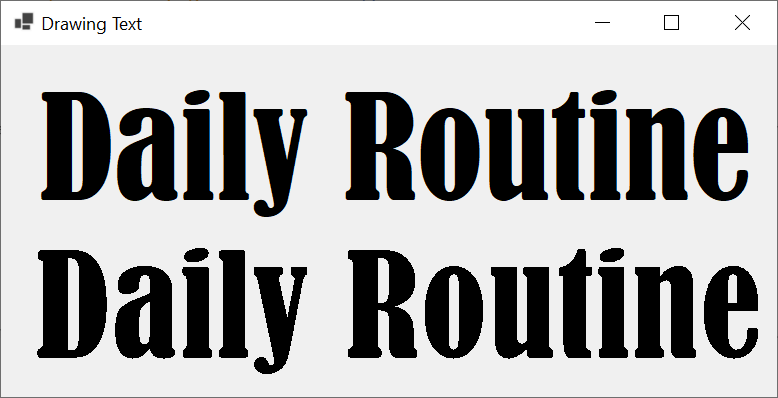
In this case, provide a point as the fourth argument to this method. The values of the point can be integers or dcimal numbers. Here is an example:
namespace DrawingStrings
{
    public partial class Exercise : Form
    {
        private string? strDisplay = "Daily Routine";
        private Font? fntWrite = new Font("Bernard MT Condensed", 36.327F, FontStyle.Regular);

        public Exercise()
        {
            InitializeComponent();
        }

        private void Exercise_Load(object sender, EventArgs e)
        {
            Label lblTitle = new Label();

            lblTitle.Text = strDisplay;
            lblTitle.AutoSize = true;
            lblTitle.Location = new Point(12, 22);
            lblTitle.Font = fntWrite;
            Controls.Add(lblTitle);
        }

        private void Exercise_Paint(object sender, PaintEventArgs e)
        {
            Point        ptCoordinate = new(12, 180);
            StringFormat format       = new StringFormat(StringFormatFlags.NoWrap);

            e.Graphics.DrawString(strDisplay, fntWrite!,
                                  Brushes.Black, ptCoordinate, format);
        }
    }
}
This would produce:
A String from an Array
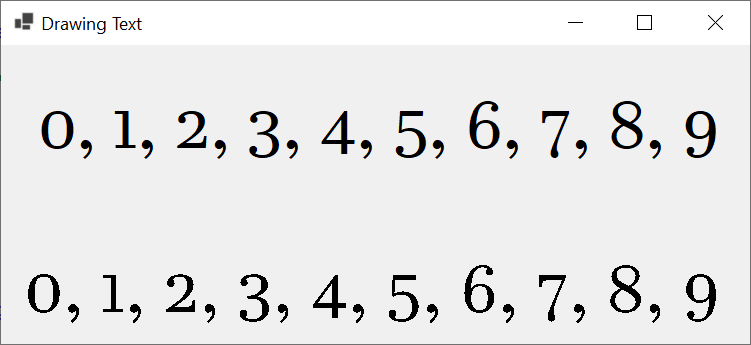
As seen in out introduction to drawing strings, you can use an array of characters and draw a string from it. If you want to apply a format to that text, to assist you, the Graphics class provides another version of its DrawString() method with the following syntax:
public void DrawString(ReadOnlySpan<char> s,
                       System.Drawing.Font font,
                       System.Drawing.Brush brush,
                       float x,
                       float y,
                       System.Drawing.StringFormat? format);
If you decide to use this method, you can use any of the techniques we reviewed in the previous lesson. This means that you can first declare an array of variable and then pass it as the argument to a ReadOnlySpan<char> constructor. You can also create the array directly in the parentheses of the ReadOnlySpan<char> constructor. You can then pass the ReadOnlySpan<char> variable as the first argument to the above Graphics.DrawString() method. Here is an example:
namespace DrawingStrings
{
    public partial class Exercise : Form
    {
        private            Font?      fntWrite;
        private readonly   FontFamily family    = new FontFamily("Javanese Text");

        public Exercise()
        {
            InitializeComponent();
        }

        private void Exercise_Load(object sender, EventArgs e)
        {
            Label lblTitle = new Label();
            fntWrite  = new Font(family, 32.858F, FontStyle.Regular);
            ReadOnlySpan<char> rosDigits =
                new ReadOnlySpan<char>(['0', '1', '2', '3', '4', '5', '6', '7', '8', '9']);

            string ? strDigits = string.Empty;

            foreach (char c in rosDigits)
            {
                strDigits += c + ", ";
            }

            strDigits = strDigits.Substring(0, strDigits.Length - 2);
            lblTitle.Text = strDigits;
            lblTitle.AutoSize = true;
            lblTitle.Location = new Point(12, 20);
            lblTitle.Font = fntWrite;
            Controls.Add(lblTitle);
        }

        private void Exercise_Paint(object sender, PaintEventArgs e)
        {
            Graphics graph = e.Graphics;
            PointF origin = new(12.002F, 114.279F);
            fntWrite = new Font(family, 32.858F, FontStyle.Regular);
            ReadOnlySpan<char> rosDigits =
                new ReadOnlySpan<char>([ '0', '1', '2', '3', '4', '5', '6', '7', '8', '9' ]);

            string? strDigits = string.Empty;

            foreach (char c in rosDigits)
            {
                strDigits += c + ", ";
            }

            strDigits = strDigits.Substring(0, strDigits.Length - 2);

            StringFormat sf = new StringFormat(StringFormatFlags.NoWrap);
            graph.DrawString(strDigits, fntWrite, Brushes.Black, origin.X, origin.Y, sf);
        }
    }
}
This would produce:
As a last alternative, you can create a ReadOnlySpan<char> object directly in the parentheses of the above Graphics.DrawString() method.
A Flag for a Format
Introduction
To support text formatting, the StringFormat class is equipped with a property named FormatFlags:
public System.Drawing.StringFormatFlags FormatFlags { get; set; }
This is a read-write property that allows you specify the format to apply to a string format. Here is an example that uses that property:
private void Exercise_Paint(object sender, PaintEventArgs e)
{
Graphics graph = e.Graphics;
PointF origin = new(400.00F, 40.00F);
StringFormat sf = new StringFormat();
FontFamily family = new FontFamily("Alien Encounters");
Font fntWrite = new Font(family, 46.414F, FontStyle.Regular);
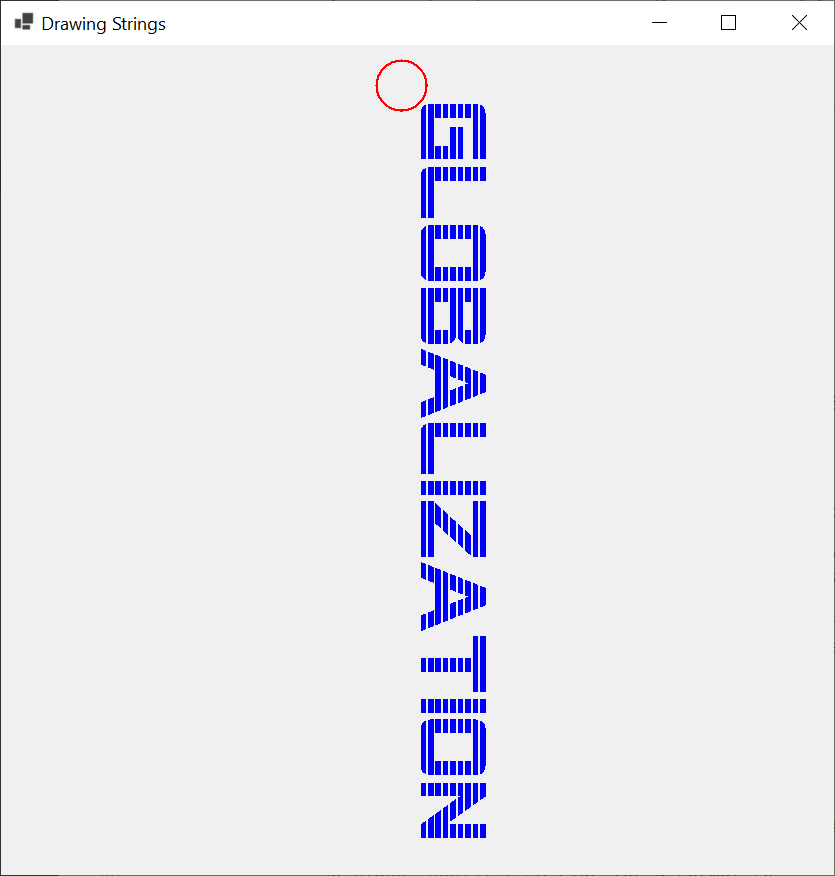
sf.FormatFlags = StringFormatFlags.DirectionVertical;
graph.DrawEllipse(new Pen(Color.Red, 2.215F), origin.X - 25, origin.Y - 25, 50, 50);
graph.DrawString("Globalization", fntWrite, Brushes.Blue, origin.X, origin.Y, sf);
}
This would produce:
Displaying Text on the Right
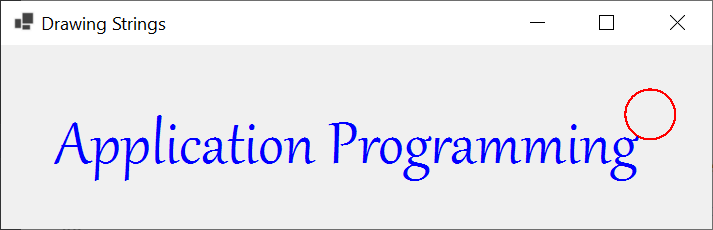
When you are drawing text and specify the origin from where to start drawing, by default, the compiler draws that text from that origin to the right direction until either the whole text has been drawn or the right border of the text holder has been reached. Such text is said to be aligned from the left side. As an alternative, you may want to align your text to the right side. To support this, the StringFormatFlags enumeration has a member named DirectionRightToLeft. With this member, text would still appear as provided, the last character would allow with the right border provided, and the rest of the text would keep displaying to the left side. Here is an example:
private void Exercise_Paint(object sender, PaintEventArgs e)
{
    Graphics graph = e.Graphics;
    PointF origin = new(648.724F, 68.824F);

    StringFormat sf = new StringFormat(StringFormatFlags.DirectionRightToLeft);

    FontFamily family = new FontFamily("Gabriola");
    Font fntWrite = new Font(family, 36.00F, FontStyle.Regular);

    graph.DrawEllipse(new Pen(Color.Red, 2.215F), origin.X - 25, origin.Y - 25, 50, 50);
    graph.DrawString("Application Programming", fntWrite, Brushes.Blue, origin.X, origin.Y, sf);

}
This would produce:
As a result, since the StringFormat.FormatFlags is a read-write property, you can either pass its member to a StringFormat contructor or assign the member to a StringFormat variable.
Aligning Text
Introduction
Consider text as follows:
private void Exercise_Paint(object sender, PaintEventArgs e)
{
    Pen pnRed = new(Color.Red, 1.50F);
    FontFamily fntFamily = new FontFamily("Cooper Black");
    Font fntWrite = new Font(fntFamily, 34.228F);

    StringFormat sf = new StringFormat();

    (float x, float y) = (404.742F, 88.626F);

    e.Graphics.DrawEllipse(pnRed, x - 30, y - 30, 60, 60);
    e.Graphics.DrawString("Atoms and Molecules", fntWrite, Brushes.Blue, x, y);
}
This would produce:
We already know that when we are drawing text, we must specify the point origin from where the compiler will start drawing text. As an alternative, the .NET Framework allows you to use that point as a reference, then specify on what side of that point the compiler should start drawing that text. To support this, the .NET Framework provides an enumeration named StringAlignment:
public enum StringAlignment
This enumeration contains three members. You can select the member you want and ask the compiler to apply it to your text. To support this, the StringFormat class is equipped with a read-write property named Alignment:
public System.Drawing.StringAlignment Alignment { get; set; }
Use this property to select an alignment, then pass the StringFormat object to a Graphics.DrawString() method as we saw already.
Drawing Text Near the Origin
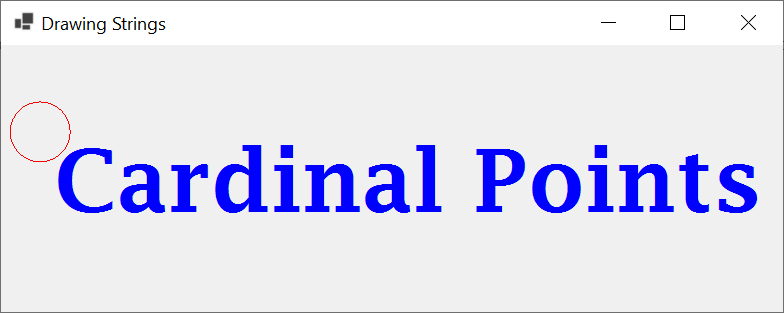
As we have seen so far, to draw text, you must specify the point from which that text will be drawn, and that would be drawn from that point to the right, until the whole text would be drawn. To support this, the StringAlignment enumeration has a member named Near. Here is an example:
private void Exercise_Paint(object sender, PaintEventArgs e)
{
    Pen pnRed = new(Color.Red, 1.50F);
    FontFamily fntFamily = new FontFamily("Lucida Fax");
    Font fntWrite = new Font(fntFamily, 43.548F, FontStyle.Bold);

    StringFormat sf = new StringFormat();
    sf.Alignment = StringAlignment.Near;

    (float x, float y) = (38.639F, 86.369F);

    e.Graphics.DrawEllipse(pnRed, x - 30, y - 30, 60, 60);
    e.Graphics.DrawString("Cardinal Points", fntWrite, Brushes.Blue, x, y, sf);
}
This would produce:
Aligning Text to the Center
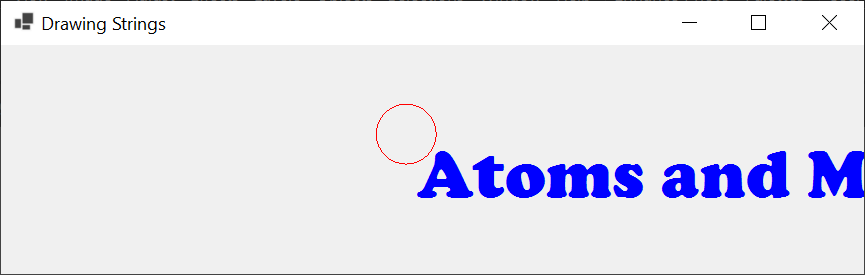
To draw text with reference to a point origin and based on the size of that text, you can ask the compiler to measure the length of that text and center that text to the origin. To support this, the StringAlignment enumeration is equipped with a member named Center. Here is an example of applying it:
private void Exercise_Paint(object sender, PaintEventArgs e)
{
    Pen pnRed = new(Color.Red, 1.50F);
    FontFamily fntFamily = new FontFamily("Cooper Black");
    Font fntWrite = new Font(fntFamily, 34.228F);

    StringFormat sf = new StringFormat();
    sf.Alignment = StringAlignment.Center;

    (float x, float y) = (404.742F, 88.626F);

    e.Graphics.DrawEllipse(pnRed, x - 30, y - 30, 60, 60);
    e.Graphics.DrawString("Atoms and Molecules", fntWrite, Brushes.Blue, x, y, sf);
}
This would produce:

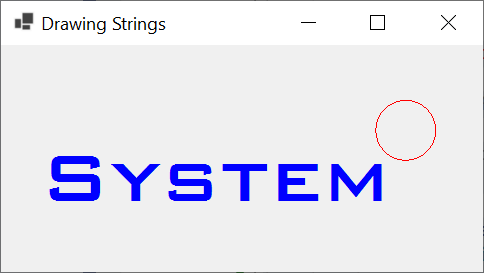
Aligning Text Far from the Origin
Once you have specified the point origin of drawing text, you can specify how to align, which can be to the center as seen in the previous section. As an alternative, you can ask the compiler to align text to the right of the reference point. To make this possible, one of the members of the StringAlignment enumeration is named Near. Here is an example of using it:
private void Exercise_Paint(object sender, PaintEventArgs e)
{
    Pen pnRed = new(Color.Red, 1.50F);
    FontFamily fntFamily = new FontFamily("BankGothic Md BT");
    Font fntWrite = new Font(fntFamily, 43.548F);

    StringFormat sf = new StringFormat();
    sf.Alignment = StringAlignment.Far;

    (float x, float y) = (404.242F, 84.827F);

    e.Graphics.DrawEllipse(pnRed, x - 30, y - 30, 60, 60);
    e.Graphics.DrawString("Immune System", fntWrite, Brushes.Blue, x, y, sf);
}
This would produce:
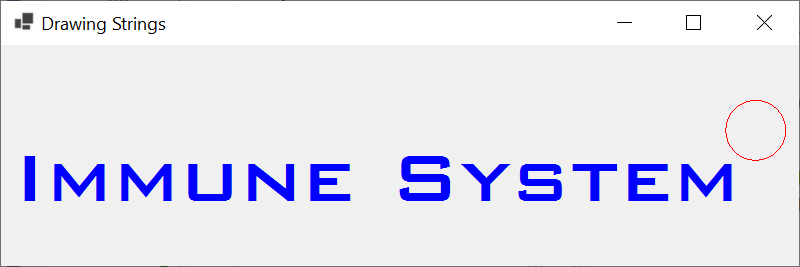
As you can see, if part of your text is hidden but you want the user to see the whole text, you should provide an appropriate point origin. Here is an example:
private void Exercise_Paint(object sender, PaintEventArgs e)
{
    Pen pnRed = new(Color.Red, 1.50F);
    FontFamily fntFamily = new FontFamily("BankGothic Md BT");
    Font fntWrite = new Font(fntFamily, 43.548F);

    StringFormat sf = new StringFormat();
    sf.Alignment = StringAlignment.Far;

    (float x, float y) = (754.242F, 84.827F);

    e.Graphics.DrawEllipse(pnRed, x - 30, y - 30, 60, 60);
    e.Graphics.DrawString("Immune System", fntWrite, Brushes.Blue, x, y, sf);
}
This would produce:
A Brush to Draw Text
Introduction
So far, we drew our text pieces without caring about their color. In reality, the third argument of every Graphics.DrawString() version is a brush, and it can be almost any type of brush, including a normal color as we have drawn strings so far. This means that you can use practically any of the brush techniques we used in previous lessons.
A Color to Draw Text
So far, we drew our text pieces in a black color. In reality, you can use any of the techniques we used in previous lessons to get colors. If you are using a visual control, such as a label, to display text, to specify its color, in the Properties window for the control, click the ForeColor field, then click the arrow of its combo box. A window with colors would come up. You can then click a color of your choice. You can also specify a color programmatically and assign it to the ForeColor property of the control.
If ou are programmatically drawing text, use any technique we saw in previous lessons to create or select a color. Once you have the color, you can apply it to a brush, then use that brush as the third argument of a Graphics.DrawString() method. Here is an exampple of drawing text in a blue color:
using System.Drawing.Drawing2D;

namespace WindowsControls
{
    public partial class Exercise : Form
    {
        public Exercise()
        {
            InitializeComponent();
        }

        private void Exercise_Load(object sender, EventArgs e)
        {
            Bitmap bmpCanvas = new(pbxCanvas.Width, pbxCanvas.Height);
            Graphics grapher = Graphics.FromImage(bmpCanvas);

            Point[] ptsFrontTriangle = { new( 15, 375), new(165, 100), new(330, 405) };
            Point[] ptsRightFace     = { new(330, 405), new(165, 100), new(585,  20), new(750, 305) };
            Point[] ptsBackLeft      = { new( 15, 375), new(165, 100), new(585,  20), new(435, 295) };
            Point[] ptsBackRight     = { new(435, 295), new(585,  20), new(750, 305) };

            Pen penVisibleLine       = new Pen(Brushes.Black, 6.225F);
            Pen penHiddenLine        = new Pen(Brushes.Silver, 2.525F);
            penHiddenLine.DashStyle  = DashStyle.Dash;

            grapher.DrawLine(penHiddenLine, ptsBackLeft[0].X, ptsBackLeft[0].Y, ptsBackLeft[3].X, ptsBackLeft[3].Y);
            grapher.DrawLine(penHiddenLine, ptsBackLeft[2].X, ptsBackLeft[2].Y, ptsBackLeft[3].X, ptsBackLeft[3].Y);
            grapher.DrawLine(penHiddenLine, ptsBackRight[0].X, ptsBackRight[0].Y, ptsBackRight[2].X, ptsBackRight[2].Y);
            grapher.DrawPolygon(penVisibleLine, ptsFrontTriangle);
            grapher.DrawPolygon(penVisibleLine, ptsRightFace);

            Brush brsTitle = new SolidBrush(Color.Blue);
            Font fntName   = new Font("Bell MT", 32.626F, FontStyle.Bold);
            grapher.DrawString(s: "Triangular Prism", font: fntName, point: new(155, 425), brush: brsTitle);

            pbxCanvas.Image = bmpCanvas;
        }
    }
}
This would produce:
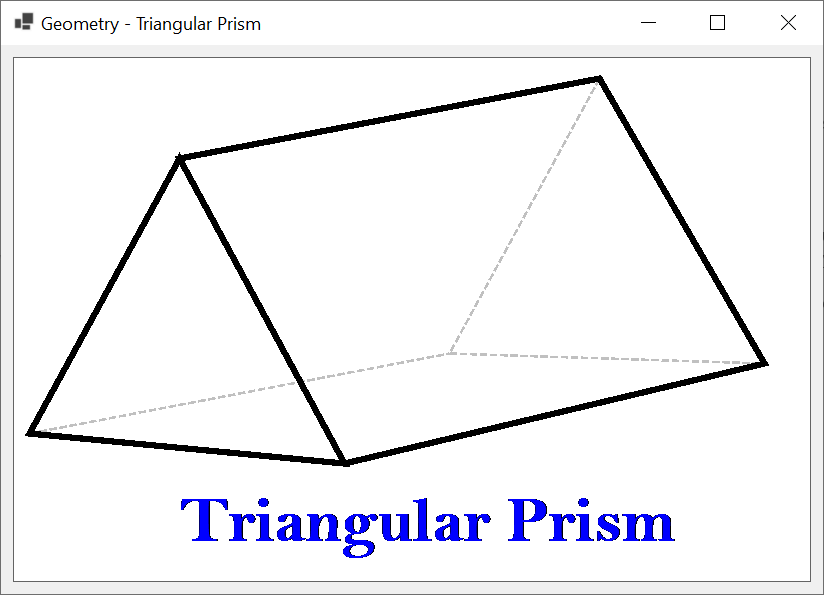
Remember that, in the same way, you can choose or produce a color any way you way using any of the techniques we saw in previous lessons. Once you have the color, you can apply it to your brush and then use that brush to draw text.
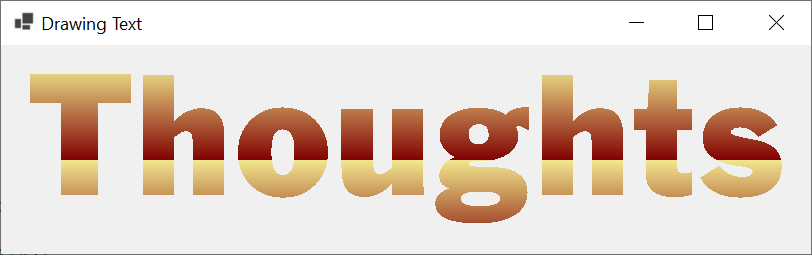
A Linear Gradient Brush to Paint Text
As you may know already, there are various types of brushes, and a linear gradient brush is an object with two colors that can be used as a transition from one side to another side. You can use such a brush to paint the characters of a string. This can be done as follows:
using System.Drawing.Drawing2D;

namespace DrawingStrings
{
    public partial class Exercise : Form
    {
        public Exercise()
        {
            InitializeComponent();
        }

        private void Exercise_Paint(object sender, PaintEventArgs e)
        {
            FontFamily family   = new FontFamily("FrankGoth BT");
            Font       fntWrite = new Font(family, 77.157F, FontStyle.Bold);

            string title = "Thoughts";

            // The confining rectangle of brush painting
            Rectangle rect  = new(20, 20, 755, 95);
            // Create a linear gradient brush
            Brush     brush = new LinearGradientBrush(rect,
                                                      Color.Khaki, Color.Maroon,
                                                      LinearGradientMode.Vertical);
            e.Graphics.DrawString(title, fntWrite, brush, 1.002F, 1.013F);
        }
    }
}
This would produce:
A Hatched Brush to Paint Text
We have already lerned how to use hatched brushes. You can use such a brush to draw text. To proceed, create a hatched brush by specifying its pattern and color. Once the brush is ready, you can pass it to any version of the Graphics.DrawString() method. Here is an example:
using System.Drawing.Drawing2D;

namespace DrawingStrings
{
    public partial class Exercise : Form
    {
        public Exercise()
        {
            InitializeComponent();
        }

        private void Exercise_Paint(object sender, PaintEventArgs e)
        {
            FontFamily family   = new FontFamily("FrankGoth BT");
            Font       fntWrite = new Font(family, 158.664F, FontStyle.Bold);

            string title = "Time";

            Brush brush = new HatchBrush(HatchStyle.Shingle, Color.Yellow);
            e.Graphics.DrawString(title, fntWrite, brush, 2.002F, 2.013F);
        }
    }
}
This would produce:

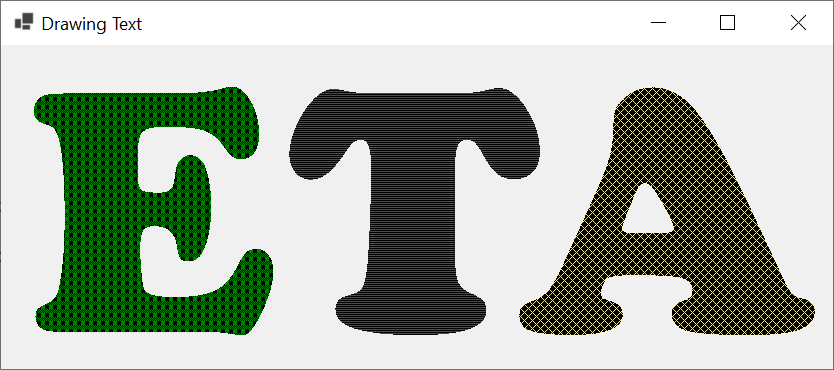
You can also use an aray of characters and draw each item with a brush of your choice. Here is an example:
using System.Drawing.Drawing2D;

namespace DrawingStrings
{
    public partial class Exercise : Form
    {
        public Exercise()
        {
            InitializeComponent();
        }

        private void Exercise_Paint(object sender, PaintEventArgs e)
        {
            ReadOnlySpan<char> eta = [ 'E', 'T', 'A' ];

            FontFamily family   = new FontFamily("Cooper Black");
            Font       fntWrite = new Font(family, 228.664F, FontStyle.Bold);

            Brush brush = new HatchBrush(HatchStyle.Plaid, Color.Green);
            e.Graphics.DrawString(eta[0].ToString(), fntWrite, brush, -32.002F, -42.013F);

            brush = new HatchBrush(HatchStyle.NarrowHorizontal, Color.Red);
            e.Graphics.DrawString(eta[1].ToString(), fntWrite, brush, 228.282F, -42.013F);

            brush = new HatchBrush(HatchStyle.OutlinedDiamond, Color.Khaki);
            e.Graphics.DrawString(eta[2].ToString(), fntWrite, brush, 458.282F, -42.013F);
        }
    }
}
This would produce:
A Picture to Paint Text
To enhance the appearance of text, you can paint it with a picture. To proceed, create a TextureBrush brush with a picture and the characteristics you want, then pass that brush to a version of the Graphics.DrawString() method.
![]() Practical Learning: Ending the Lesson
Practical Learning: Ending the Lesson
|
|
|||
| Previous | Copyright © 2010-2024, FunctionX | Thursday 25 April 2024 | Next |
|
|
|||