Home

Fundamentals of Using a Window


The Mouse


Mouse Position

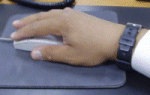
The mouse is one of several pieces of hardware you will be using when interacting with the computer. It works by its pointing on the screen and your judging whether it is pointing or resting on the right item.

A mouse is primarily made of three parts: the buttons, the handling area, and the rolling object. By default, a mouse has two buttons: left and right. Most mice nowadays are also equipped with a wheel on top:

Mouse
Author Note

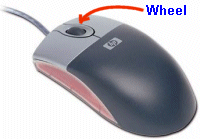
You will usually see the expression "by default" in computer books and web sites. The expression "by default" means "if everything is not (yet) changed from the original or normal settings".

To use the mouse, the first decision you make is to know which of your two hands you will be using to handle the mouse. By default, the mouse is configured to work for the right hand. If you are left-handed, the settings can be changed to suit your needs.


Practical Learning: Introducing the Mouse

  1. (This lesson continues from the previous and we assume that your computer is turned on)
    To find out if you are left or right handed, right-now (assuming both of your hands are free and fine), without thinking, touch the top of your head. If you used your left hand, you are likely left-handed. If you used your right hand, you are likely right-handed.
    If you are right handed, you can continue the lessons.
    If you are left-handed, you may need to first configure your mouse. If you are in a classroom, your teacher can do that for you (Start -> Control Panel; Mouse; Switch Primary And Secondary Buttons:
     

    OK).

  2. If you are right-handed, position the mouse on the right of the keyboard
    If you are left-handed, position the mouse to the left of the keyboard
  3. If you are right-handed, place your right index finger on the left mouse button
    If you are left-handed, place your left index finger on the right mouse button
  4. If you are right-handed, place your (right) middle finger on the right mouse button
    If you are left-handed, place your (left) middle finger on the left mouse button
  5. If you are right-handed, place your right thumb on the left side of the mouse
    If you are left-handed, place your left thumb on the right side of the mouse
  6. If you are right-handed, place your right pinky and ring fingers on the right side of the mouse
    If you are left-handed, place your left pinky and ring fingers on the left side of the mouse


Mouse Cursors

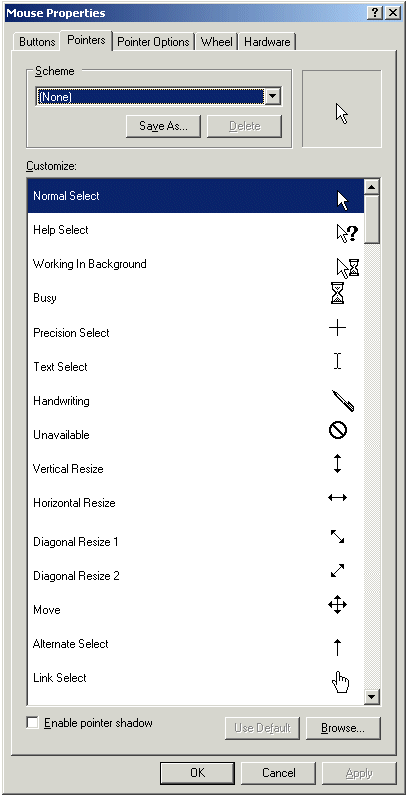
After positioning the mouse to the desired position, the next thing you must do is to locate its presence on the screen. Most of the time, and after a while of practice, you will be more concerned with where your mouse is on the screen as opposed to where your fingers are. This means that the position of the mouse on the screen is very important and you should know it at all times (unless an application, such as a screen saver, is meant to hide it).

To make the position of the mouse known, the computer draws a small picture on the screen. This picture is called a mouse cursor or simply, a cursor.

Author Note

From now on, the word "cursor" always refers to the mouse, always. When we refer to the keyboard, we will use another word but we will never use the word "cursor" when referring to the keyboard. In the same way, the word we will use for the keyboard's presence will never be used for the mouse. Once again, when we use cursor, we mean the mouse.

The most used cursor displays as an arrow pointing to the North-West (in some scenarios of word processing, it will point to the North-East). Because there are various types of operations you will usually be asked to perform, there are other types of cursors. To support the most regular assignments, the computer comes with its own set of cursors:

As mentioned already, the most regularly used cursor is the one with the up-left pointing arrow. The primary object that defines what cursor to use is the computer. In some cases, when performing an assignment, the mouse cursor may change also depending on what you are doing. A programmer (a person who creates a computer program) also is highly in charge of deciding what cursor to display and when. Besides the above cursors, many programs you will use also have their own cursors, in addition to, or instead of, the above.

Mouse Operations: Move

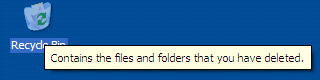
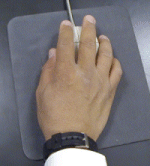
Not all mice function the same, nor do they use the same mechanical functionality, but all accomplish the same purpose. Many mice have a ball in the bottom section; that ball rolls when the mouse moves. Some mice, such as trackballs, have their ball on top and/or they don't exhibit buttons; you would have to grab the ball to do what you want:

Trackball

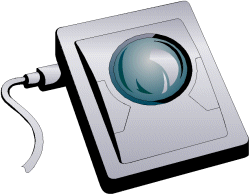
Many of the new mice don't use a ball at all: they use a type of light beam to provide the same functionality as the ball. Laptop computers - Notebooks - use another process to simulate the mouse. They are usually equipped with a small flat area/surface, or, sometimes, a short stick.

One of the actions you can perform with the mouse is to move it. To do this, if you are using a regular mouse, you can physically but slightly push the mouse on the table. If you are using a trackball, you can roll the ball. If you are using a laptop, you can position a finger on the pad, press and hold the finger, then move the pressed finger.

When the mouse rests on certain items on the desktop or on some buttons of some programs, a short word or sentence appears: that's a tool tip.

Practical Learning: Moving the Mouse

  1. Position the mouse on an empty area of the desktop. You see the mouse pointer also called the mouse cursor or simply the cursor
  2. To see a tool tip, position (only position) the mouse on the Recycle Bin icon and see the sentence that appears:
     
 
From now on, unless specified otherwise, the word "Mouse" refers to the mouse pointer or cursor on the screen. For example, if we write, "Position the mouse on Mamma", we mean, "Position or place the mouse cursor on the item identified as Mamma". This means that the word mouse will not anymore refer to the mouse on the table or the pad on the laptop. Unless specified otherwise, the word mouse means the cursor on the screen.
 

Mouse Operations: Click

The mouse is the object you will use the most when interacting with the computer. The mouse is primarily used in one of four actions.

When asked to click, this request always refers to the left mouse button. To perform this action:

  1. Place your index finger (if you are right-handed, this refers to the right hand index finger; if you are left-handed, this refers to the left hand index finger) on the left mouse button
  2. Press the index finger once on the button and release the finger. What you see on the item clicked depends on the type of item. We will view most types of behaviors that occur when the mouse is clicked on an item

Practical Learning: Clicking the Mouse 

  1. Position the mouse on an empty area of the desktop and make sure the mouse pointer is not touching anything else:
     
  2. Place your index finger on the left mouse button and press the mouse button once. This action is called Click 
  3. Notice that nothing happens
  4. Move the mouse and position its cursor on Recycle Bin
  5. Then press the mouse button again once
  6. After clicking, notice that the Recycle Bin icon becomes highlighted. This is also referred to as "selected"
  7. Position the mouse on another item such as Internet Explorer. Then click once
  8. Notice that Recycle Bix is not selected anymore but the new item is now selected or highlighted
  9. Position the mouse on an empty area on the desktop and click
  10. Notice that the previous item that was selected got deselected and now nothing is selected
From now on, unless specified otherwise, if you are asked to CLICK, position the mouse cursor on the item you are asked to CLICK (we will always state or indicate what item you need to click). Then press the left mouse button once.
Remember two things:
1. CLICK always refers to the LEFT MOUSE BUTTON
2. CLICK always means press the left mouse button ONCE
 

Mouse Operations: Double-Click

Another regular action you will perform using the mouse consists of pressing one of its button twice, very fast. This action is referred to as Double-Click. To perform this action:

  1. Position the mouse on an item
  2. Then apply two very fast strokes on the left mouse button. What happens as a result depends on the item on which you performed the action. It may open something. It may select another. Or it may not do anything at all

Practical Learning: Double-Clicking


  1. Position the mouse cursor on Recycle Bin
  2. Then press the left mouse button twice, very fast.
    A rectangular object called a window should open. It it doesn't, repeat the action until a rectangular object displays:
     
  3. To perform double-clicking again, position the mouse cursor on the most upper-left small picture on the rectangular object:
     
  4. Then double-click again
  5. Notice that the rectangular window has disappeared
From now on, unless specified otherwise, if you are asked to DOUBLE-CLICK:
1. Position the mouse cursor on the item you are asked to DOUBLE-CLICK (you will always be indicated what you need to double-click)
2. Then press the left mouse button twice and very fast

Remember two things. Unless indicated otherwise:
1. DOUBLE-CLICK always refers to the LEFT MOUSE BUTTON
2. DOUBLE-CLICK always means press the left mouse button TWICE VERY FAST


Mouse Operations: Drag

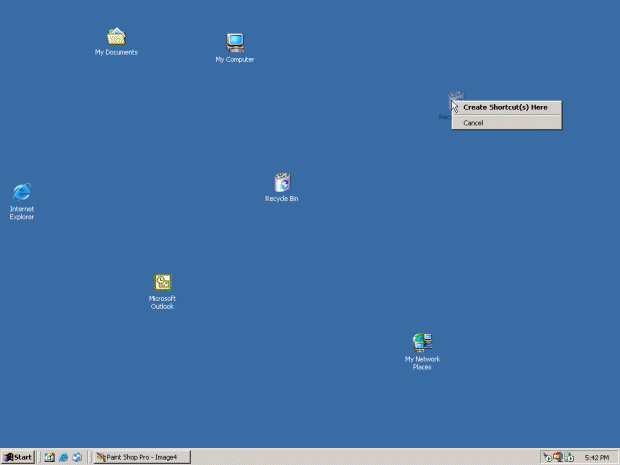
An action that has become popular with the use of the computer now consists of clicking somewhere and moving the mouse while the clicked button is still held down. This action is referred as Dragging. To perform this action:

  1. Position the mouse where indicated (the person or the document asking you to drag will always tell you where to start the action)
  2. Then click and hold your mouse down
  3. Then move the mouse in the indicated direction (you will always be told where to move the mouse)
  4. Once you get to the desired location, release the mouse. That would be the end of the dragging action.

What happens, when you drag, depends on the item you were dragging, whether an item was selected when you were dragging, and what button was pressed when you were dragging.

Practical Learning: Dragging

  1. Position the mouse on Recycle Bin
  2. Click once and hold your mouse button down
  3. While the mouse is still down, move it in the right direction until Recycle Bin is positioned somewhere in the middle center of the desktop
  4. Then release the mouse
  5. Once again, position the mouse on another icon
  6. Click and hold the mouse button down
  7. While the mouse button is still down and the item is selected, move the mouse right and down until the item is not positioned where it was
  8. Then release the mouse
  9. In the same way, drag other items of your screen right, left, up, or down. Your desktop may look like this (I can guaranty your desktop will be different than mine and it can be different than your neighbor's if you are in a classroom, but that's not important):

A Messy Desktop

From now on, unless specified otherwise, if you are asked to DRAG
  1. Position the mouse cursor on the item or the word indicated (you will always be indicated where to start and what to drag)
  2. Then press the left mouse button once and hold it down
  3. Then move the mouse in the direction indicated (the direction, left, right, up, or down will always be given to you)
  4. Once you get to the specified location, item, or word, then release the mouse.

Remember this. Unless indicated otherwise: DRAG always refers to the LEFT MOUSE BUTTON. Sometimes you will be asked to RIGHT-DRAG an item. In this case, perform the same dragging operation but with the right mouse button.


Mouse Operations: Right-Click

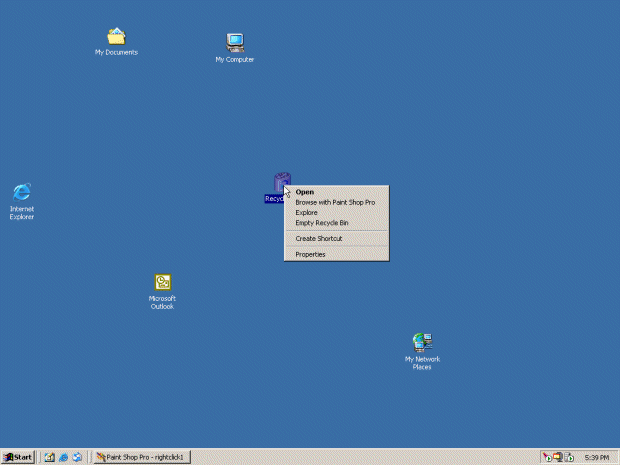
We saw already that the mouse is equipped with two buttons. This is not intended to make it fancy. Each button has a distinct role in the computer. Just like the left mouse button, the right mouse button can be clicked. It can also be double-clicked. It can even be involved in a dragging operation. Clicking the right mouse button of the mouse is referred to as Right-Click. What happens when you click with the right mouse button depends on the item that was clicked and/or sometimes whether the item was selected.

To perform the right-click action:

  1. Position the mouse on the indicated item or word (you will always be indicated what to right-click)
  2. Then press the right mouse button once and release it

Practical Learning: Right-Clicking

  1. Position the mouse pointer on an unoccupied area on the desktop
  2. Position the middle finger (of the hand that is using the mouse) on the right button of the mouse and press it once
  3. Notice that a series of words, referred to as a menu, appears:
     
  4. Position the mouse on the Taskbar. Then click the right mouse button with your middle finger
  5. Notice that a different series of words appears
  6. Position the mouse on Recycle Bin and right-click:
     
  7. Notice the series of words that appears
  8. Click somewhere else to deselect Recycle Bin
  9. Position the mouse on Recycle Bin again and hold your mouse down
  10. While the right mouse button is still held down on Recycle Bin, move the mouse in the right direction to drag
  11. When the item gets to the right section of the desktop, release the mouse:
     
  12. Notice a different series of words
  13. Click an unoccupied area on the desktop
Some applications, namely programs used to manipulate text (they are called word processors), allow you to triple-click. We will review this action when we get to that area of our lessons.
 

The Keyboard


Introduction

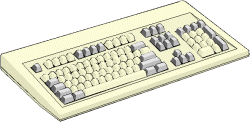
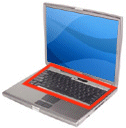
The computer keyboard, commonly called the keyboard, is a semi-flat object that lies on the table in front of the monitor or is the main area of the laptop when the laptop is opened:

A keyboard is equipped with small objects called keys. These keys are the real objects that give meaning to the keyboard. The keyboard is made useful when you press a key and something happens.

The keyboard is made of three main categories of keys. Each category is used for a different purpose. The end-goal is to help your computer experience be as effective as possible. Many companies that manufacture computers equip their keyboards with additional useful keys. For example, this HP keyboard has buttons to increase the volume of your computer and even to get on the internet:

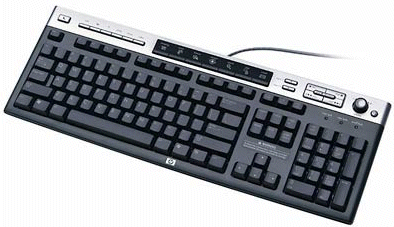
The following description relates only to the QWERTY keyboard used in US English. If you are using a different keyboard layout or language, please consult the documentation that came with it or the MS Windows Help files
 

Key Categories: Character Keys

The first category is made of keys used to display readable characters on the screen. To display a character or to get the equivalent character of a key, you have to press its corresponding key. The keys in this category include:

Letters a, b, c, d, e, f, g, h, i, j, k, l, m, n, o, p, q, r, s, t, v, w, x, y, z
Numbers 0, 1, 2, 3, 4, 5, 6, 7, 8, 9
Symbols
Accent ` Dash - Equal  =
Opening Square Bracket [ Closing Square Bracket ] Backslash  \
Semi-Colon ; Single-Quote '     
Comma , Period . Forward Slash   /

Unlike the mouse, the keyboard shows its presence on the screen only when you are typing (in a text-based document). In that case, the object that shows the presence of the keyboard is called a caret. We will come back to it when we perform word processing. The caret allows you to know what section of the document would receive a letter that you type. If you are typing in a text document, it is very important for you to know at all times where the caret is.

Practical Learning: Typing Readable Characters

  1. To open an application, on the Taskbar, click Start
  2. Position the mouse on Programs or All Programs
  3. Position the mouse on Accessories
  4. Move the mouse down and click Notepad
  5. To experiment with some of these keys, press each of the following keys I N D O W S 9 8
 

Key Categories: Action Keys

A second category of keys are those not used to type anything, instead they cause an action. Some of these special keys are:

 Escape  Tab  Caps Lock  Shift
 Control  Alt   Backspace  Enter
 Windows    Win Menu          
 Insert  Home  Page Up    
 Delete  End  Page Down     
 Up Arrow   Left Arrow   Right Arrow   Down Arrow 
 Space Bar

The letters you typed in the previous section are referred to as lower case or lowercase. To type their equivalent uppercase, first press and hold a Shift key . While the Shift key is down, press the key corresponding to the letter you want. If you wanted to type only one uppercase letter, after typing, you can release Shift. Otherwise, you can keep Shift down and type the desired uppercase letters. At the end, release the Shift key.

If you plan to type a lot of uppercase characters, you can press the Caps Lock key. This causes the keyboard to display a light, usually on the upper-right section of the keyboard of a desktop or the Caps Lock key itself. After typing the uppercase characters, press the Caps Lock again to turn the light off.

Besides being used to type uppercase letters, the Shift key also allows you to access the upper base of the keys that display two of them. Such symbols are:

Tilde  ~ Exclamation Mark  ! At  @ Pound  #
Dollar  $ Percent  % Accent  ^ Ampersand  &
Asterisk  * Opening Parenthesis  ( Closing Parenthesis  ) Underscore  _
Plus  + Opening Curly Bracket  { Closing Curly Bracket  } Colon  :
 

Practical Learning: Using Action Keys

  1. To experiment with some of the action keys, press Home . Notice that the caret is at the beginning of the line of text
  2. With your right pinky finger, press and hold Shift .
  3. With your left pinky, press and release the W key once. That displays w in uppercase
     
  4. Press End and notice that the caret is at the end of the line of text
  5. Press Enter . Notice that the caret has moved to the next line
  6. With your left pinky, press and hold Shift
  7. With your right index, press M and release Shift
  8. Press the following keys in order I C R O S O F T
    This produces Microsoft
  9. Press the up arrow key to move the caret up
  10. Press the left arrow key to move the caret left
  11. Press the left arrow again to position the caret between s and 9
  12. Press the Space bar
  13. Notice that this creates an empty space between Windows and 98
  14. Press End to position the caret at the end of the line
  15. Press the down arrow key and press Enter
  16. Using the letter keys and the Space bar, type world news and report
  17. Press Home and notice that the caret is at the beginning of the line
  18. Press End to position the caret at the end of the line
  19. Press the up arrow key and notice that the cursor is at the end of the Microsoft line
  20. With your left pinky, press and hold the left Ctrl key
  21. While Ctrl is still down, press Home once and release Ctrl
  22. Notice that the caret is at the very beginning of the text
  23. Press and hold the left Ctrl. Then press End once and release Ctrl
  24. Notice that the caret is at the very end of the whole text
From now on, and throughout this web site, unless specified otherwise
  • The words "Click", "Right-Click", "Double-Click", and "Drag" always refer to the mouse. Remember that the word "Click" always refers to the left mouse button (I keep repeating this because I have had my share with students, very frustrating for me: Click is always the left mouse button, not the middle, not the right, always the left, always!!!)
  • The word "Press" always refer to the keyboard
 

Application-Dependant Keys

The third category of keys is mainly subject to programmers' choice. These are called function keys. They are F1, F2, F3, F4, F5, F6, F7, F8, F9, F10, F11, and F12. Although the F1 key is usually used to get help while working in Microsoft Windows, the use of the other keys vary from one application to another. Eventually, the application you use will give you instructions on what to do and how to use the function keys.

Practical Learning: Using Application-Defined Keys

  1. While Notepad is still displaying, press F1
  2. Notice that the Help file opens

Key Combinations

In the Action Keys section, we saw that some keys can be combined to produce uppercase letters or to access the upper symbols of some keys. Keys are also combined for many other reasons. When this site, a book or any other document wants you to combine keys, the request will usually specify how to use/press those keys; this sometimes differs from one book or document to another.

In some situations, you have to press keys simultaneously, which means that you may be expected to press two or more keys at the same time, or almost at the same time. In some other situations, you may have to press and release one key, followed by another.

For our lessons on this site, here are the conventions we will use:

if you are asked to Do this
Press T
  • Press the T key once and release the key (you press and release immediately; you don't hold the key)
Type t
  • Press the T key once and release the key
Press Ctrl + T
  1. Press and hold Ctrl
  2. While you are still holding Ctrl, press the t key
  3. Then release Ctrl
press Ctrl + Alt + Delete
  1. Press and hold Ctrl
  2. While you are still holding Ctrl, press and hold Alt
  3. While you are still holding Ctrl and Alt, press Delete
  4. Then release all keys
press Alt, V
  1. Press and release Alt
  2. Then press and release the v key
Alt, F, C
  1. Press and release Alt
  2. Then press and release F
  3. Finally press and release c
As we move in our lessons, we will review many other combinations of keys for various purposes.
 

Practical Learning: Combining Keys

  1. To use a combination of keys, press Start + Esc
  2. Press P and make sure Programs is highlighted. If Programs is not selected, either press P again, or press the up and/or down arrow keys a few times until the (All) Programs line is highlighted
  3. Press the right arrow key and the down arrow key until Accessories is highlighted
  4. Press the right arrow key and press the down arrow key a few times until WordPad is highlighted
  5. With WordPad selected, press Enter
  6. To access the programs in the background, press and hold Alt
  7. Then press and release Tab
  8. With Alt still down, press Tab a few times until the picture with the yellow question mark is selected
     
  9. Release Tab and Alt
  10. To close the Help file, press Alt + F4
  11. To close WordPad, press Alt, F, X

Shortcuts

A shortcut is a quick action you ask a program to perform when you press one particular key or a combination of keys. Some shortcuts are universal or almost, that is, the computer responds regardless of what application is running. Some other shortcuts depend on what you have on your screen.

When to use a shortcut, you will be directed so. If the shortcut is made of one key, you will be specified the key. If the shortcut is a combination, you will be given the combination as we reviewed them earlier. Whenever you open a menu and decide not to use it anymore, press Esc.

Some shortcuts are already known to the computer (as part of the operating system). Most other shortcuts are set by the programmer of the particular application you are using. Yet some applications allow you to create your own shortcuts. Some shortcuts are readily obvious and can be seen from the main menu of the application. Some other shortcuts are either part of Microsoft Windows (and can be applied in your program) or are not easily displayed, you might have to search the Help documentation of the program you are using.

Practical Learning: Using Shortcuts

  1. To open the Start menu, press Ctrl + Esc
  2. To dismiss it, press Esc
  3. Press Ctrl + Alt + Delete
  4. What comes on your screen depends (on the operating system you are using). To dismiss it, press Esc
  5. If you have any window open, close it
    Press F1, notice that the Help window for the computer comes up
  6. To close the Help file, press Alt + F4
  7. To start WordPad, on the Taskbar, click Start. Position the mouse on Programs or All Programs. Position the mouse on Accessories. Click WordPad
  8. While WordPad is displaying, press F1. Notice that, this time, it is the Help window for WordPad that came up
  9. To close the Help file, press Alt + F4
  10. To close WordPad, press Alt + F4
 

Previous Copyright © 2000-2009-2013 FunctionX, Inc. Next