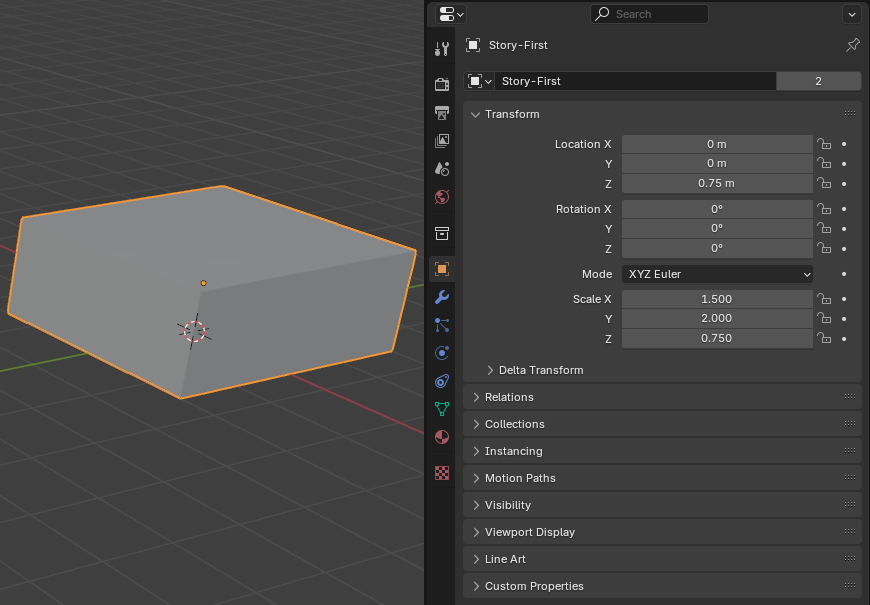
Introducing the Base Level
 Practical Learning: Introducing the Base Level
- Start Blender
- Click the default cube to select it (it should be selected already)
- In the Properties window, click the Object button
 (it should be selected already) to access the primary properties of the cube
- Change the following values:
Name:     Story-First
Location: Z: 0.75
Scale:    X: 1.5
          Y: 2
          Z: 0.75
- On the main menu, click Shading
- On the Shading toolbar click Material to select it
- Type Wall and press Enter
- In the Principled BSDF window, click the right side of Base Color
- Set the RGB values as follows:
Red:   0.375
Green: 0.125
Blue:  0.005
- To edit the building, on the top-main menu of Blender, click Modeling
- Press Ctrl + R to create a loop cut
- Position the mouse on one of the long borders (perpendicular to the X axis). Scroll a little to get two lines
- Click to apply the cuts, and right-click to accept the cuts
- Press S to resize
- Move the mouse slightly away from the cube and click
- In the bottom-left section of the 3D Viewport window, click Resize to expand its window
- In the Resize window, change the scale values as follows:
Scale X: 1
      Y: 2.915
      Z: 1

- Position the mouse on the cube in the 3D Viewport. Press Ctrl + R to create a loop cut
- Position the mouse on one of the short borders. Scroll a little to get two lines
- Click to apply the cuts, and right-click to accept the cuts
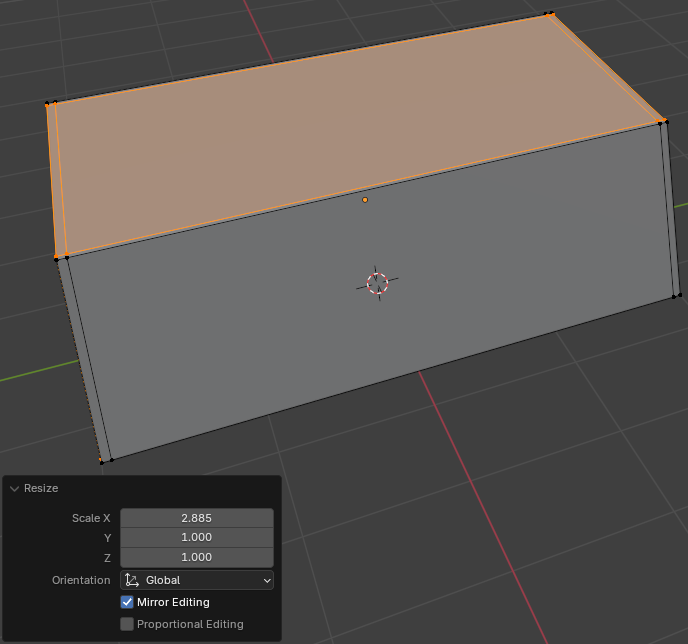
- Press S to resize
- Move the mouse slightly away from the cube and click
- In the Resize window, change the scale values as follows:
Scale X: 2.885
      Y: 1
      Z: 1
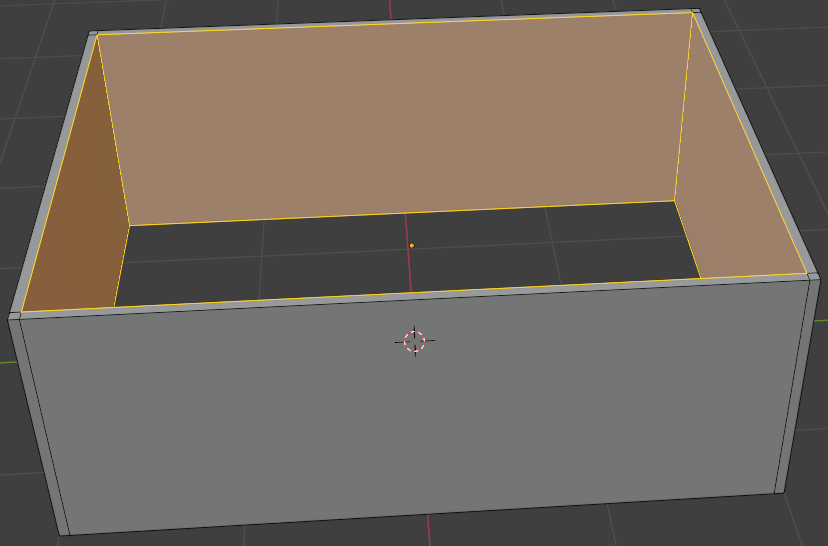
- On the top menu, click the Face button

- Click the top large face to select it
- Click and drag the cube to access the bottom face
- Press and hold Shift
- Click the bottom large face to select it and make sure both the top and the bottom large faces are selected
- Release Shift
- On the menu bar, click Edge -> Bridge Edge Loops
- On the main menu of Blender, click Layout
Modeling a Door Frame
Practical Learning: Modeling a Door Frame
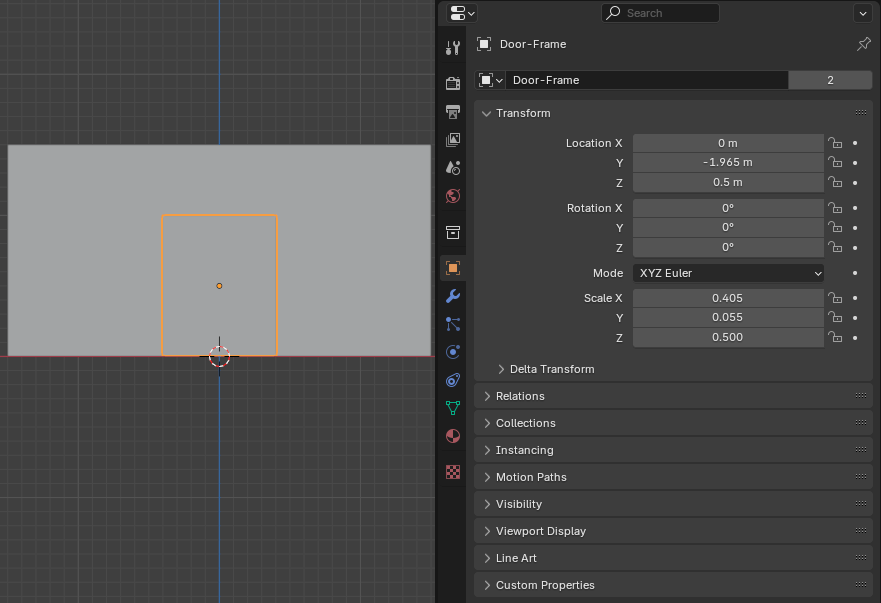
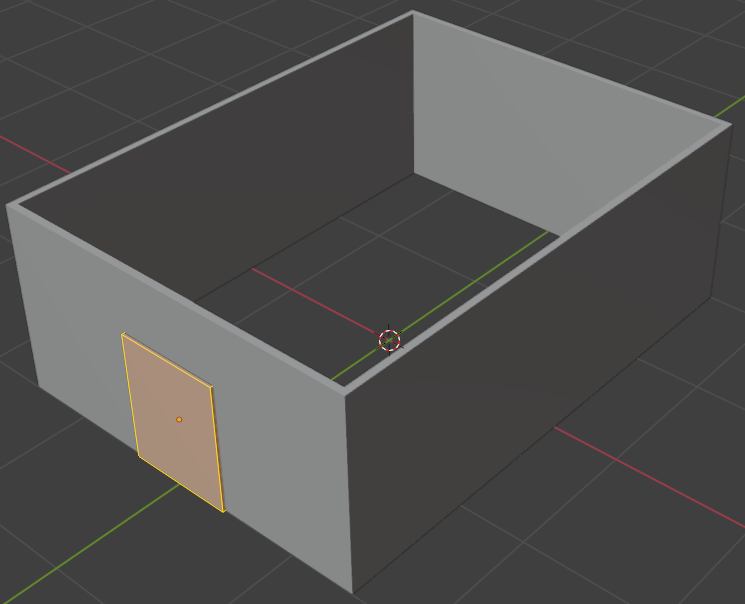
- On the top menu of Blender, click Add -> Mesh -> Cube
- In the Object section of the Properties window, change the following characteristics:
Name:    Door-Frame
Location Y: -1.965
         Z:  0.5
Scale    X:  0.405
         Y:  0.055
         Z:  0.5
- On the main menu, click Modeling
- Position your mouse in the 3D Viewport window. To hide the objects that are not selected, on the numeric pad of the keyboard, press /
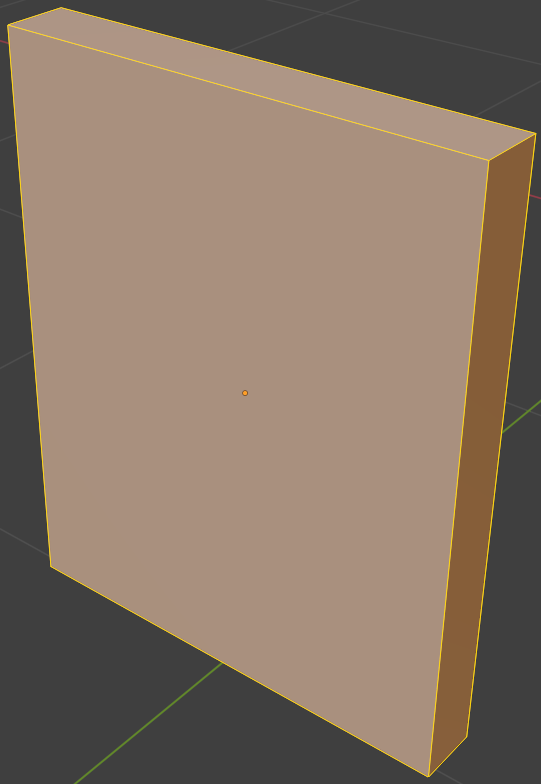
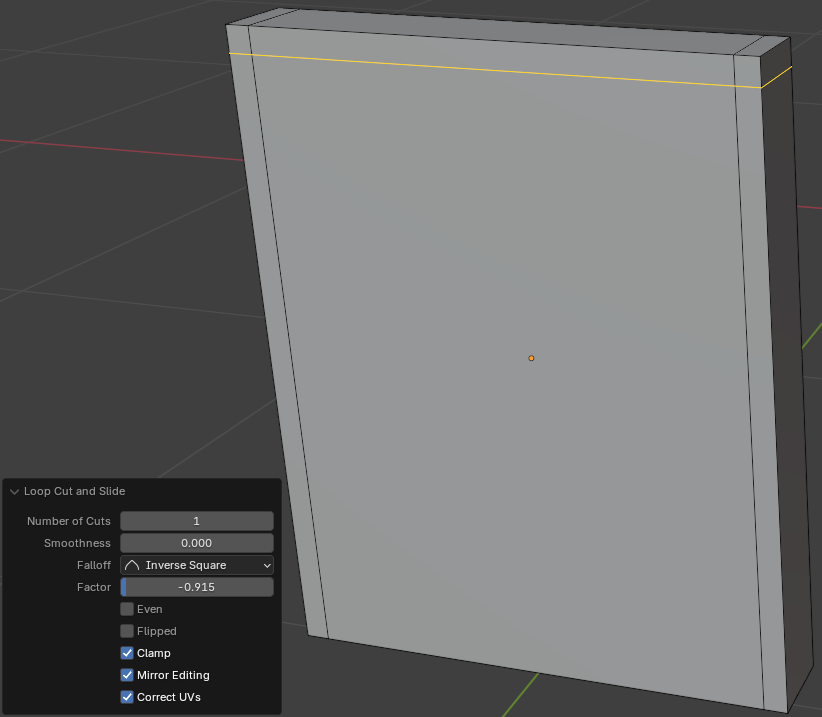
- Position your mouse on the top or the bottom part of the door. Press Ctrl + R to create vertical loop cuts
- Roll the mouse to get two cuts and click twice
- Press S to resize
- Move the mouse away slightly from the door and click
- In the Resize window, change the scale values as follows:
Scale: X: 2.725
       Y: 1
       Z: 1
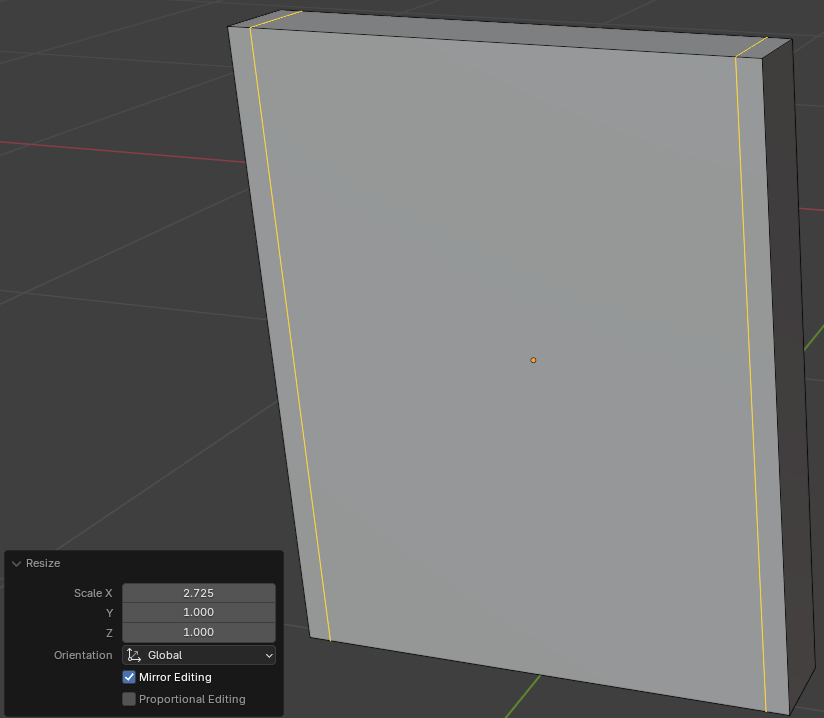
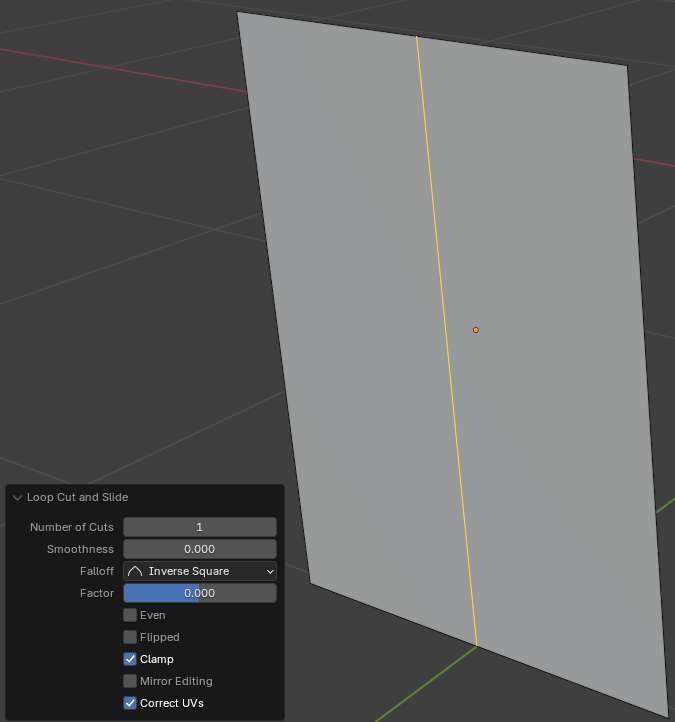
- Position your mouse on the left or the right side of the door. Press Ctrl + R to create a horizontal loop cut
- Click twice
- In the Resize window, change the Factor value to s:
Factor: -0.915
- On the top bar, click the Face button
- Click and drag the Rotate button to view the back of the door
- Click the large back face in the middle of the door to select it

- Right-click anywhere in the 3D Viewport -> Delete Faces
- Click the bottom face in the middle of the door to select it

- Right-click anywhere in the 3D Viewport -> Delete Faces
- Click the other large face in the middle of the door to select it
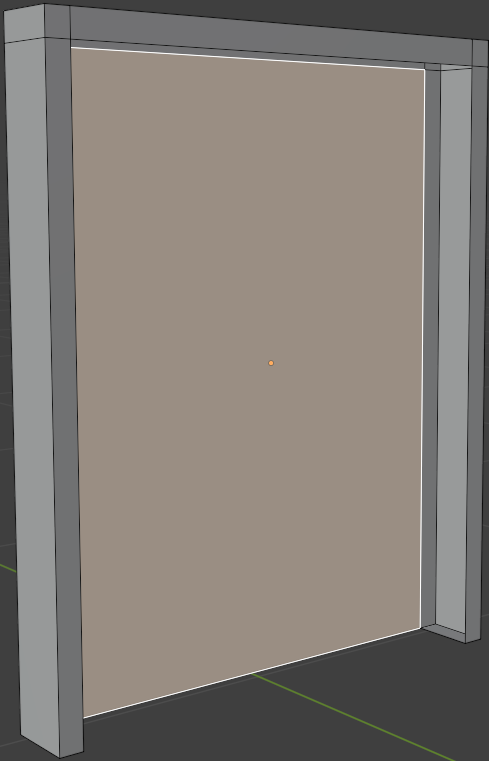
- Right-click anywhere in the 3D Viewport workspace window -> Separate -> Selection

- Position your mouse in the 3D Viewport window. To display the objects that were hidden, on the numeric pad of the keyboard, press /
- On the main menu of Blender, click Layout
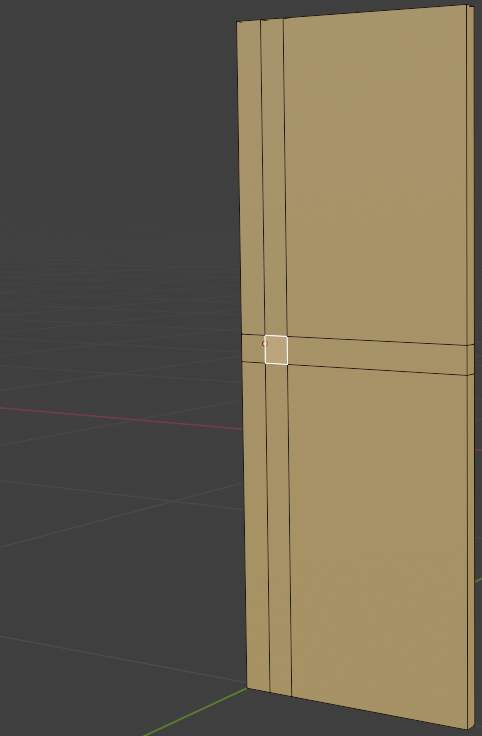
The Door Leaf
Practical Learning: Modeling the Door Leaf
- Click the middle face to select it
- In the Object section of the Properties window, click Door.Frame.001 to select it. Type Door-Leaf and press Enter
- On the main menu, click Shading
- On the Shading toolbar, click the New button
- Click Meterial to select it
- Then type Wood-Light and press Enter
- Click the right side of Base Color
- Set the RGB values as follows:
Red:   0.575
Green: 0.425
Blue:  0.135
- On the main menu of Blender, click Layout
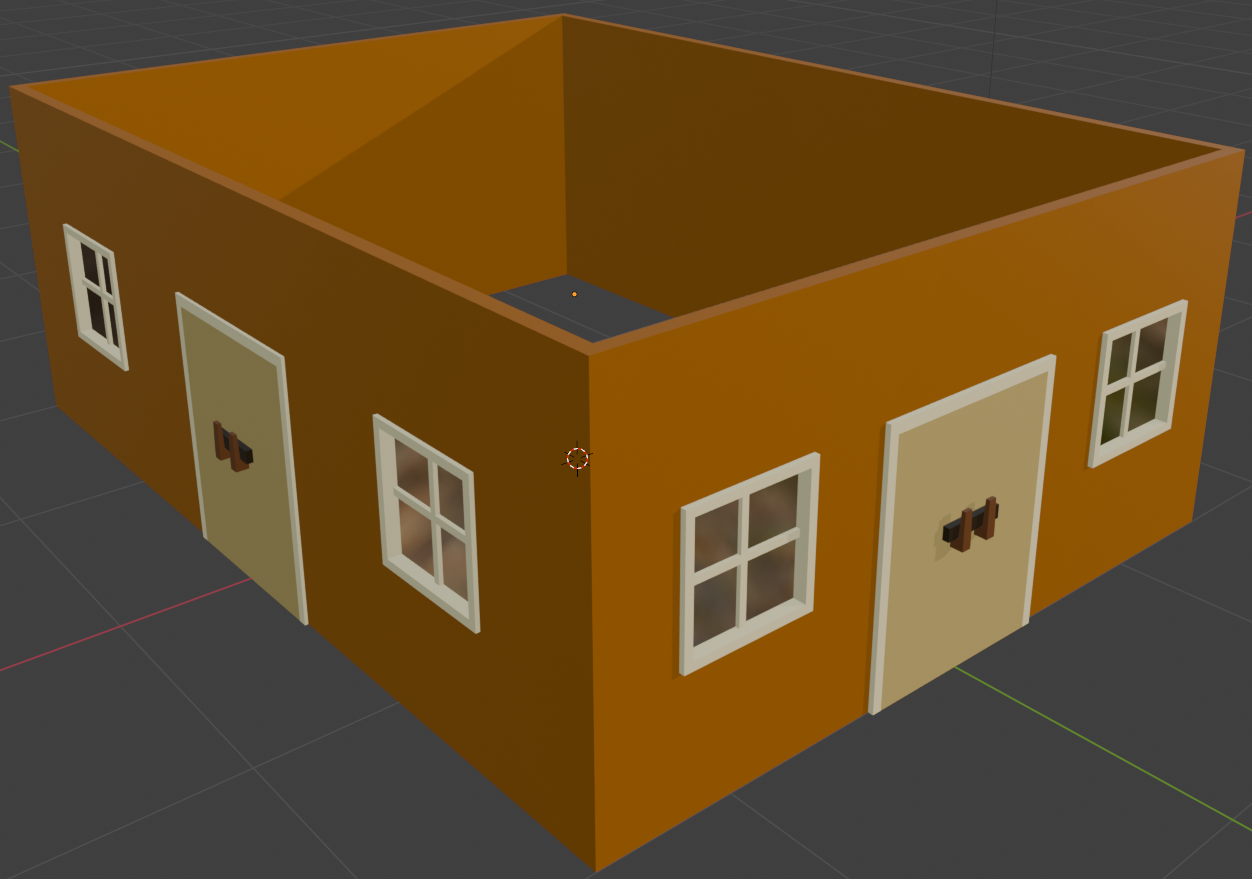
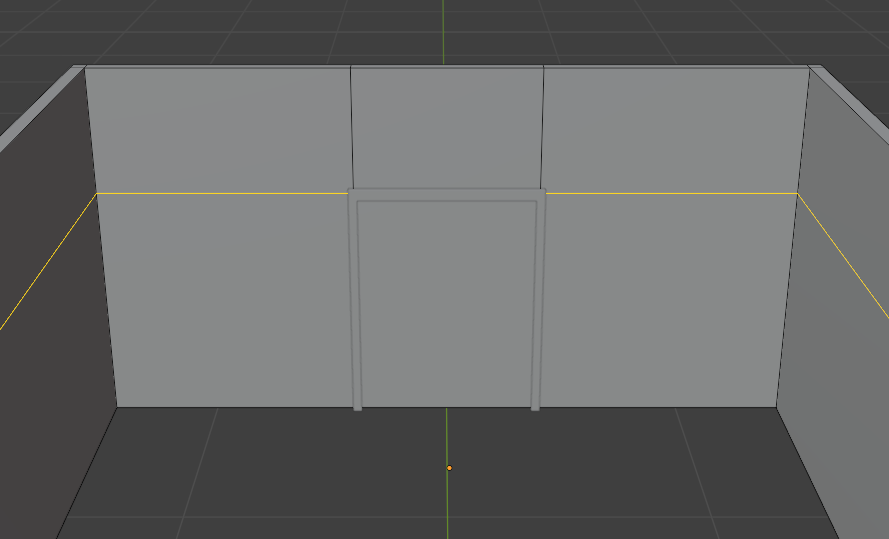
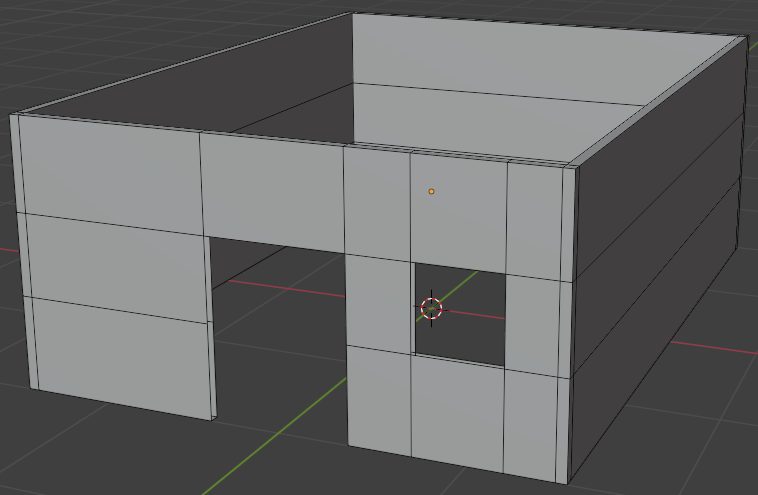
Continuing the Base Building
Practical Learning: Continuing the Base Building
- Click one of the walls of the barn to select it
- On the top-main menu of Blender, click Modeling
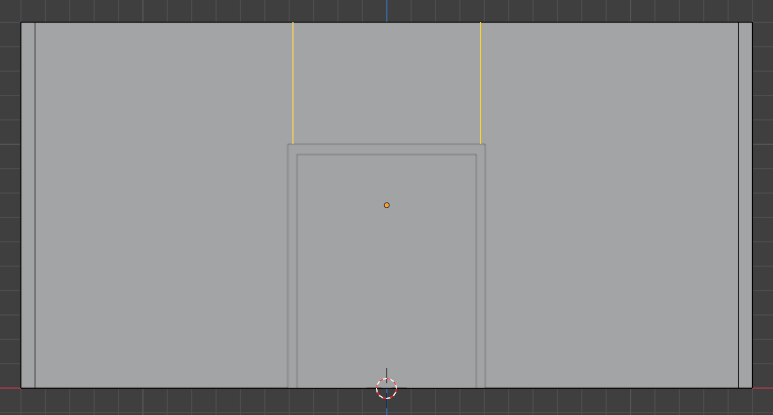
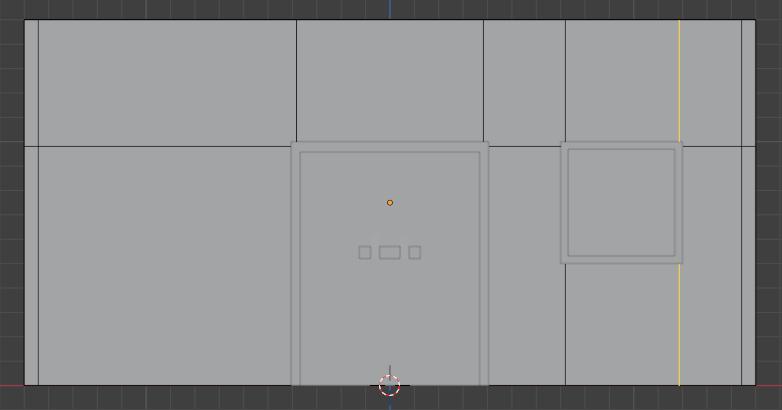
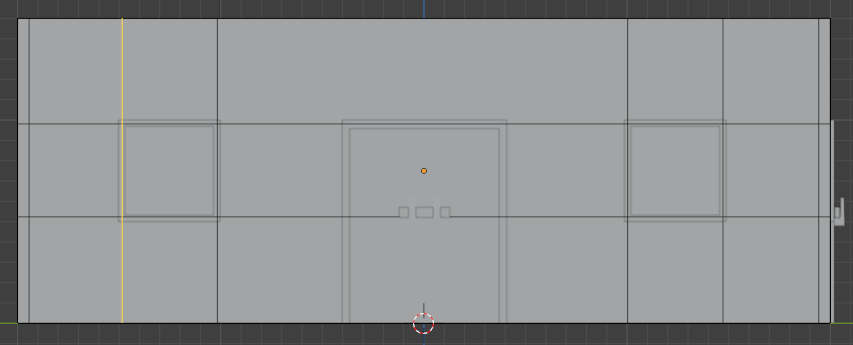
- On the top menu, click View -> Viewpoint -> Front
- Position your mouse on the top or the bottom part of the bottom building. Press Ctrl + R to create vertical loop cuts
- Roll the mouse slightly to get two cuts
- Click to apply the cuts, and right-click to accept the cuts
- Press S, then press X
- Move the mouse towards the door to position the cuts between the horizontal frames of the door
- Then click
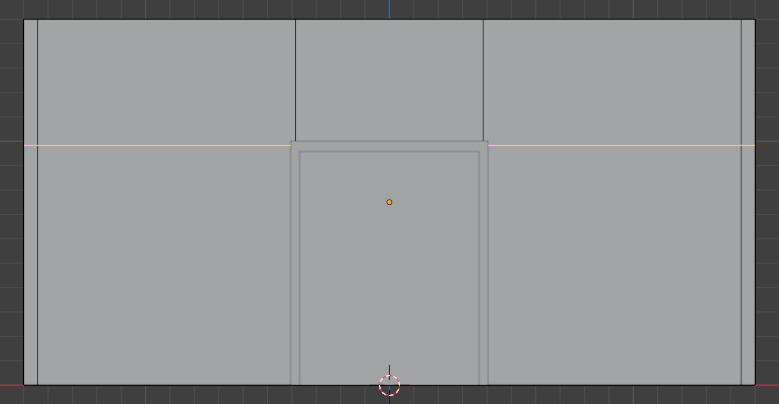
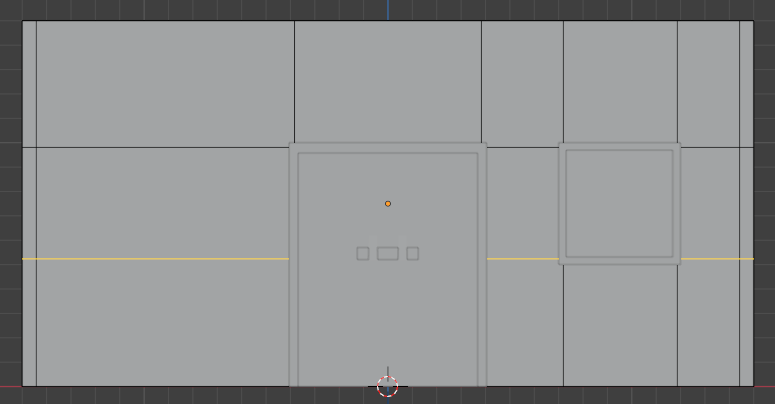
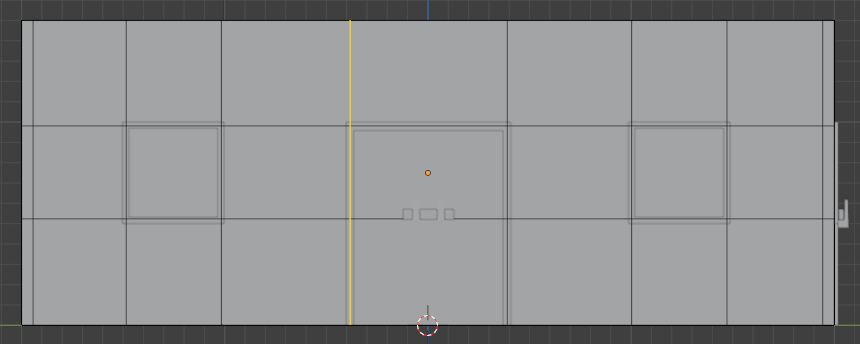
- Position your mouse on the left or the right side of the building. Press Ctrl + R to create a horizontal loop cut
- Click once. Then move the mouse up to position the cut between the horizontal lines of the top frame of the door
- Then click
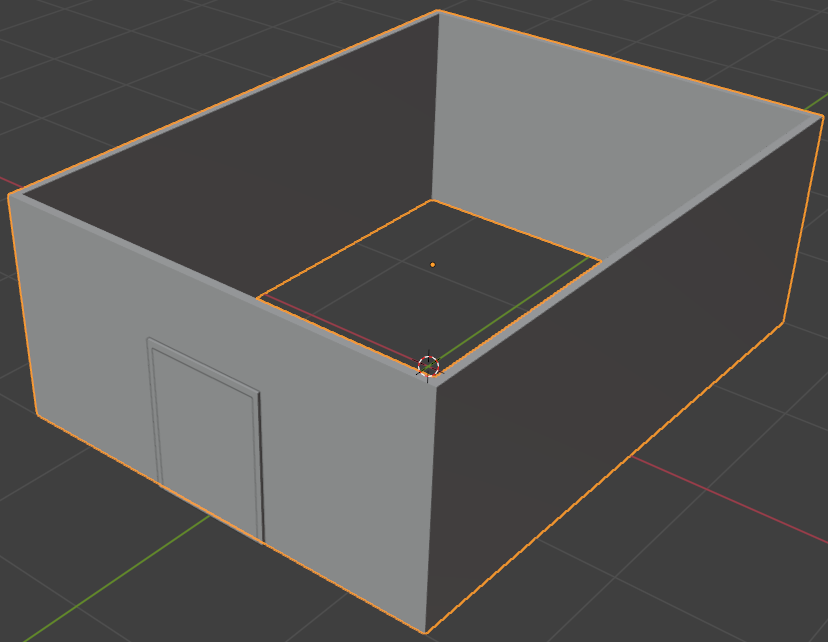
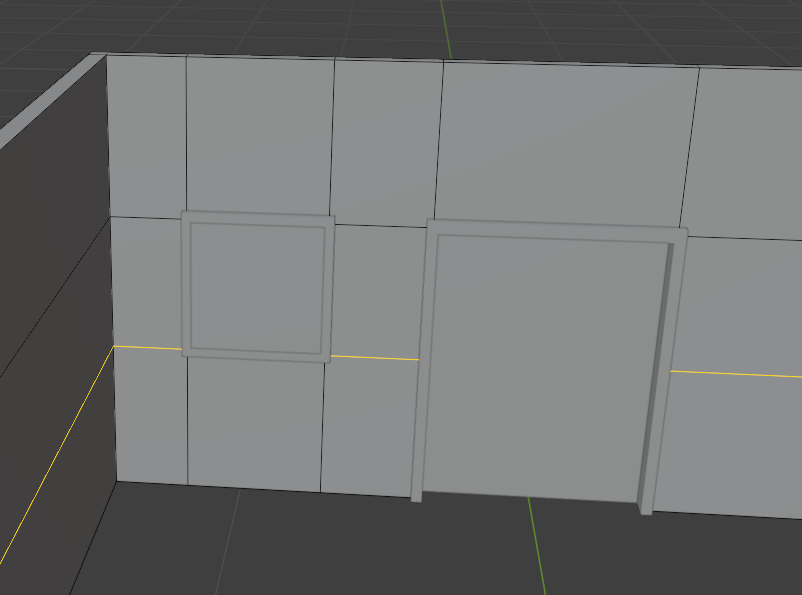
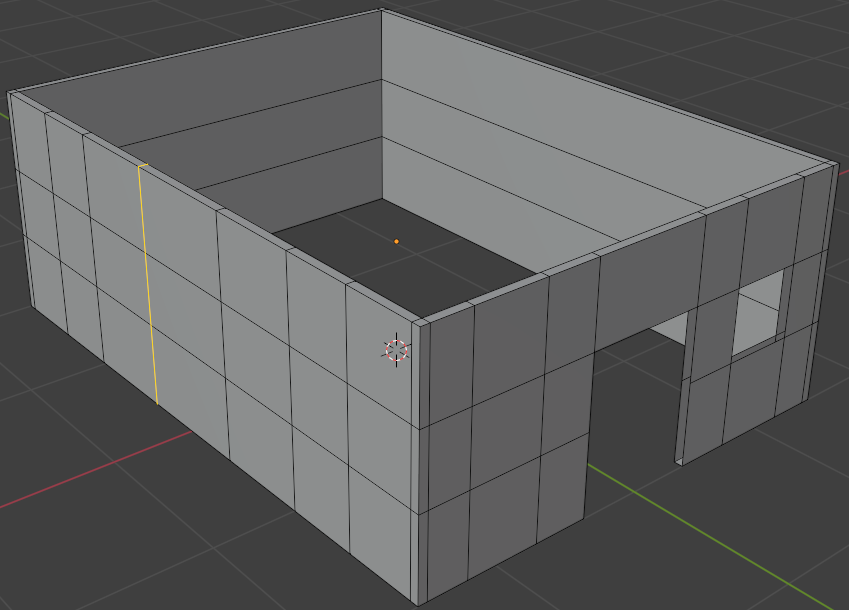
- Click and drag the Rotate button to access the interior of the barn and the back of the door
- Position your mouse on the left or the right side of the interior of the barn. Press Ctrl + R to create a horizontal loop cut
- Click once. Then move the mouse up to position the cut between the horizontal lines of the top frame of the door
- Then click
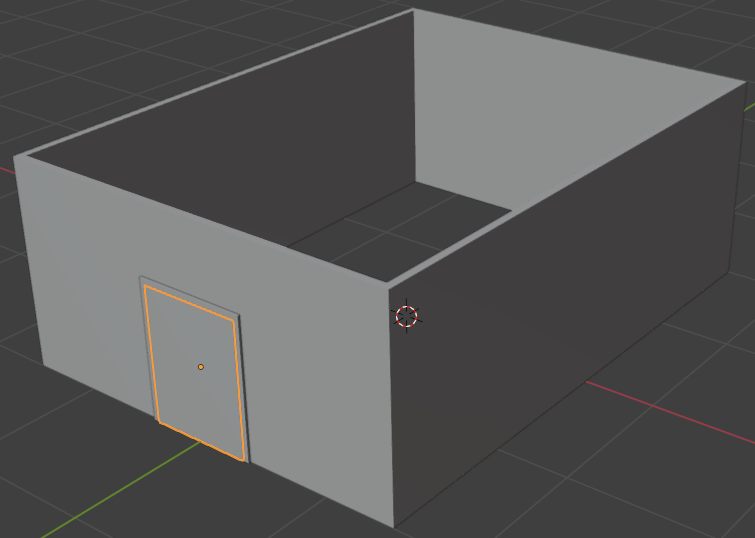
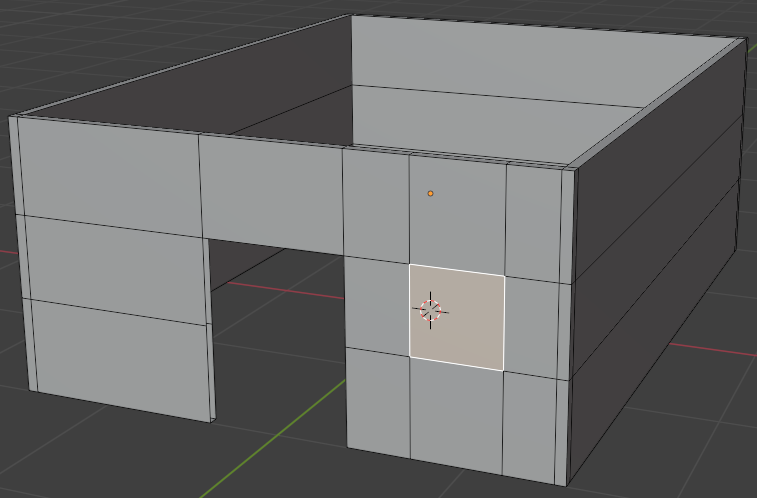
- On the top bar, click the Face button
- Click the face inside the frame of the door to select it
- On your keyboard, press Delete
- On the menu that appears, click Faces
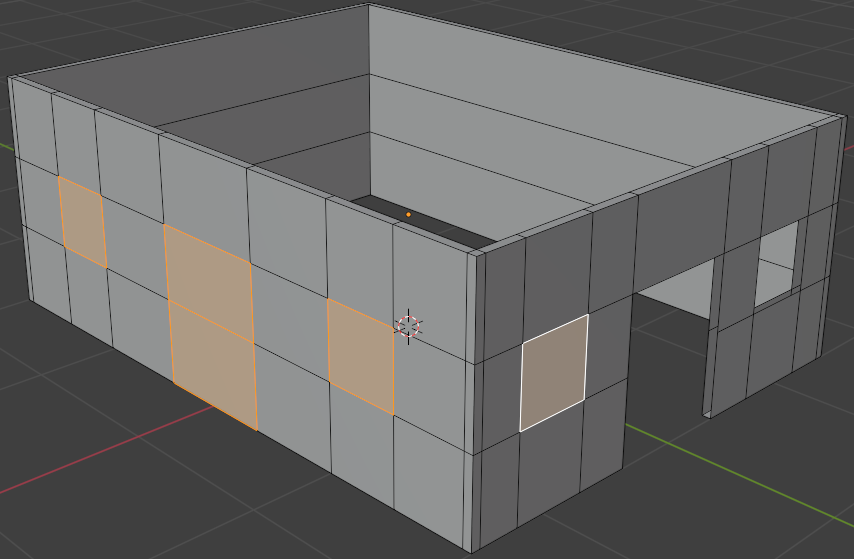
- Click the other face inside the frame of the door to select it
- Right-click anywhere in the 3D Viewport -> Delete Faces
- Click the face on the bottom side between the left and right frames of the door to select it
- Right-click anywhere in the 3D Viewport and click Delete Faces
- On the main menu of Blender, click Layout
Continuing the Door Frame
Practical Learning: Continuing the Door Frame
- Click the door frame to select it
- To continue editing the door, on the main menu of Blender, click Modeling
- Position your mouse in the 3D Viewport window. To display the objects that were hidden, on the numeric pad of the keyboard, press /
- On the top bar, click the Edge button

- On the door, click one of the interior edges of the opening to select it
- On your keyboard, press and hold Shift
- Click each of the interior edges of both openings of the door but don't select the bottom edge of each side
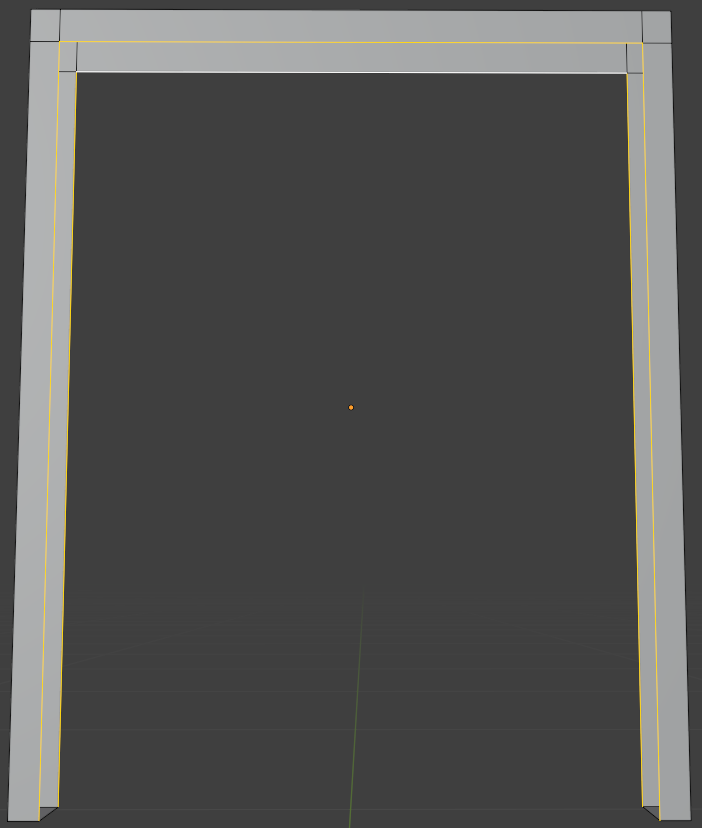
- On the menu bar, click Edge -> Bridge Edge Loops
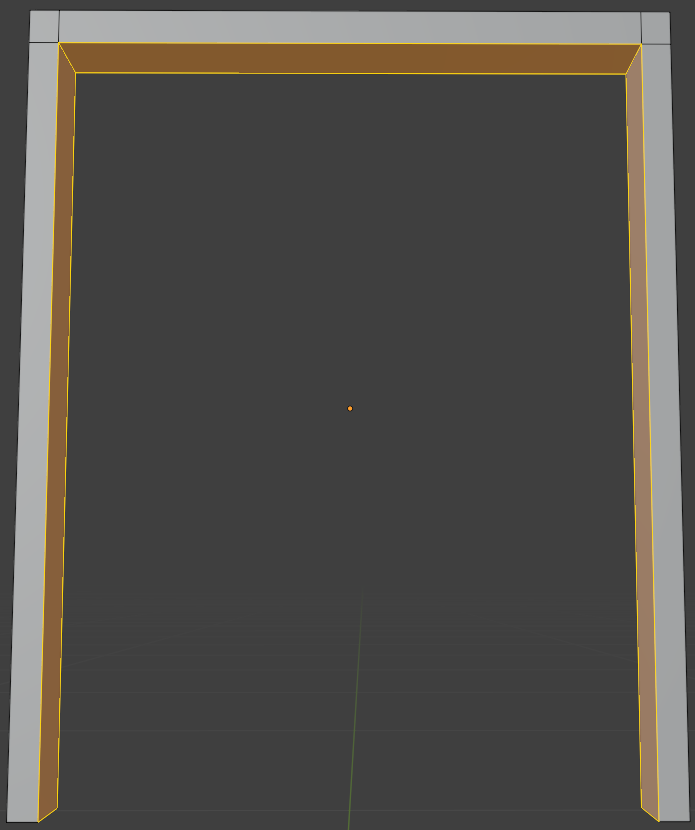
- Position your mouse in the 3D Viewport window. To display the objects that were hidden, on the numeric pad of the keyboard, press /
- On the main menu, click Shading
- On the Shading toolbar, click the New button
- Click Meterial to select it
- Then type Creame and press Enter
- Click the right side of Base Color
- Set the RGB values as follows:
Red:   1
Green: 0.875
Blue:  0.465
- On the main menu of Blender, click Layout
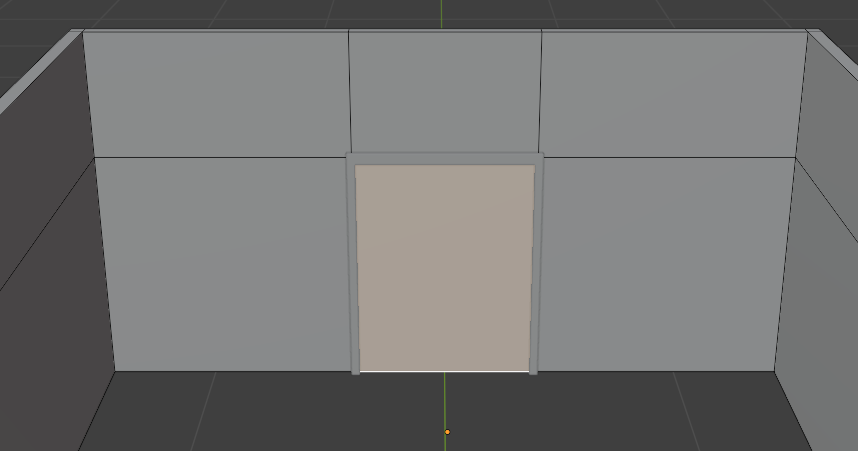
Continuing the Door Face
Practical Learning: Continuing the Door Face
- Click the door face (or door leaf) to select it
- To edit the door, on the main menu of Blender, click Modeling
- Position the mouse on the door. In the numeric pad of the keyboard, press / to hide the other objects
- Click and drag the Rotate button to view the front on the door in perspective
- Press Ctrl + R to create a loop cut
- Position the mouse on the top or the bottom edge and click twice to create a vertical loop cut
- On the top bar, click the Face button
- Click the left side of the vertical line to select the left face
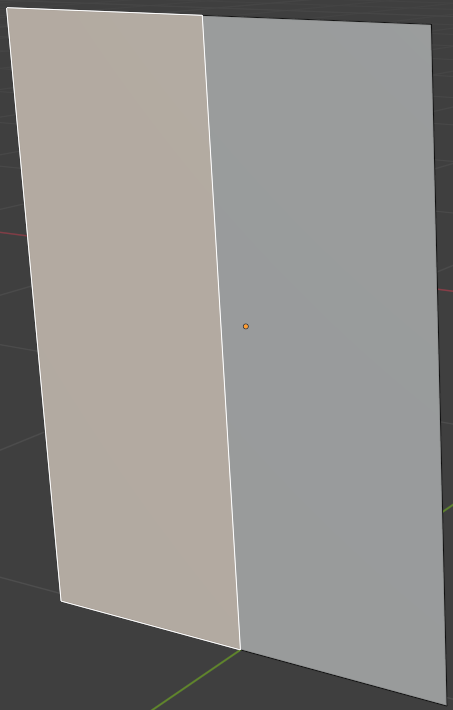
- Press X to delete
- On the menu that appears, click Faces
- On the toolbar of the Properties window, click the Modifiers button

- Click the door face to select it
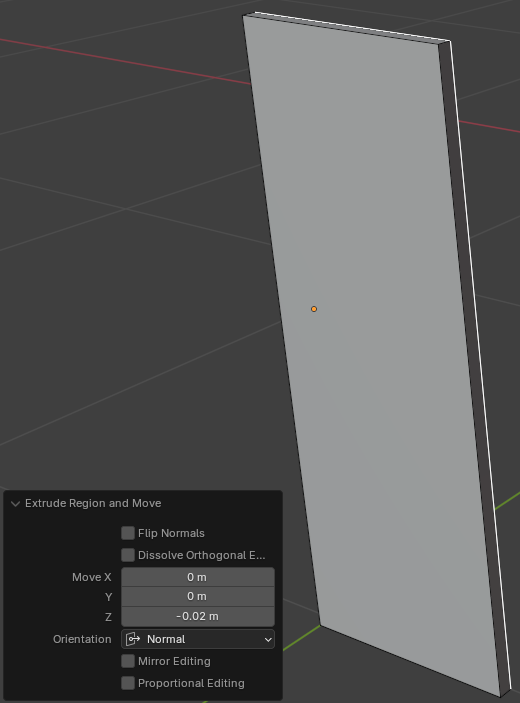
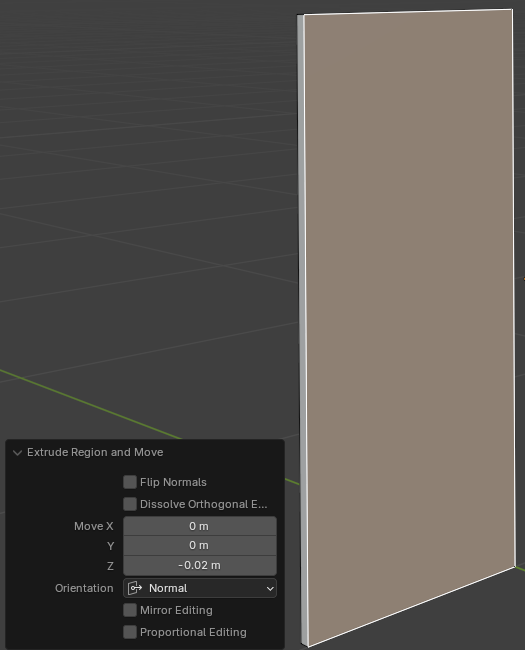
- Press E to extrude and press Enter
- In the Extrude Region and Move window, change the Z value to -0.02:
Move Z: -0.02
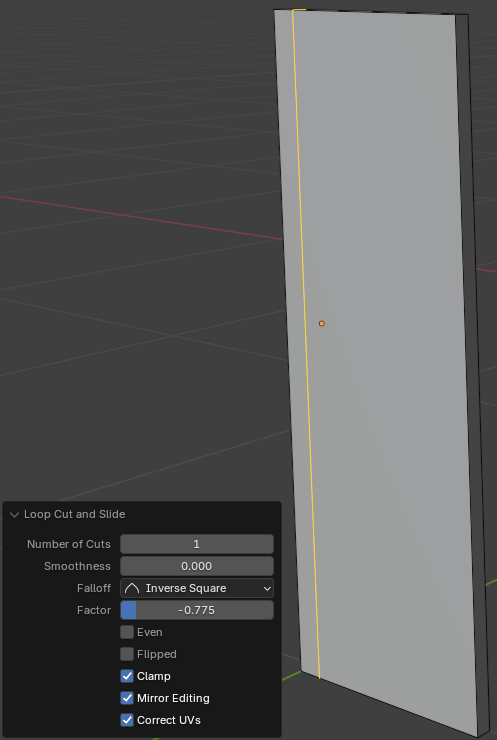
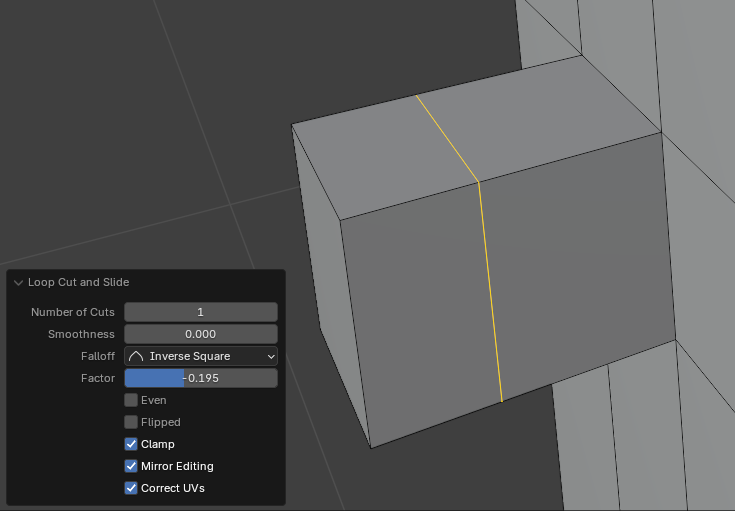
- Position your mouse on the top or the bottom side of the door. Press Ctrl + R to create a vertical loop cut
- Click twice to confirm the loop cut
- In the Loop Cut and Slide window, change the factor value to -0.775:
Factor: -0.775
- Position your mouse on the top or the bottom side of the face. Press Ctrl + R to create a vertical loop cut
- Click twice to confirm the loop cut
- In the Loop Cut and Slide window, change the factor value to -0.765:
Factor: -0.765
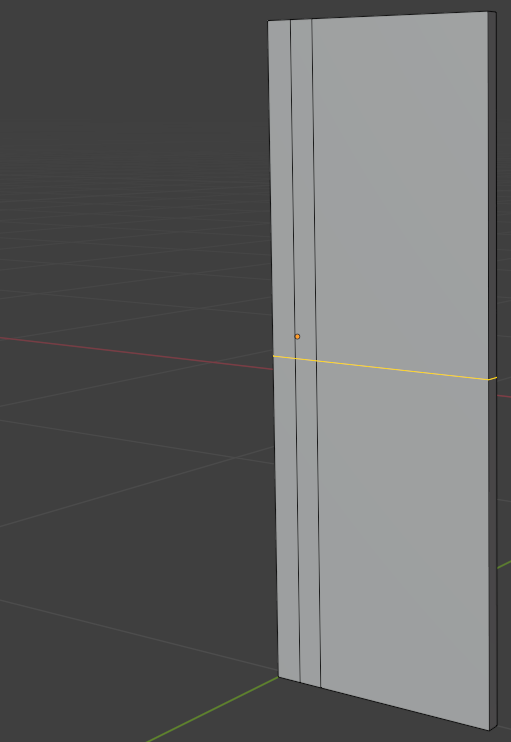
- Position your mouse on the left or the right side of the door leaf. Press Ctrl + R to create a horizontal loop cut
- Click twice to confirm the loop cut
- Position your mouse on the left or the right side of the lower part of the door leaf. Press Ctrl + R to create a horizontal loop cut
- Click twice to confirm the loop cut
- In the Loop Cut and Slide window, change the factor value to -0.775:
Factor: -0.775

- Press Ctrl + R to create a vertical loop cut. Position your mouse on the left or the right side of the door leaf
- Click twice to confirm the loop cut
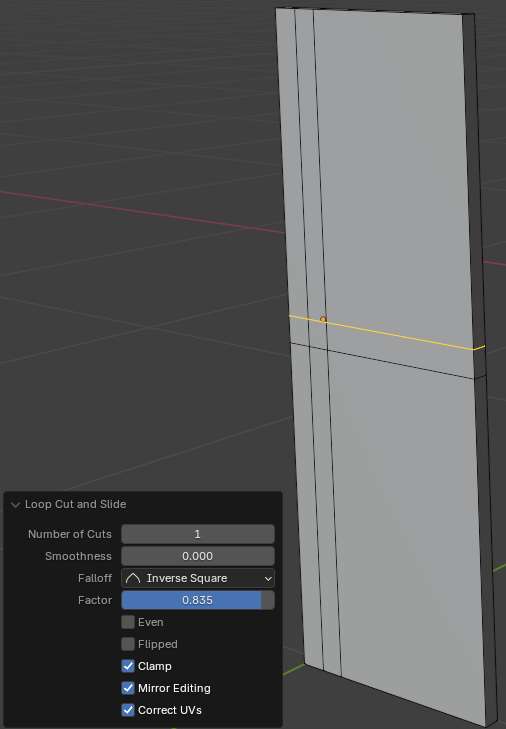
- Position your mouse above the previously create cut. Press Ctrl + R to create a horizontal loop cut
- Click twice to confirm the loop cut
- In the Loop Cut and Slide window, change the factor value to -0.765:
Factor: 0.835
- On the toolbar in the top-right section, click the Material Preview button

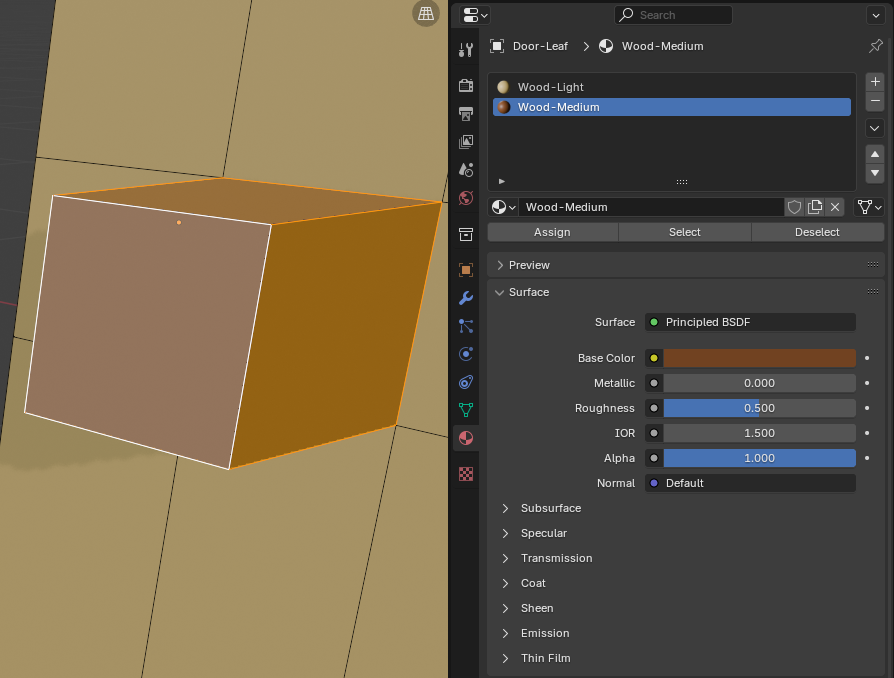
- On the toolbar of the Properties window, click the Material button

- On the top bar, click the Face button
- Click the face at the intersection of the cuts
- In the Material section of the Properties window, click the + button
- Click the New button
- Click Material to select the name
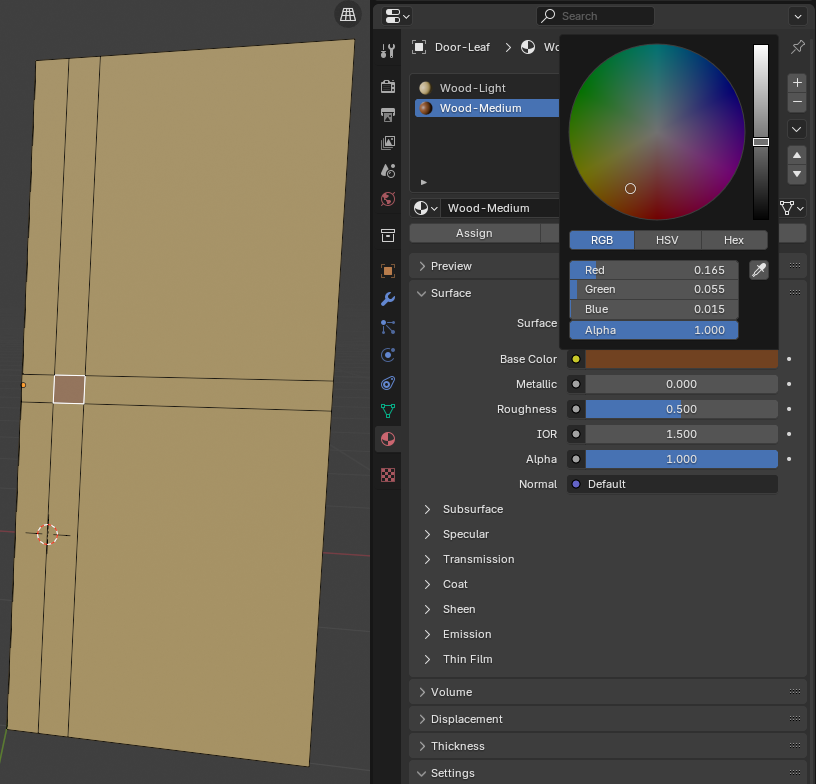
- Type Wood-Medium and press Enter
- While the small face is still selected and the Wood-Medium name is selected, click the Assign button
- Click the right side of Base Color
- Set the RGB values as follows:
Red:   0.165
Green: 0.055
Blue:  0.015
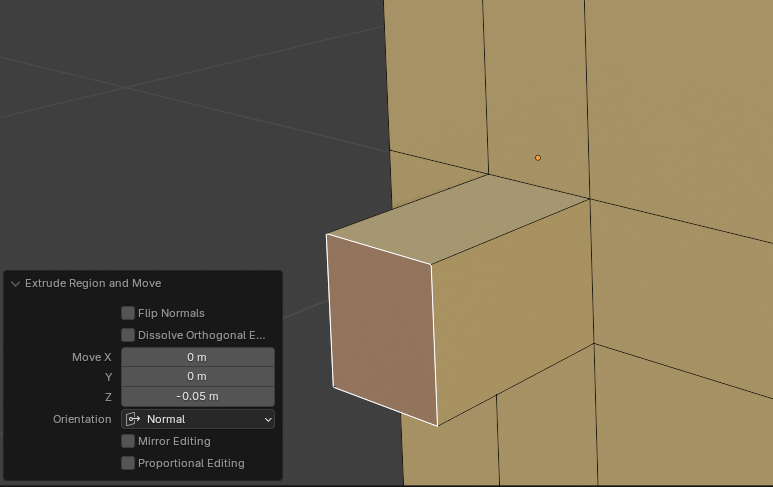
- Position the mouse in the 3D Viewport. Press E to extrude and press Enter
- In the Extrude Region and Move window, change the Z value to -0.05:
Move Z: -0.05
- Press and hold Shift
- While the face is still selected, in the numeric pad of the keyboard, press +. That will select the faces close to the one that was previously selected
- Release Shift
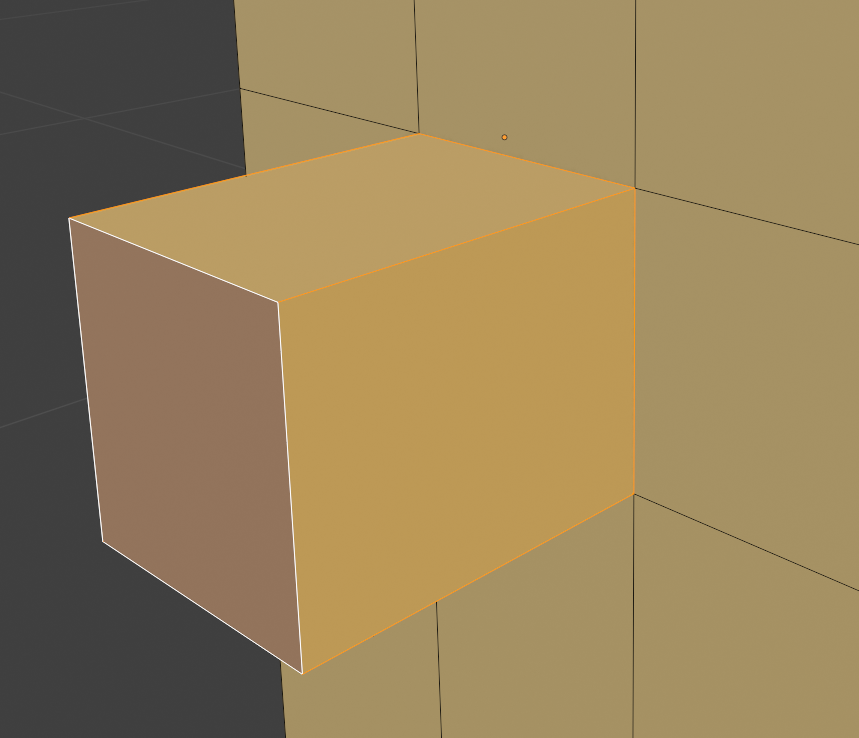
- Make sure the faces next to the previous small face are selected. In the Material section of the Properties window, click Wood-Medium
- Click Assign
- On the toolbar in the top-right section, click the Solid button

- Position your mouse on the left or the right side of the part that was extruded. Press Ctrl + R to create a horizontal loop cut
- Click once to create a loop cut
- Move the mouse slightly to enlarge the section from the door
- Click to create a loop cut
- On the top bar, click the Face button
- Click the top second face from the part that was just created

- On the toolbar in the top-right section, click the Material Preview button
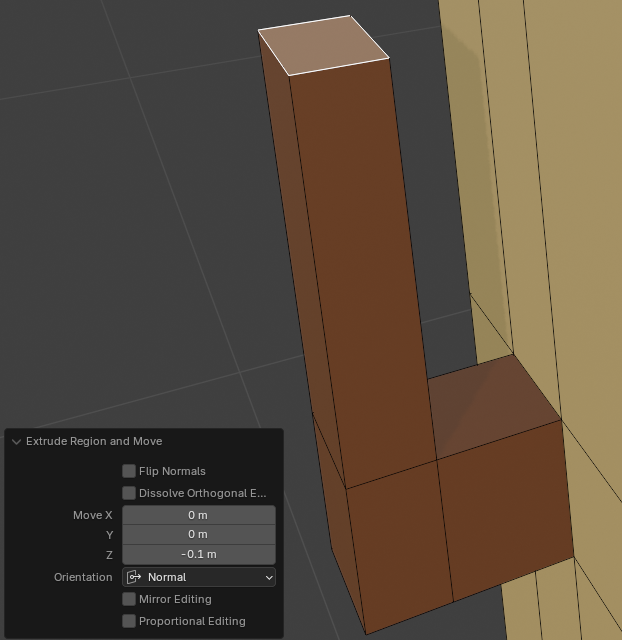
- Press E to extrude and press Enter
- In the Extrude Region and Move window, change the Z value to -0.1:
Move Z: -0.1
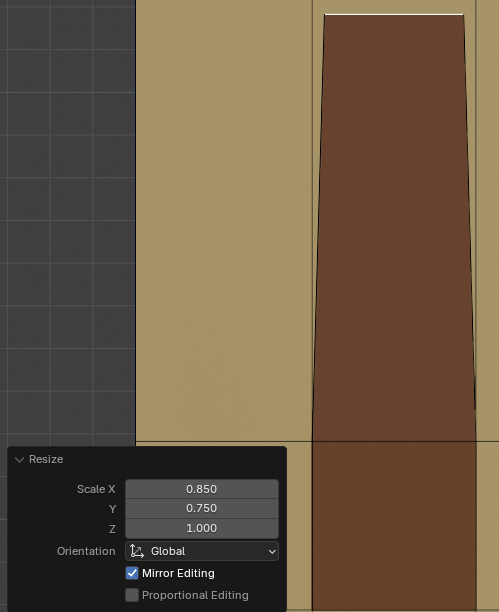
- Position your mouse on the 3D Viewport. Press S to resize the face and press Enter
- In the Resize window, change the X and the Y scale values:
Scale: X: 0.85
       Y: 0.75
       Z: 0
- On the toolbar in the top-right section, click the Solid button
- Position your mouse in the 3D Viewport window. To display the objects that were hidden, on the numeric pad of the keyboard, press /
- On the main menu of Blender, click Layout
- On the toolbar of the Properties window, click the Modifiers button
- In the Modifiers section of the Properties window, click Add Modifier -> Generate -> Mirror
Modeling a Door Closer
Practical Learning: Modeling a Bar Closer
- On the top menu of Blender, click Add -> Mesh -> Cube
- In the Properties window, click the Object button
- In the Properties window, change the following values:
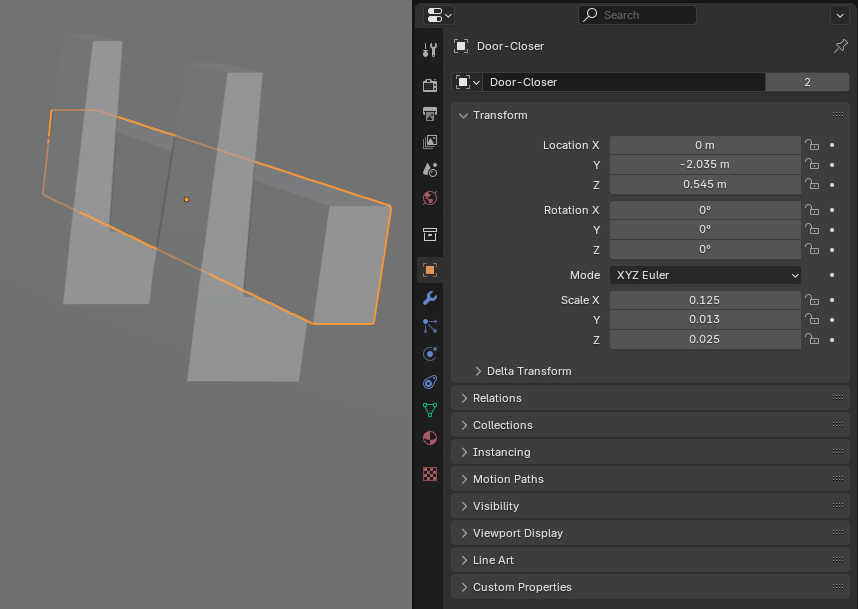
Name:     Door-Closer
Location: X: 0
          Y: -2.035
          Z: 0.545
Scale:    X: 0.125
          Y: 0.0125
          Z: 0.025
(or set the values as necessary)
- On the main menu, click Shading
- Make sure the new bar is selected. On the Shading toolbar, click the New button
- Click Meterial to select it
- Then type Wood-Dark and press Enter
- Click the right side of Base Color
- Set the RGB values as follows:
Red:   0.0265
Green: 0.015
Blue:  0.005
- On the main menu of Blender, click Layout
Modeling a Window
Practical Learning: Modeling a Window
- On the top menu of Blender, click Add -> Mesh -> Cube
- In the Properties window, click the Object button to access the primary properties of the cube
- Change the following values:
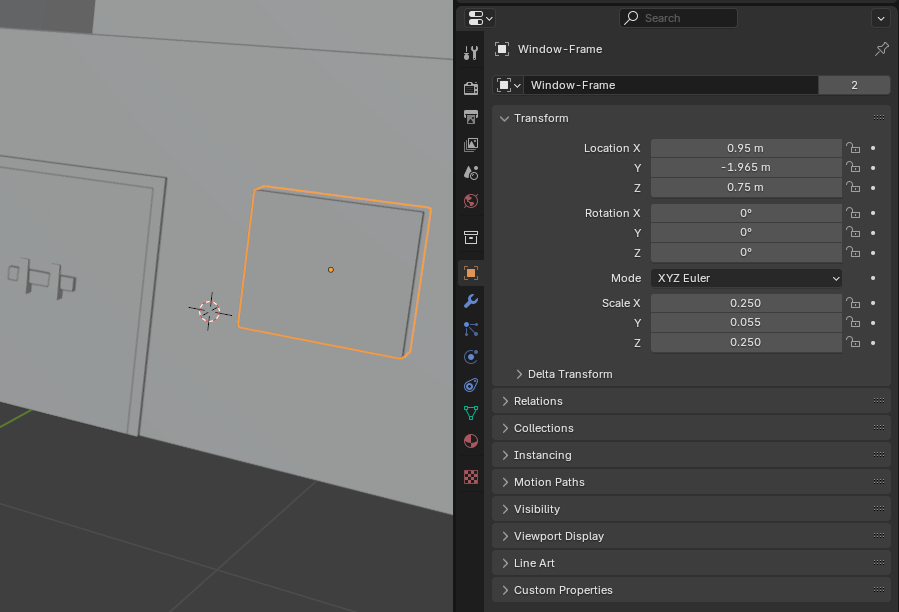
Name:     Window-Frame
Location: X:  0.95
          Y: -1.965
          Z:  0.75
Scale:    X:  0.25
          Y:  0.055
          Z:  0.25
- Make sure the new cube (the new window) is selected.
To edit the cube, on the main menu of Blender, click Modeling
- Position the mouse in the 3D Workspace. To hide the objects that are not selected, in the numeric pad of the keyboard, press /
- On the top menu, click View -> Viewpoint -> Front
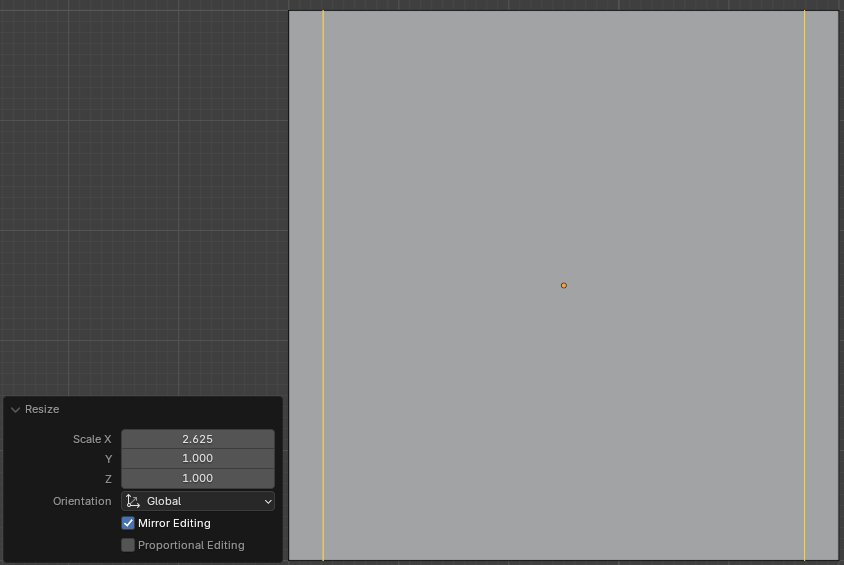
- Position the mouse on the top or the bottom side of the window. Press Ctrl + R to create vertical loop cuts and scroll the mouse slightly to get two vertical loop cuts
- Then click and right-click
- Position the mouse in the 3D Viewport window. Then, on your keyboard, press S
- Move the mouse slightly and click
- In the Resize window in the bottom-left section of the 3D Viewport window, change the following values:
Scale: X: 2.625
       Y: 1
       Z: 1
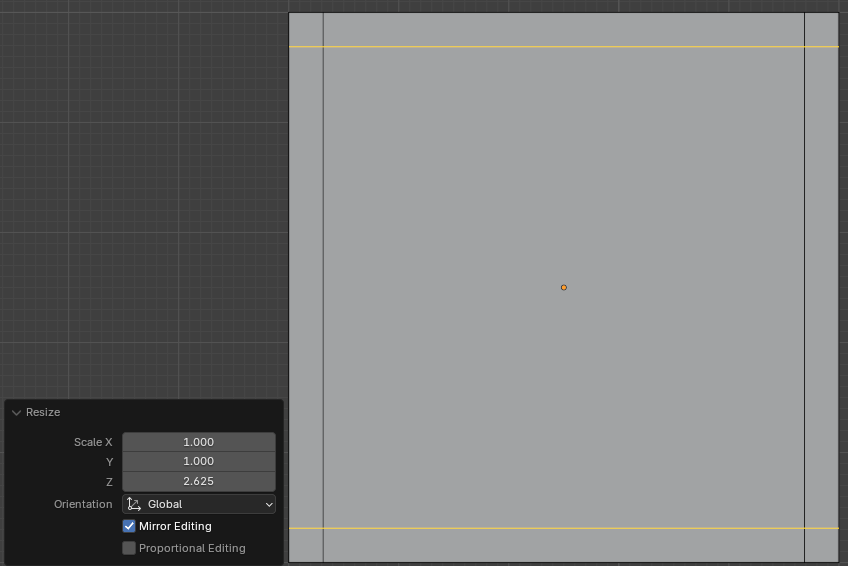
- Position the mouse on the left or the right side of the window. Press Ctrl + R to create horizontal loop cuts and scroll the mouse slightly to get two horizontal loop cuts
- Then click and right-click
- Position the mouse in the 3D Viewport window. Then, on your keyboard, press S
- Move the mouse slightly and click
- In the Resize window in the bottom-left section of the 3D Viewport window, change the following values:
Scale: X: 1
       Y: 1
       Z: 2.625
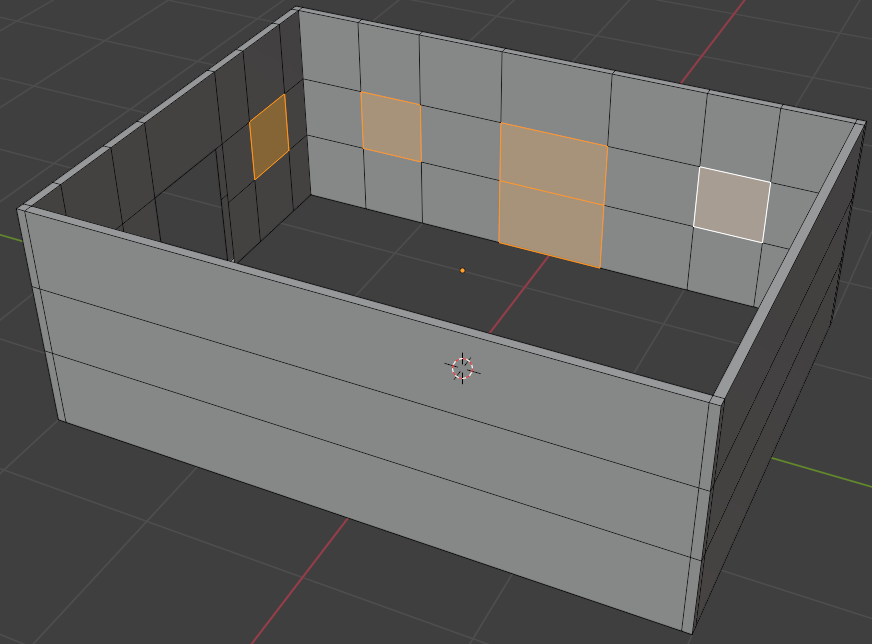
- On the top bar, click the Face button
- Click the large face in the middle of the shape to select it
- On your keyboard, press X
- On the menu that appears, click Faces
- Click the other large face in the middle of the shape to select it
- Right-click anywhere in the 3D Viewport workspace window -> Separate -> Selection
- Position your mouse in the 3D Viewport window. To display the objects that were hidden, on the numeric pad of the keyboard, press /
- To confirm the separated parts, on the top-main menu of Blender, click Layout
Continuing Modeling the Building
Practical Learning: Continuing Modeling the Building
- Click any wall of the barn to select it
- To continue editing the window, on the top-main menu of Blender, click Modeling
- On the top menu, click View -> Viewpoint -> Front
- Position the mouse above the window. Press Ctrl + R to create a horizontal loop cut
- Click once to initiate a loop cut
- Move the mouse to position the line within a frame of the window
- Click to create the loop cut
- Position the mouse above the window and on the side with the wider part of the window. Press Ctrl + R to create a horizontal loop cut
- Click once to initiate a loop cut
- Move the mouse to position the line within the other frame of the window
- Click to create the loop cut
- Position the mouse on the right side of the window and on the bottom border of the window. Press Ctrl + R to create a vertical loop cut
- Click once to initiate a loop cut
- Move the mouse to position the line within the bottom frame of the window
- Click to create the loop cut
- Click and drag the Rotate button to access the interior of the barn and the back of the window
- Position the mouse on the bottom border of the window. Press Ctrl + R to create a horizontal loop cut
- Click once to initiate a loop cut
- Move the mouse to position the line within the bottom frame of the window
- Click to create the loop cut
- Click and drag the Rotate button to access the exterior of the barn and the front of the window
- Position the mouse in the 3D Workspace. To hide the objects that are not selected, in the numeric pad of the keyboard, press /
- On the top bar, click the Face button
- Click the face from where the window was
- Right-click anywhere in the 3D Viewport -> Delete Faces
- Click the same area to select the back face where the window was
- Right-click anywhere in the 3D Viewport -> Delete Faces
- Position the mouse in the 3D Workspace. To display the objects that were hidden, in the numeric pad of the keyboard, press /
- On the top-main menu of Blender, click Layout
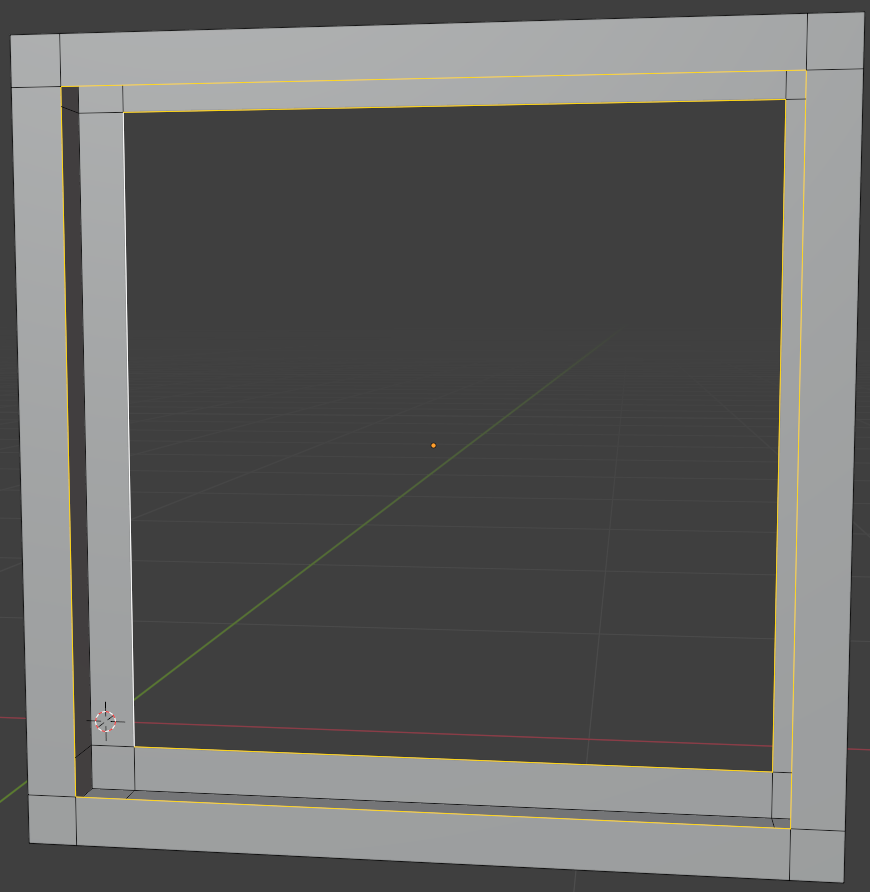
Continuing Modeling the Window
Practical Learning: Continuing Modeling the Window
- Click any border of the window to select it
- To continue editing the window, on the top-main menu of Blender, click Modeling
- Position the mouse in the 3D Workspace. To hide the objects that are not selected, in the numeric pad of the keyboard, press /
- On the top bar, click the Edge button
- Press and hold Alt
- Click one of the interior edges of the window frame (make sure all the interior edges of the same from or back side are selected)
- While you are still holding Alt, press and hold Shift
- Click an interior edge of the side opposite the one you first selected (make sure the interior edges of each site is selected)
- Release Alt and Shift
- On the menu bar, click Edge -> Bridge Edge Loops
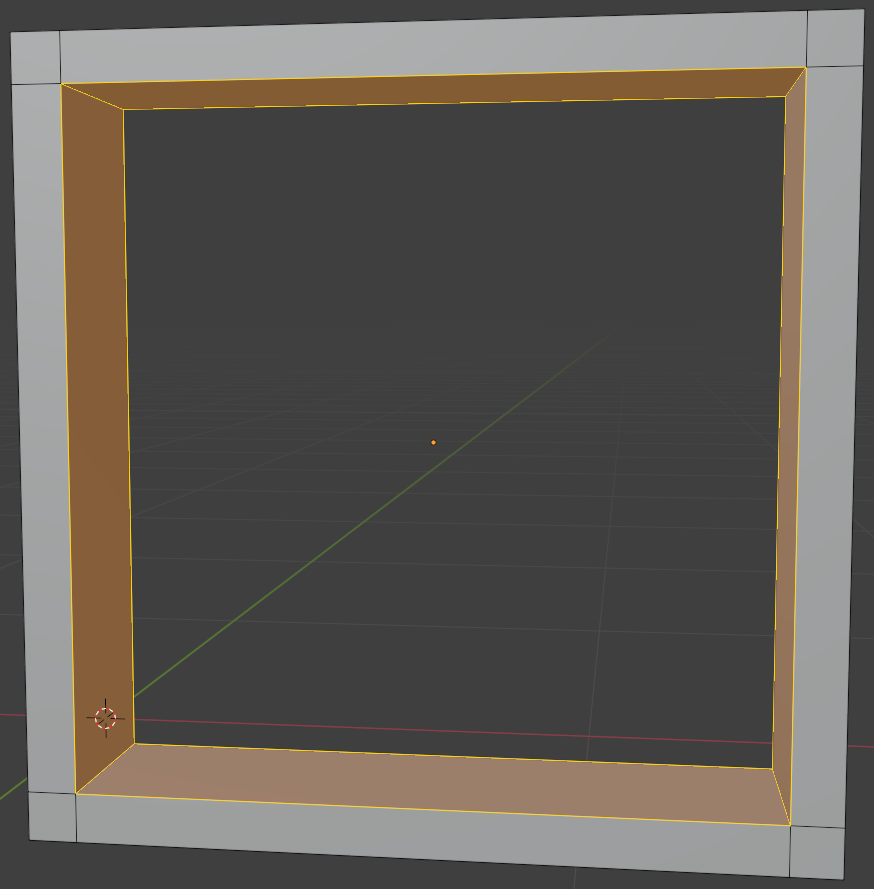
- On the main menu of Blender, click Layout
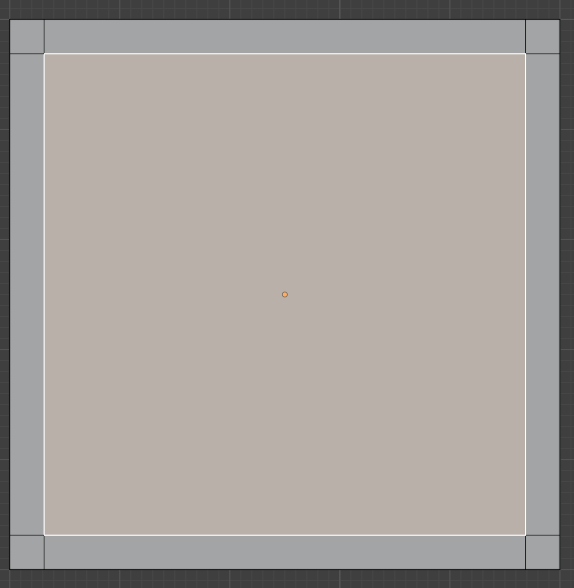
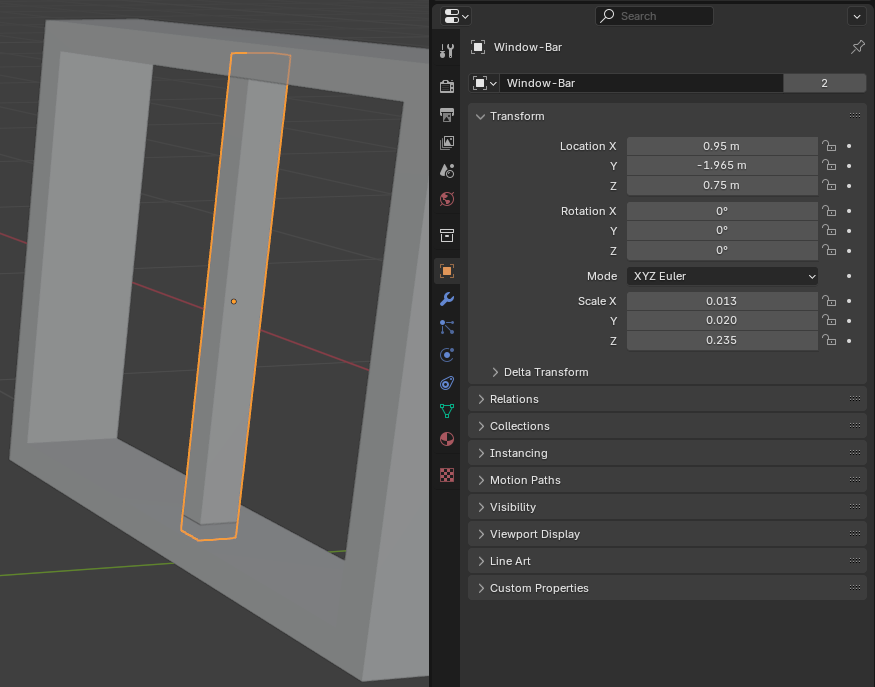
Creating Windows Bars
Practical Learning: Creating Windows Bars
- Make sure the window's frame is selected.
Position the mouse in the 3D Viewport. To hide the objects that are not selected, in the numeric pad of the keyboard, press /
- On the top menu of Blender, click Add -> Mesh -> Cube
- In the Object section of the Properties window, change the following values:
Name:    Window-Bar
Location X: 0.95
         Y: -1.965
         Z: 0.75
Scale    X: 0.0125
         Y: 0.02
         Z: 0.235
- On the main menu, click Modeling
- Position the mouse in the 3D Workspace. To display the objects that were hidden, in the numeric pad of the keyboard, press /
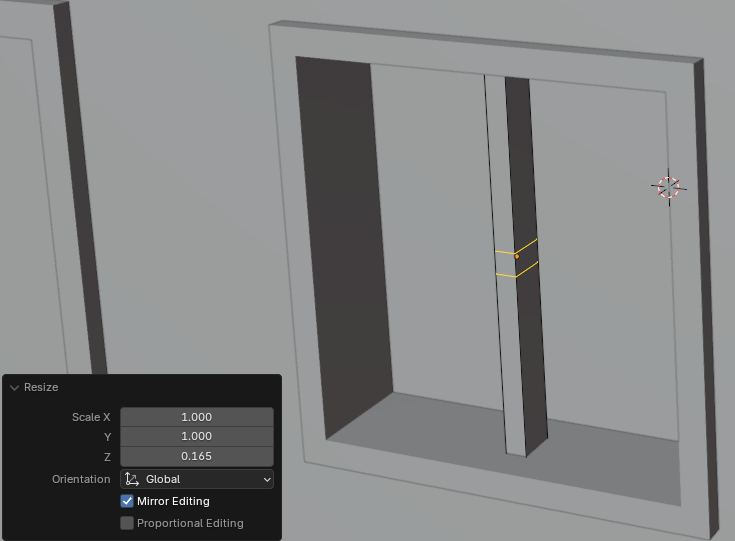
- Position the mouse on the left or the right border of the bar. Press Ctrl + R to create loop cuts
- Scroll the mouse slightly to get two vertical loop cuts and click twice to accept
- Press S to resize
- Press Z to resize vertically
- Move the mouse slightly towards the bar and click
- In the Resize window, change the Z value to 0.275:
Scale X: 1
      Y: 1
      Z: 0.165
- On the top menu bar, click the Face button
- Click and drag the Rotate button to view one of the sides of the bar
- Click the middle face on one side of the bar
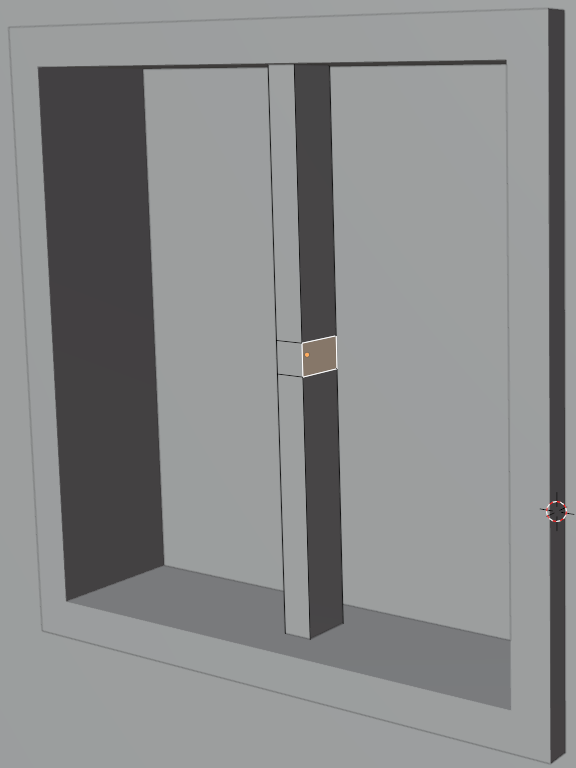
- Click and drag the Rotate button to view the other side of the bar
- Press and hold Shilft
- Click the middle face on the other side of the bar
- Release Shift
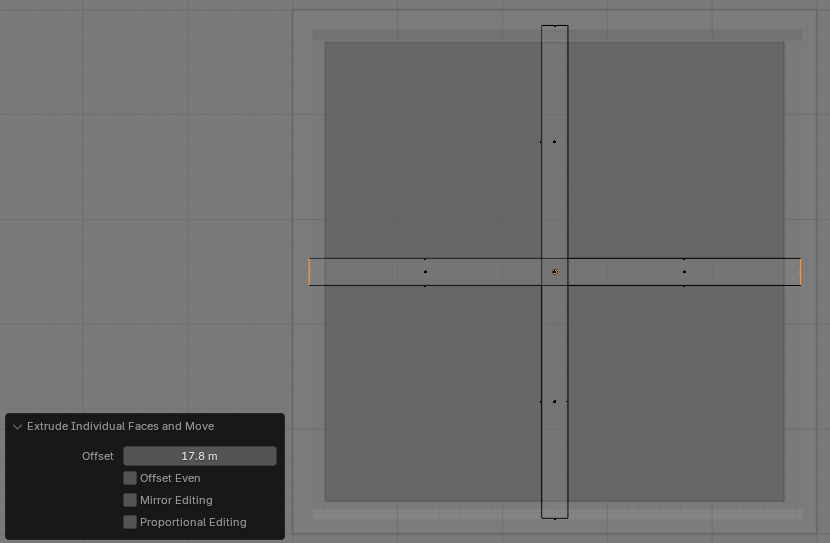
- On the top menu, click View -> Viewpoint -> Front
- While both middle side faces of the bar are selected, press Alt + E
- In the menu that appears, click Extrude Individual Faces
- Move the mouse up from the bar and click
- In the Extrude Indiviodual Faces and Move window, change the Offset value to 10.95:
Offset: 17.75
(or set the value so that the ends of the bars are within the frame in the left and the right borders of the window)
- On the main menu, click Layout
- Position the mouse in the 3D Viewport. On the numeric pad of the keyboard, press / to show the hidden objects
- On the main menu of Blender, click Shading
- On the barn, click the frame of the window
- On the Shading toolbar, click the arrow of the Material button and select Creame
- On the barn, click the bar within the window
- On the middle toolbar, click the arrow of the Material button and select Creame
- On the main menu of Blender, click Layout
- Click the frame of the door to select it
- Right-click anywhere in the 3D Viewport and click Move to Collection
- In the window that appears, click New Collection
- Type Door as the name of the new collection
- Click Create
- Click the face within the door to select it
- Right-click anywhere in the 3D Viewport and click Move to Collection
- In the list, click Door
- Click the small horizontal bar within the door to select it
- Right-click anywhere in the 3D Viewport and click Move to Collection
- In the list, click Door
Creating the Window Glass
.
Practical Learning: Creating the Window Glass
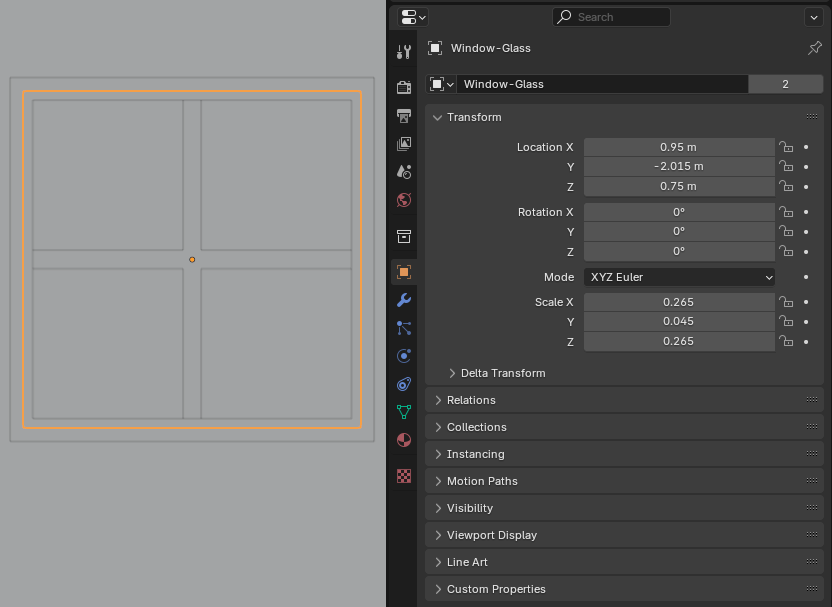
- Click the face within the window
- In the Object section of the Properties window, change the following characteristics of the window:
Location Y: -2.015
Scale:   X: 0.265
         Z: 0.265
- On the main menu, click Shading
- Make sure the face inside the window is selected.
On the Shading toolbar, click the New button
- On the Shading toolbar, click Material to select it
- Type Window-Glass and press Enter
- In the Principled BSDF window, click Transmission to expand it
- Still in the Principled BSDF window, change the following values:
Roughness:    0
IOR:          1.115
Transmission: Weight: 1
- On the main menu of Blender, click Layout
- Click the frame of the window to select it
- Right-click anywhere in the 3D Viewport and click Move to Collection
- In the window that appears, click New Collection
- Type Window as the name of the new collection
- Click Create
- Click the bar within the window to select it
- Right-click anywhere in the 3D Viewport and click Move to Collection
- In the list, click Window
- Click the face within the window to select it
- Right-click anywhere in the 3D Viewport and click Move to Collection
- In the list, click Window
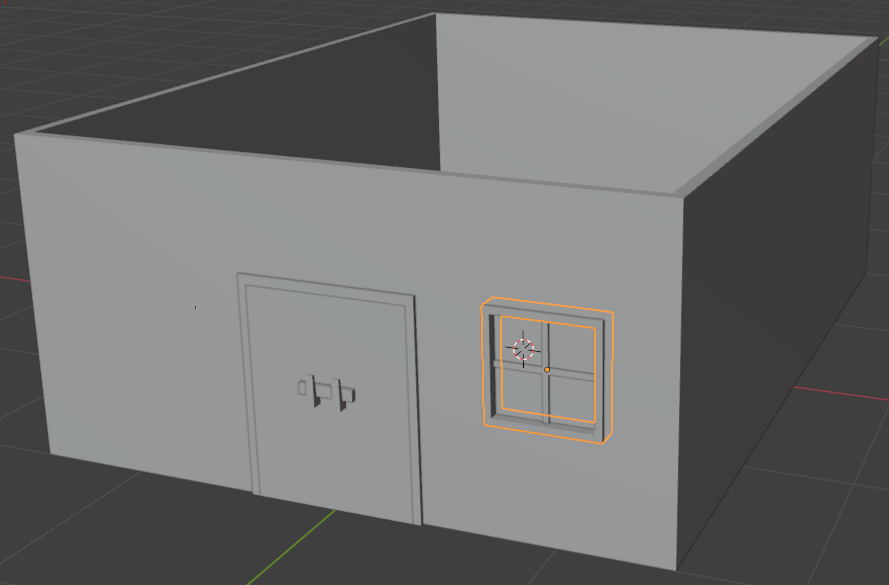
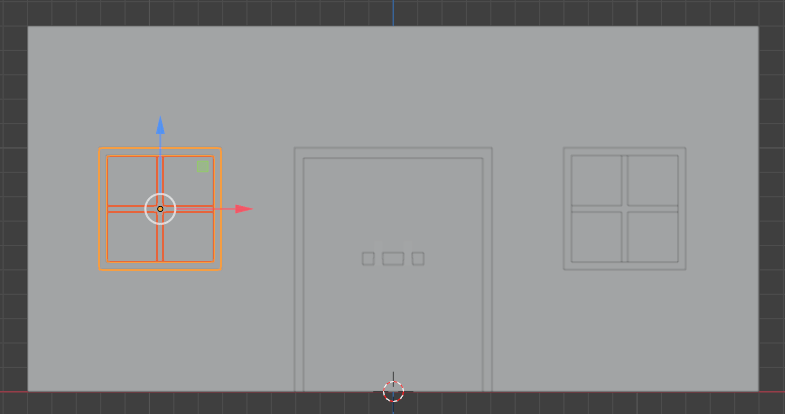
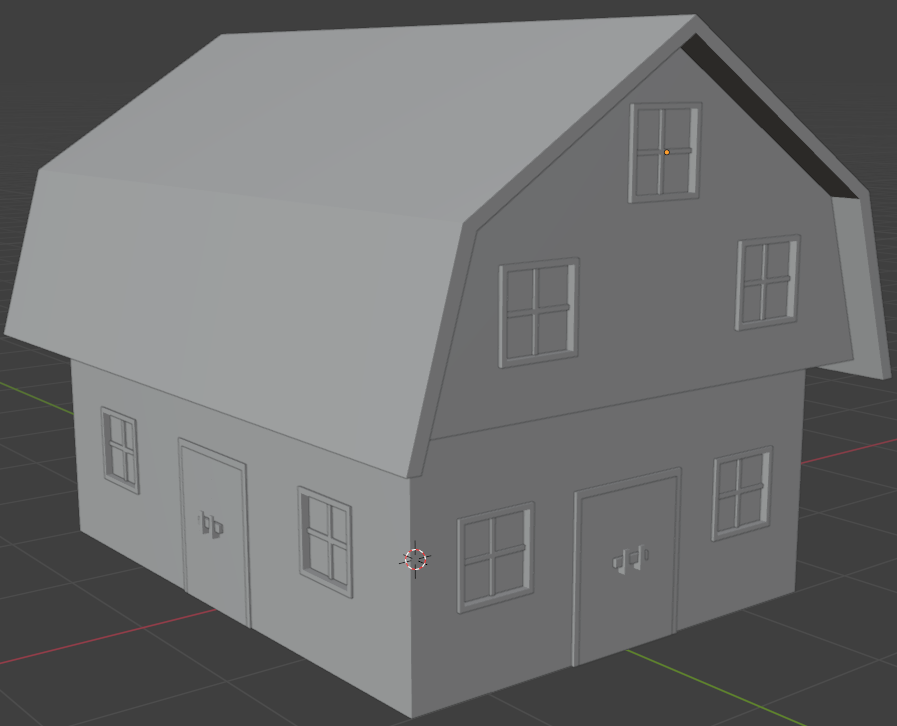
Adding a Door and Windows
.
Practical Learning: Adding a Door and Windows
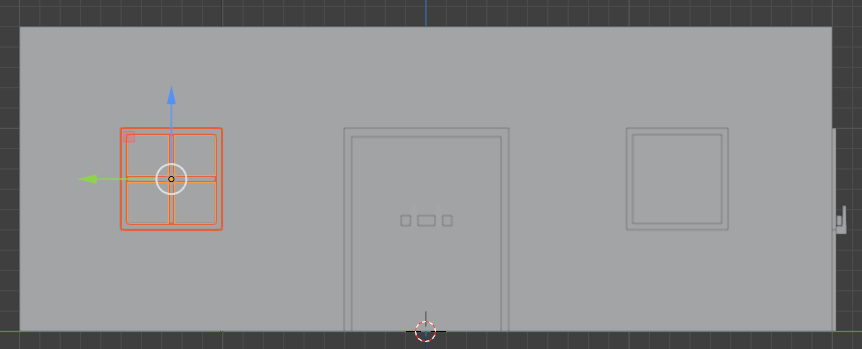
- On the left toolbar, click the Move button

- On the top menu, click View -> Viewpoint -> Front
- In the Outliner, click Window-Bar to select it
- Press and hold Ctrl
- In the Outliner, click Window-Frame to slect it
- In the Outliner, click Window-Glass to slect it
- Release Ctrl
- On the menu bar, click Object -> Duplicate Objects
- Right-click in the 3D Viewport to accept the duplicate
- Drag the red X arrow to move the selected group to the left of the door
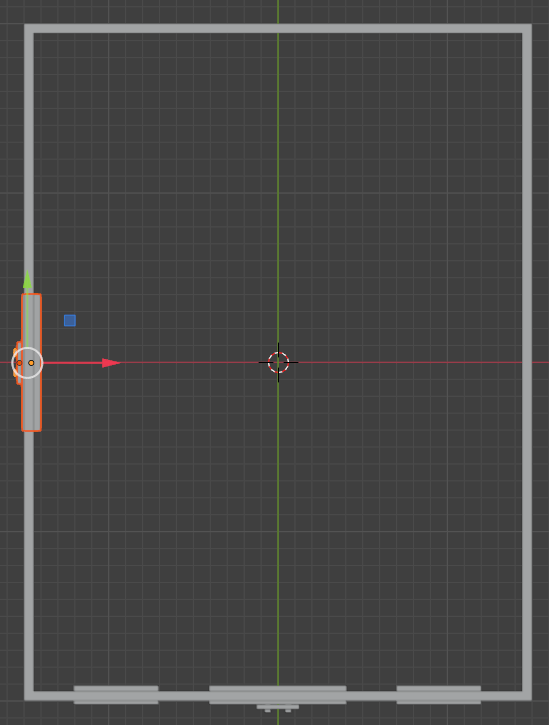
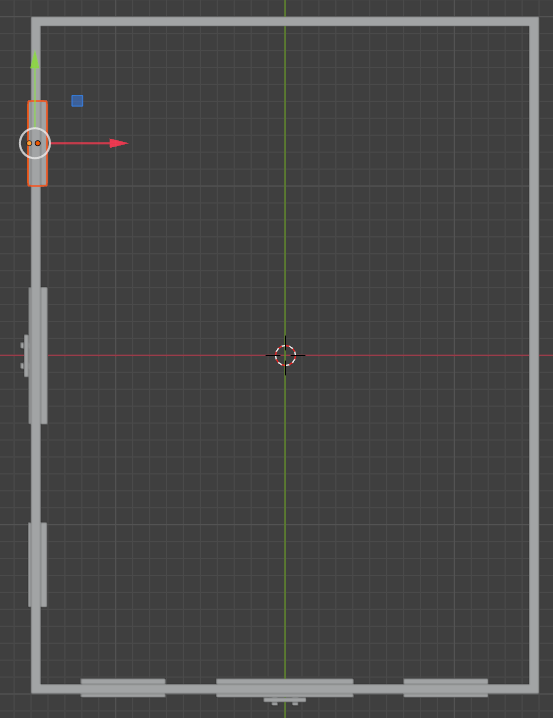
- On the top menu, click View -> Viewpoint -> Top
- In the Outliner, click one of the items in the Door collection
- Press and hold Ctrl
- Click each of the other items of the same group
- Release Ctrl
- On the menu bar, click Object -> Duplicate Objects
- Right-click in the 3D Viewport to accept the duplicate
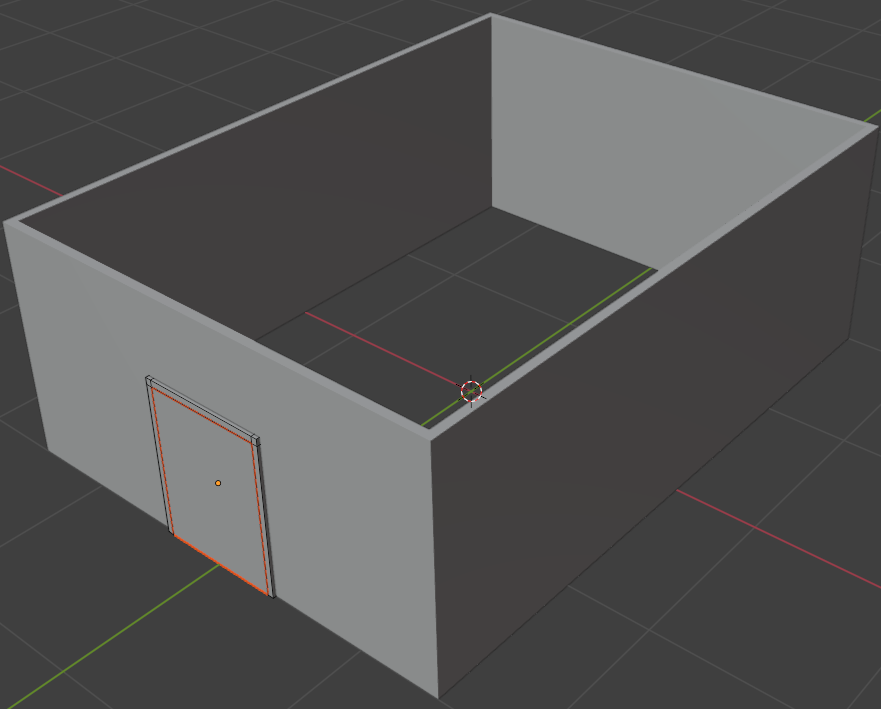
- Drag the red X arrow to move the selected group to the left wall
- To rotate the door, press R
- Type 90 and press Enter
- Drag the green arrow to position the door to the center of the left wall
- In the Outliner, click Window-Bar to select it
- Press and hold Ctrl
- Click Window-Frame to slect it
- Click Window-Glass to slect it
- Release Ctrl
- On the menu bar, click Object -> Duplicate Objects
- Right-click in the 3D Viewport to accept the duplicate
- Drag the red X arrow to move the selected group to the left wall
- To rotate the window, press R
- Type 90 and press Enter
- Drag the green arrow to position the door to the right of the door in the left wall
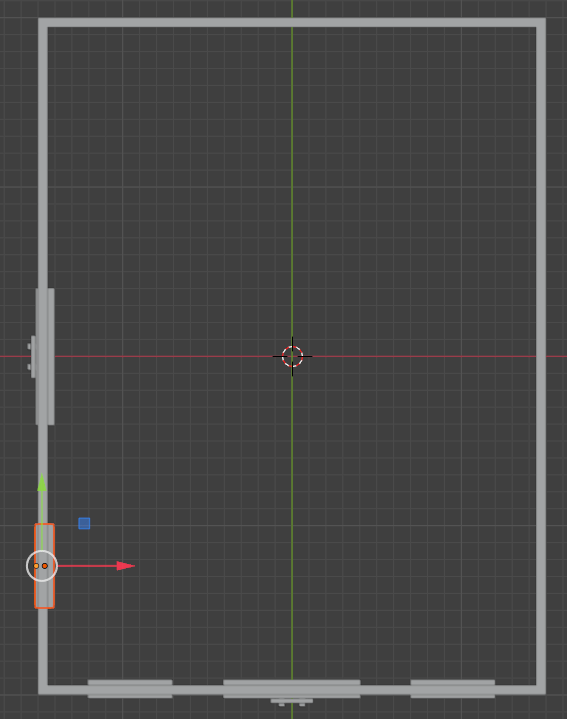
- While the window is still select, on the menu bar, click Object -> Duplicate Objects
- Right-click in the 3D Viewport to accept the duplicate
- Drag the green arrow to position the window on the other side of the left door
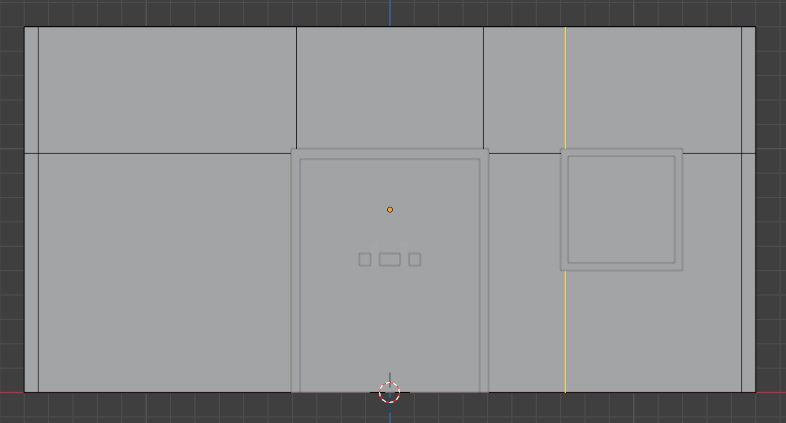
Finalizing the Base Level
.
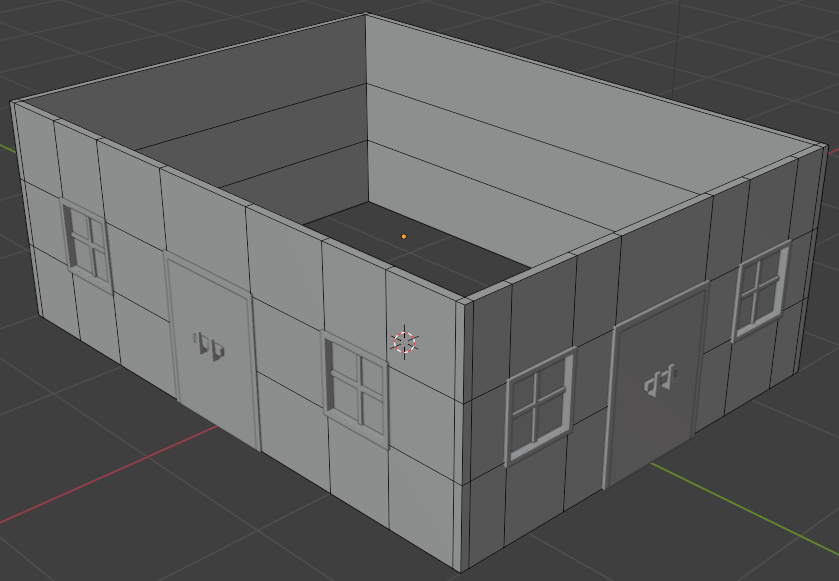
Practical Learning: Finalizing the Base Level
- Click a wall of the barn to select it
- On the main menu, click Modeling
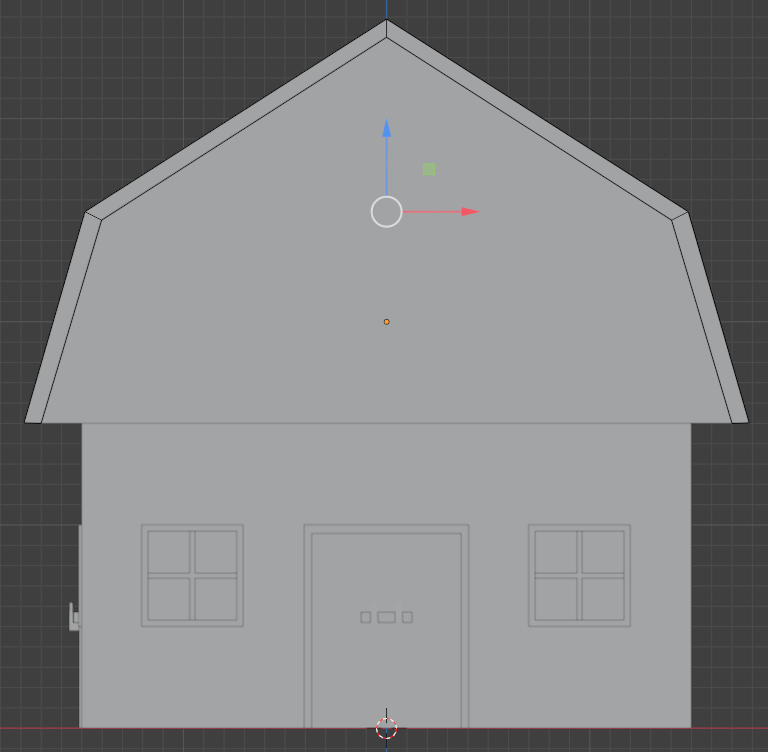
- On the top menu, click View -> Viewpoint -> Front
- Press Ctrl + R to create a loop cut
- Position the mouse on top or the bottom border of the left window
- Click once to create the cut
- Move the mouse to position the cut within one of the borders of the window
- Click to create the cut
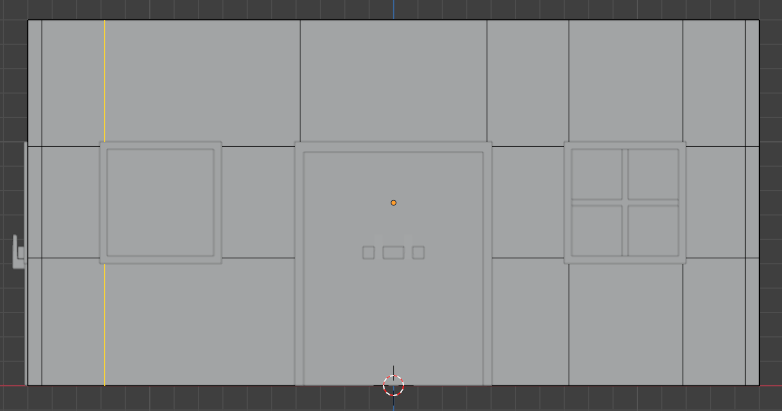
- Press Ctrl + R to create a loop cut
- Position the mouse on top or the bottom border of the other side of the window
- Click once to create the cut
- Move the mouse to position the cut within the other border of the window
- Click to create the cut
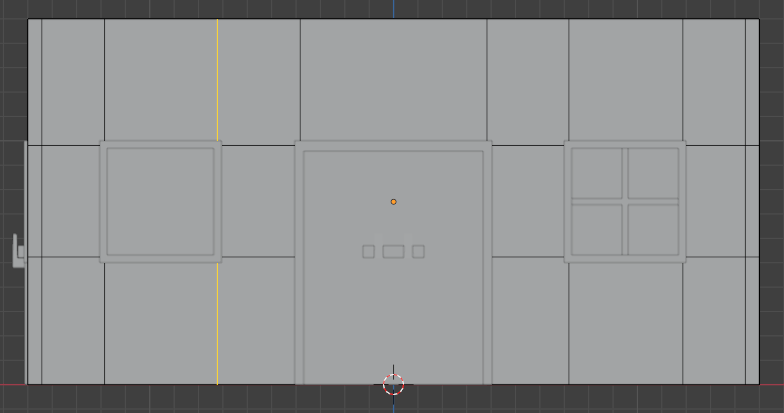
- On the top menu, click View -> Viewpoint -> Left
- Press Ctrl + R to create a loop cut
- Position the mouse on top or the bottom border of one of the windows
- Click once to create the cut
- Move the mouse to position the cut within one of the borders of the window
- Click to create the cut
- Repeat the steps to apply a vertical loop cut to each of the borders of the windows:

- Also create a vertical loop cut for each of the borders of the door
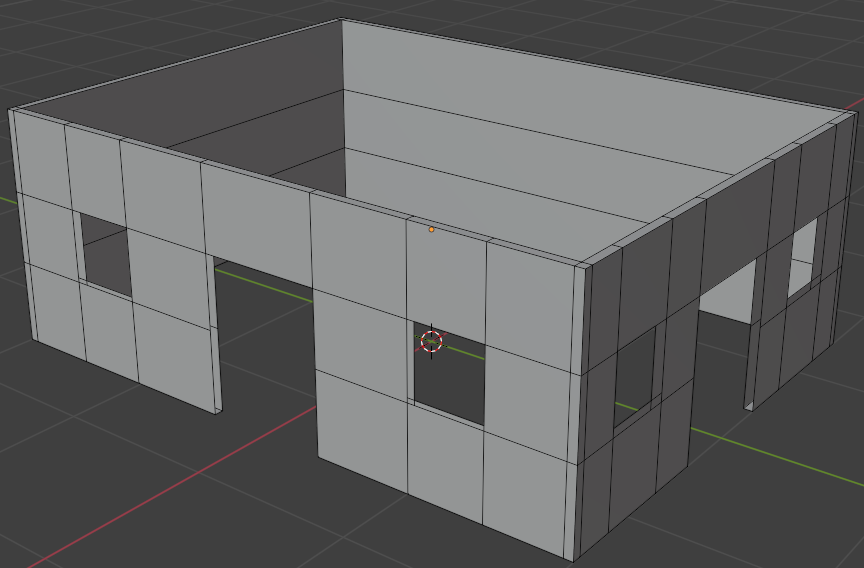
- Position your mouse in the 3D Viewport window. To hide the doors and window, on the numeric pad of the keyboard, press /
- On the top menu, click the Face button
- Click one of the faces within a window
- Press and hold Shift
- Click each of the faces within a window and both faces within the left door
- Releas Shift
- Click and drag the Rotation button to access the interior walls of the barn
- Press and hold Shift
- Click each of the faces within a window and both faces within the left door
- Releas Shift
- Right-click anywhere in the 3D Viewport and click Delete Faces
- Click the bottom face of the left door to select it
- Right-click anywhere in the 3D Viewport and click Delete Faces
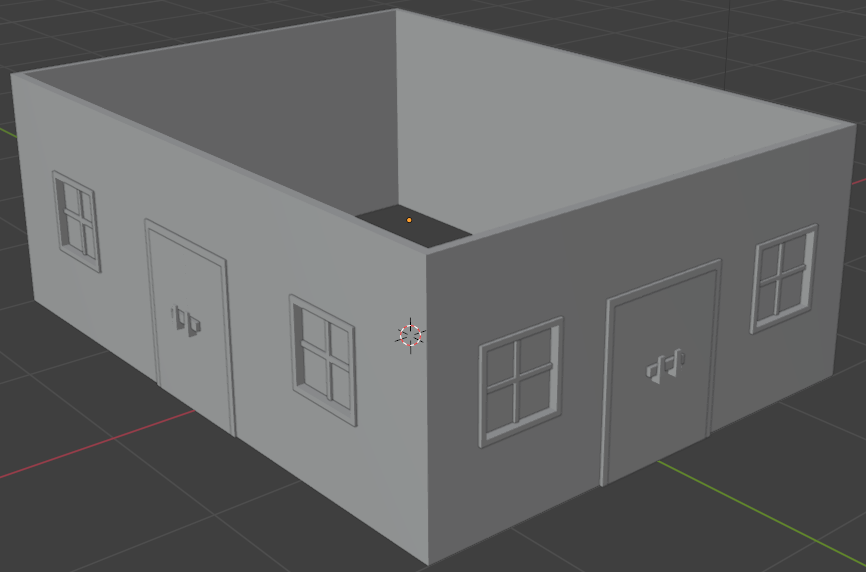
- Position your mouse in the 3D Viewport window. To display the parts that were hidden, on the numeric pad of the keyboard, press /
- On the main menu, click Layout
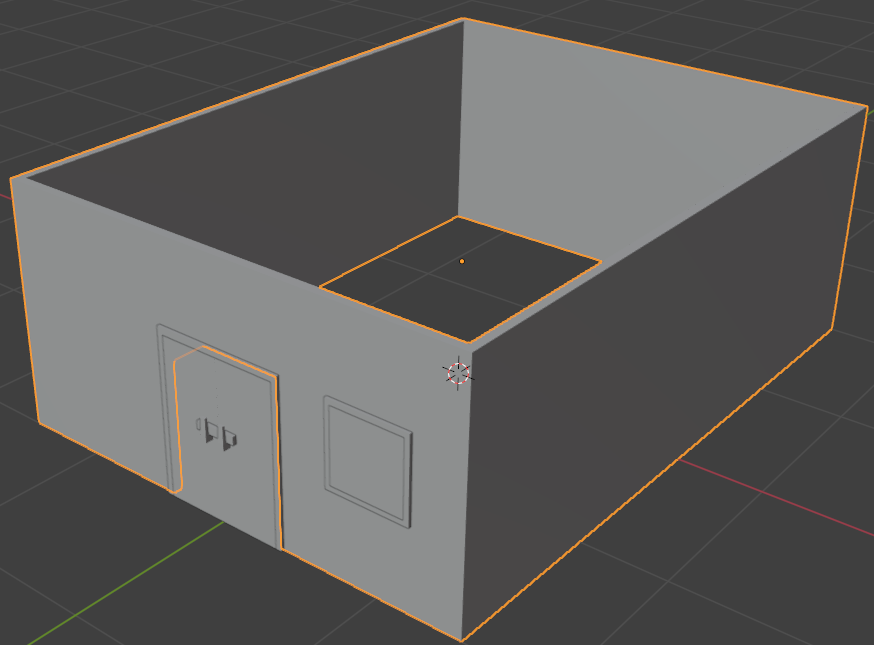
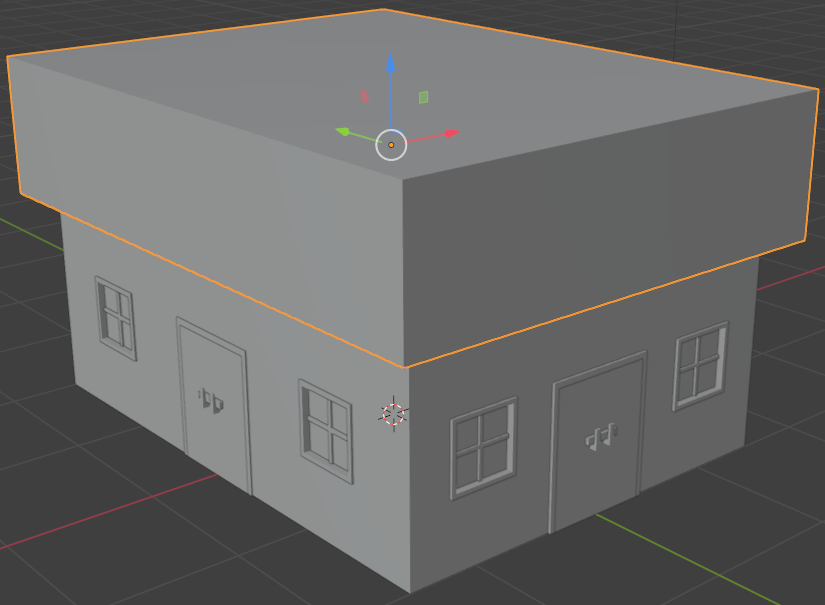
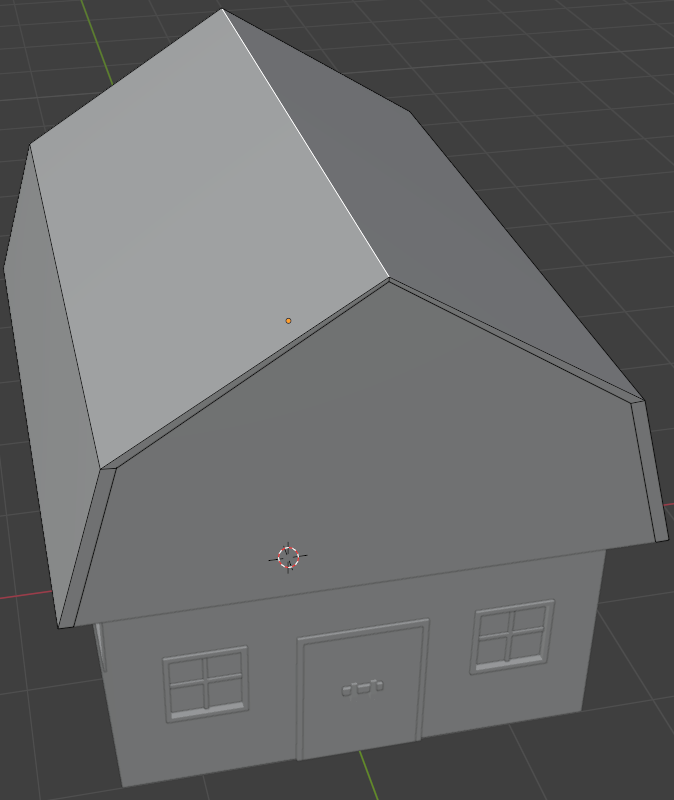
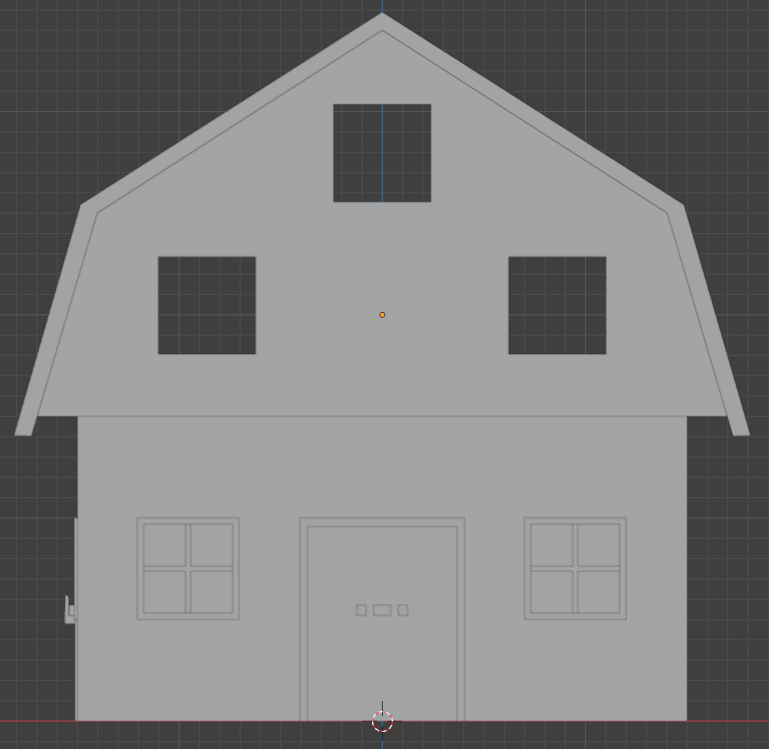
Introducing the Top Level
Practical Learning: Introducing the Top Level
- In the Properties window, click the Object button
- To create an object, on the menu bar, click Add -< Mesh -> Cube
- In the Object section of the Properties window, change the following values:
Name:     Story-Second
Location: Z: 2
Scale:    X: 1.7
          Y: 2.2
          Z: 0.5
- To edit the building, on the top-main menu of Blender, click Modeling
- Click and drag the Rotate button to view the bottom side of the new cube in perspective
- On the top menu, click the Face button
- Click the bottom face to select it
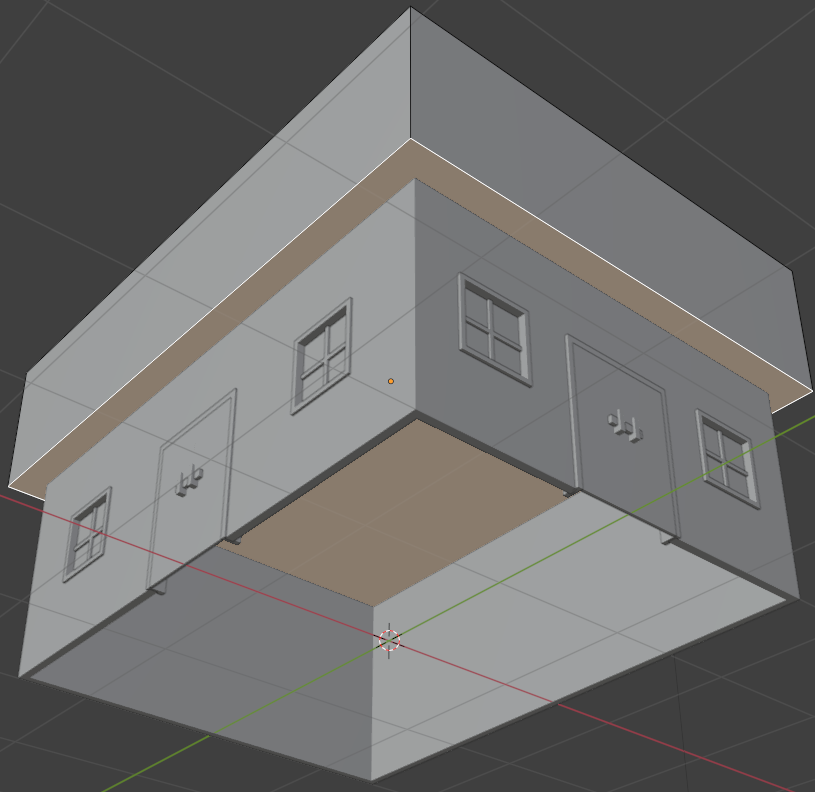
- Press I to create an inset
- Move the mouse to position the lines close to the walls of the bottom cube and click
- Click the Wireframe button

- In the numeric section of the keyboard, press 7 to display the to view
- Use S + X and S + Y to move the lines and align them within the corresponding interior walls of the bottom cube
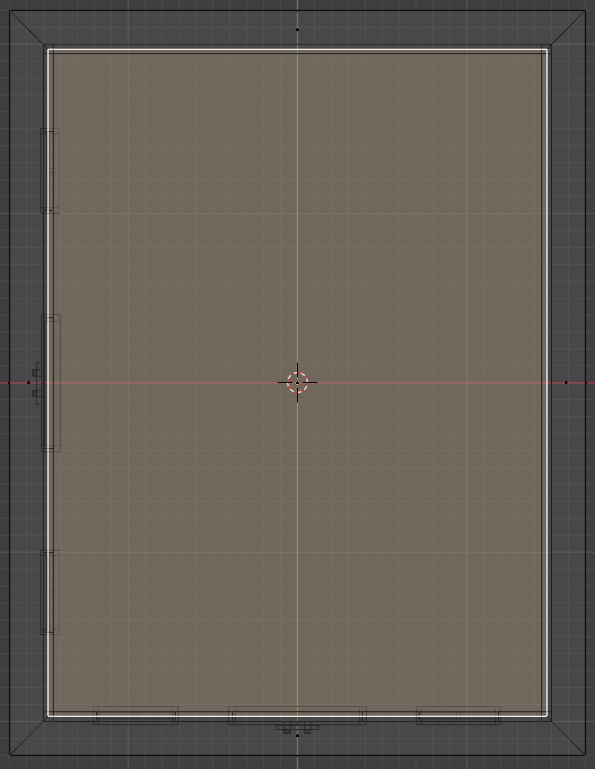
- While the bottom large face is still selected, press X to delete
- On the menu that appears, click Faces
- Click the Solid button
- Click and drag the Rotate button to view the barn in perspective from the top side
- Click the top face to select it
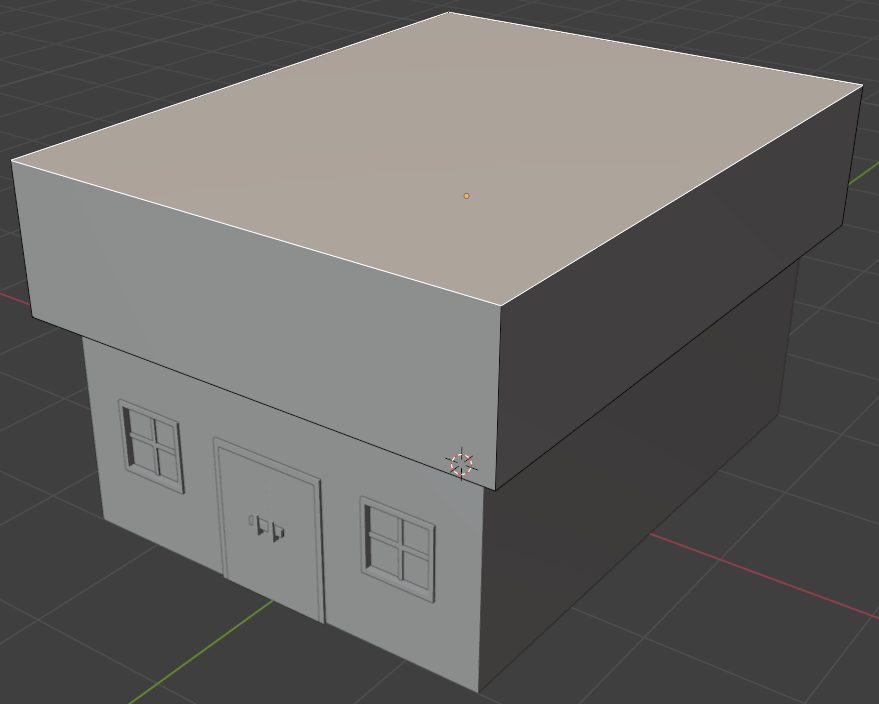
- Position the mouse on the shape. Press S to resize
- Move the mouse slightly towards the shape and click
- In the Resize window, change the scale values as follows:
Scale: X: 0.825
       Y: 1
       Z: 1
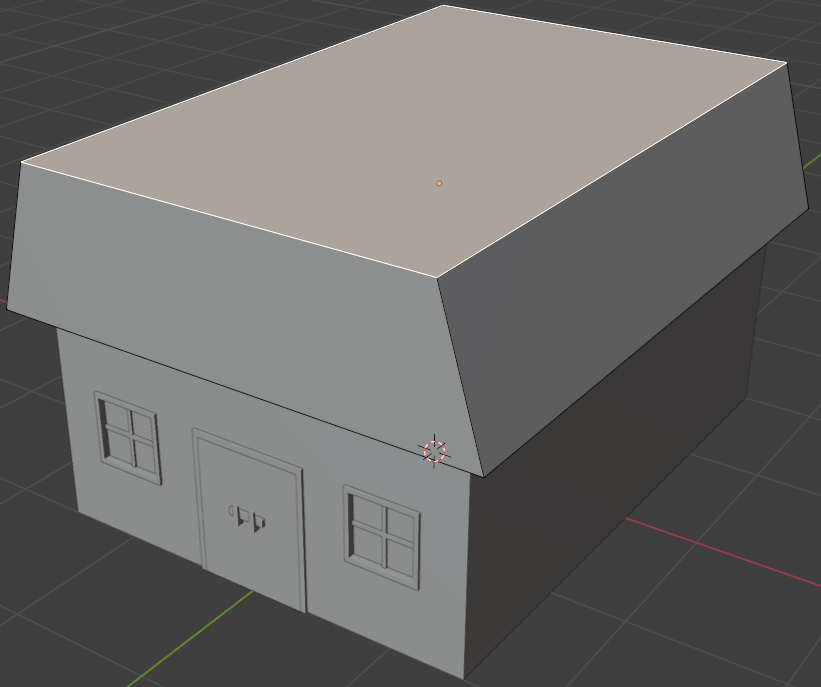
- Position the mouse on the shape. Press E to extrude and press Enter
- In the Extrude Region and Move window, change the Z value to 0.9:
Scale: X: 0
       Y: 0
       Z: 0.9
- On the top bar, click the Edge button
- Click and drag the Rotate button to view the barn in perspective from the top side.
On the top face, click one of the smaller edges (parallel to the X axis)
- On the menu bar, click Mesh -< Merge -> At Center
- On the top face, click the edge parallel to the X axis
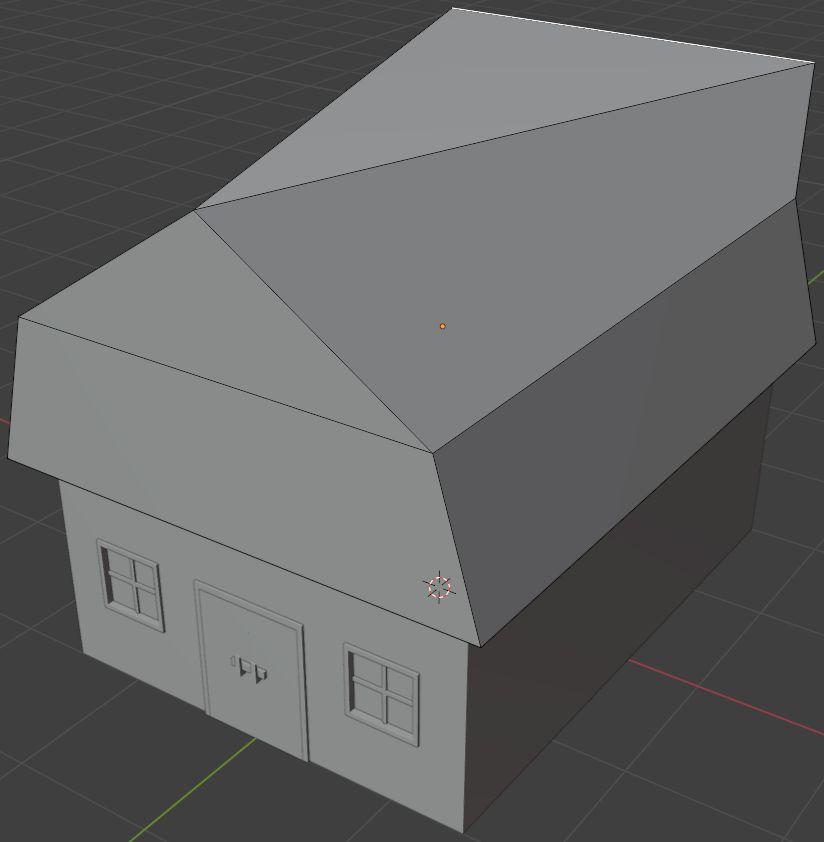
- Press M
- On the menu that aapears, click At Center
- On the main menu, click Layout
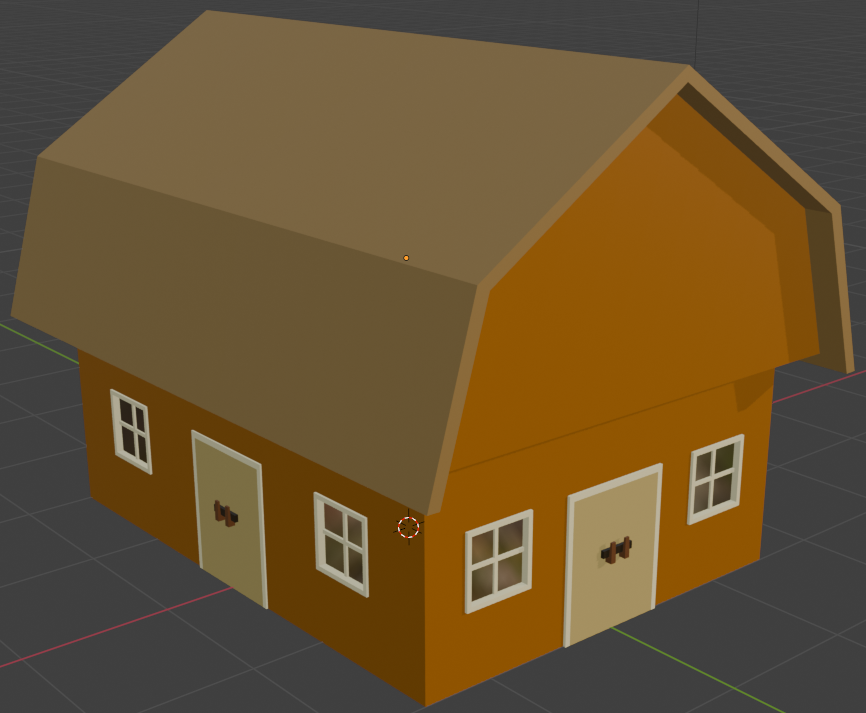
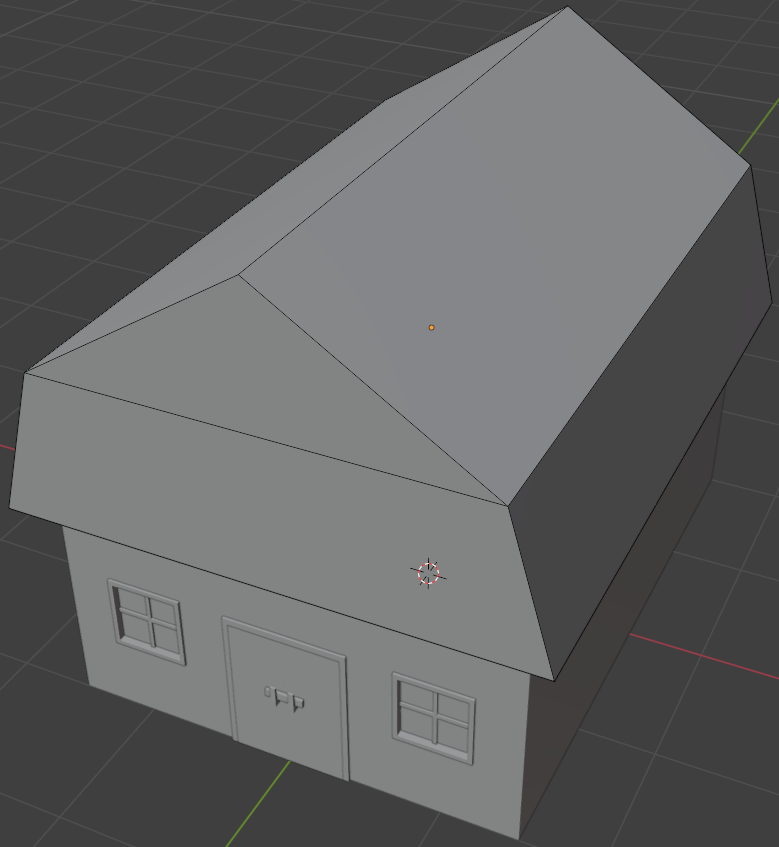
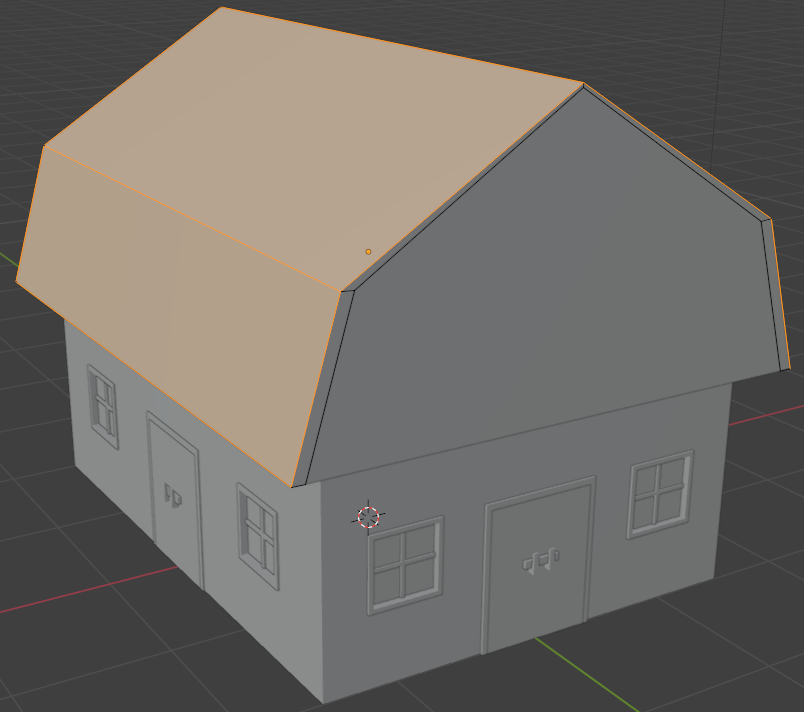
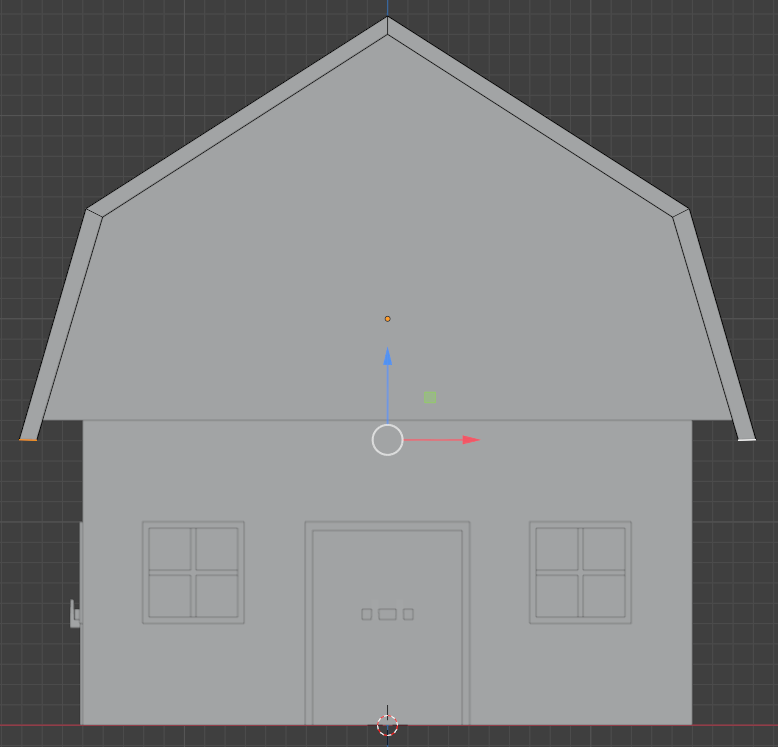
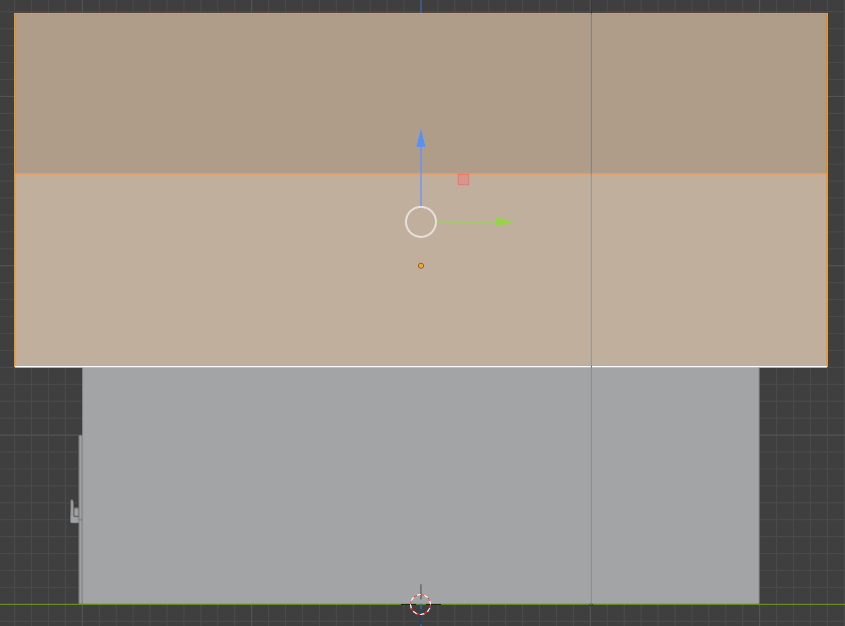
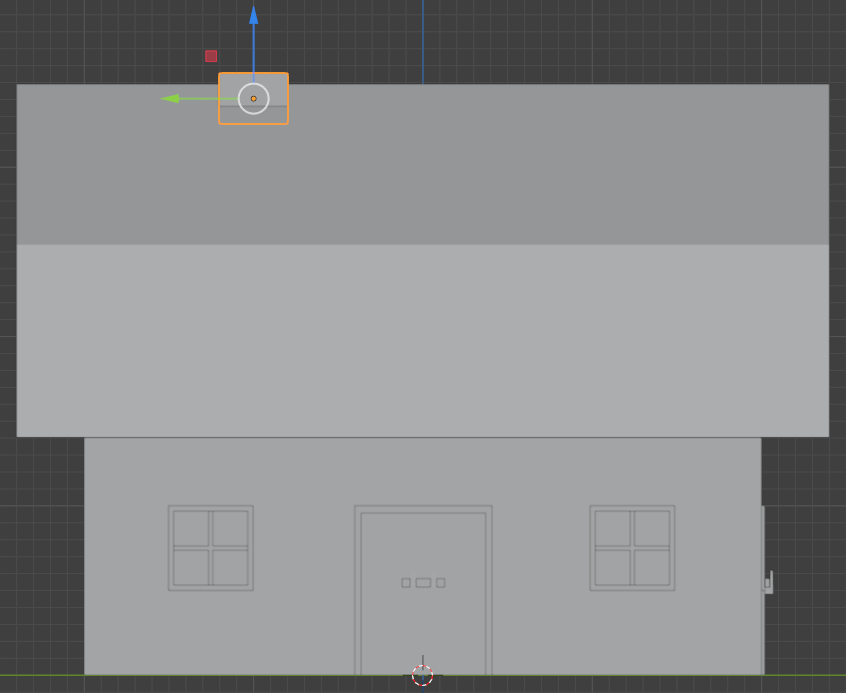
Creating the Roof
Practical Learning: Creating the Roof
- Make sure the top side of the barn is selected:
On the main menu of Blender, click Modeling
- On the top menu, click the Face button
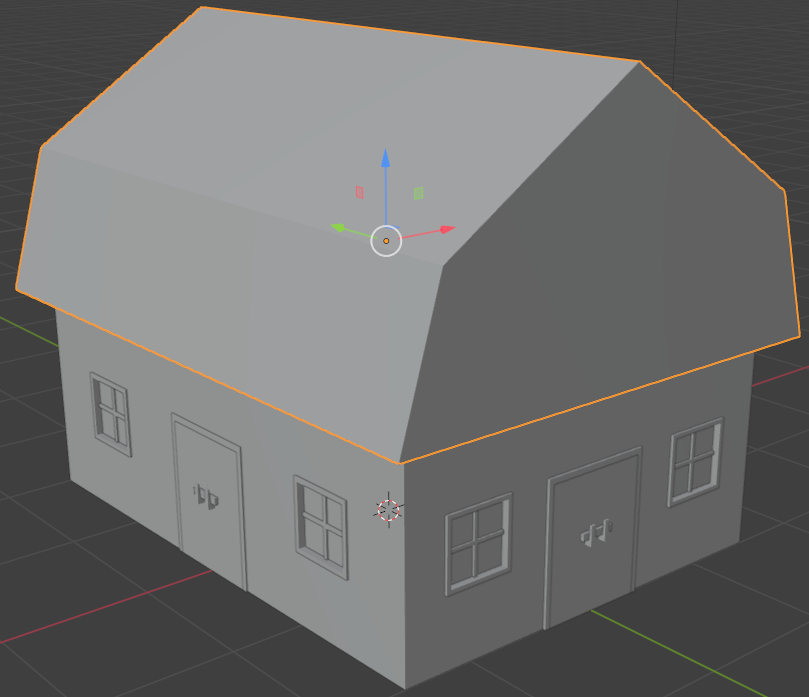
- Click one of the top faces to select it
- Press and hold Shift
- Click each of the slant and the top faces
- Release Shift
- Right-click anywhere in the 3D Viewport workspace window -> Separate -> Selection
- On the main menu, click Layout
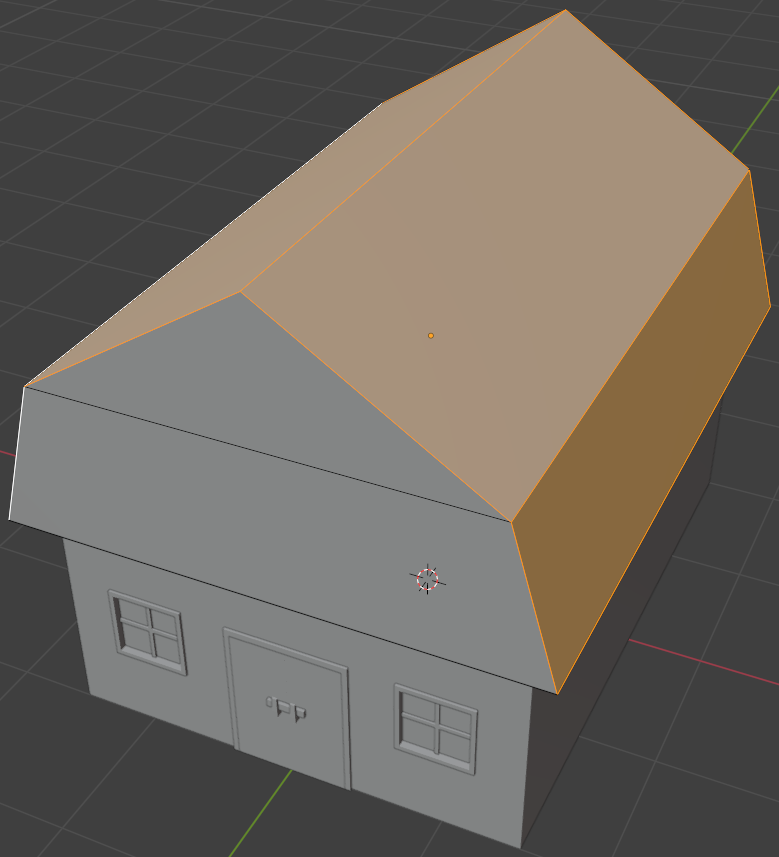
- Click the roof to confirm its separation

- On the main menu, click Modeling
- On the top menu bar, click Select -> All
- Press Alt + E to extrude
- In the menu that appears, click Extrude Faces Along Normals
- Move the mouse slightly away from the roof and click
- In the Extrude Indiviodual Faces and Move window, change the Offset value to 0.05:
Offset: 0.05
(or set the value so that the ends of the bars are within the frame in the left and the right borders of the window)
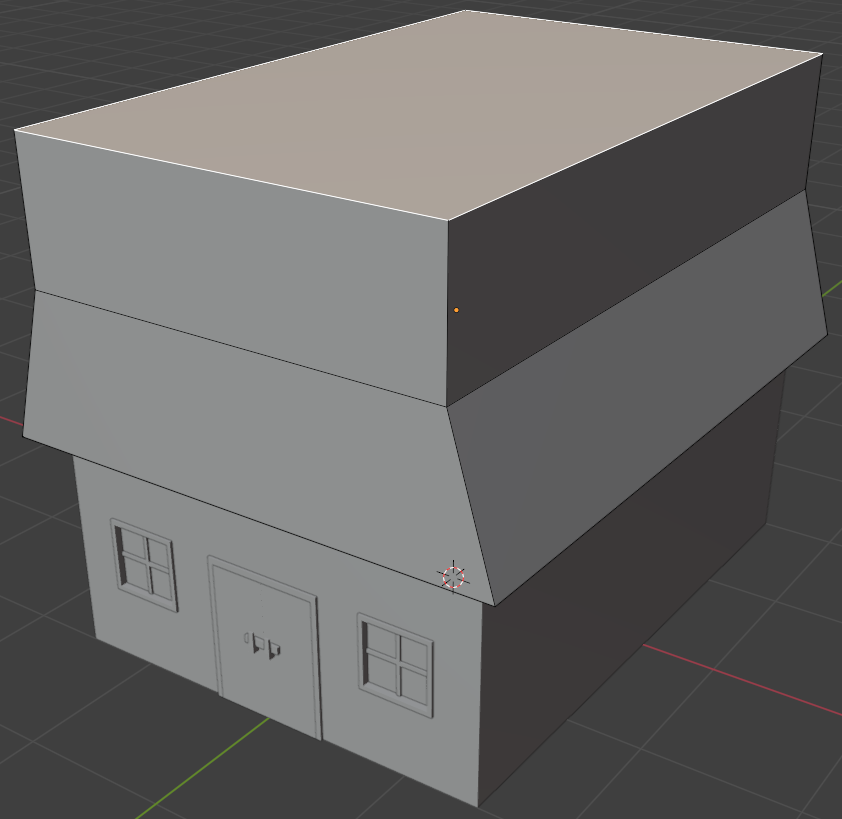
- On the top bar, click the Edge button
- Click the top edge of the roof
- Move it slightly up (in the Move window, you can set the Z value to 0.065)
Move Z: 0.065
- In the same way, click each of the middle edges and move them slightly up to make sure all roof parts have the same width:
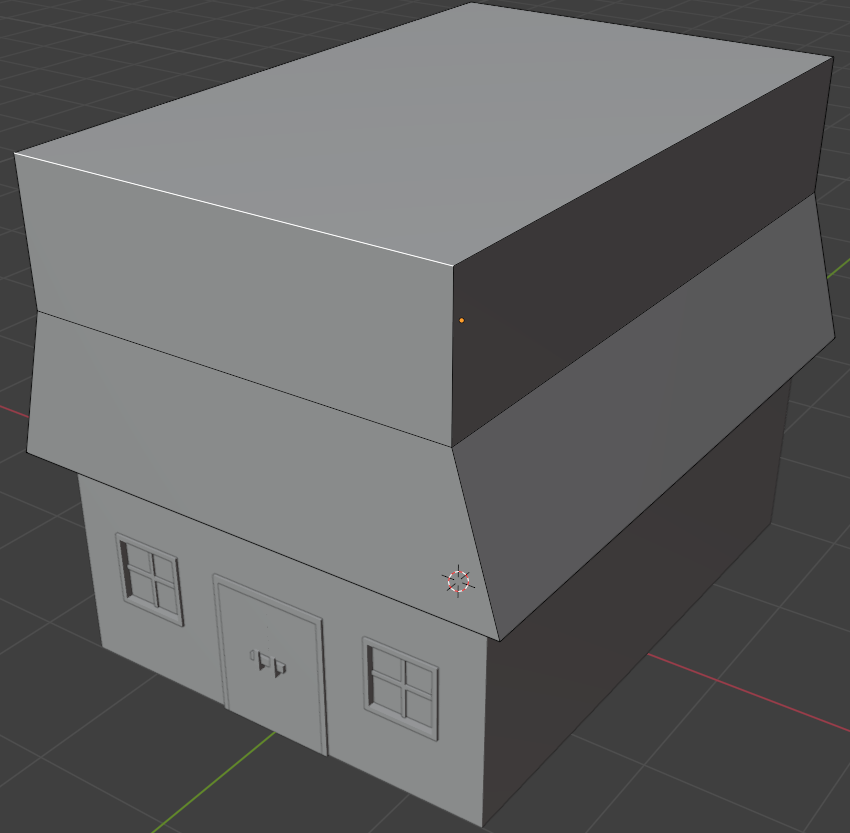
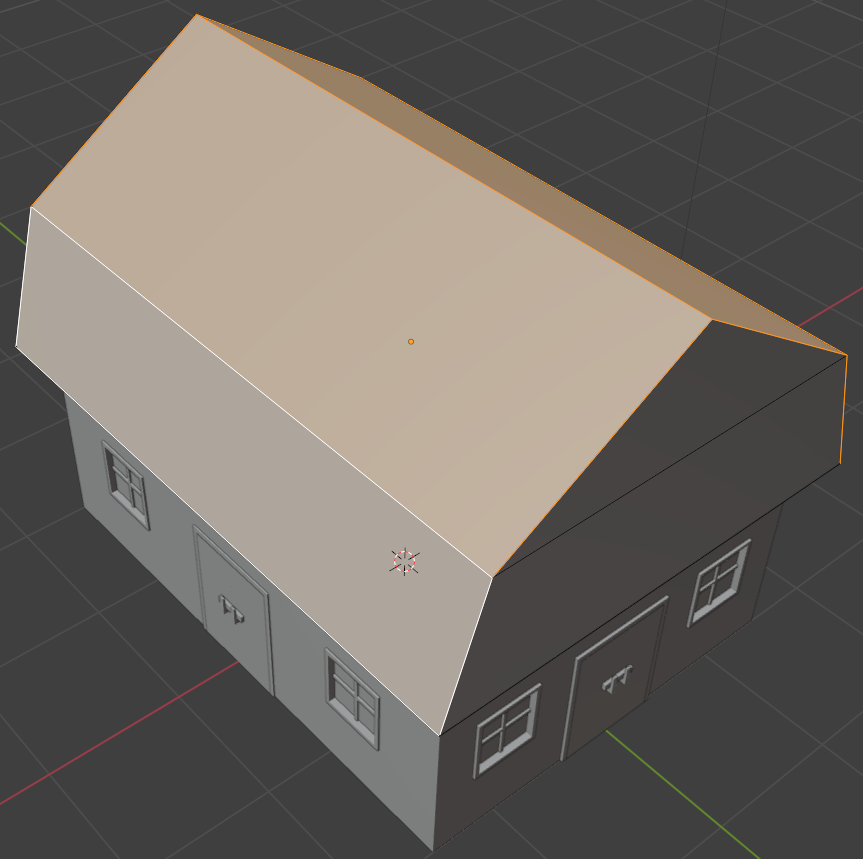
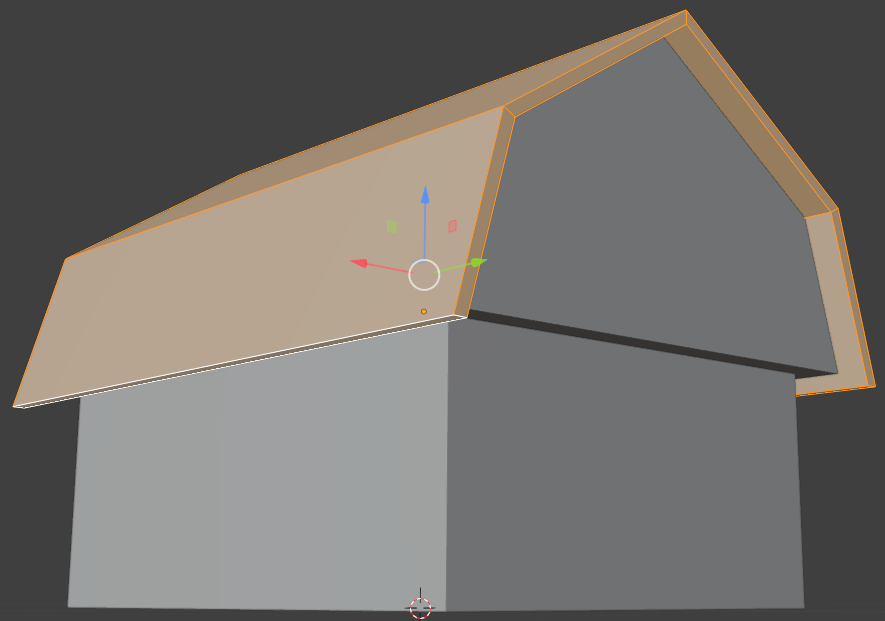
- On the top menu bar, click the Face button
- Click one of the bottom side faces of the roof to select it
- Press and hold Shift
- Click the other bottom side face of the roof
- Release Shift
- Move those faces down and away slightly
- On the top menu, click Select and click All
- Use S and Y to enlarge the roof slightly
- On the main menu, click Layout
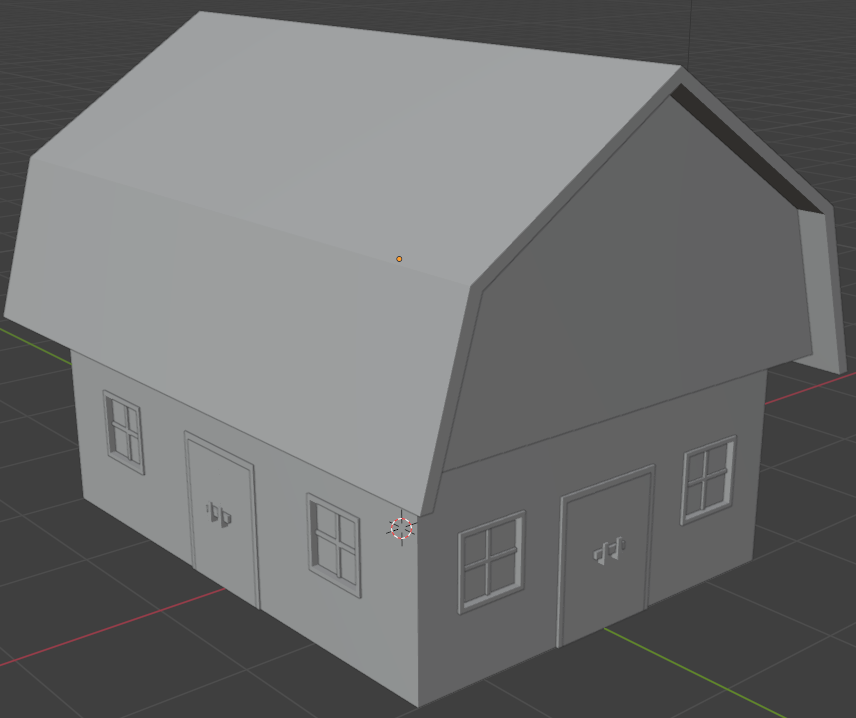
- On the main menu of Blender, click Shading
- Make sure the roof is selected.
On the Shading bar, click the New button 
- Click Material to select the name. Type Brown-Roof and press Enter
- Click the right side of Base Color. Set the RGB values as follows:
Red:   0.335
Green: 0.195
Blue:  0.055
- Click the other top part of the barn below the roof
- On the middle toolbar, click the arrow of the material combo box and select Wall
- On the main menu of Blender, click Layout
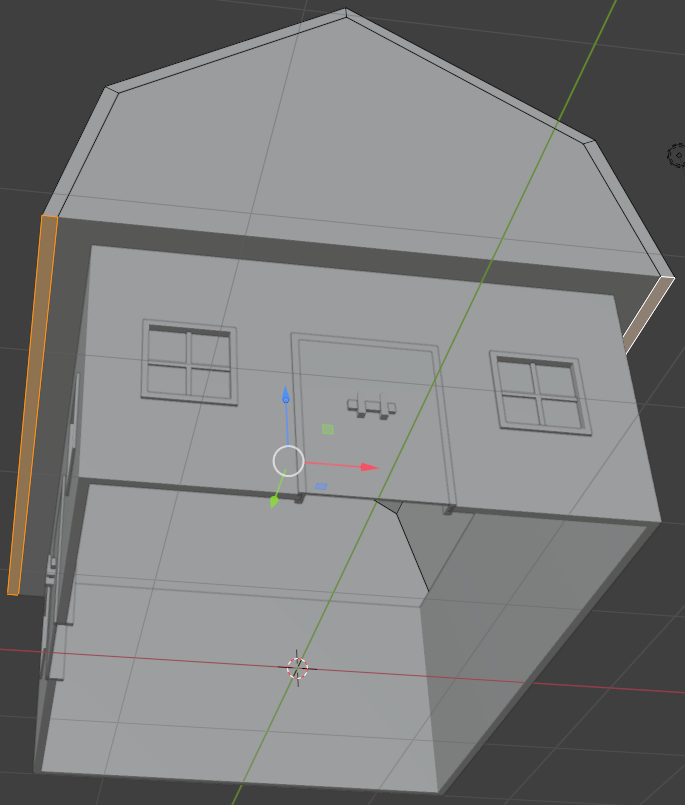
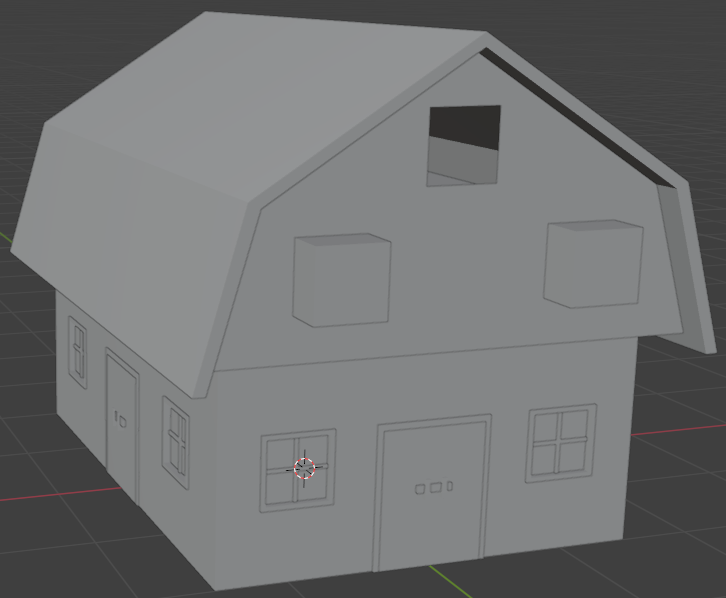
Creating the Top Windows Openings
.
Practical Learning: Creating the Top Windows Openings
- On the top menu, click View -> Viewpoint -> Bottom
- On the top menu of Blender, click Add -> Mesh -> Cube
- On the toolbar of the Properties window, click the Modifiers button
- In the Modifiers section of the Properties window, click Add Modifier -> Generate -> Mirror
- Click the button of the Mirror Object text box and click the top side of the bar (make sure the Mirror Object text box displays Story-Second)
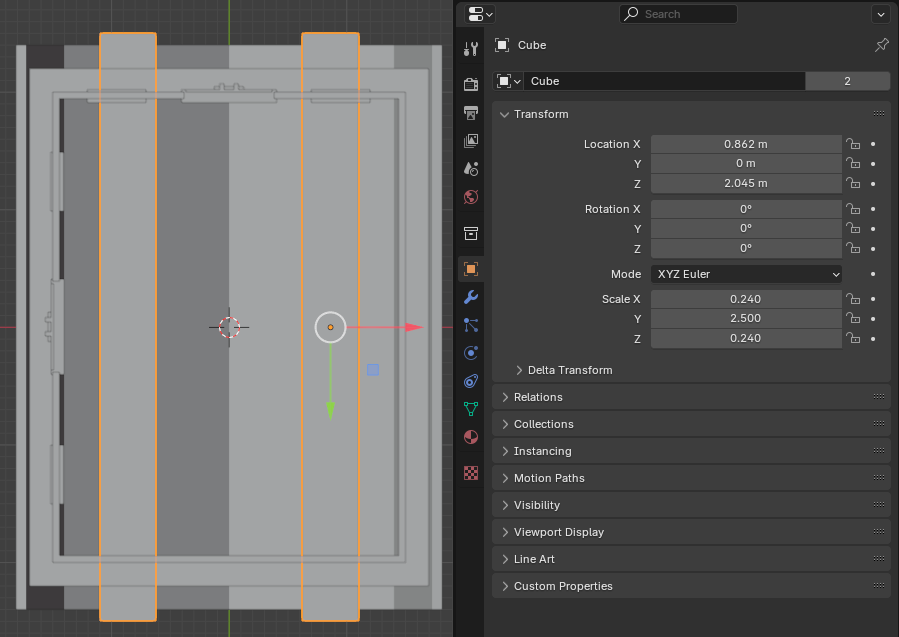
- In the Properties window, click the Object button
- In the Object section of the Properties window, change the following values:
Location X: 0.862
         Y: 0
         Z: 2.045
Scale: X: 0.24
       Y: 2.5
       Z: 0.24
- On the toolbar of the Properties window, click the Modifiers button
- Click the arrow of the Mirror button and click Apply
- Click and drag the Rotate button to display the barn in perpective view
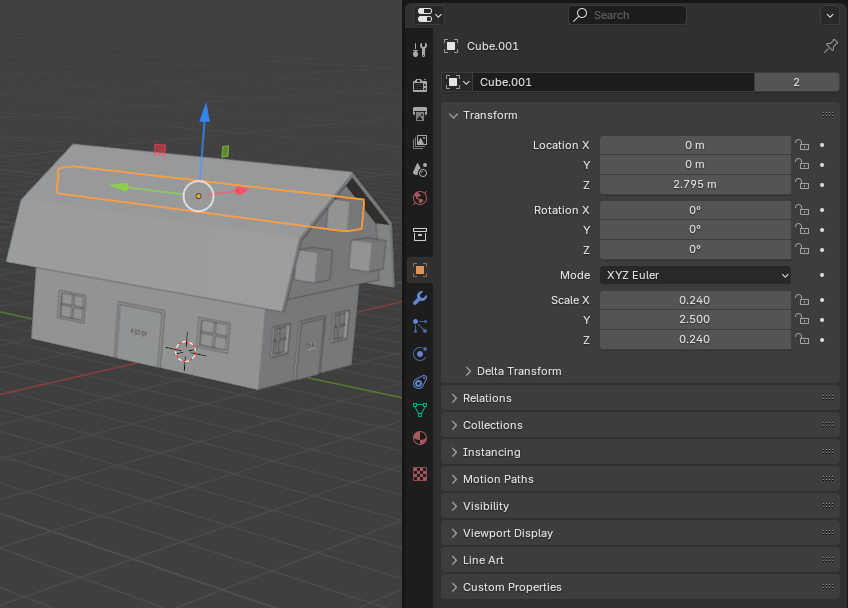
- On the top menu of Blender, click Add -> Mesh -> Cube
- In the Object section of the Properties window, change the following values:
Location X: 0
         Y: 0
         Z: 2.795
Scale: X: 0.24
       Y: 2.5
       Z: 0.24
- Click the top body of the barn to select it
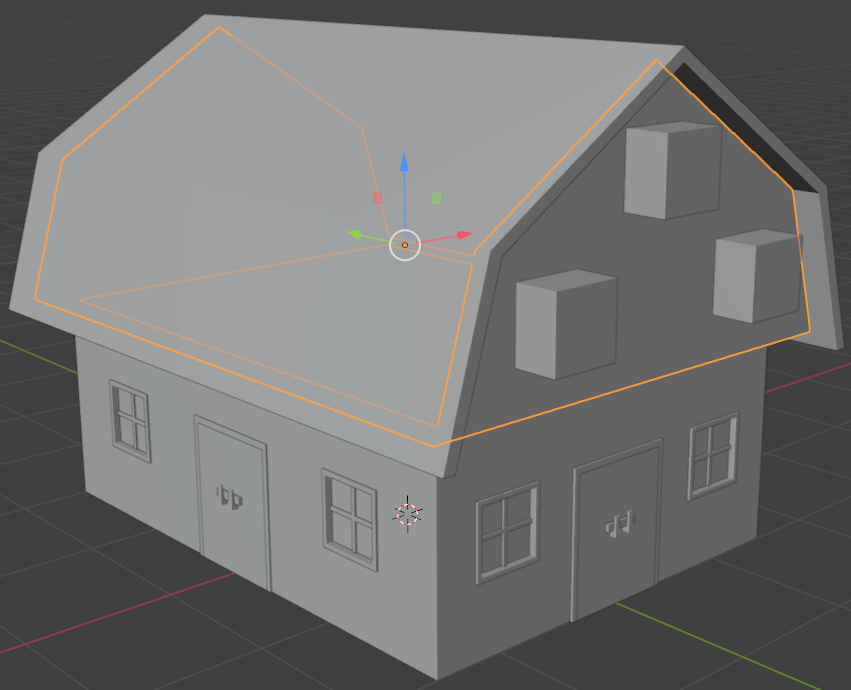
- On the toolbar of the Properties window, click the Modifiers button
- In the Modifiers section of the Properties window, click Add Modifier -> Generate -> Boolean
- Click the button of the Object button and click one of the cubes that were just added
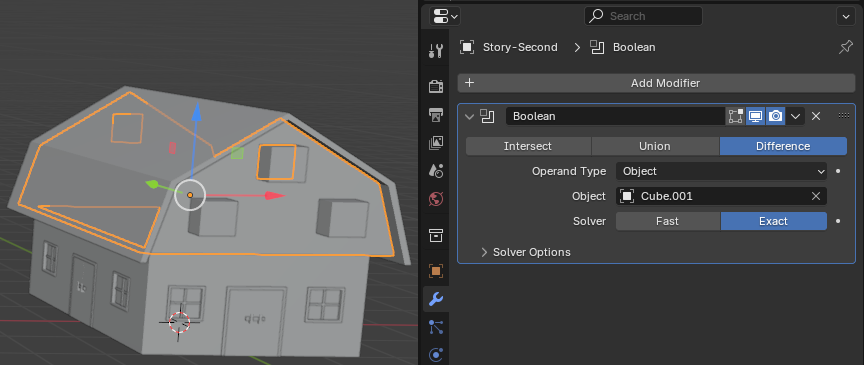
- Click the same cube you just clicked to select it
- Press Delete
- Click the top body of the barn again to select it
- In the Modifiers section of the Properties window, click the down-pointing arrow button and click Apply
- While the top body of the barn is still selected, in the Modifiers section of the Properties window, click Add Modifier -> Generate -> Boolean
- Click the button of the Object button and click one of the other cubes that were left
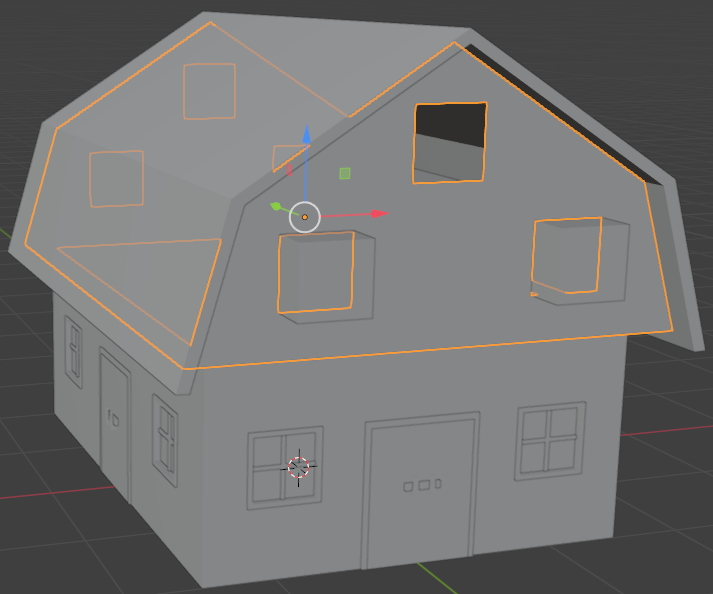
- Click the same cube you just clicked to select it
- Press Delete
- Click the top body of the barn to select it
- In the Modifiers section of the Properties window, click the down-pointing arrow button and click Apply
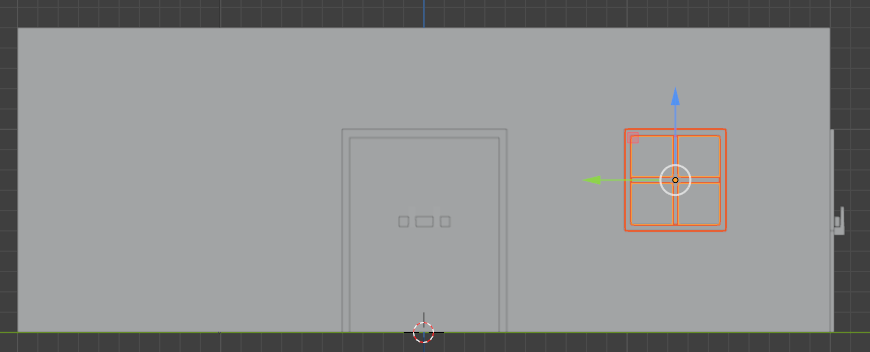
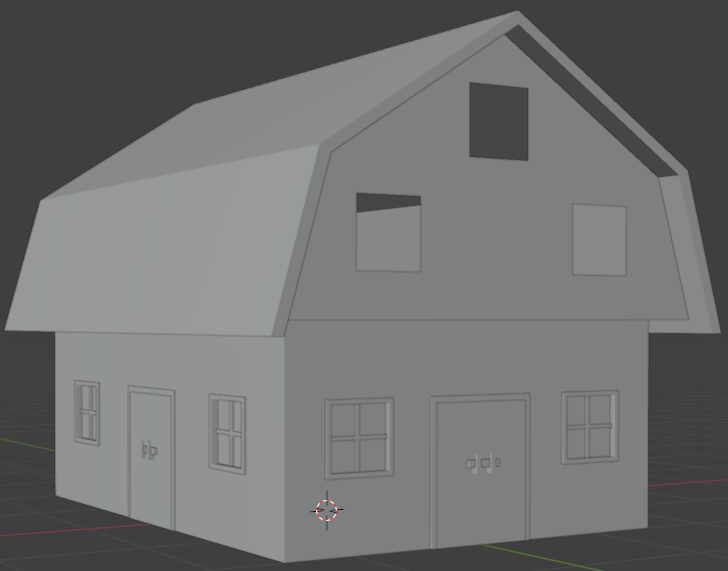
- On the left toolbar, click the Move button .
On the top menu, click View -> Viewpoint -> Front
- In the Outliner, click Window-Bar to select it
- Press and hold Ctrl
- Click Window-Frame to slect it
- Click Window-Glass to slect it
- Release Ctrl
- On the menu bar, click Object -> Duplicate Objects
- Right-click in the 3D Viewport to accept the duplicate
- Use the red X and the Y arrows to move the selected group to one of the window openings
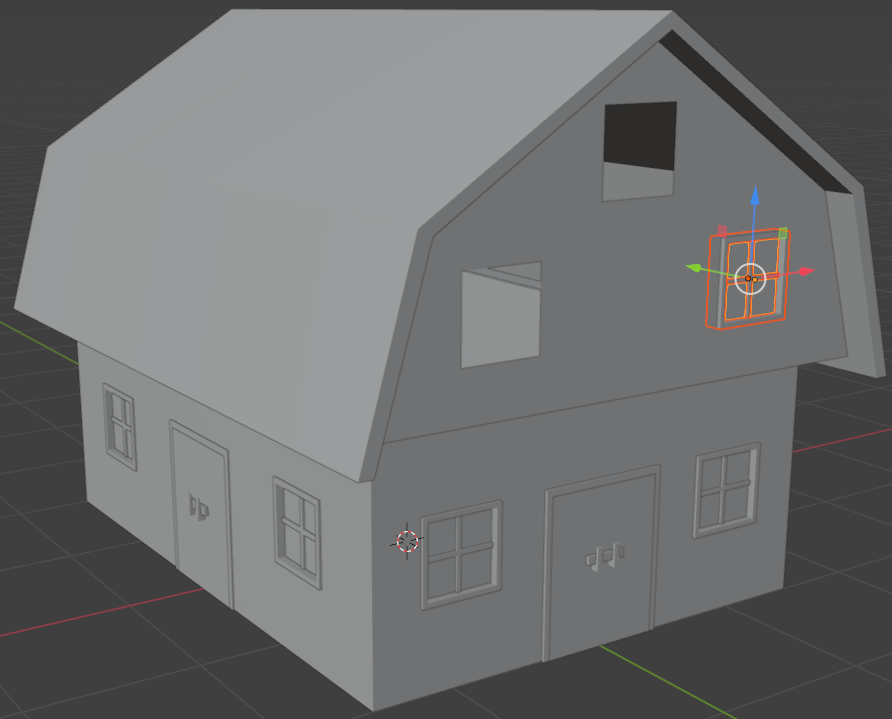
- While the window is still selected, press Shift + D to duplicate
- Press X or press Y. Then move the window to one of the other window openings
- Repeat the steps to duplicate a window and move it to the remaining window opening
Modeling a Barn Chimney - 1
.
Practical Learning: Creating the Top Windows Openings
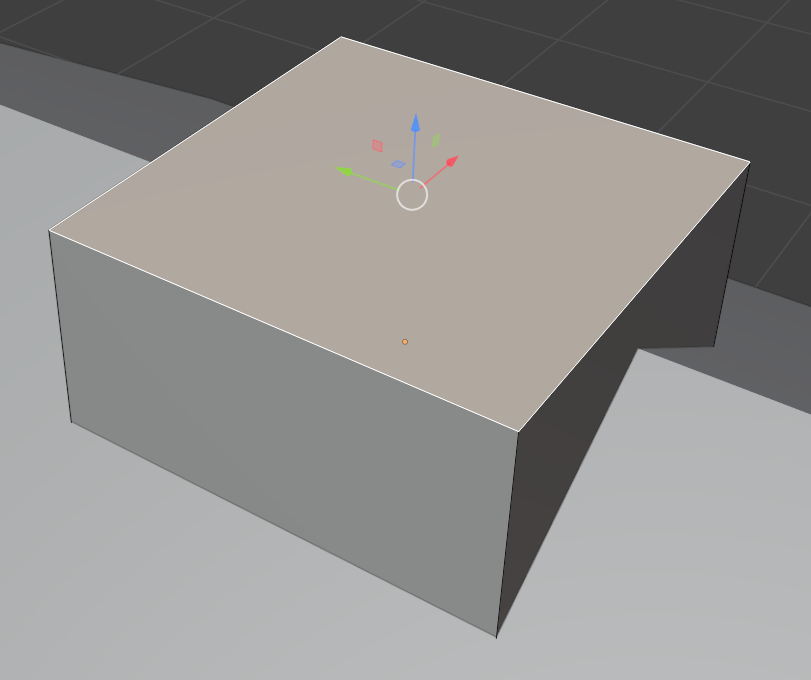
- On the top menu of Blender, click Add -> Mesh -> Cube
- In the Properties window, click the Object button
- In the Object section of the Properties window, change the following values:
Location X: 0
         Y: 1
         Z: 3.405
Scale: X: 0.205
       Y: 0.205
       Z: 0.15
- On the Blender main menu, click Modeling
- Click and drag the Rotate button to see the top side of the cube. Then zoom in to see as much as possible of the new cube
- On the top toolbar, click the Face button
- Click the top face to select it
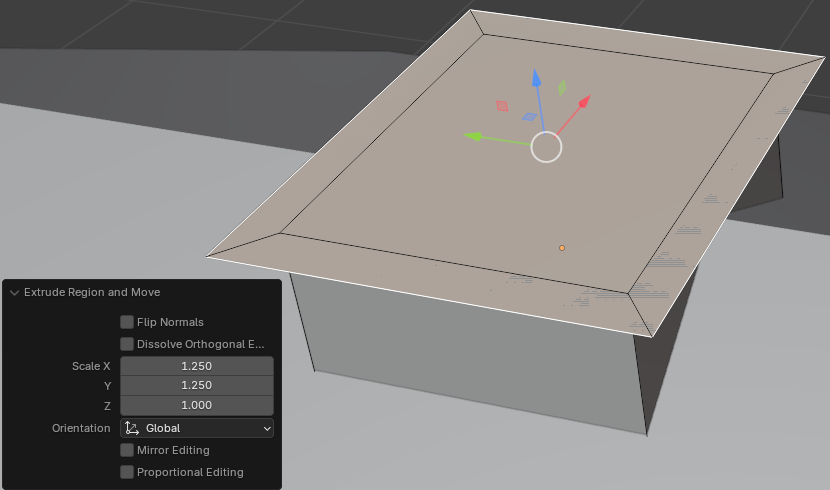
- To expand the top face, press E, then press S, and press Enter
- In the Extrude Region and Move window, change the following values:
Scale: X: 1.25
       Y: 1.25
       Z: 1
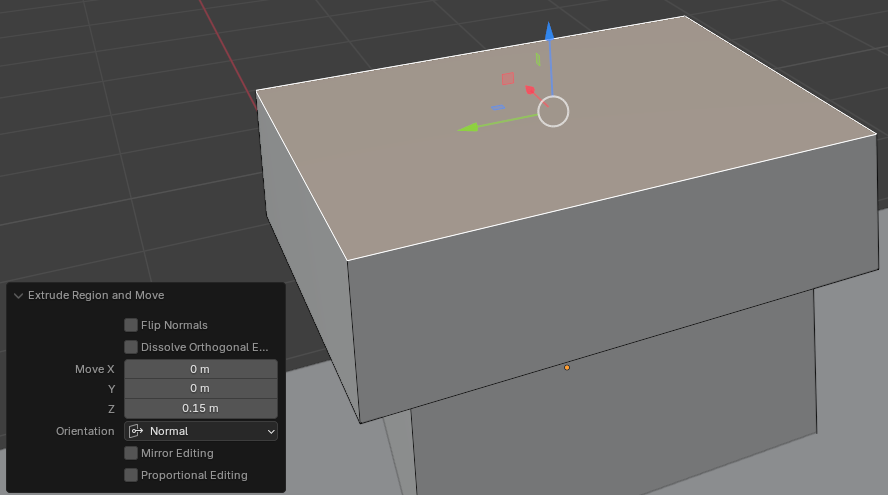
- To extrude, press E and press Enter
- In the Extrude Region and Move window, change the following values:
Scale: X: 0
       Y: 0
       Z: 0.15
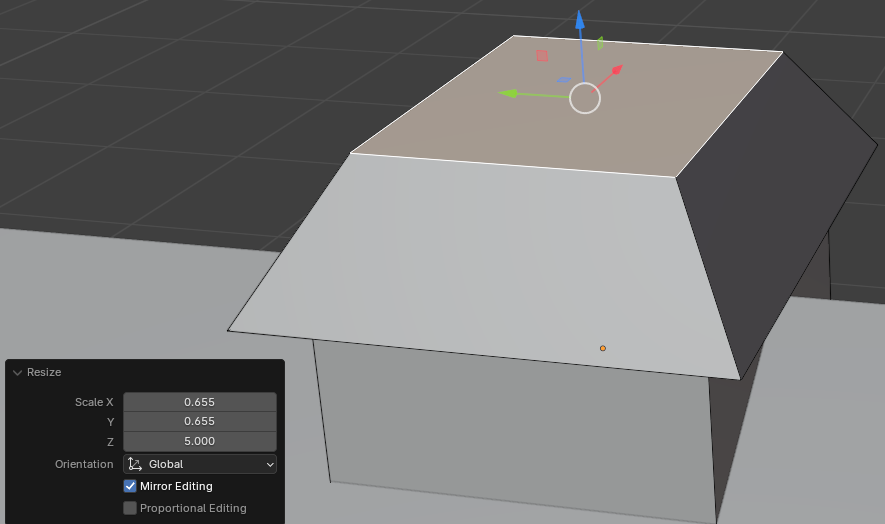
- To resize the face, press S and press Enter
- In the Resize window, change the scale values as follows:
Scale: X: 0.655
       Y: 0.655
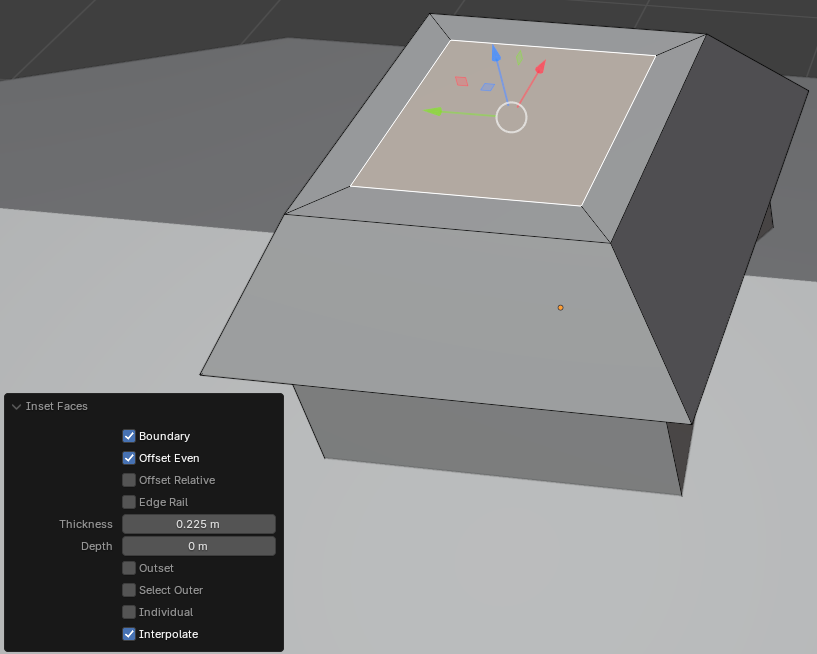
- To create an inset, press I and press Enter
- In the Inset Faces window, change the Thickness to 0.225:
Thickness: 0.225
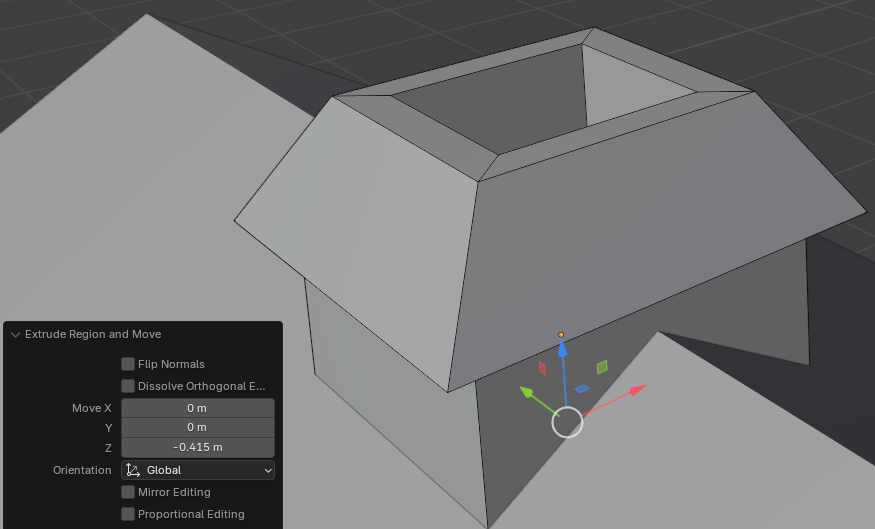
- To dig a hole, press E, then press Z
- Move the mouse slightly and click
- In the Extrude Region and Move window, change the following values:
Scale: X: 0
       Y: 0
       Z: 0.15
- On the Blender main menu, click Layout
Adding Cubes to a Barn Chimney
.
Practical Learning: Adding Cubes to a Barn Chimney
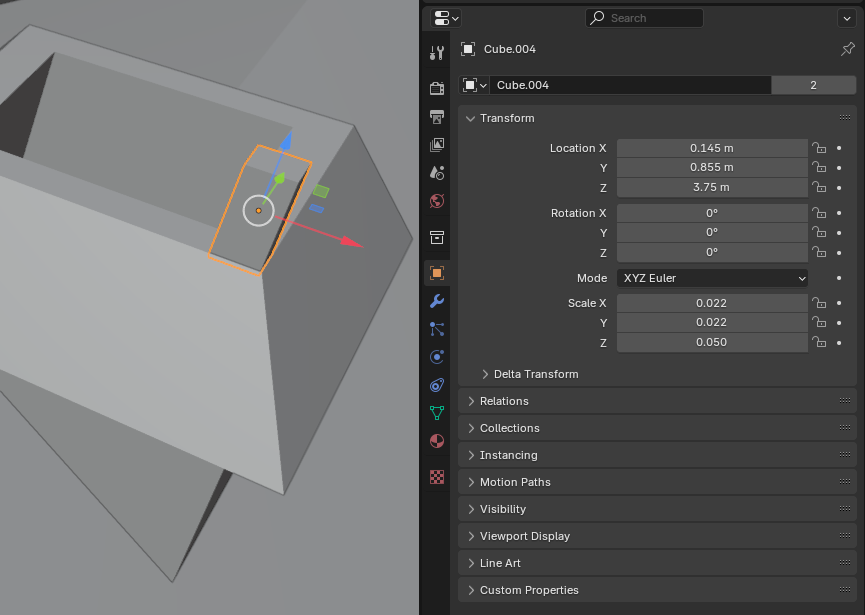
- On the top menu of Blender, click Add -> Mesh -> Cube
- In the Object section of the Properties window, change the following values:
Location X: 0.145
         Y: 0.855
         Z: 3.75
Scale: X: 0.0215
       Y: 0.0215
       Z: 0.05
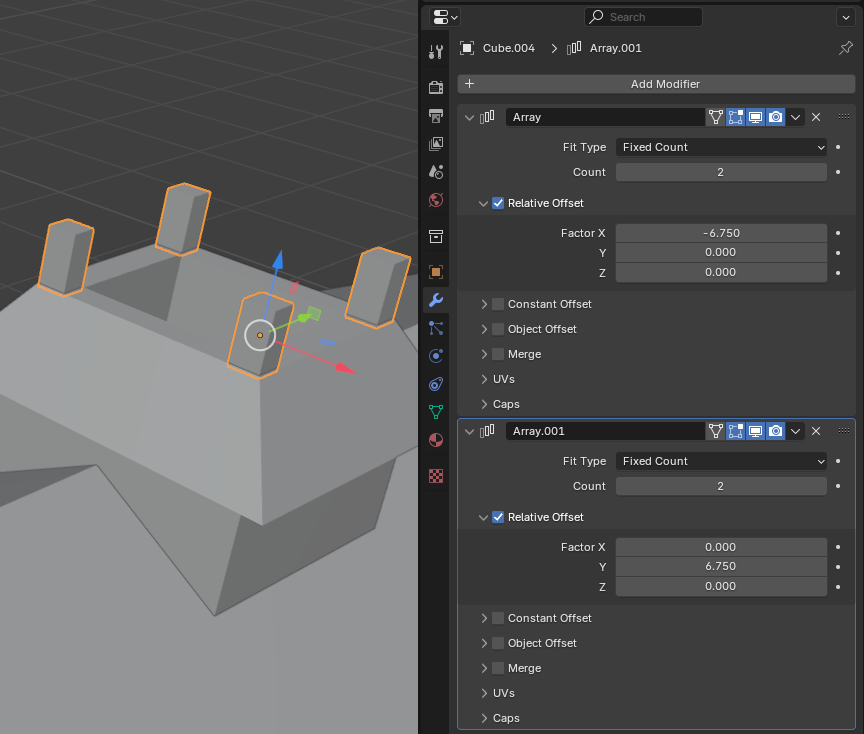
- On the toolbar of the Properties window, click the Modifiers button
- In the Modifiers section of the Properties window, click Add Modifier -> Generate -> Array
- Set the values as follows:
Count: 2
Factor X: -6.75
       Y: 0
       Z: 0
- Again, in the Modifiers section of the Properties window, click Add Modifier -> Generate -> Array
- For the second array, set the values as follows:
Count: 2
Factor X: 0
       Y: 6.75
       Z: 0
Modeling a Barn Chimney - 2
.
Practical Learning: Creating the Top Windows Openings
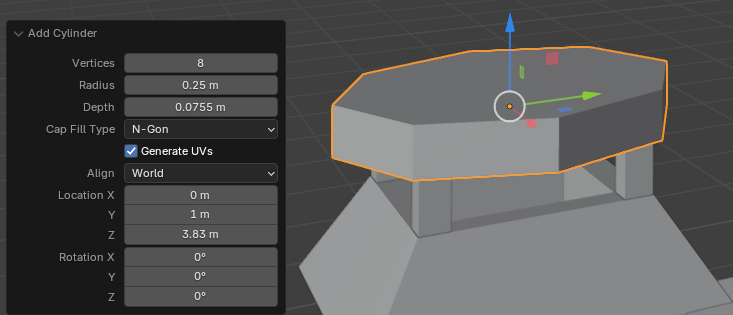
- On the top menu, click Mesh -> Add -> Cylinder
- In the bottm-left section, click Add Cylinder
- In the Add Cylinder window, change the values as follows:
Vertices:   8
Radius:     0.25
Depth:      0.0755
Location X: 0
         Y: 1
         Z: 3.825
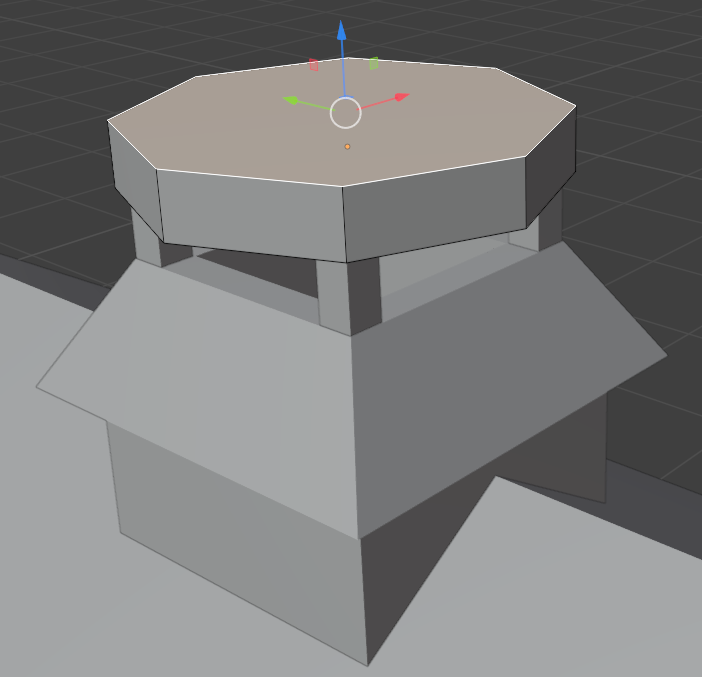
- On the Blender main menu, click Modeling
- On the top toolbar, click the Face button
- Click the top face to select it
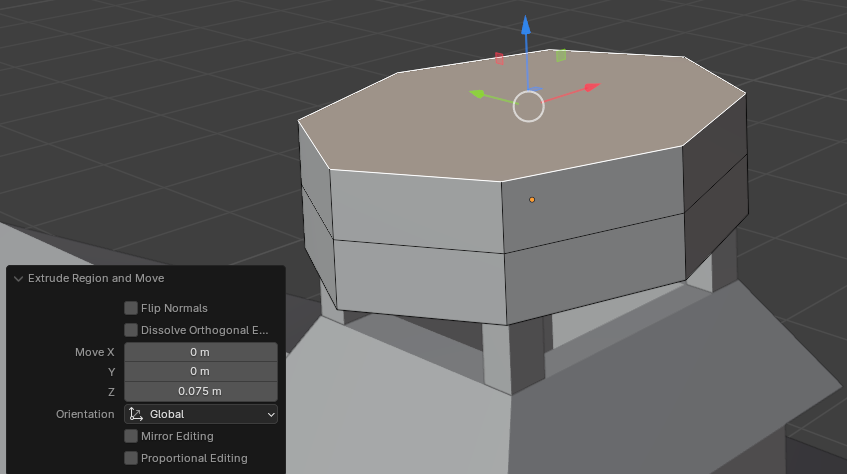
- To extrude the face, press E, then press Z, and press Enter
- In the Extrude Ragion and Move window, change the Move values as follows:
Move X: 0
     Y: 0
     Z: 0.075
- To resize the face, press S and press Enter
- In the Resize window, change the following values:
Scale X: 0.775
      Y: 0.775

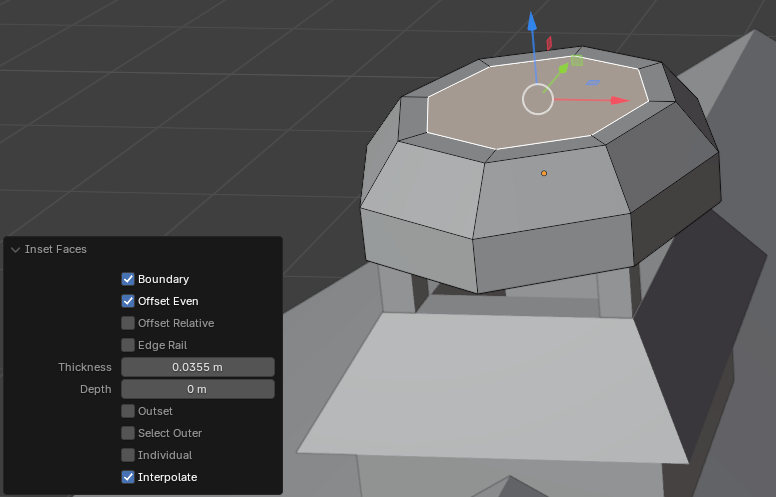
- To create an inset, press I and press Enter
- In the Inset Faces window, change the Thickness to 0.0355:
Thickness: 0.0355
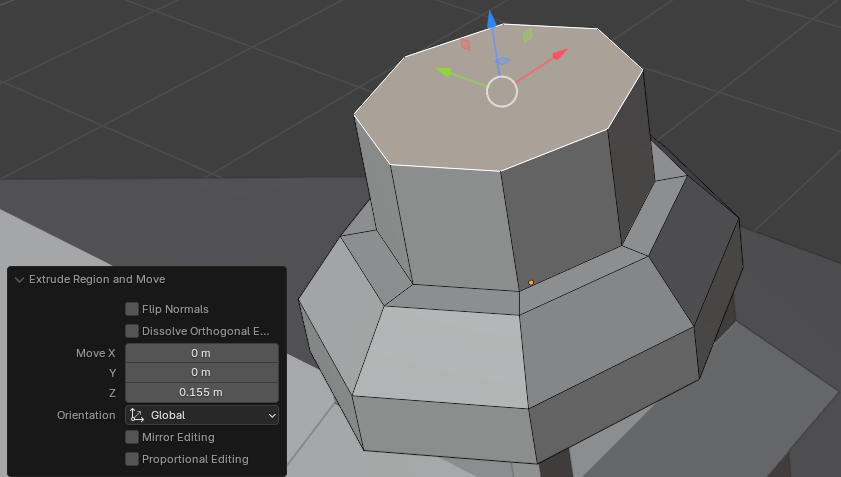
- To extrude, press E, then press Z
- Move the mouse slightly and click
- In the Extrude Region and Move window, change the following values:
Scale: X: 0
       Y: 0
       Z: 0.155
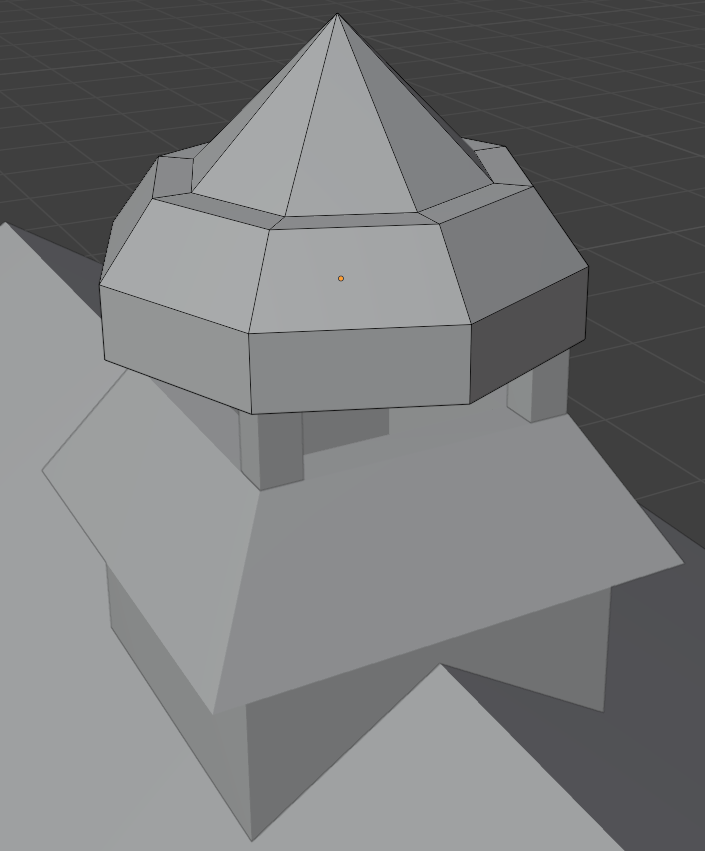
- To join the face, press M
- In the menu that appears, click At Center
- On the main menu of Blender, click Shading
- On the barn, click one of the parts on the chimney
- On the Shading toolbar, click the New button
- Click Meterial to select it
- Then type Metal and press Enter
- Click the right side of Base Color
- Set the RGB values as follows:
Red:   0.255
Green: 0.255
Blue:  0.255
- Set the other values as follows:
Metal:     0.745
Roughness: 0.5
- Click another part of the chimney
- On the Shading toolbar, click the arrow of the material button and select Metal
- Click another part of the chimney
- On the Shading toolbar, click the arrow of the material button and select Metal
- On the main menu of Blender, click Layout
- On the top menu, click View -> Viewpoint -> Left
- Draw a rectangle that touches all objects of the chimney to select them
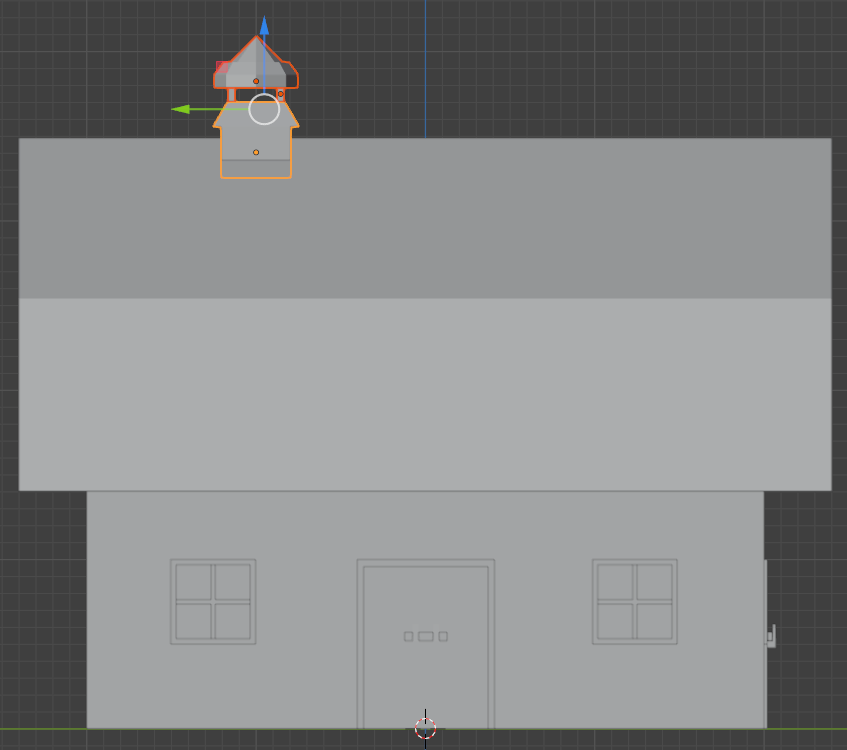
- Press Shift + D to duplicate the chimney
- Press Y and move the duplicate chimney to the other side

- On the toolbar in the top-right section, click the Material Preview button :
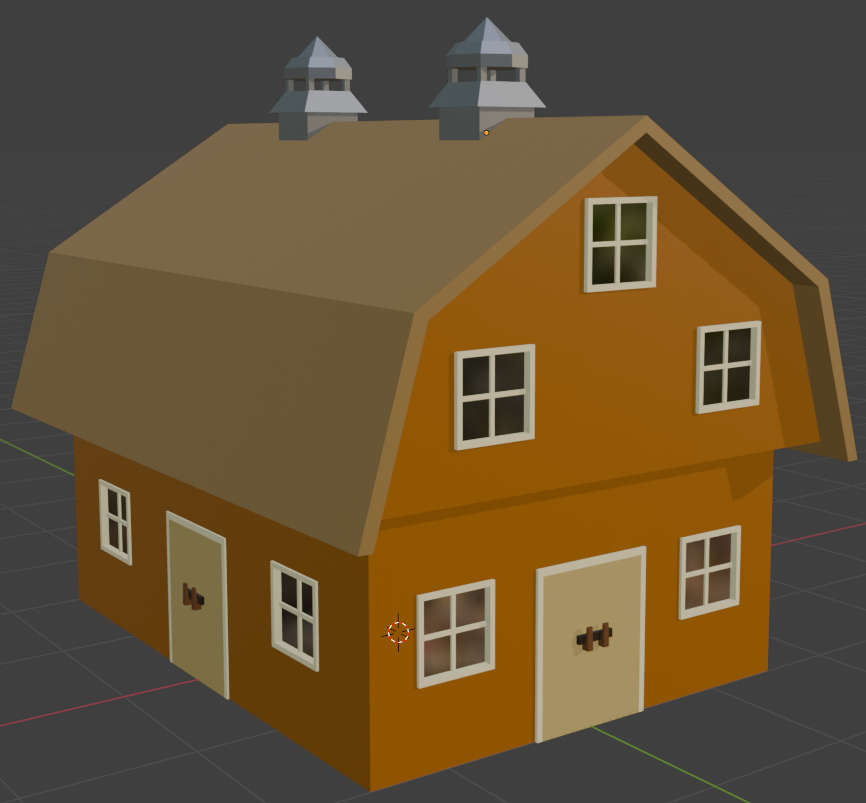
- To save, on the main menu, click File -> Save
- Set the file naame to Barn-Medium
- Click Save Blender File