A Simple Garage Door
 Practical Learning: Introducing the Model
- Start Blender
- Click the default cube to select it (it should be selected already)
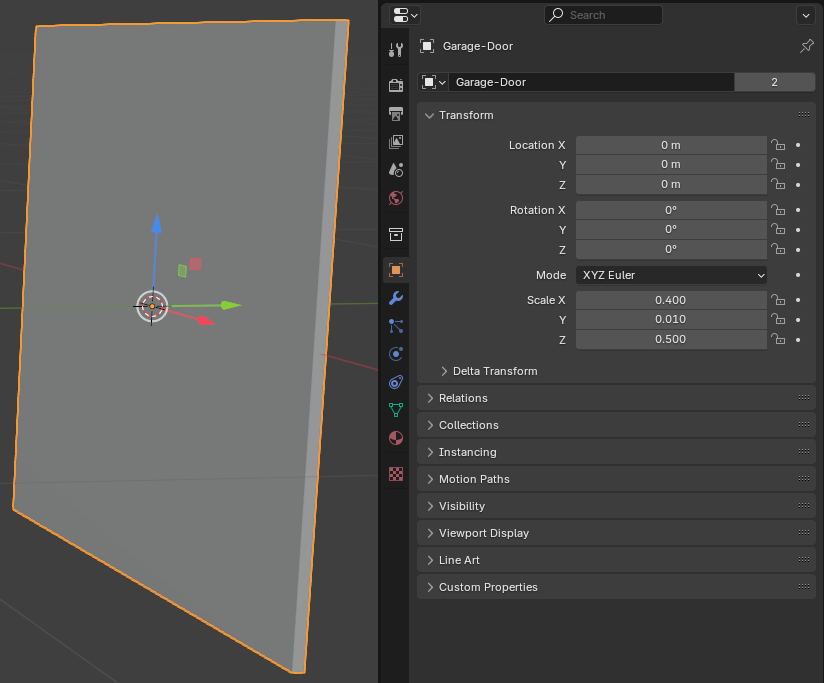
- In the Properties window, click the Object button
 (it should be selected already) to access the primary properties of the cube.
Change the following values:
Location: X: 0
          Y: 0
          Z: 0
Scale:    X: 0.4
          Y: 0.01
          Z: 0.5
- To edit the cube, on the top-main menu of Blender, click Modeling
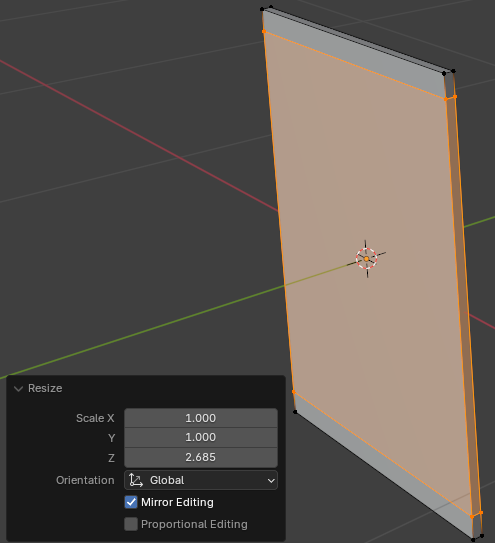
- Position the mouse on the left or the right side of the cube and press Ctrl + R to create loop cut
- Roll the mouse slightly to get two loop cuts and click twice
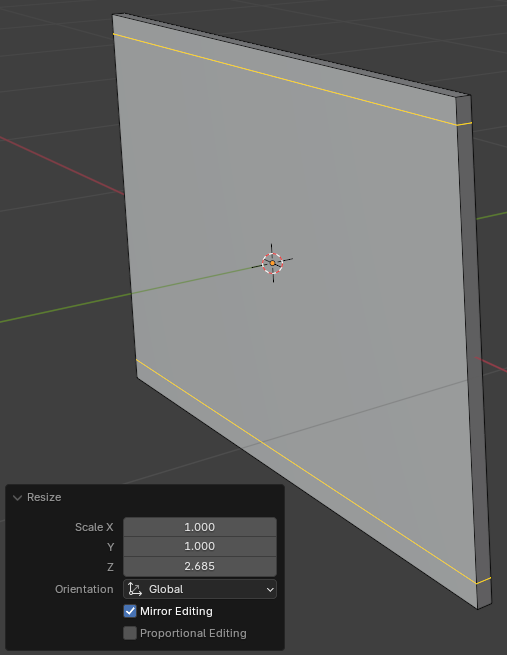
- Press S then press Z to move the loop cuts, and press Enter
- In the Resize window, set the Z value to 2.685:
Move X: 1
     Y: 1
     Z: 2.685
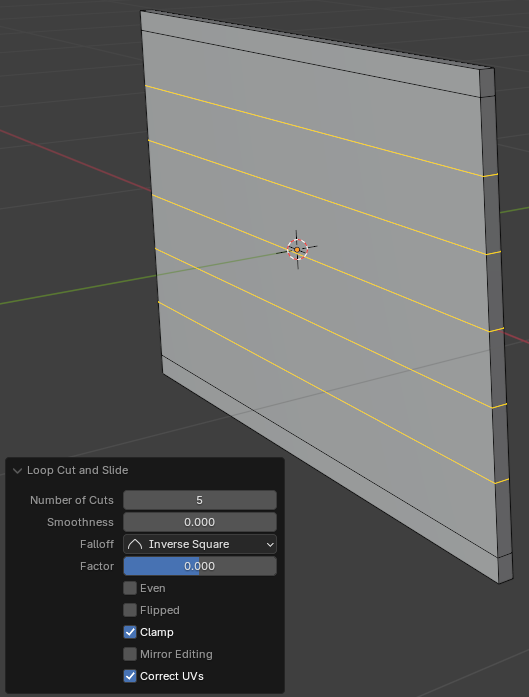
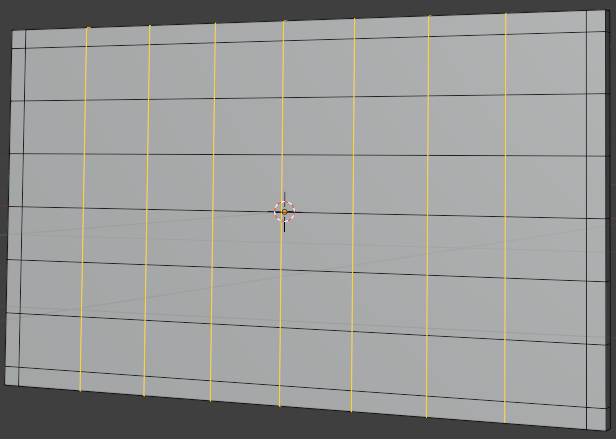
- Position the mouse on the left or the right side of the cube between the previously created bars and press Ctrl + R to create loop cut
- Rool the mouse to get five loop cuts and click twice
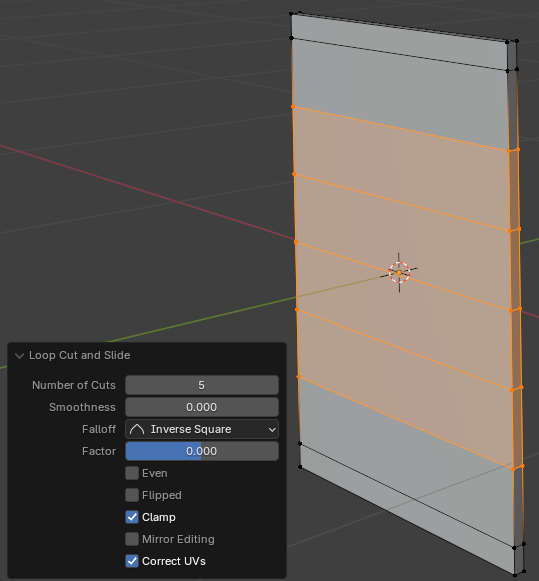
- Position the mouse on the top or the bottom side of the cube and press Ctrl + R to create loop cut
- Roll the mouse slightly to get two loop cuts and click twice
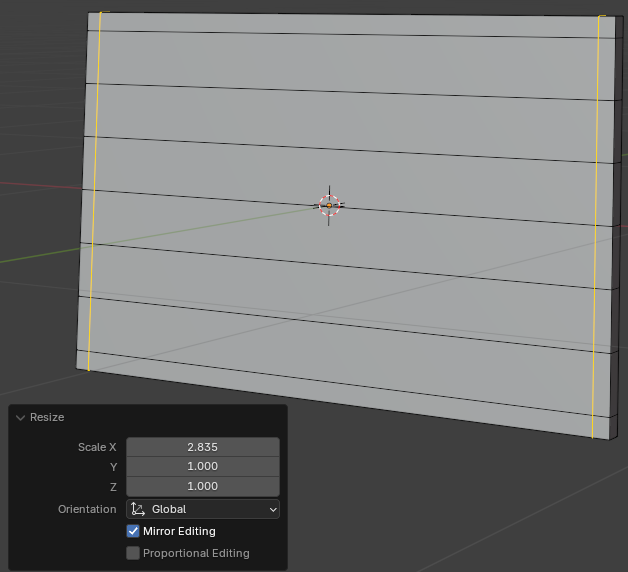
- Press S then press X to move the loop cuts, and press Enter
- In the Resize window, set the Z value to 2.685:
Move X: 2.605
     Y: 1
     Z: 1

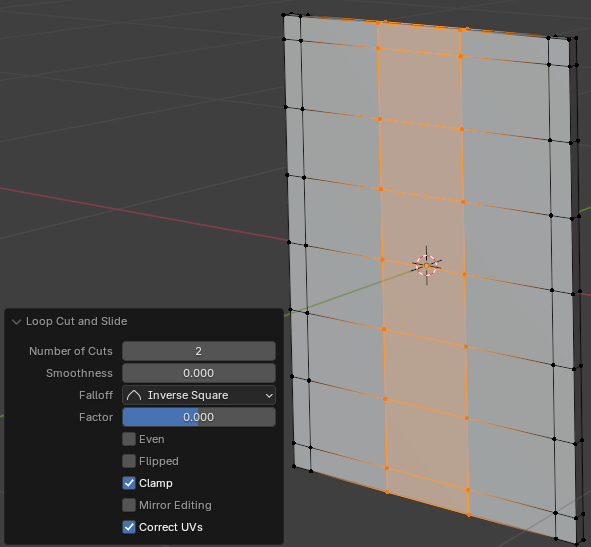
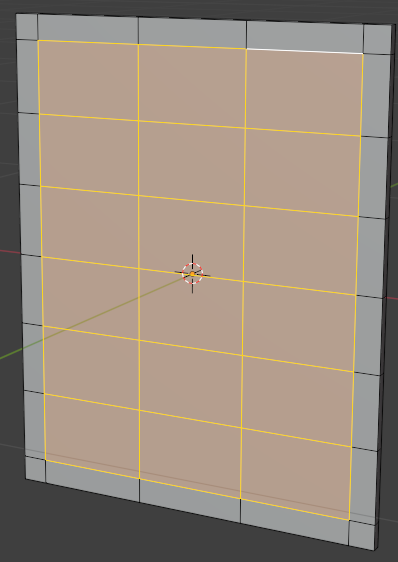
- Position the mouse on the top or the bottom side of the cube between the previously created vertical bars and press Ctrl + R to create loop cut
- Rool the mouse to get two loop cuts and click twice
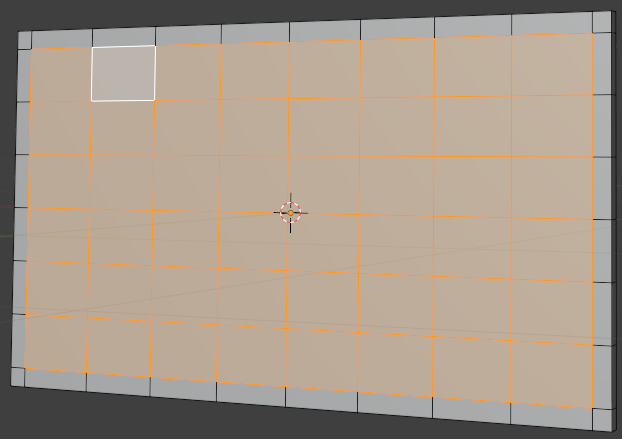
- On the top bar, click the Face button

- Select all the interior faces:
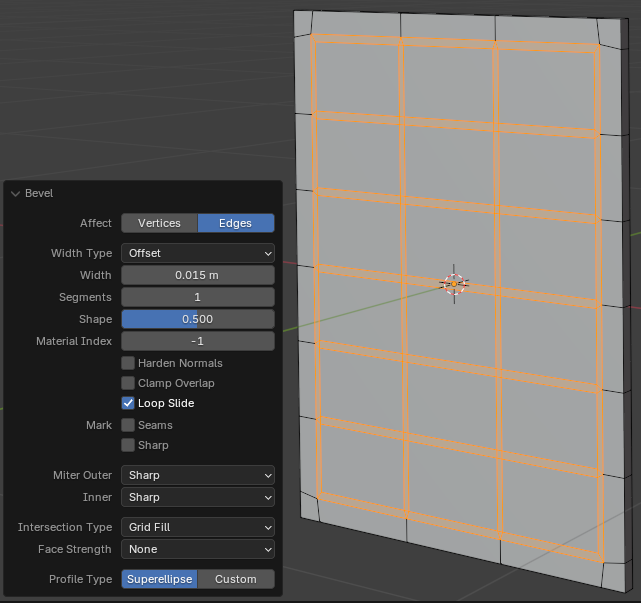
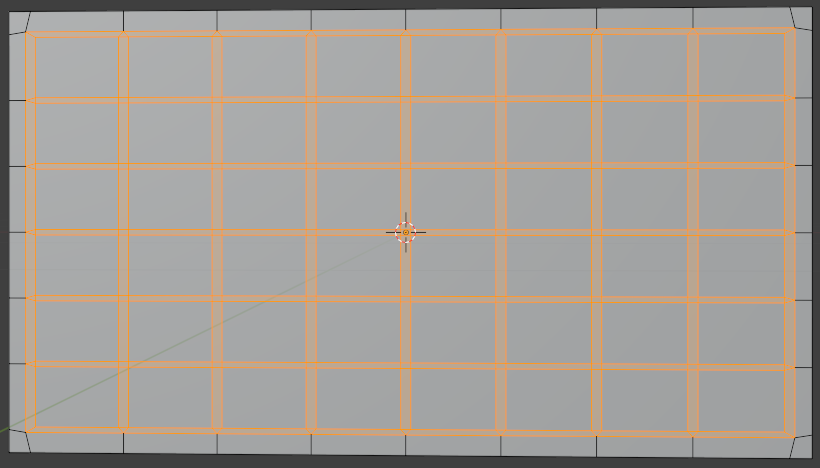
- Press Ctrl + B to create bevels and press Enter
- In the bottom-left side of the 3D Viewport, click Bevel to expand its window
- In the Bevel window, change the following values:
Width:    0.015
Segments: 1
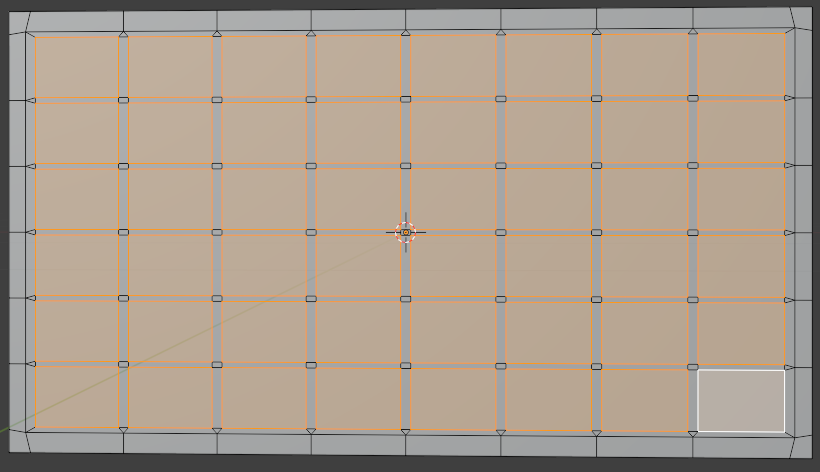
- Make sure the Face button is still selected.
Select each of the large faces (you can first click one of the faces, press and hold Shift, then click each of the other faces, then release Shift):
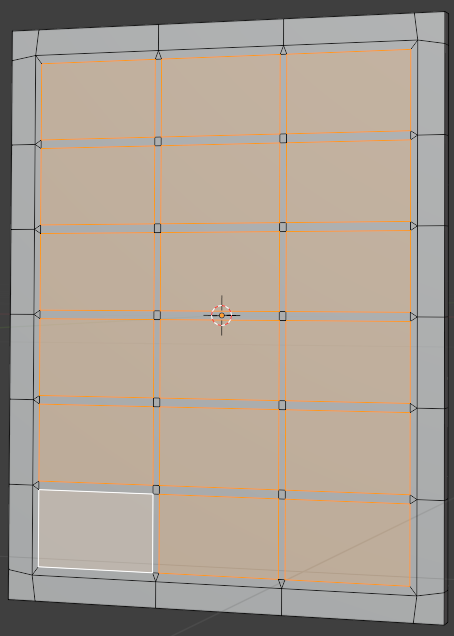
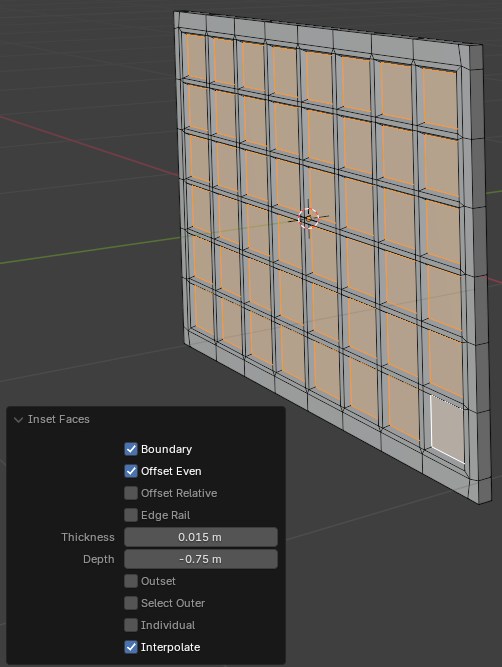
- To create insets, press I and press Enter
- In the Inset Faces window, change the Thickness value to 0.025:
Thickness: 0.025
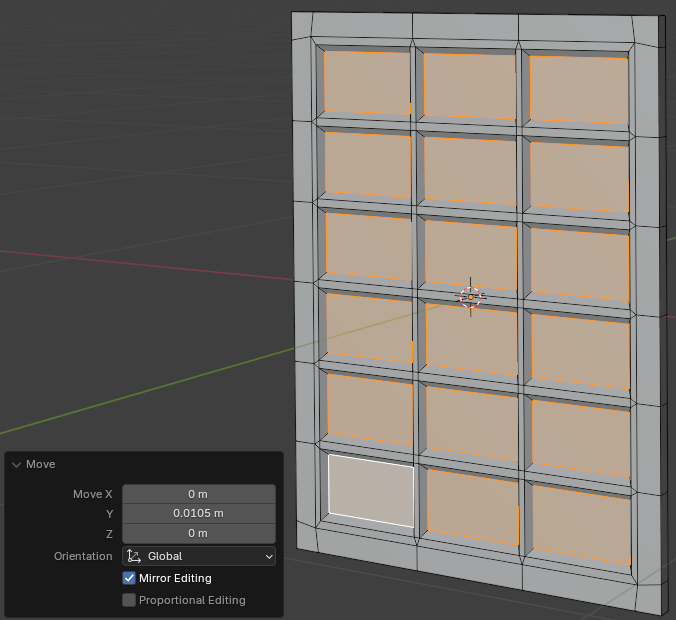
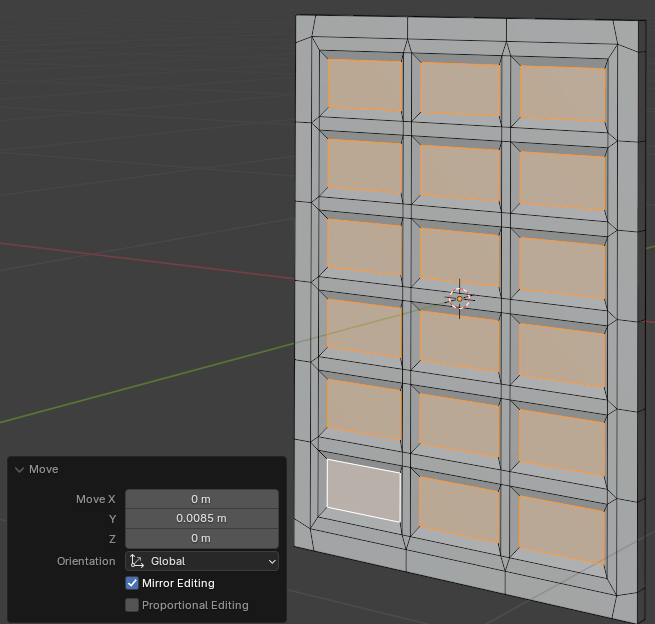
- Press G. Then press Y to move the face
- Move the mouse very slightly away from the shape and click:
Move X: 0
Y: 0.025
Z: 0
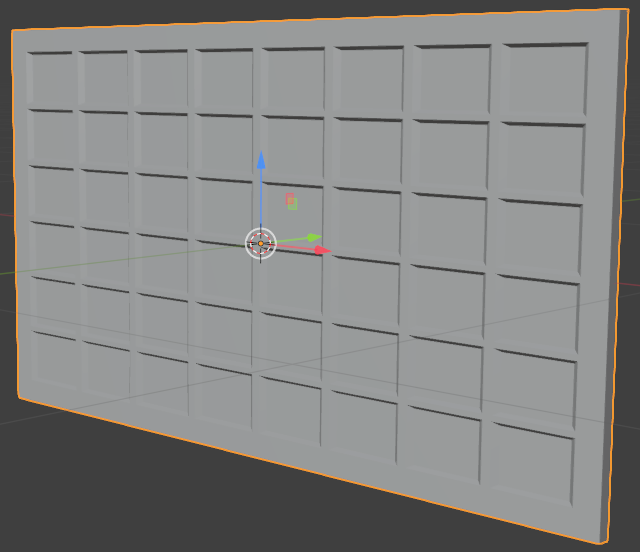
- On the top-main menu of Blender, click Layout

- To save the lock, on the main menu, click File -> Save
- Set the document name Door-Garage-1
- Click Save
A Two-Car Garage Door
Practical Learning: Introducing the Model
- To start a new project, on the main menu of Blender, click File -> New -> General
- In the the Object section of the Properties window, change the following values:
Location: X: 0
          Y: 0
          Z: 0
Scale:    X: 0.9
          Y: 0.015
          Z: 0.5
- To edit the cube, on the top-main menu of Blender, click Modeling
- Position the mouse on the left or the right side of the cube and press Ctrl + R to create loop cut
- Roll the mouse slightly to get two loop cuts and click twice
- Press S then press Z to move the loop cuts, and press Enter
- In the Resize window, set the Z value to 2.685:
Move X: 1
     Y: 1
     Z: 2.685
- Position the mouse on the left or the right side of the cube between the previously created bars and press Ctrl + R to create loop cut
- Roll the mouse to get five loop cuts and click twice
- Position the mouse on the top or the bottom side of the cube and press Ctrl + R to create loop cut
- Roll the mouse slightly to get two loop cuts and click twice
- Press S then press X to move the loop cuts, and press Enter
- In the Resize window, set the Z value to 2.685:
Move X: 2.835
     Y: 1
     Z: 1
- Position the mouse on the top or the bottom side of the cube between the previously created vertical bars and press Ctrl + R to create loop cut
- Rool the mouse to get seven loop cuts and click twice
- If the Face option is not selected, on the top bar, click the Face button .
Select all the interior faces:
- Press Ctrl + B to create bevels and press Enter
- In the bottom-left side of the 3D Viewport, click Bevel to expand its window
- In the Bevel window, change the following values:
Width:    0.0125
Segments: 1
- Select each of the large faces:
- To create insets, press I and press Enter
- In the Inset Faces window, change the Thickness value to 0.025:
Thickness:  0.025
Depth:     -0.75
- On the top-main menu of Blender, click Layout
- To save the lock, on the main menu, click File -> Save As...
- Set the document name Door-Garage-Extended-1
- Click Save As