Modeling the Walls of a House
In this project, we will model a medium house. We will model only the exterior of the house.
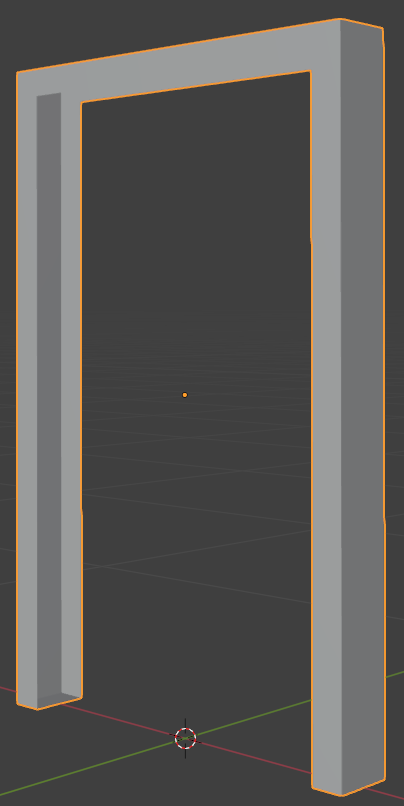
The building of a house starts with a foundation, followed by walls. In this section, we will start by creating the main walls of the house.
 Practical Learning: Introducing the Model
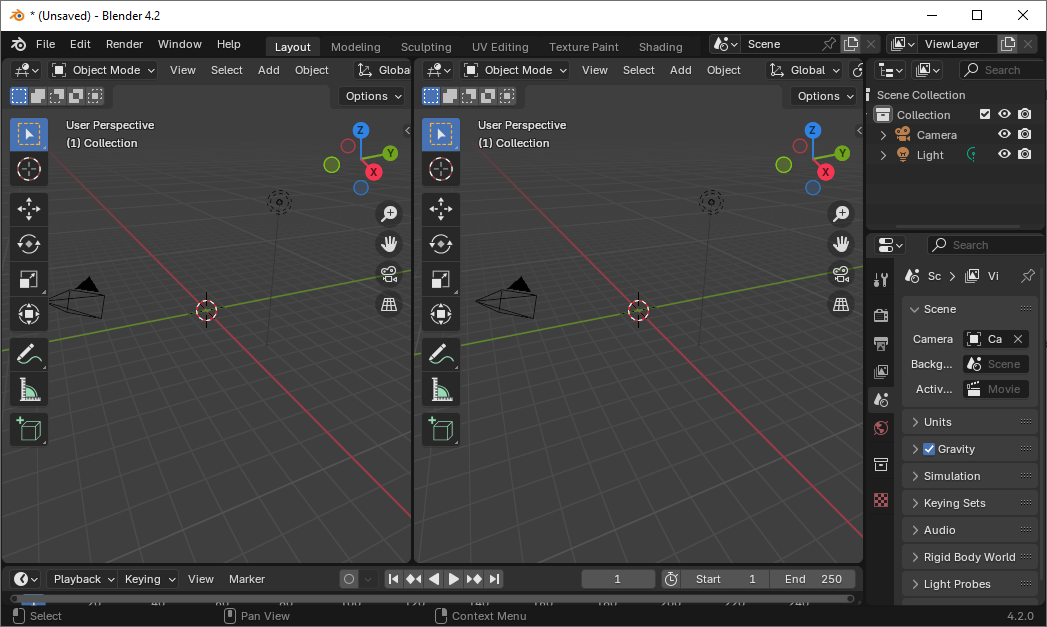
- Start Blender
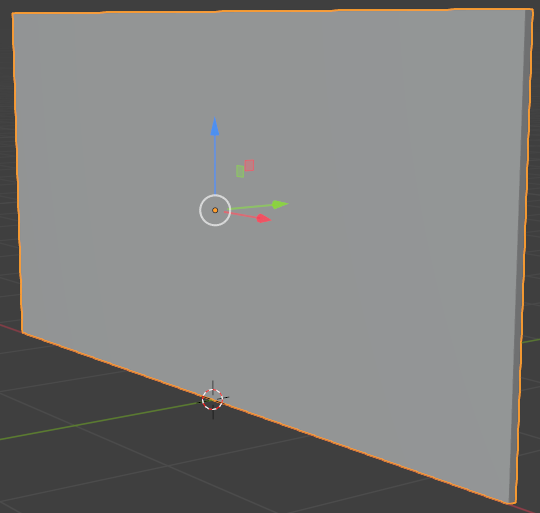
- Click the default cube to select it (it should be selected already)
- On the left toolbar, click the Move button

- In the Properties window, click the Object button
 (it should be selected already) to access the primary properties of the cube.
Change the following values:
Name:     Wall-External-Front
Location: X: 0
          Y: 0.025
          Z: 1.355
Rotation: X: 90
          Y: 0
          Z: 0
Scale:    X: 2.6
          Y: 1.35
          Z: 0.025
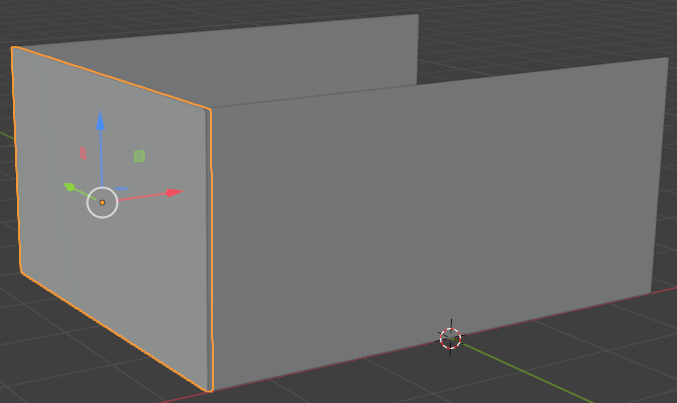
- To duplicate the wall, position the mouse in the 3D Viewport. Press Shift + D and press Enter
- In the Object section of the Properties window, change the Y location to 3.975
Name:       Wall-External-Back
Location Y: 3.975

- To add a new object, on the top menu, click Add -> Mesh -> Cube
- In the Object section of the Properties window, change the following values:
Name:         Wall-External-Left
Location: X: -2.58
          Y:  2
          Z:  1.355
Rotation: X:  90
          Y:  0
          Z:  90
Scale:    X:  2
          Y:  1.35
          Z:  0.025
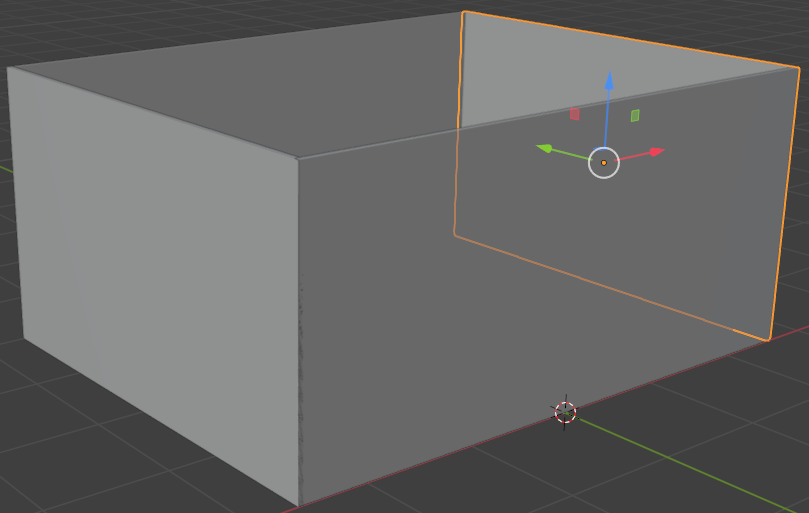
- To duplicate the wall, position the mouse in the 3D Viewport. Press Shift + D and press Enter
- In the Object section of the Properties window, remove the - sign in the value of the Y location
Name:       Wall-External-Right
Location X: 2.58
Adding the Entrance Door
Obviously, a house should have doors. In this section, we will add the necessary doors to our house.
Practical Learning: Adding an Entrance Door
- In a previous lesson, we modeled a simple door. Start another instance of Blender and open that file
- Draw a rectangle that touches the door frame and its inside face (the door leaf)
- Press Ctrl + C to copy the door to the clipboard
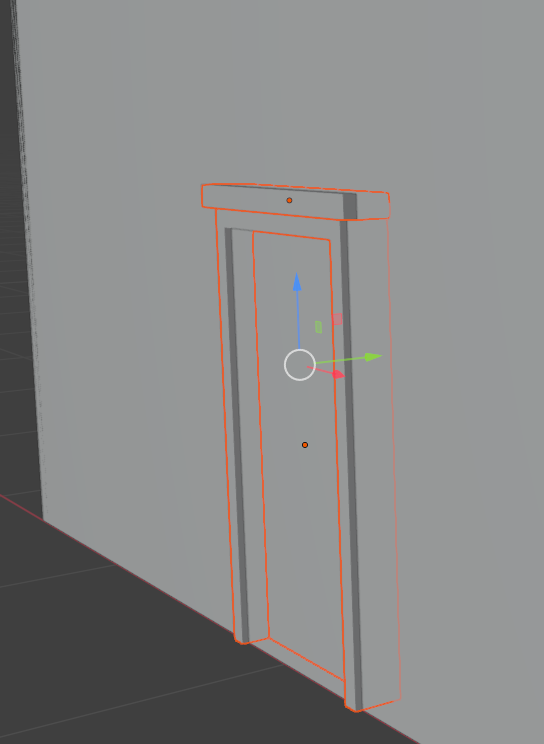
- Return to the instance of Blender where we are modeling the house
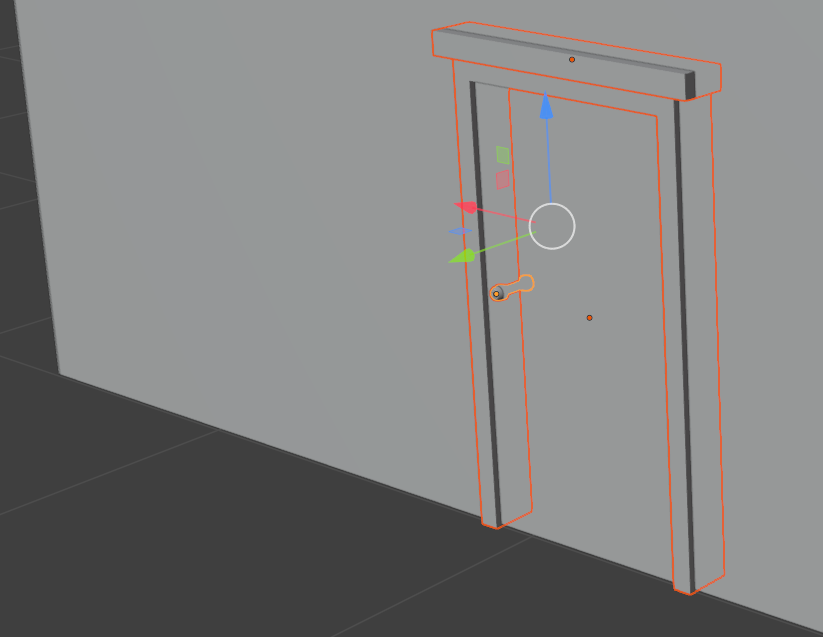
- Position the mouse in the 3D Viewport and press Ctrl + V to paste the door
- While the door is still selected, right-click anywhere in the 3D Viewport and click Move to Collection
- In the window that comes up, click New Collection
- Type Door-External as the new name and press Enter
- On the Move to New Collection dialog box, click Create
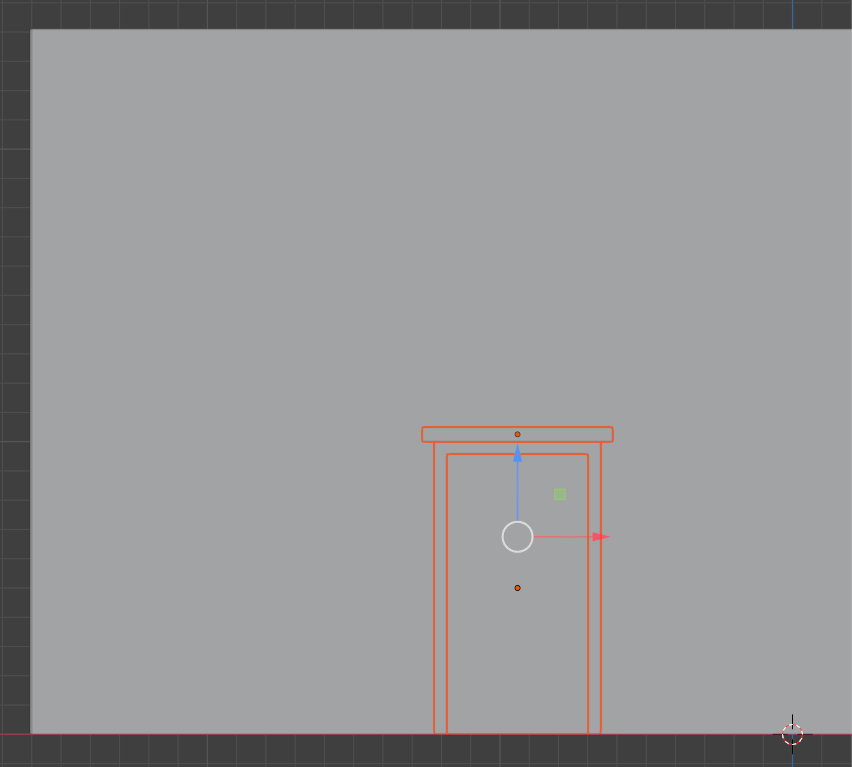
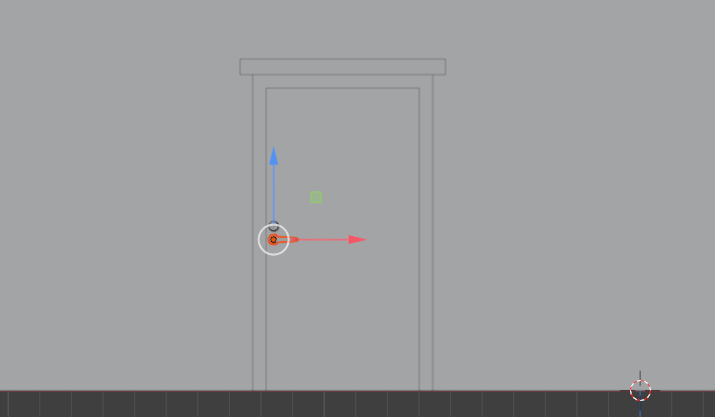
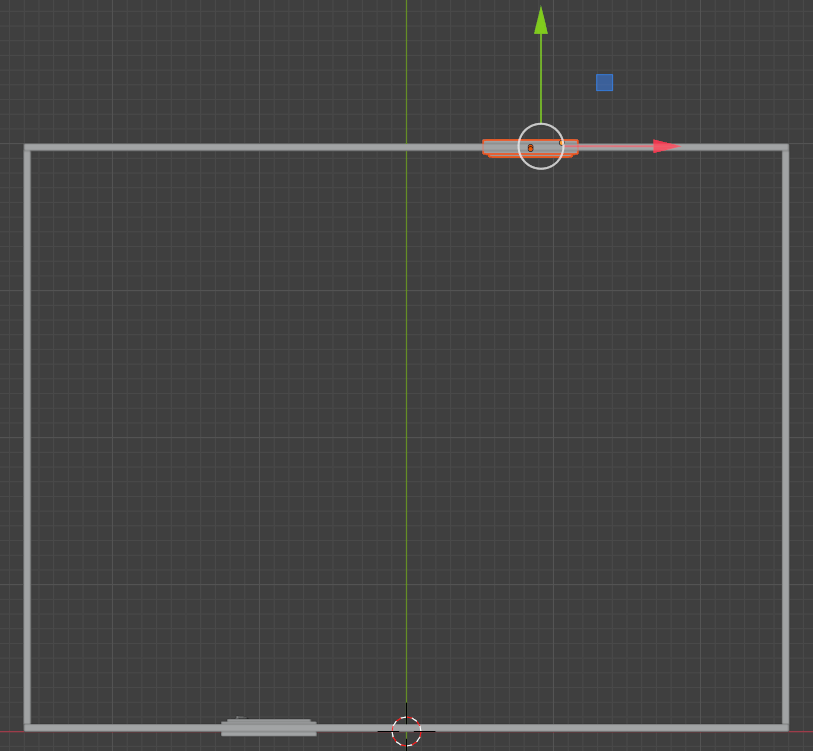
- On the top menu, click View -> Viewpoint -> Front
- Use the red arrow of the X axis to move the door to the left as follow:
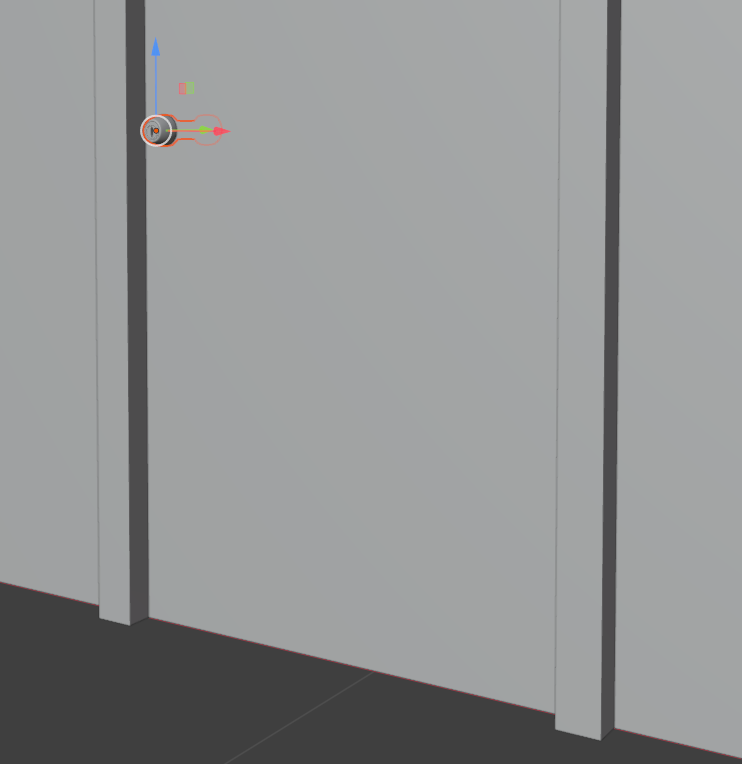
- In a previous lesson, we modeled a simple door lock. In the other instance of Blender you had started, open the file of that door lock
- Click the door lock to select it
- Press Ctrl + C to copy it
- Return to the instance of Blender where we are modeling the house
- Position the mouse in the 3D Viewport and press Ctrl + V to paste the door
- While the door lock is still selected, right-click anywhere in the 3D Viewport and click Move to Collection
- On the Move to Collection dialog box, click Door-External
- On the top menu, click View -> Viewpoint -> Front
- Use the red arrow of the X axis to move the door to the left as follow:
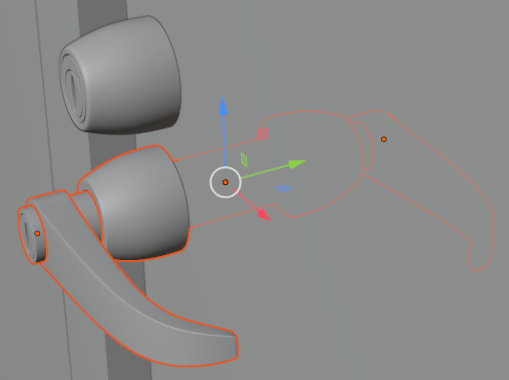
- In a previous lesson, we modeled a door handle. In the other instance of Blender you had started, open the file of that door lock
- Draw a rectangle that touches the parts of the door handle to select
- Press Ctrl + C to copy the selection
- Return to the instance of Blender where we are modeling the house
- Position the mouse in the 3D Viewport and press Ctrl + V to paste the door
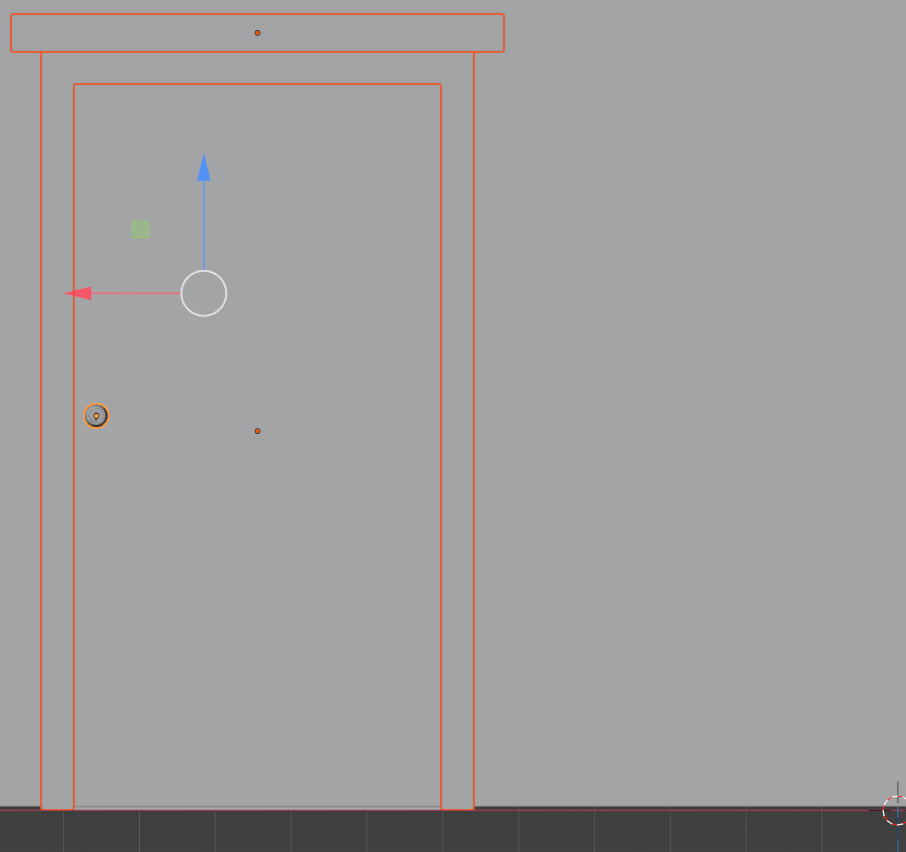
- While the door handle is still selected, use the blue arrow of the Z axis to move the door handle and its lock down as follow:
Adding a Kitchen Door
The house has a kichen and that kitchen will use an external door. In this section, we will add that door.
Practical Learning: Adding a Kitchen Door
- In the Outliner, click one of the objects in the Door-External node
- Press and hold Shift
- Still in the Outliner, click each one of the object objects in the Door-External node to select them
- On the top menu, click View -> Viewpoint -> Top
- Press Alt + D and press Enter
- To rotate the duplicated door, first press the R key
- Press Z to rotate horizontally
- Type 180 and press Enter
- While the door is still selected, move it to the back wall of the house as follows:
- On the top menu, click View -> Viewpoint -> Back
- While the door and its locks are still selected, press Alt + D and press Enter
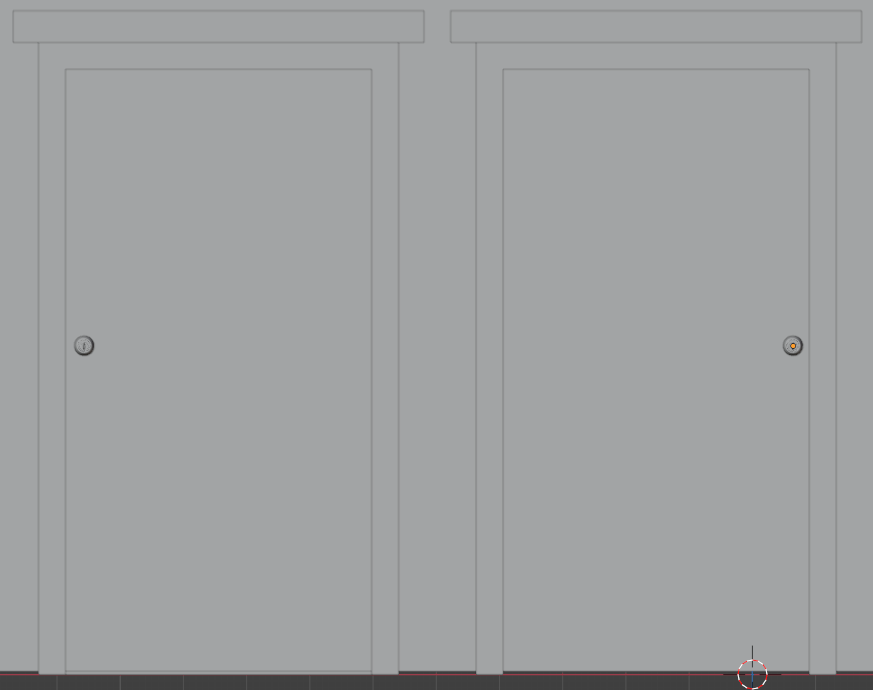
- Use the X arrow to move the duplicated door to the right side of the other
- Move the door lock and the handle to the right side of the dooe:
Adding a Garage Door
The house has an indoor garage. That garage has a door. We will make it a two-door garage. In this section, we will add those doors.
Practical Learning: Adding Two Garage Doors
- In a previous lesson, we modeled a garage door. In the other instance of Blender, open that file
- Click the garage door to select it
- Press Ctrl + C to copy the garage door to the clipboard
- Return to the instance of Blender where we are modeling the house
- Position the mouse in the 3D Viewport and press Ctrl + V to paste the door
- While the garage door is still selected, press Alt + D to duplicate and press Enter
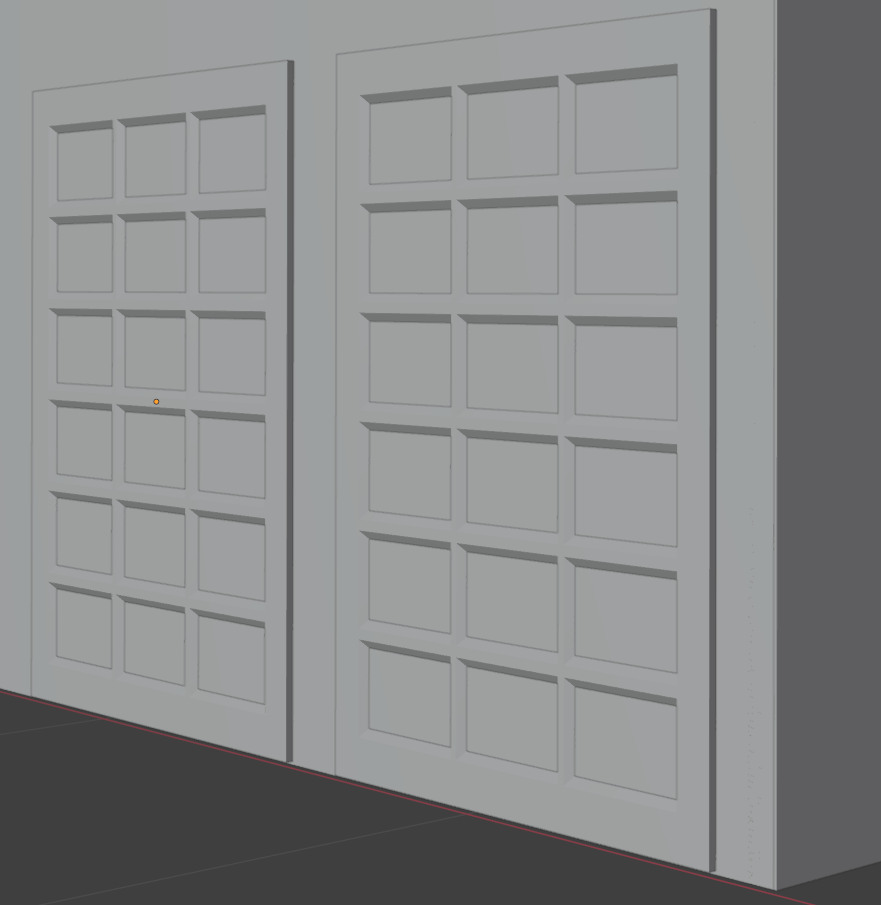
- Position the garage doors to the right side of the house:
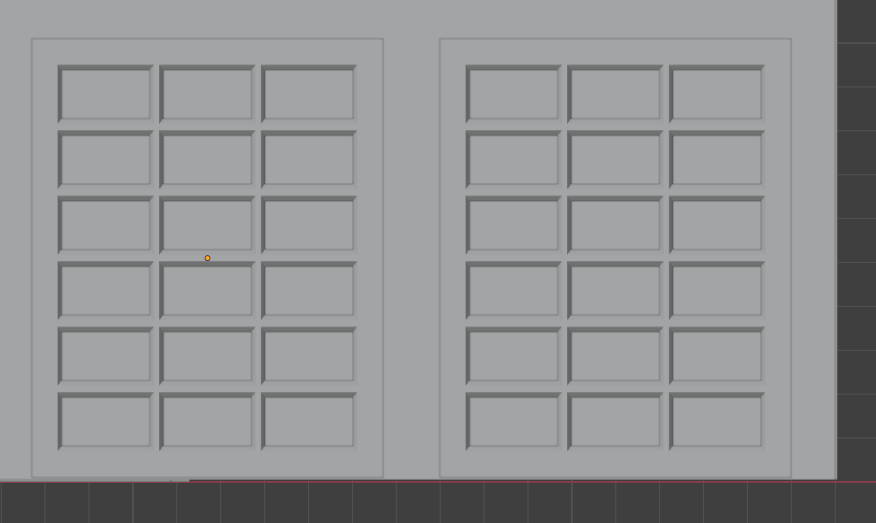
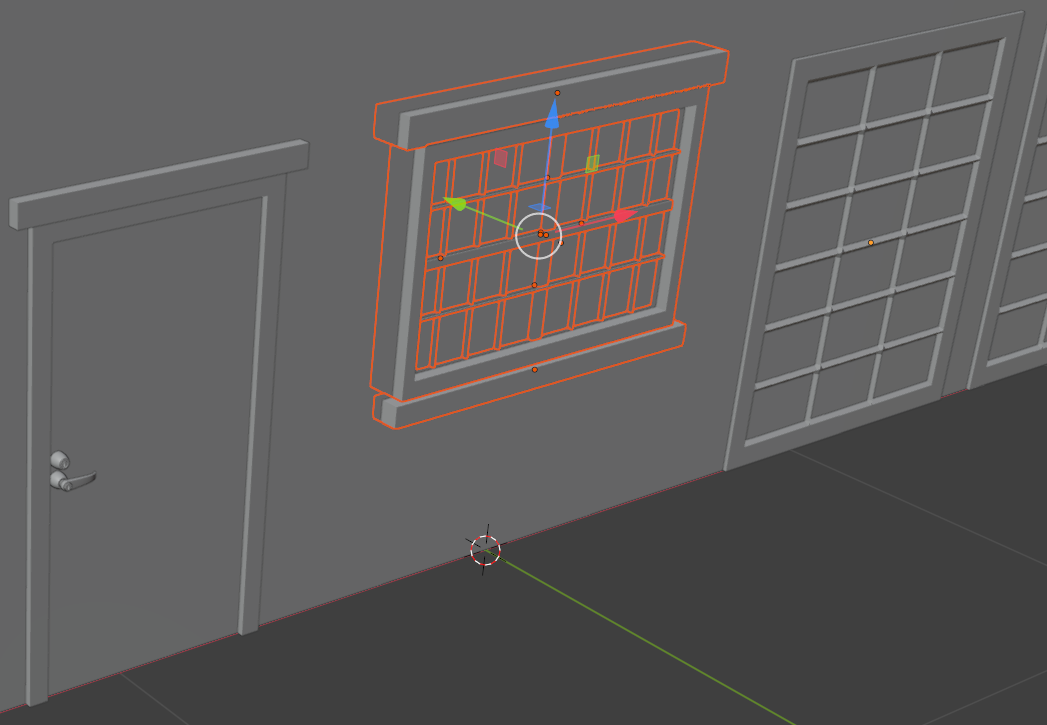
Adding a Large Window
Obviously, the house has windows. Now, we will add some windows. We start with a large window because the house uses only one of them.
Practical Learning: Adding a Large Window
- In a previous lesson, we modeled a large window. In the other instance of Blender you had started, open the file of that door lock
- Draw a rectangle that touches the parts of the window to select
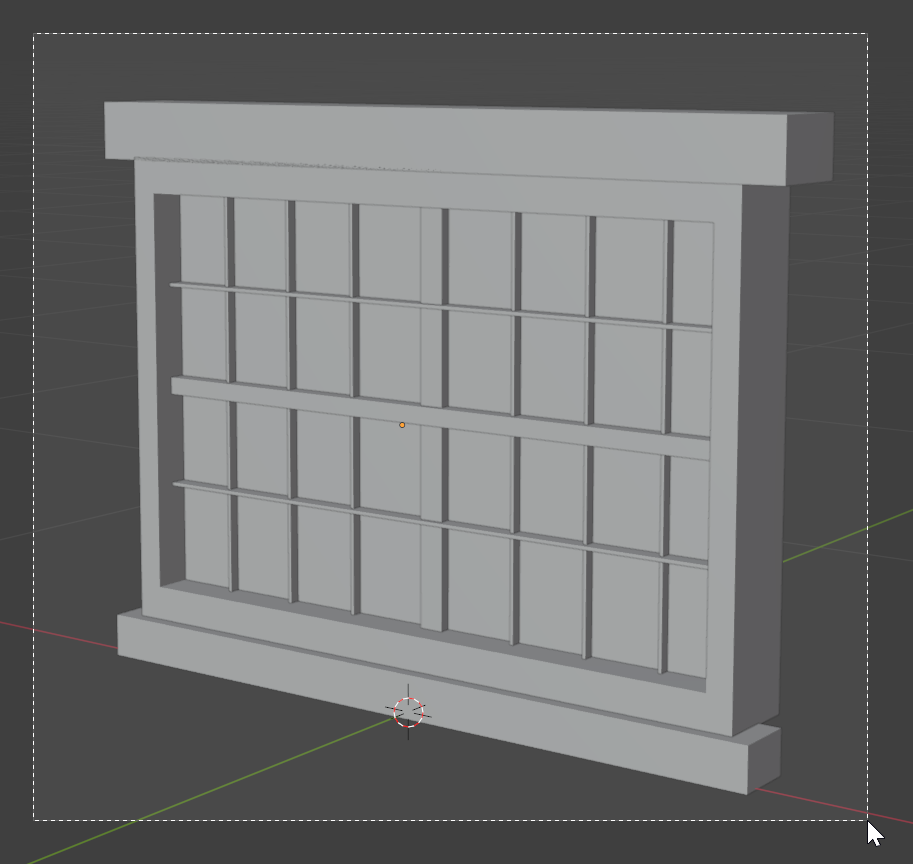
- Press Ctrl + C to copy the selection
- Return to the instance of Blender where we are modeling the house
- Position the mouse in the 3D Viewport and press Ctrl + V to paste the door
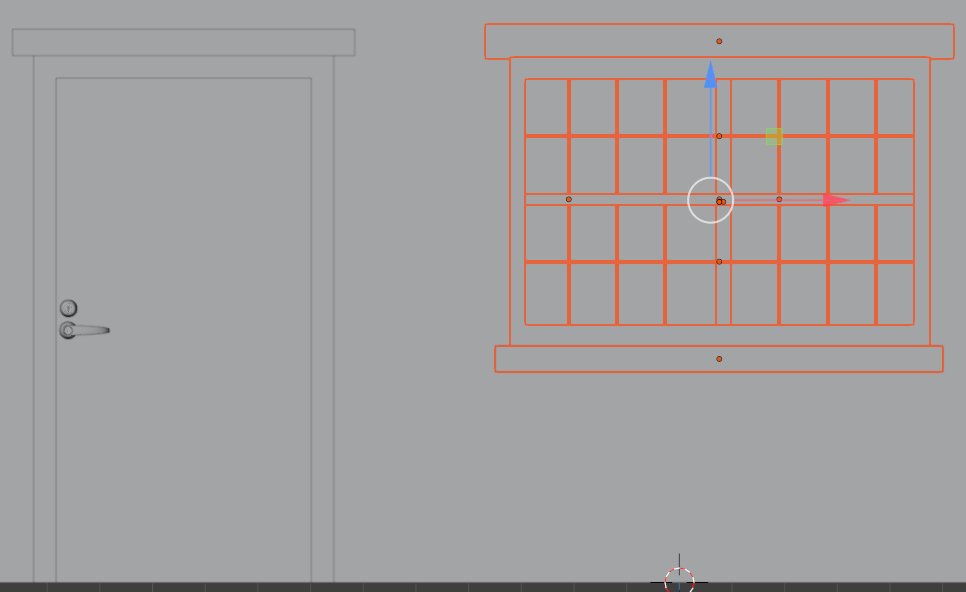
- While the window is still selected, use the visual arrows to move the window to the right side of the from door as follow:
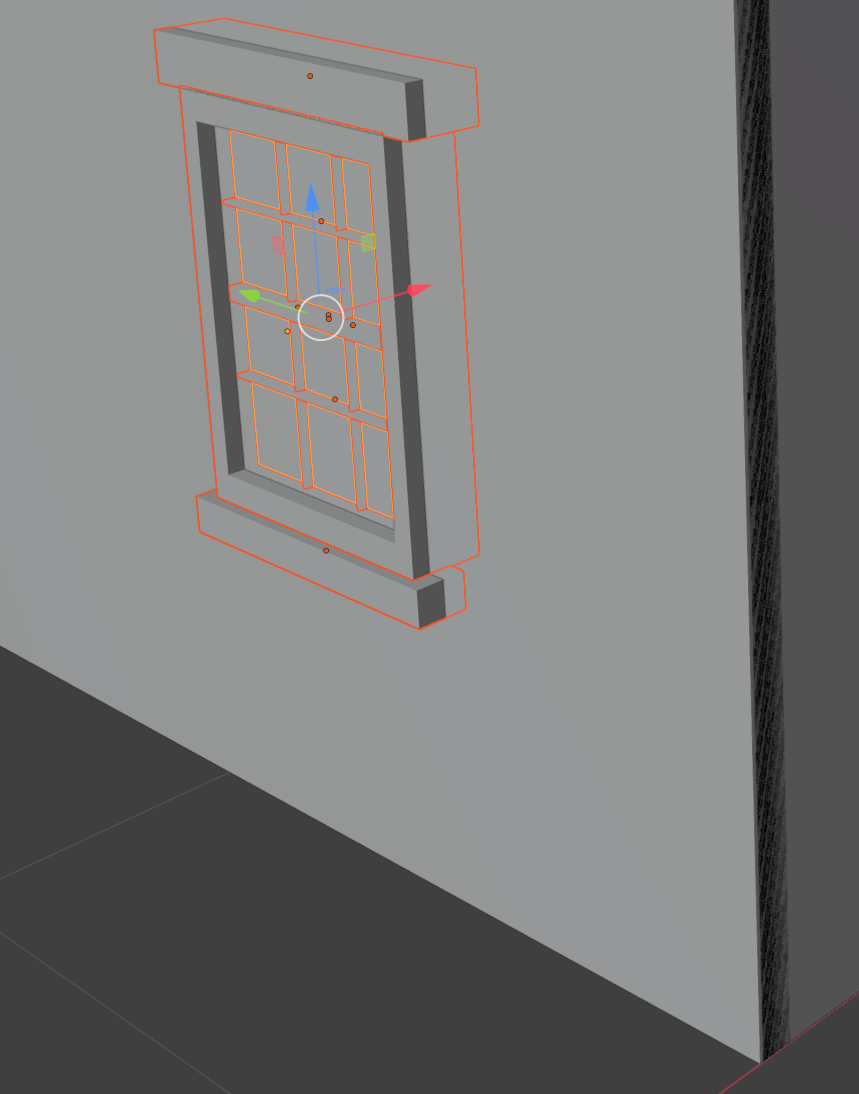
Adding Medium Windows
The house must use various windows for different rooms of the house. In this section, we will add one of those windows, and then duplicate it for the rooms that need such a window.
Practical Learning: Adding Windows
- In a previous lesson, we modeled a simple window. In the other instance of Blender, open that file
- Draw a rectangle to touches the parts of the window to select it
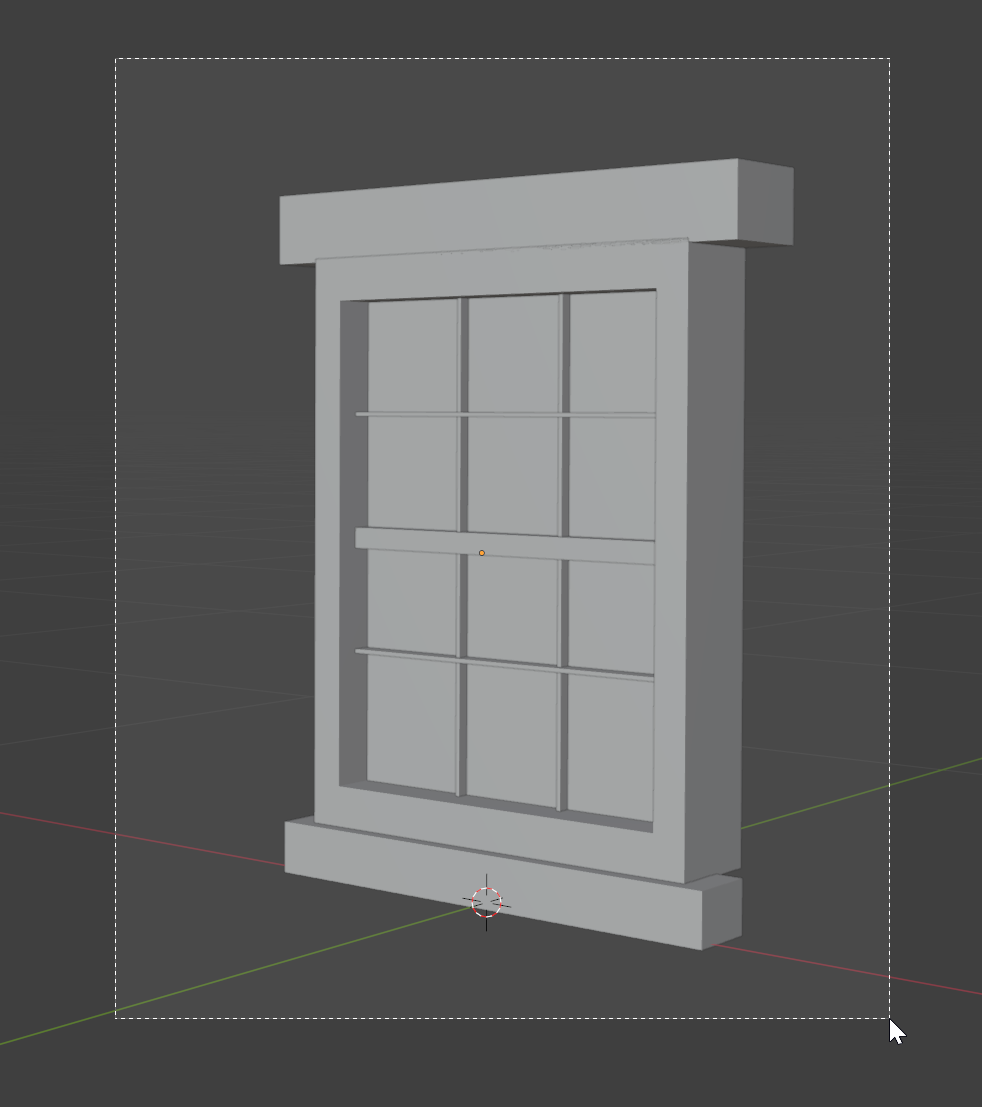
- Press Ctrl + C to copy it
- Return to the instance of Blender where we are modeling the house
- Position the mouse in the 3D Viewport and press Ctrl + V to paste the door
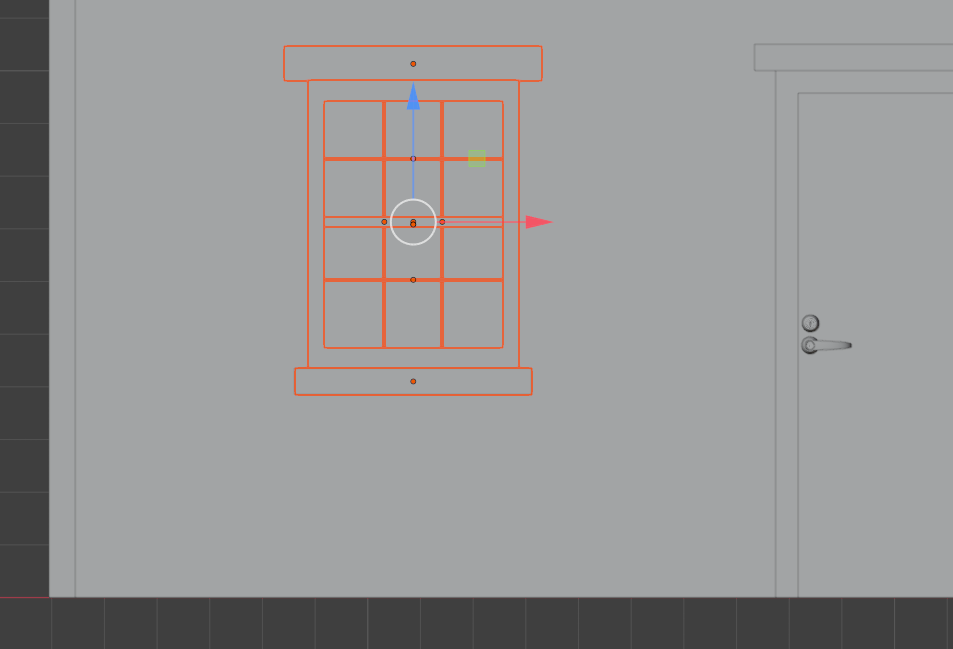
- While the window (and its parts) is still selected, right-click anywhere in the 3D Viewport and click Move to Collection
- On the Move to Collection dialog box, click New Collection
- Type Window-Front-BL
- Click Create
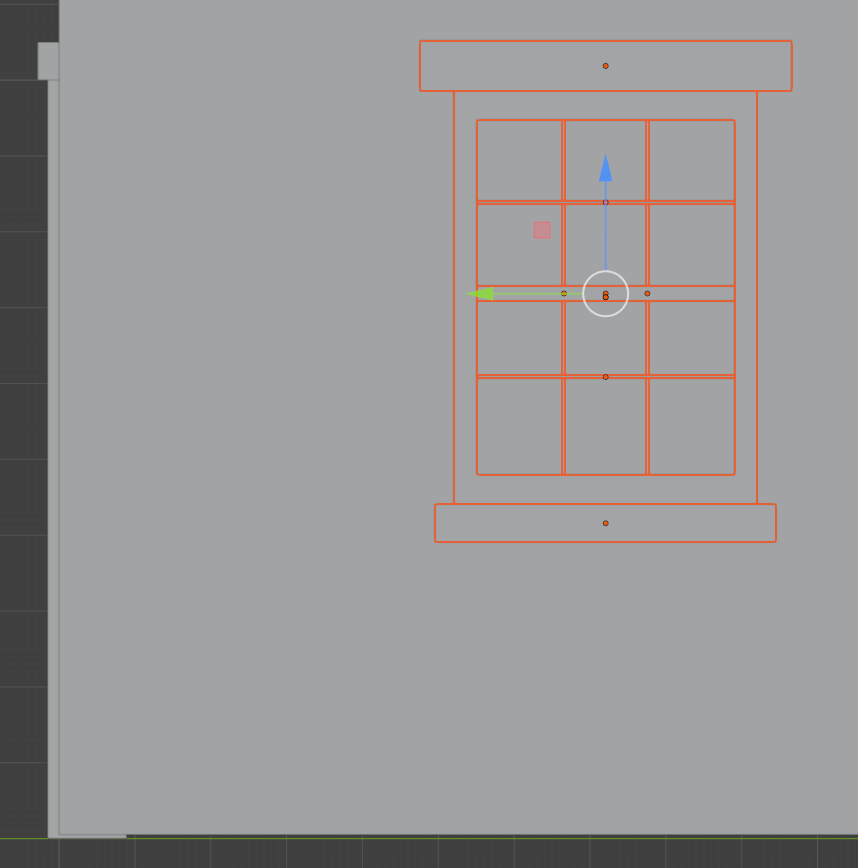
- On the top menu, click View -> Viewpoint -> Front
- Use the visual arrows in the 3D Viewport to move the window to the left of the front door as follow:
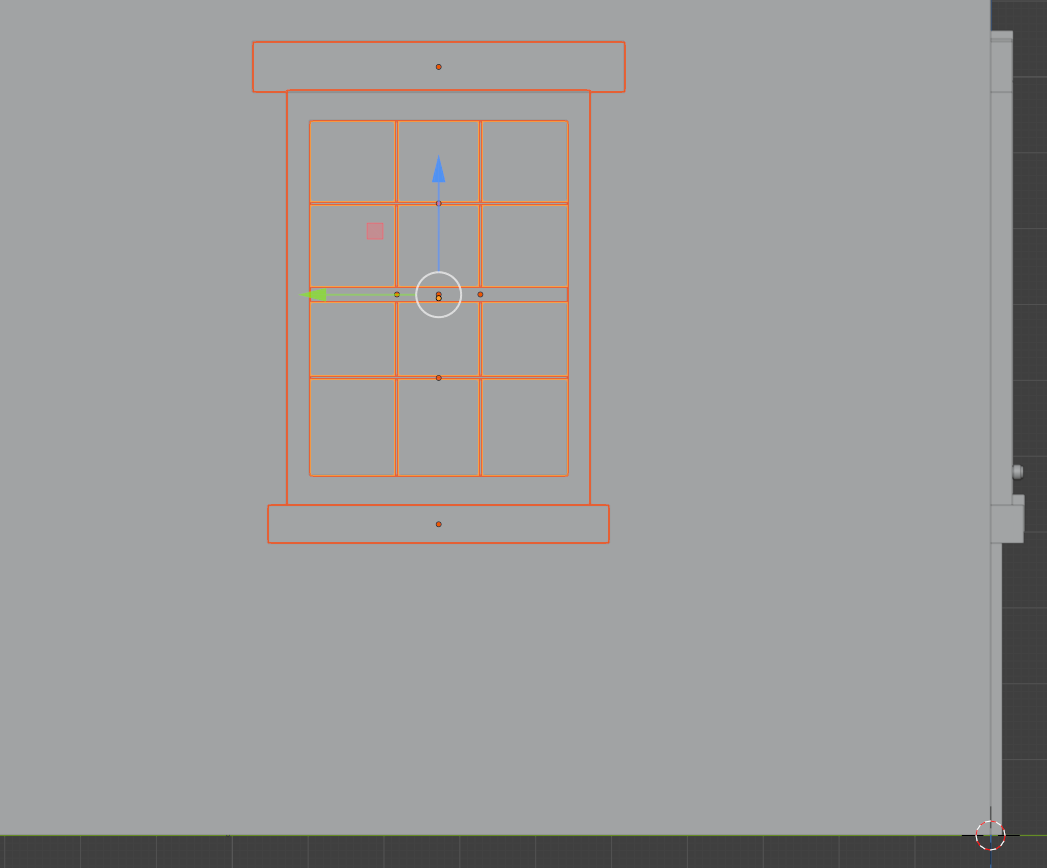
- Make sure the window is selected (if it is not, in the Outliner window, click the first item below Window-Front-BL; press and hold Shift; click the last item below Window-Front-BL to select the whole window; then release Shift).
Press Alt + D to duplicate the window
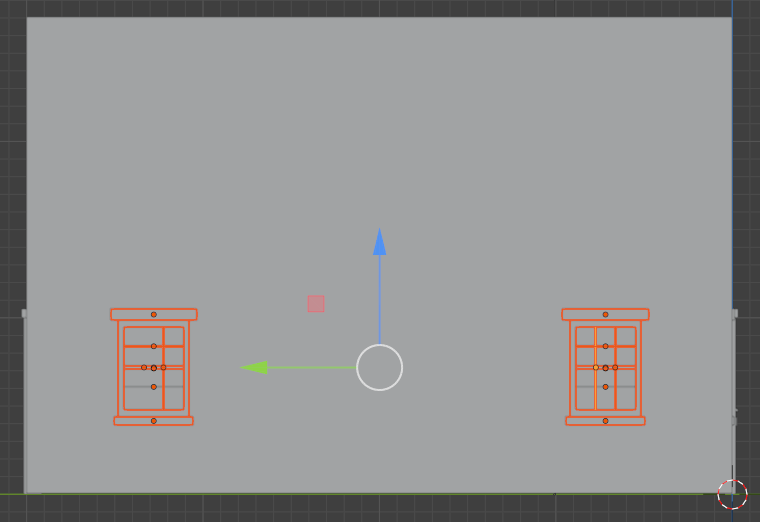
- While the window and all its parts are still selected, to change the orientation of the window, press R (to rotate)
- Press Z to rotate vertically
Type -90 and press Enter |
- Use the visual X (red) and Y (green) but not the Z (blue) arrows on the screen to position the window to the right section of the left wall
- While the window (and its parts) is still selected, right-click anywhere in the 3D Viewport and click Move to Collection
- On the Move to Collection dialog box, click New Collection
- Type Window-Left-Wall-BR
- Click Create
- Make sure the new window is selected (if it is not, in the Outliner, select all objects below the Window-Left-Wall-BR collection).
Position the mouse in the 3D Viewport, press Alt + D to duplicate and move the duplicate
- While the window (and its parts) is still selected, right-click anywhere in the 3D Viewport and click Move to Collection
- On the Move to Collection dialog box, click New Collection
- Type Window-Left-Wall-BL
- Click Create
- Move the new window to the left side of the back wall as follows:
- To select both left wall windows, in the Outliner, select all objects in the Window-Front-BL section and those in the Window-Left-Wall-BL section:
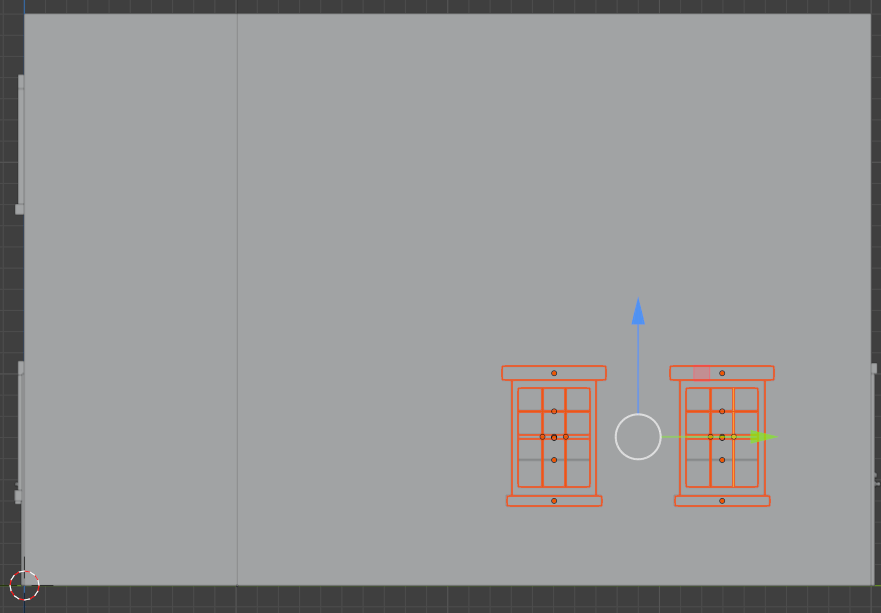
- To duplicate the windows, press Alt + D and press Enter
- Move the selected window up as follows:
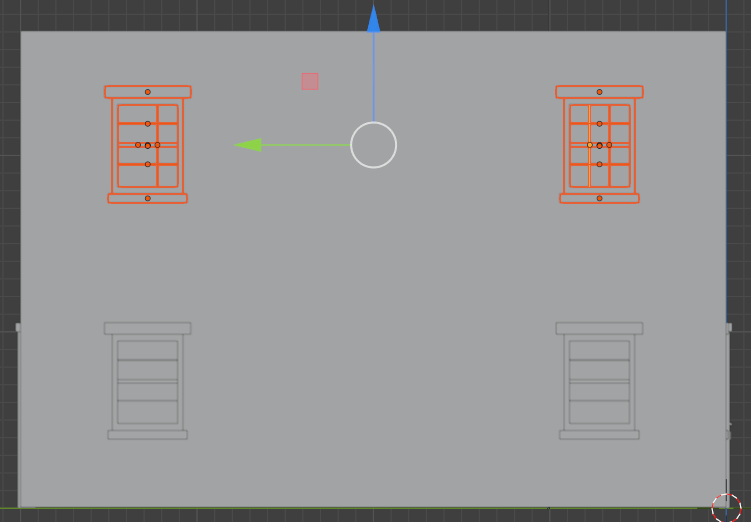
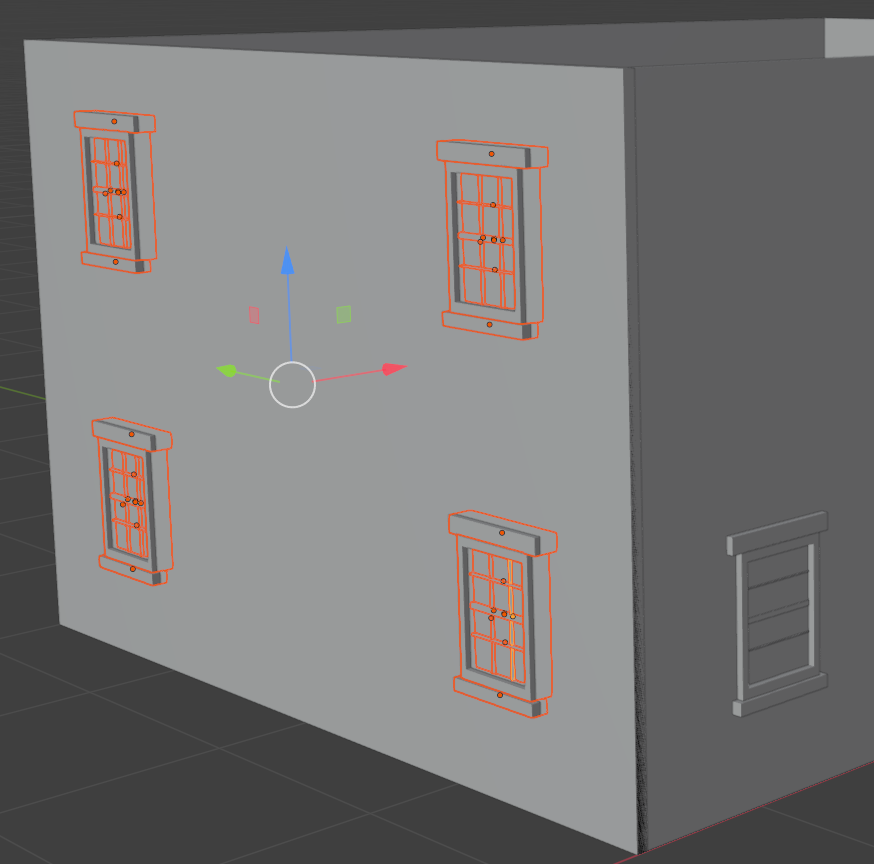
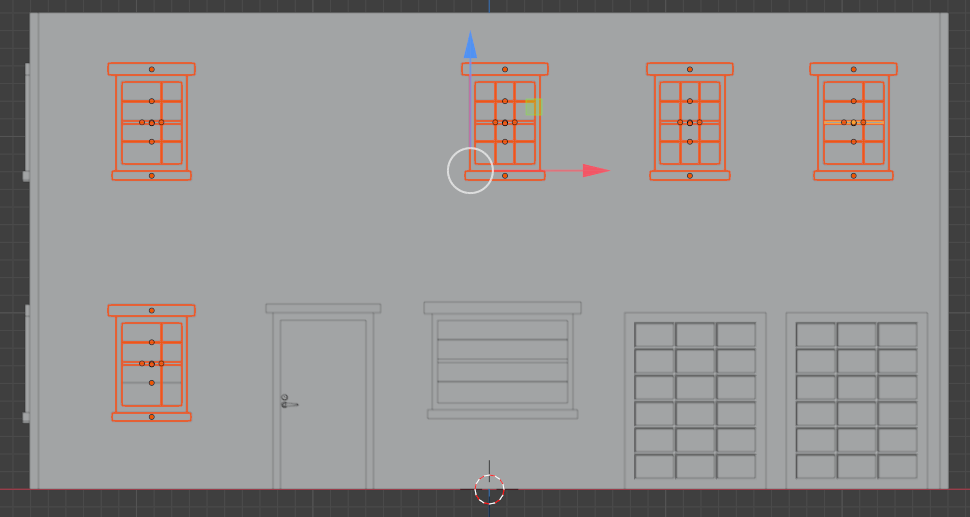
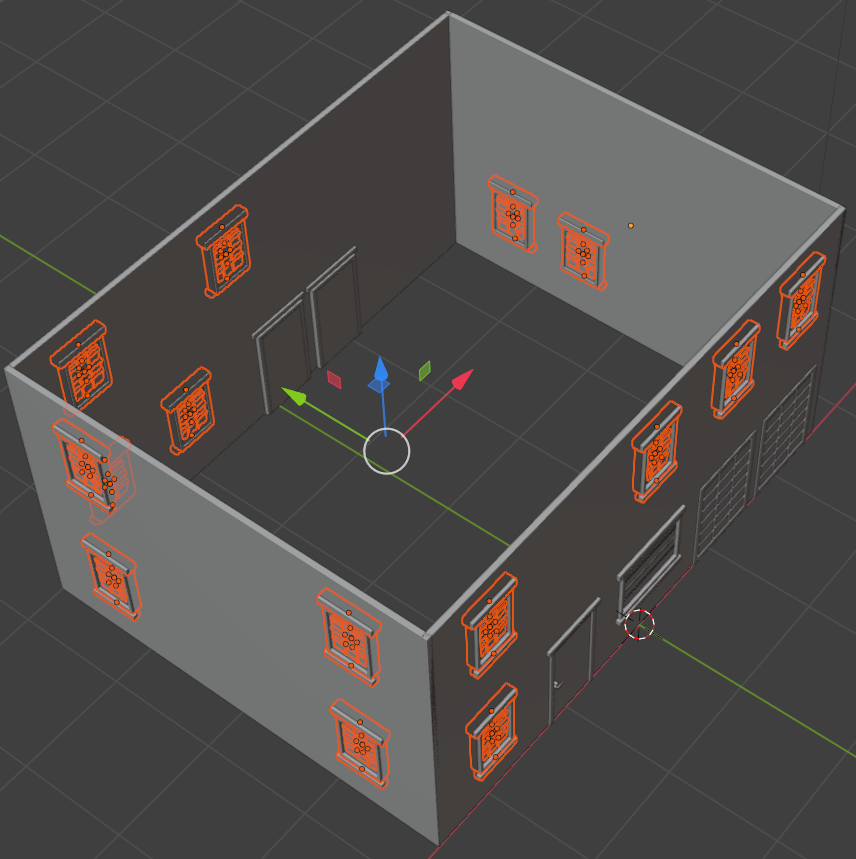
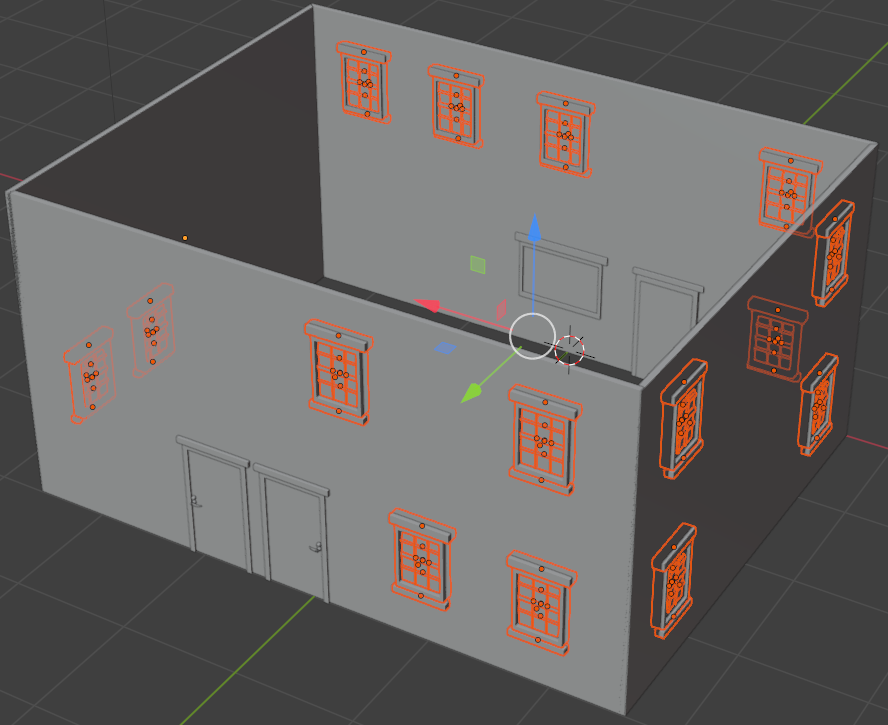
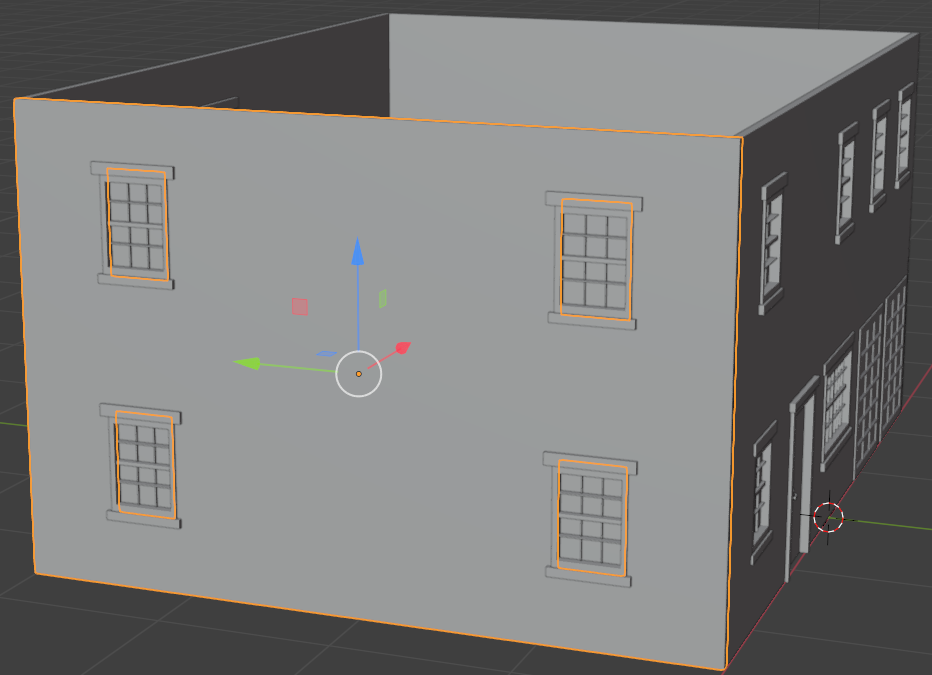
- Use any of the above techniques to add four new windows to the front wall of the house as follows:
- In the same way, add two windows to the bottom-right section of the right was as follows:
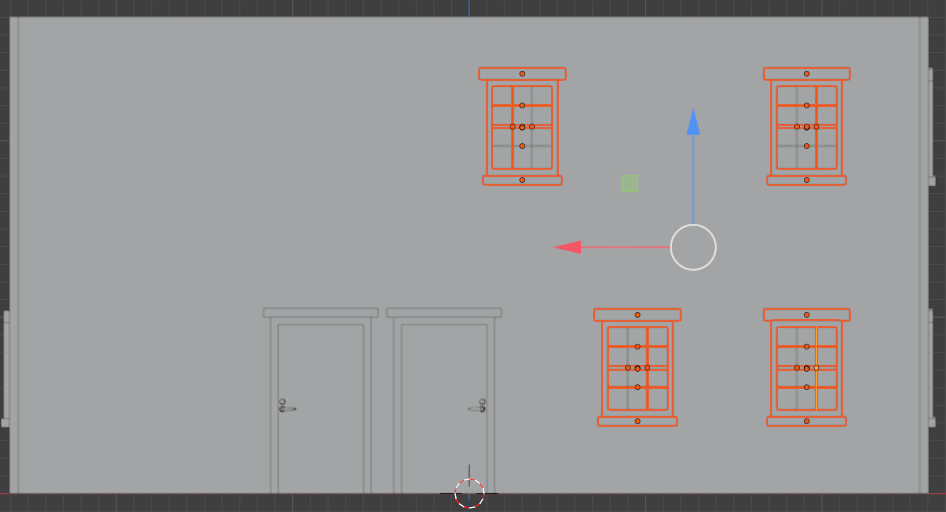
- In the same way, add four windows to the back door as follows:
Doors and Windows Openings
In previous sections, we add windows by their positions. Now we will create some openings on the walls where the windows and doos are positioned.
Practical Learning: Creating Openings for Doors and Windows
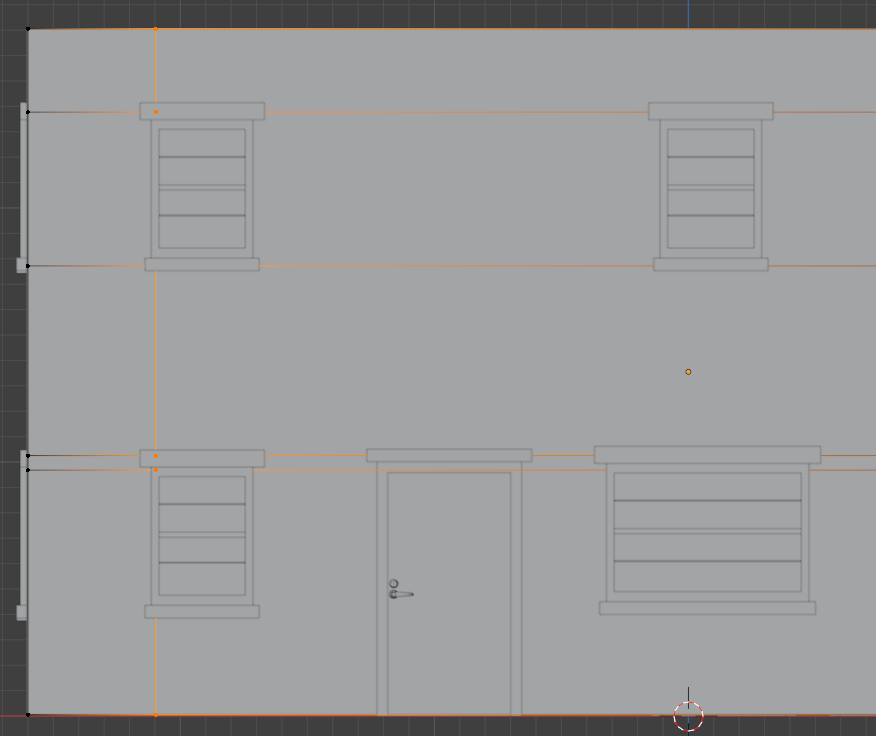
- To display the front view of the house, on the top menu, click View -> Viewpoint -> Front
- Click an empty area of house to select the front wall
- On the top-main menu of Blender, click Modeling
- To display the front view of the house, on the top menu, click View -> Viewpoint -> Front
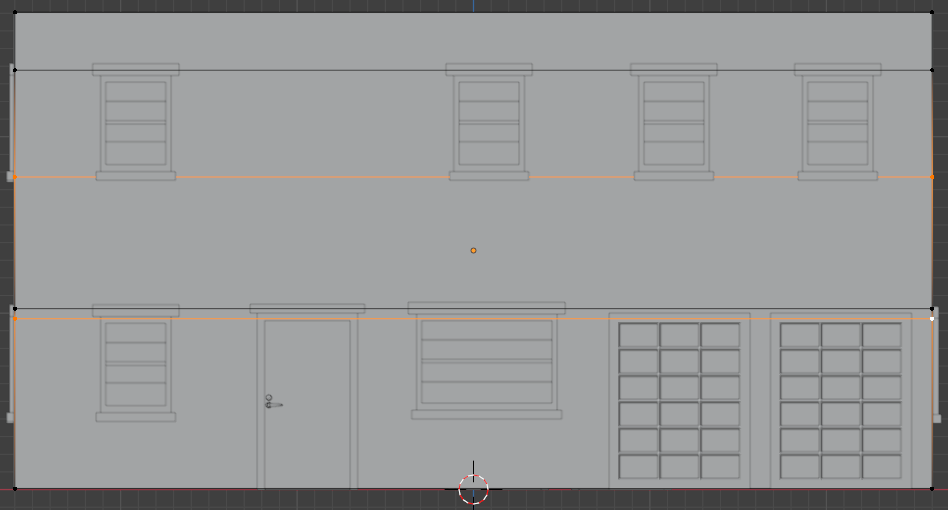
- Position the mouse as close as possible to the left (or the right) border of the wall. Press Ctrl + R to create a horizontal cut and click once
- Move the cut to position it within the top border of the top windows:
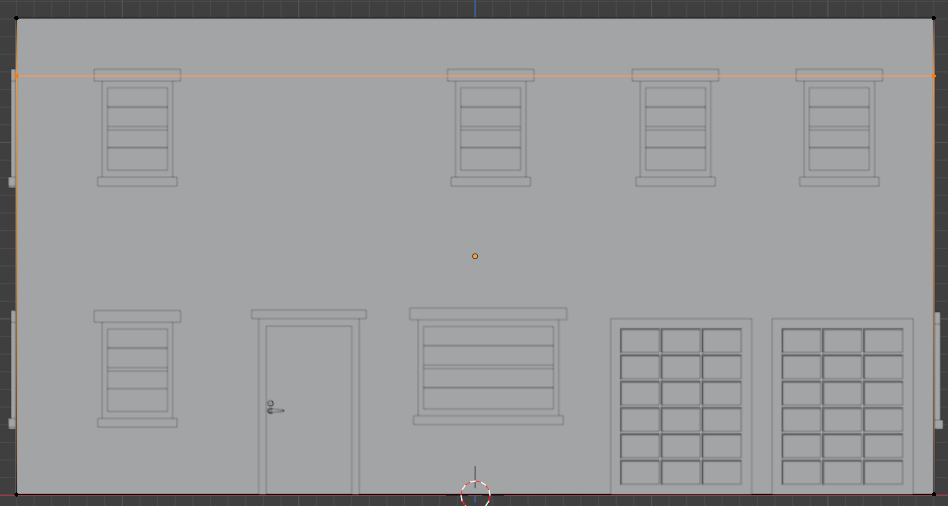
- Click to confirm the loop cut
- In the same way, create horzontal cuts within the bottom borders of the top window, within the top borders of the bottom window, within the bottom borders of the bottom window, and within the top borders of the garage window:
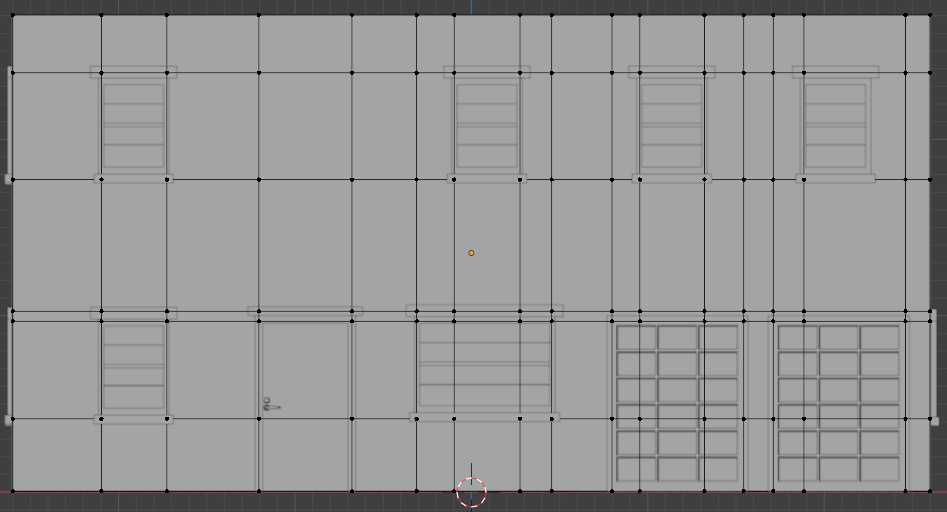
- Position the mouse as close as possible to the top (or the bottom) border of the wall of the house. Press Ctrl + R to create a vertical cut and click once
- Move the cut to position it within the left border of the left windows:
- Click to confirm the loop cut
- In the same way, create horzontal cuts within the vertical borders of the windows and walls:
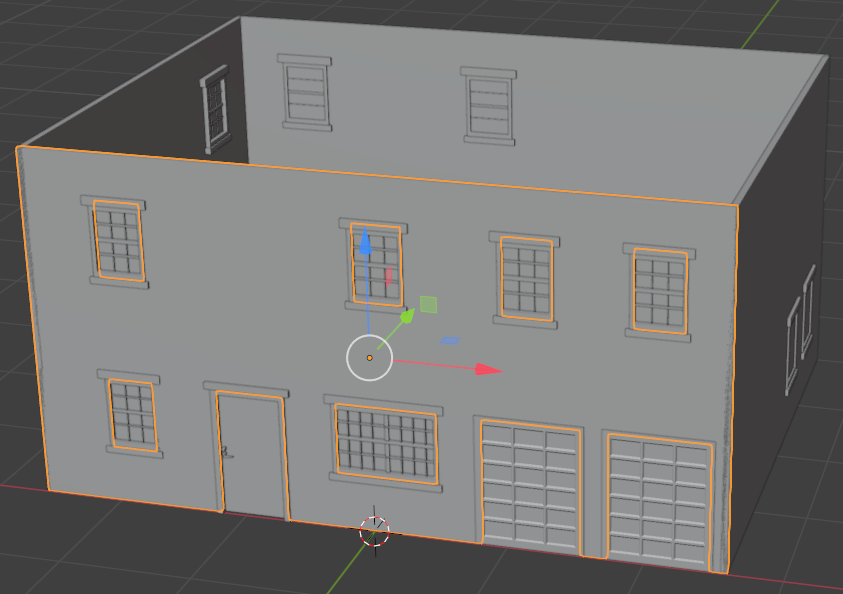
- On the top bar, click the Face button

- Click within a window or a door to select its inside face:

- Press Delete
- On the menu the comes up, click Faces. In the same way, delete the faces within windows and doors
- Rotate the house to access its inside. Delete the faces within windows and doors
- On the main menu of Blender, click Layout:
- Follow the above steps to create openings in the left wall:
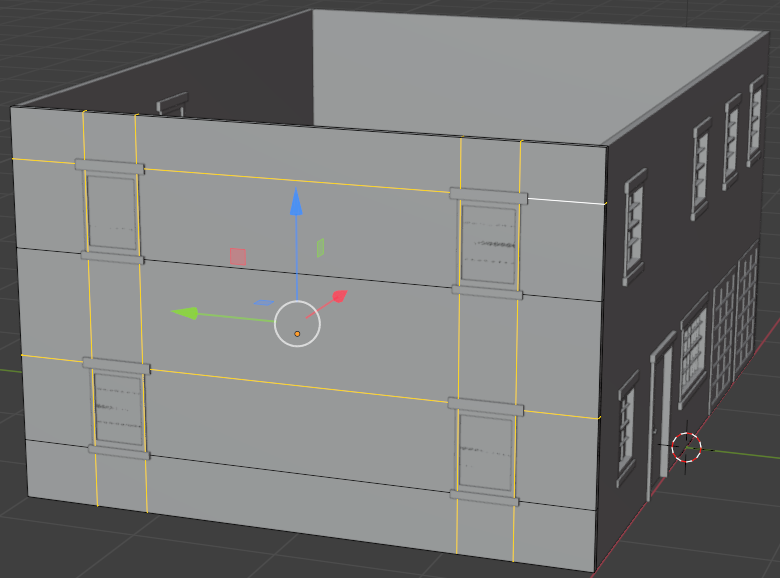
- And delete the face(s) within each window:
- In the same way, Follow the above steps to create openings in the back wall and delete the face(s) within each window
- On the top menu of Blender, click Layout
- To save the model, on the main menu of Blender, click File and click Save
- In the top combo box, specify a folder of your choice
- Change the file name to House-Medium
- Click Save Blender File
Modeling the Ceiling Frame
A house must be covered. That cover starts with a frame made of different parts, usually in wood. Since this is not an extended design, we will keep the ceiling frame to a minimum.
Practical Learning: Modeling the Ceiling Frame
Setting the Materials for Walls
We are planning to create some variances of the same house. Those variances will have different colors or wall appearances.
Practical Learning: Setting the Materials for Walls
- To access the materials of the faces, on the top-main menu of Blender, click Shading
- On the top menu, click View -> Viewpoint -> Front
- Click somewhere on the wall to select it
- Rotate the house to view it in perspective
- On the bottom bar, click Material to select it
- Type Large-Wall and press Enter
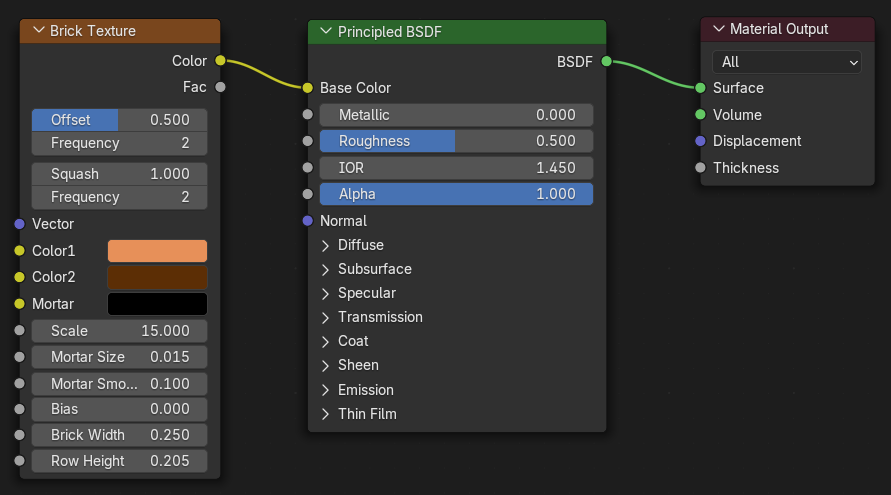
- On the Shading toolbar, click Add -> Texture -> Brick Texture
- From the Brick Texture window, drag Color and drop it to the Base Color of Principled BSDF
- In the Brick Texture window, change the following values:
Color 1:       #E79059FF
Color 2:       #5C2E05FF
Scale:         15
Mortar Size:   0.015
Mortar Smooth: 0.1
Brick Width:   0.25
Row Height:    0.205
- Click one of the smaller walls of the house to select it
- On the Shading toolbar, click the New Material button

- Type Small-Wall and press Enter
- On the Shading toolbar, click Add -> Texture -> Brick Texture
- From the Brick Texture window, drag Color and drop it to the Base Color of Principled BSDF
- In the Brick Texture window, change the following values:
Color 1:       #E79059FF
Color 2:       #5C2E05FF
Scale:         15
Mortar Size:   0.015
Mortar Smooth: 0.1
Brick Width:   0.295
Row Height:    0.205
- Click the other small wall to select it
- On the Shading toolbar, click the arrow of the Material button and select Small-Wall
- On the top-main menu of Blender, click Layout
- On the bottom bar, click the arrow of the Browse Material combo box
 and select Short-Wall
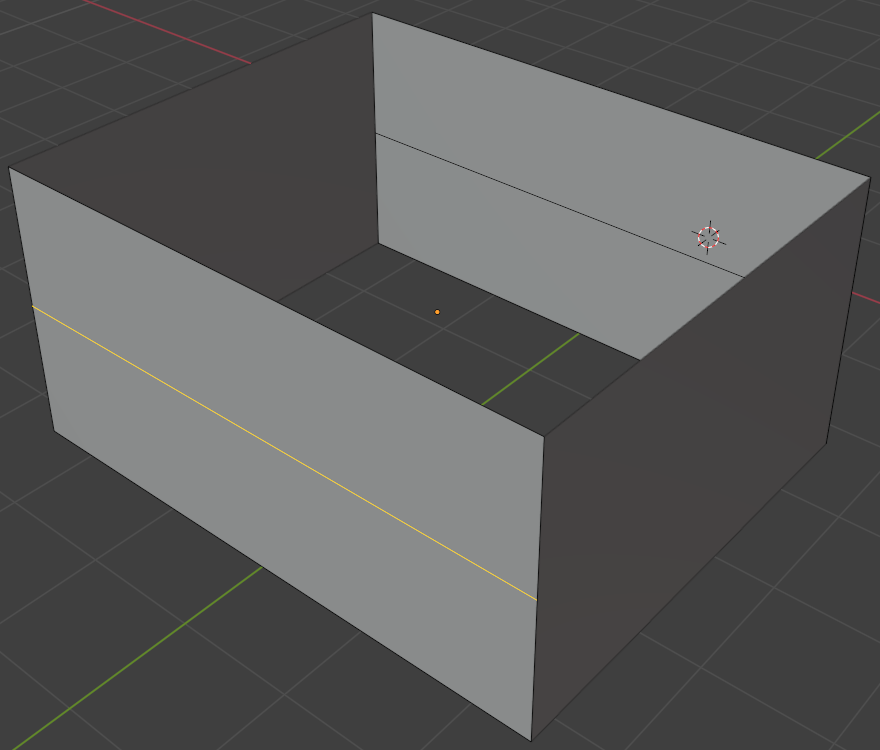
- On the left bar, click the Loop Cut button

- On the top-main menu of Blender, click Modeling
- Rotate the shape to access the other wallClick that wall to create a horizontal cut
- On the top menu of Blender, click Layout
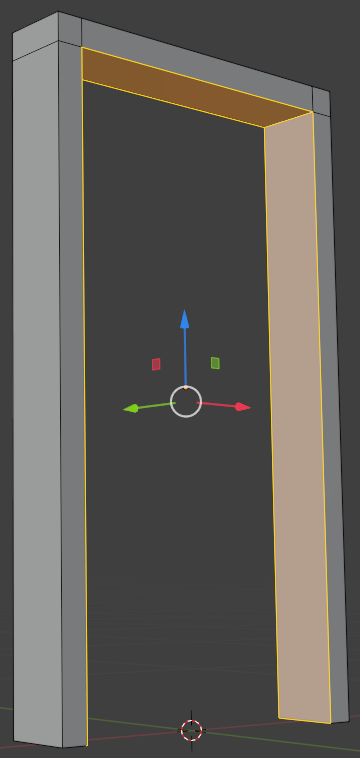
- In the Object section of the Properties window, change the following values:
Name:     Door-Frame
Location: X: -0.925
          Y:  2.265
          Z:  0.5
Scale:    X:  0.285
          Y:  0.0315
          Z:  0.5
- To hide the walls of the house, in the numeric pad of the keyboard, press /

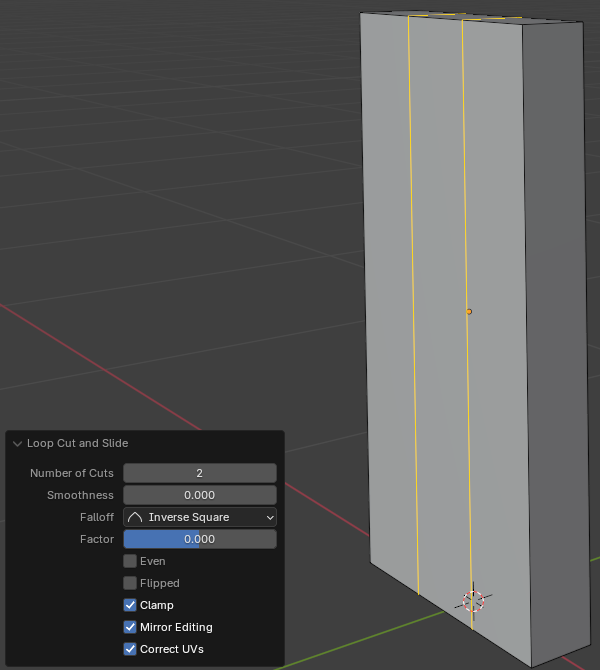
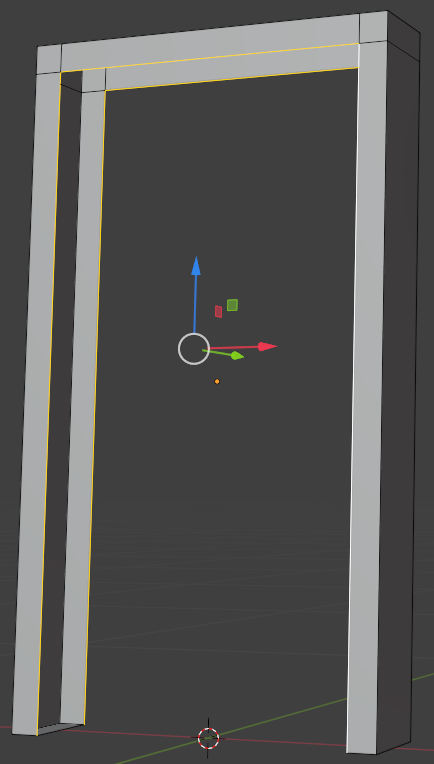
- On the left bar, click the Loop Cut button
- Change the Number of Cuts value to 2:
Number of Cuts: 2
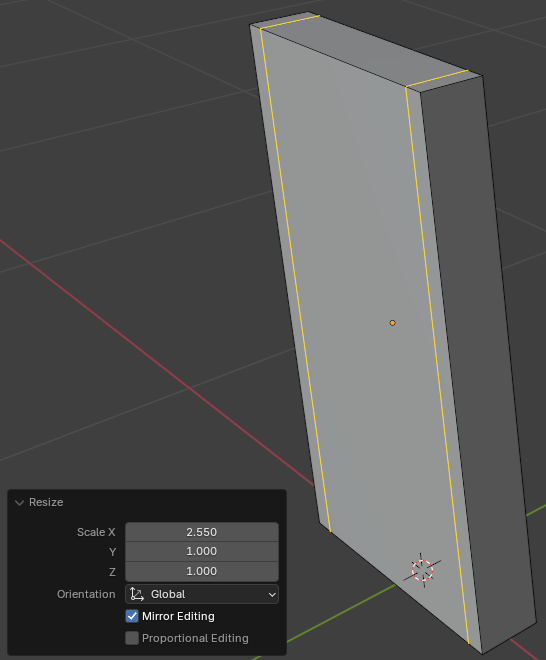
- In the Resize window in the bottom-left section of the 3D Viewport window, change the following values:
Move: X: 2.55
      Y: 1
      Z: 1
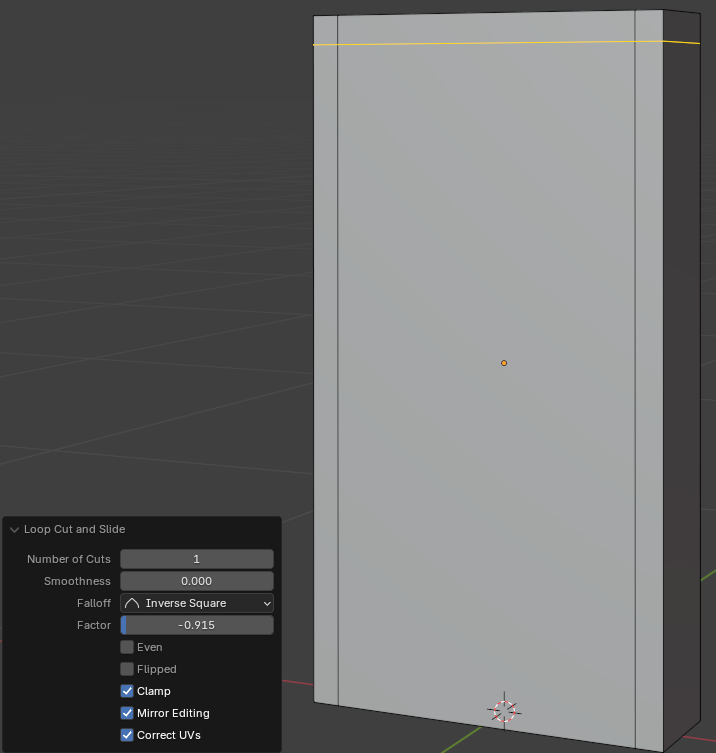
- In the Loop Cut and Move window, change the factor to -0.915:
Factor: -0.915
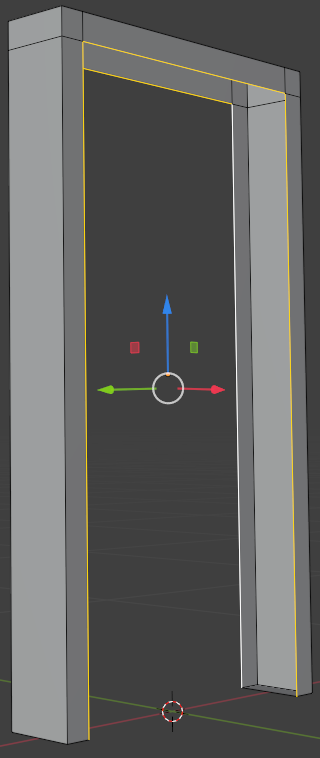
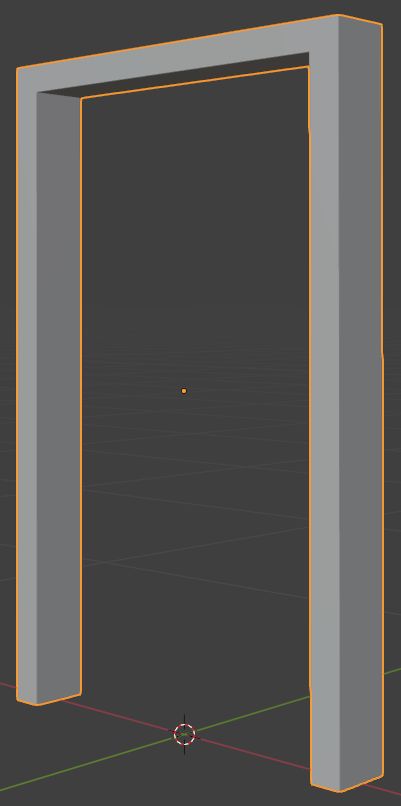
- On the top bar, click the Face button
- On your keyboard, press X
- On the menu that appears, click Faces
- Click the bottom-central face of the shape to select it
- On your keyboard, press Delete
- On the menu that appears, click Faces
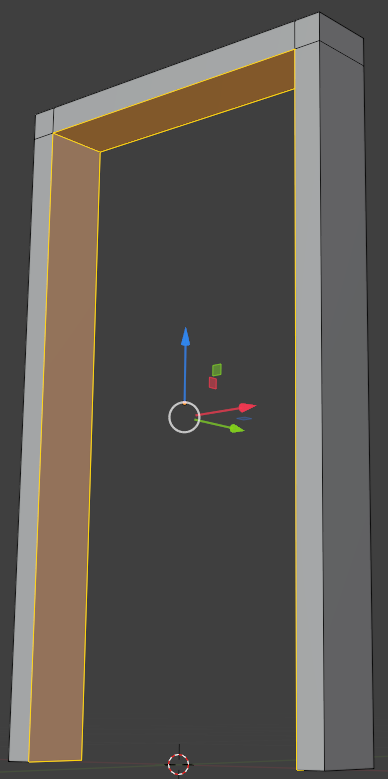
- Right-click anywhere in the 3D Viewport workspace window -> Separate -> Selection
- To display the hidden objects, in the numeric pad of the keyboard, press /
- To confirm the separated parts, on the top-main menu of Blender, click Layout
- Click the wide face in the middle of the shape to select it
- In the Object section of the Properties window, click Door-Frame.001 to select the name
- Position the mouse on the 3D Viewport. On your keyboard, press H to hide the face
- Click any border of the window to select it
- To continue editing the door, on the main menu of Blender, click Modeling
- On the top bar, click the Edge button

- On the window, click one of the interior edges of the opening to select it
- On your keyboard, press and hold Shift
- Click each of the interior edges of both openings of the door but don't select the bottom edge of each side
- On the menu bar, click Edge -> Bridge Edge Loops
- On the top-main menu of Blender, click Layout
- In the Outliner, click the Hide In Viewport button of Door-Leaf to unhide it
- In the 3D Viewport, click that interior face (Door-Leaf) to select it
- To edit the face, on the main menu of Blender, click Modeling
- On the top menu bar, click the Face button
- Click the large face on the door
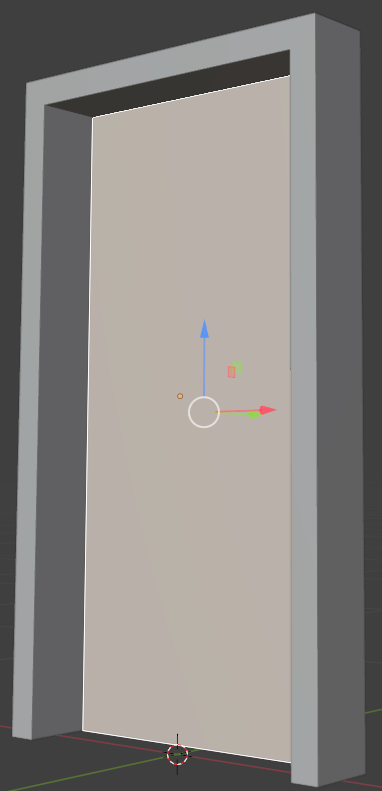
- Press E to extrude and press Enter
- On the main menu of Blender, click Layout


- In the bottom-left section of the 3D Viewport, click Add Cube to expand its window
- In the Add Cube window, change the following characteristics:
Radius:     0.015
Radius 2:    0.01
Depth:       0.01
Location X: -1.135
         Y:  2.25
         Z:  0.55
Rotation X:  90

- Type Door-Lock-Round as the name and press Enter
- To edit the cone, on the top-main menu of Blender, click Modeling
- To hide the other objects, in the numeric pad of the keyboard, press /
- Click and drag the Rotate button to see the large back face of the cone
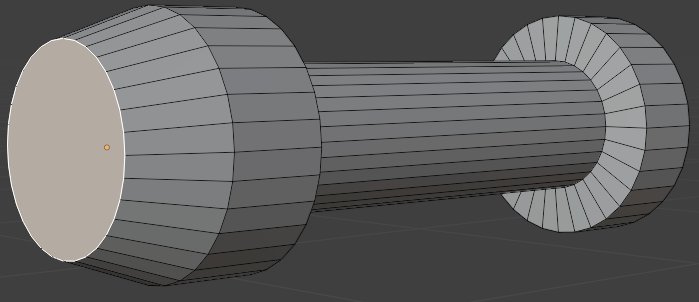
- On the top menu, click the Face button
- Click the large vertical face to select it
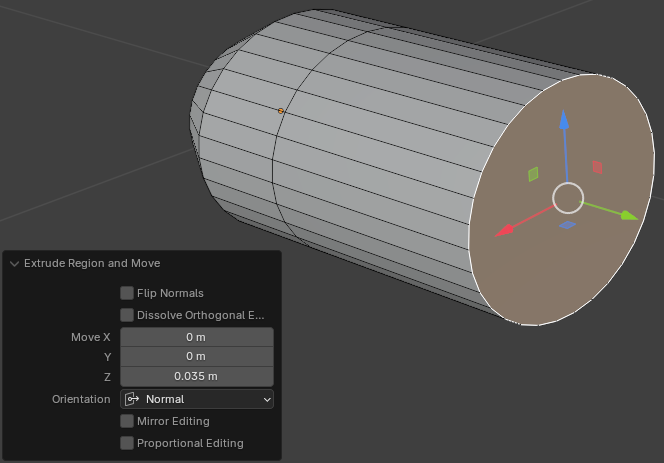
- Press E to extrude and press Enter
- In the Extrude Region and Move window, change the Z value to 0.45:
Move Z: 0.035
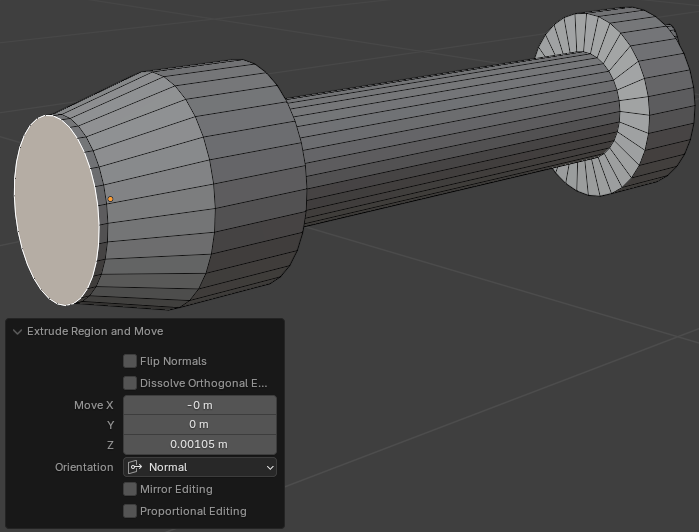
- Position the mouse on an empty area of the 3D Viewport window. Press E to extrude and press Enter
- In the Extrude Region and Move window, change the Z value to 0.1:
Move Z: 0.1
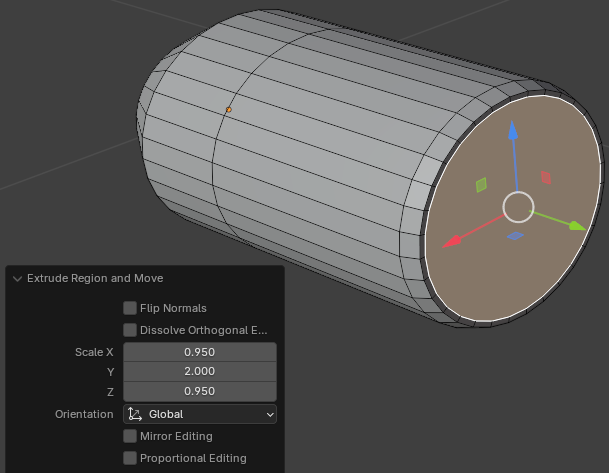
- Position the mouse in the 3D Viewport. Press S to resize the face. Pull the mouse slightly and click
- In the Resize window, change the X and the Z values to 0.95 each:
Scale: X: 0.95
       Z: 0.95
- Position the mouse in the 3D Viewport. Press E to extrude, then press S to resize, then press Enter
- In the Extrude Region and Move window, change the X and the Z values to 0.5:
Scale: X: 0.95
       Z: 0.95
- Rotate the cone to see the front face (you can use the middle button of the mouse)
- Click the front vertical face to select it
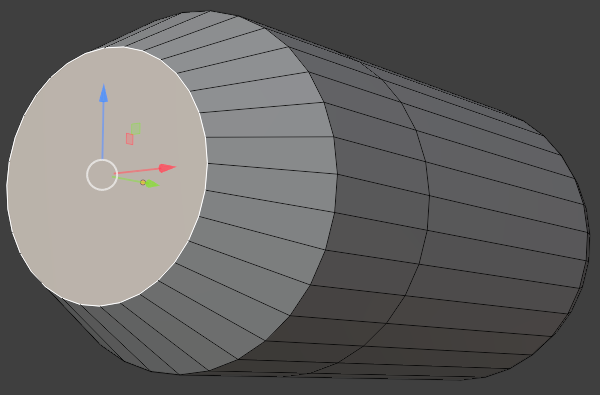
-----------------------------------------------------------------------------------------------------------
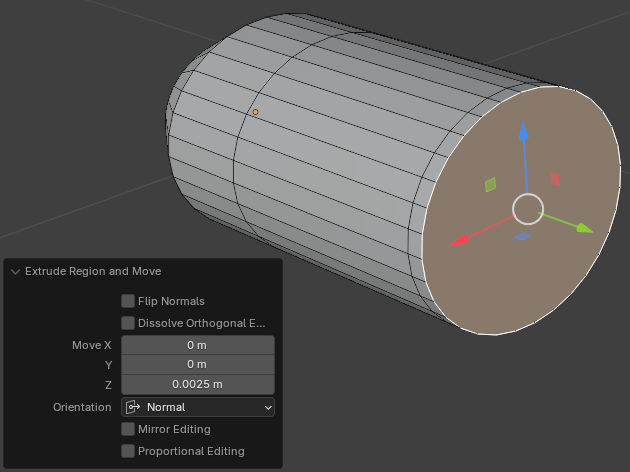
- Press E to extrude and press Enter
- In the Extrude Region and Move window, change the Z value to 0.025:
Move Z: 0.025
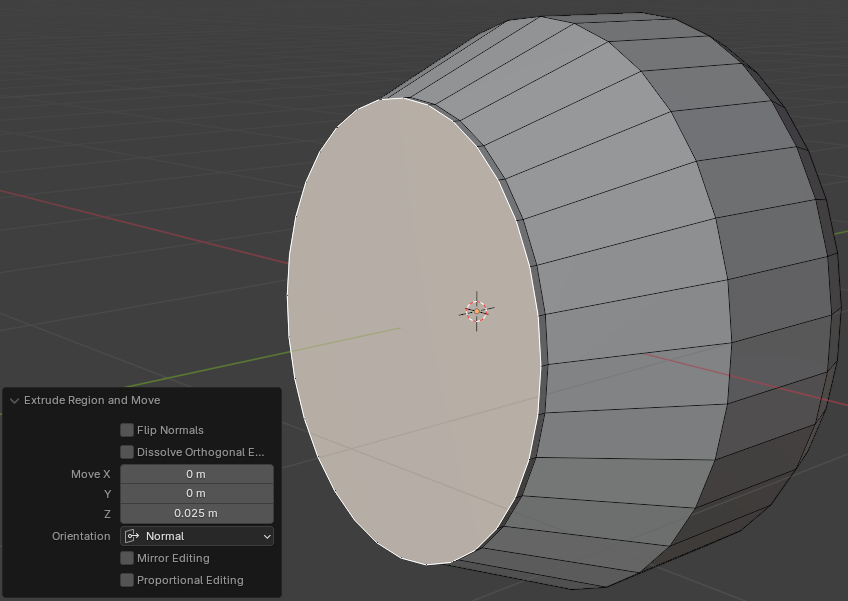
- Position the mouse in the 3D Viewport. Press S to resize. Slightly move the mouse and click
- In the Resize window, change the X and the Z values to 0.95 each:
Scale: X: 0.95
       Z: 0.95
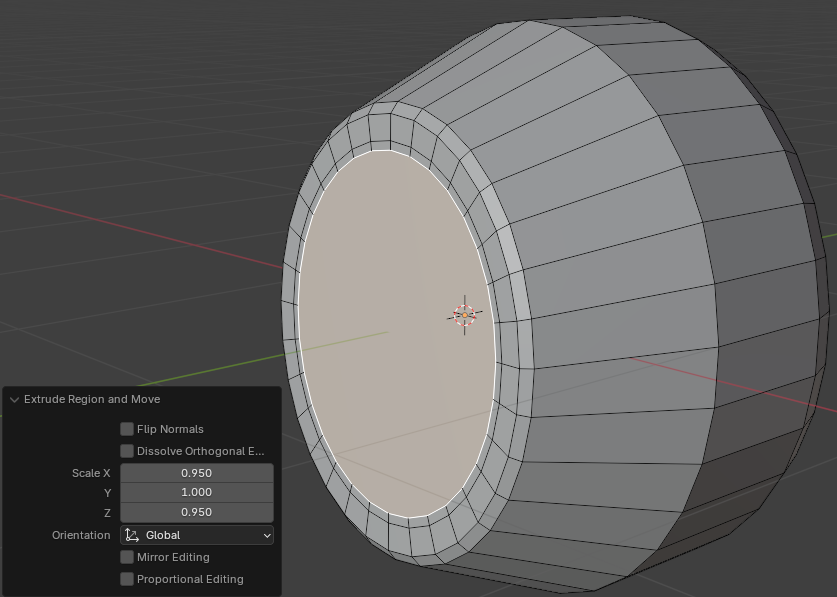
- While the face is still selected, position the mouse in the 3D Viewport. Press E to extrude, then press S to resize, then press Enter
- In the Extrude Region and Move window, change the X and the Z values to 0.875:
Scale: X: 0.875
       Z: 0.875

- While the face is still selected, position the mouse in the 3D Viewport. Press E to extrude, then press S to resize, then press Enter
- In the Extrude Region and Move window, change the X and the Z values to 0.95:
Scale X: 0.95
       Z: 0.95
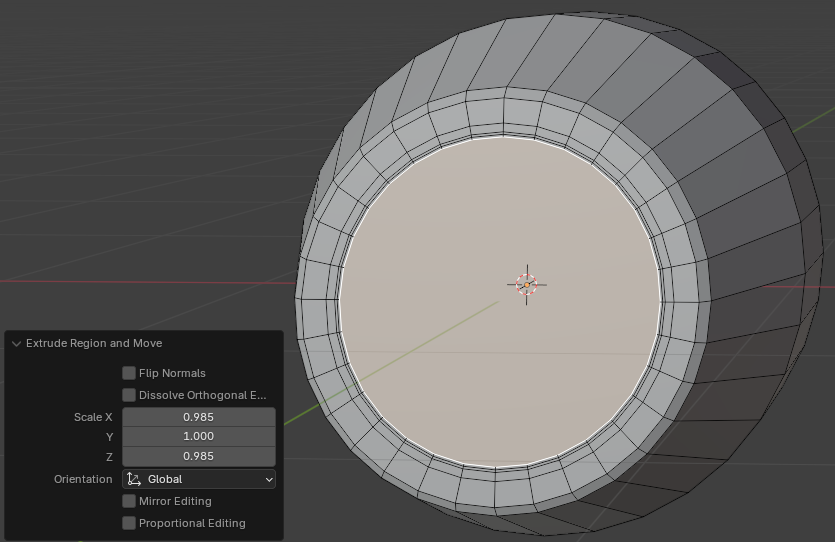
- While the face is still selected, position the mouse on the 3D Viewport window. Press E to extrude, then press S to resize, then press Enter
- In the Extrude Region and Move window, change the X and the Z values to 0.95 each:
Scale: X: 0.985
       Z: 0.985
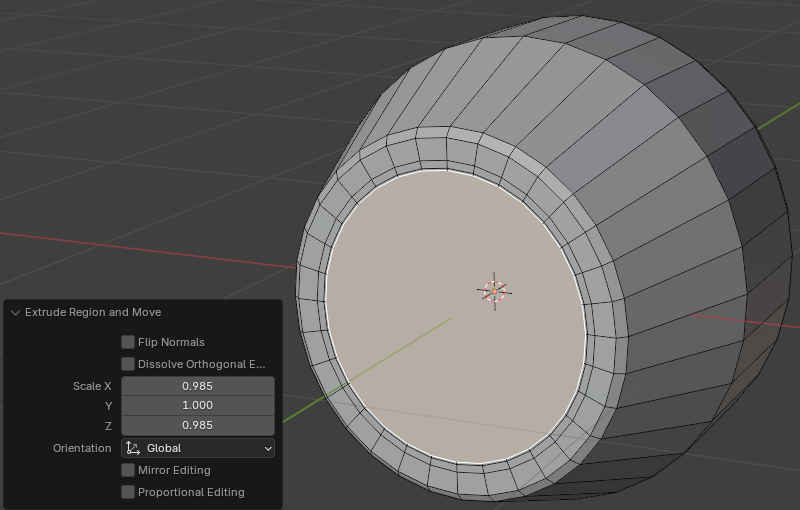
- While the face is still selected, position the mouse on an empty area of the 3D Viewport window. Press E to extrude, then press S to resize, then press Enter
- In the Extrude Region and Move window, change the X and the Z values to 0.95 each:
Scale: X: 0.985
       Z: 0.985
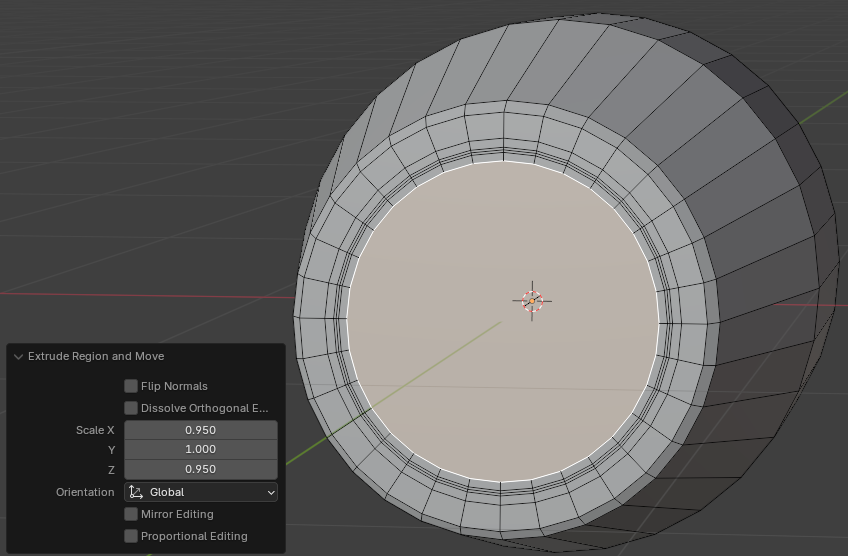
- While the face is still selected, position the mouse on an empty area of the 3D Viewport window. Press E to extrude, then press S to resize, then press Enter
- In the Extrude Region and Move window, change the X and the Z values to 0.95 each:
Scale: X: 0.95
       Z: 0.95
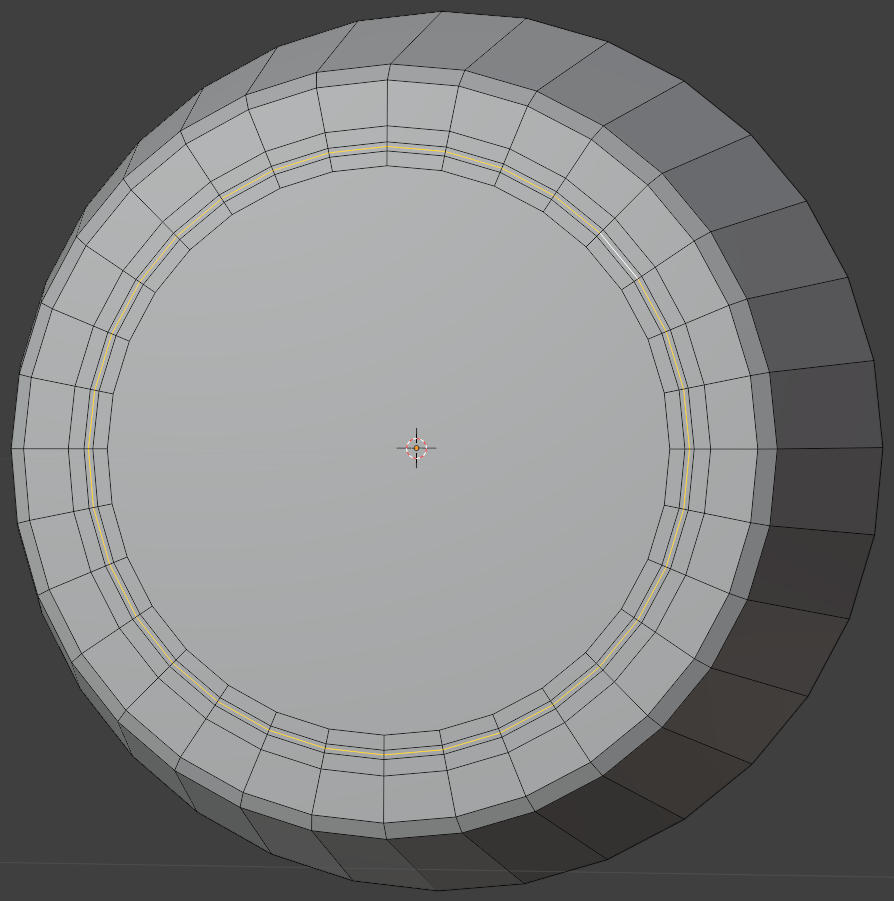
- On the top tool menu, click the Edge button
- Press and hold Alt
- On the shape in the 3D Viewport, click one of the edges of the 5th circle from the external circle
- Release Alt
- Press G slightly and click
- In the Move window, change the values as follows:
Move: X: 0
      Y: 0.25
      Z: 0
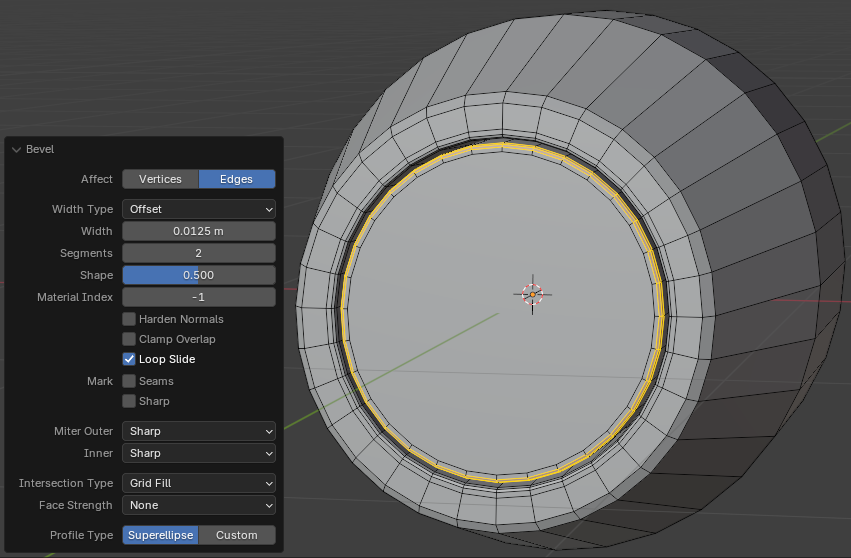
- Press and hold Alt
- Click one of the edges of the 4th circle from the external circle
- Release Alt
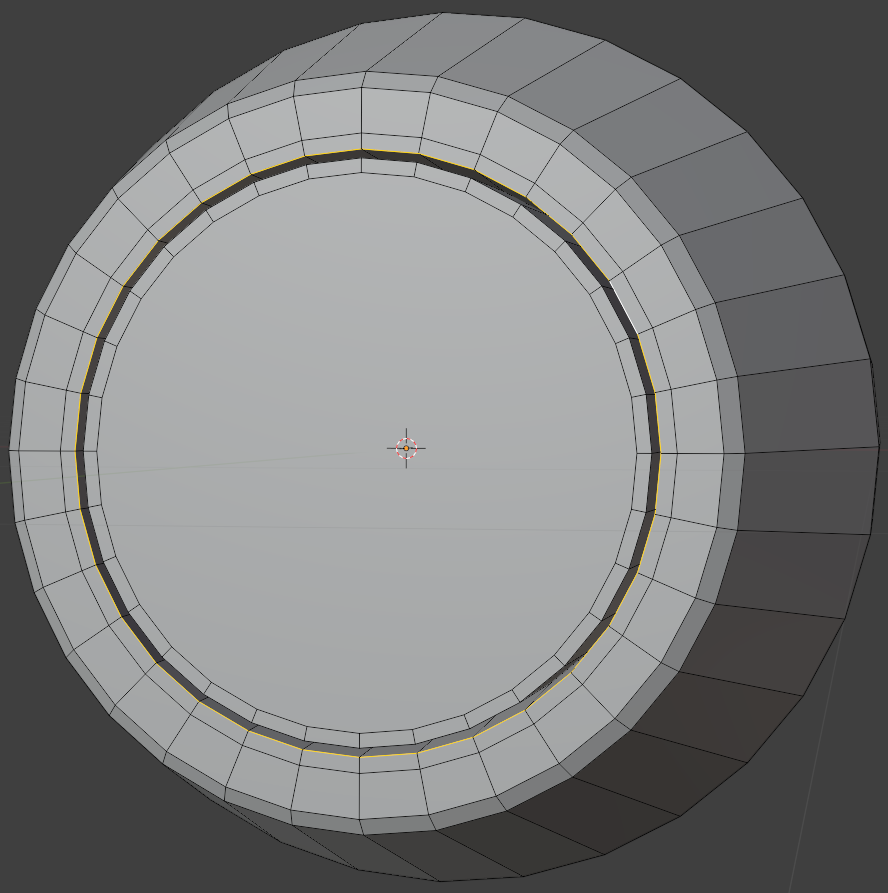
- Press Ctrl + B and press Enter
- In the Bevel window, change the following values:
Width:    0.0125
Segments: 2
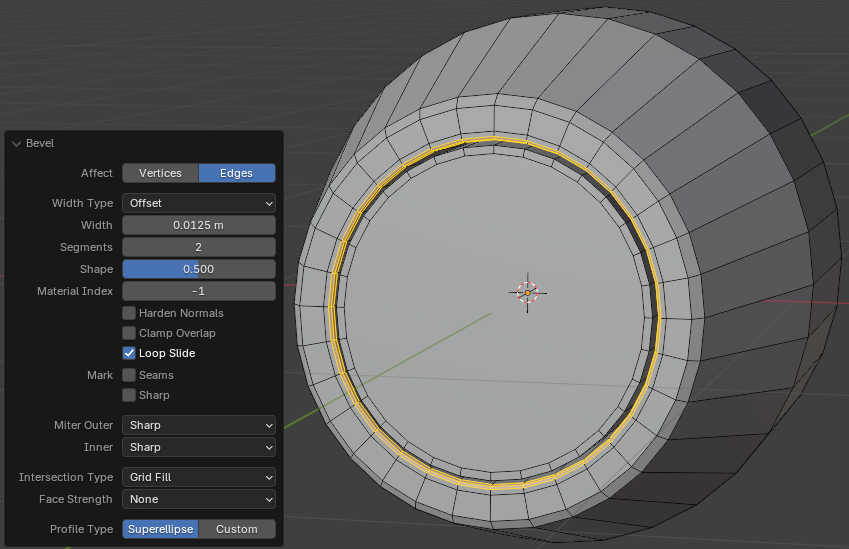
- While the Edge option is still selected, press and hold Alt
- Click one of the edges outside the inner circle
- Release Alt
- Position the mouse in the 3D Viewport window. Press Ctrl + B and press Enter
- In the Bevel window, change the following values:
Width:    0.0125
Segments: 2
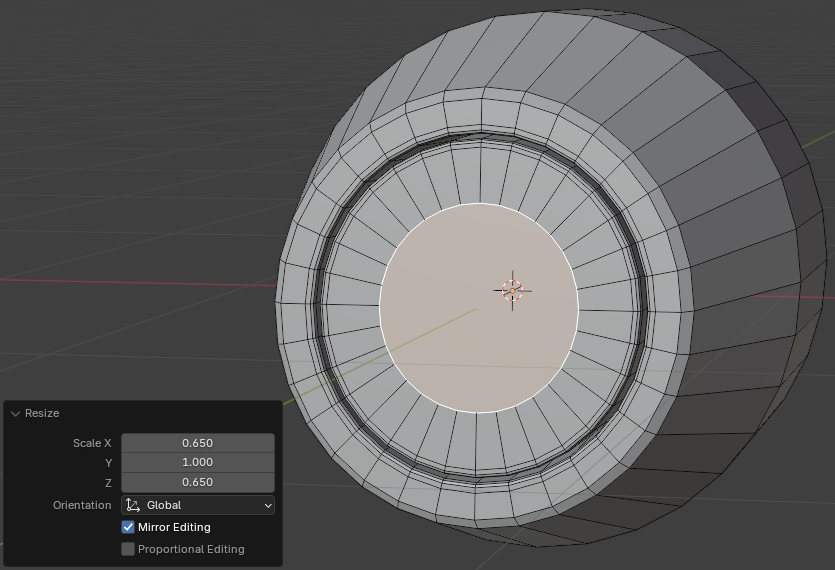
- On the top bar, click the Face button
- Click the large central face to select it
- Press E to extrude
- Then press S to resize, then press Enter
- In the Extrude Region and Move window, change the X and Y values as follows:
Scale X: 0.65
      Z: 0.65
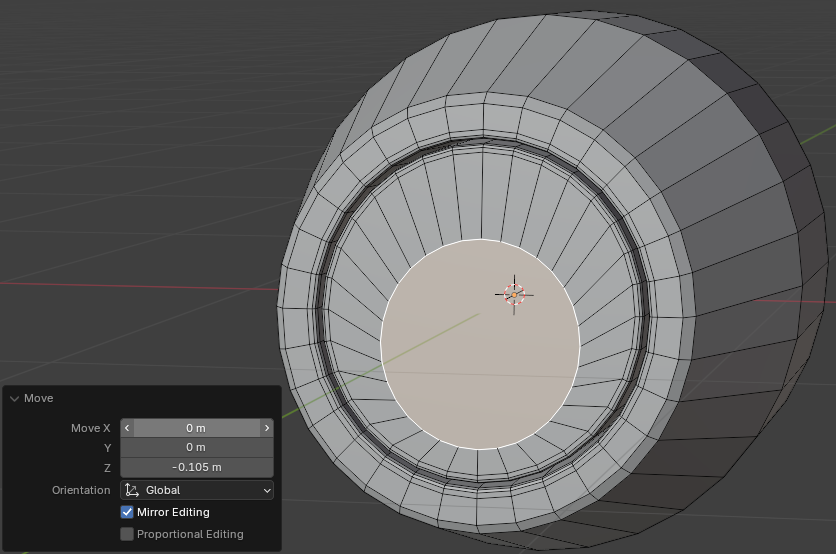
- Position the mouse in the 3D Viewport window. Press G to move the face
- Move the mouse slightly and click
- In the Move window, change the following values:
Move X: 0
          Y: 0
          Z: -0.105
- While the face is still selected, press E to extrude
- Then press S, then press Enter
- In the Extrude Region and Move window, change the following values:
Move X: 0.975
     Z: 0.975
- While the face is still selected, press E to extrude
- Tthen press S, then press Enter
- In the Extrude Region and Move window, change the following values:
Move X: 0.975
     Z: 0.975
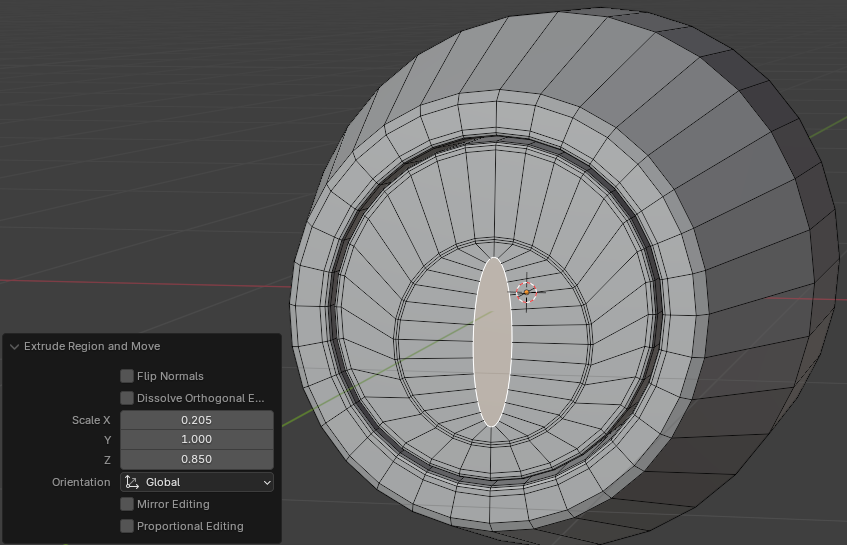
- While the face is still selected, press E to extrude
- Then press S, then press Enter
- In the Extrude Region and Move window, change the following values:
Move X: 0.205
     Z: 0.85
- On the top tool menu, click the Edge button
- Press and hold Alt
- Click one of the edges of the circle between the three circles that were just drawn
- Release Alt
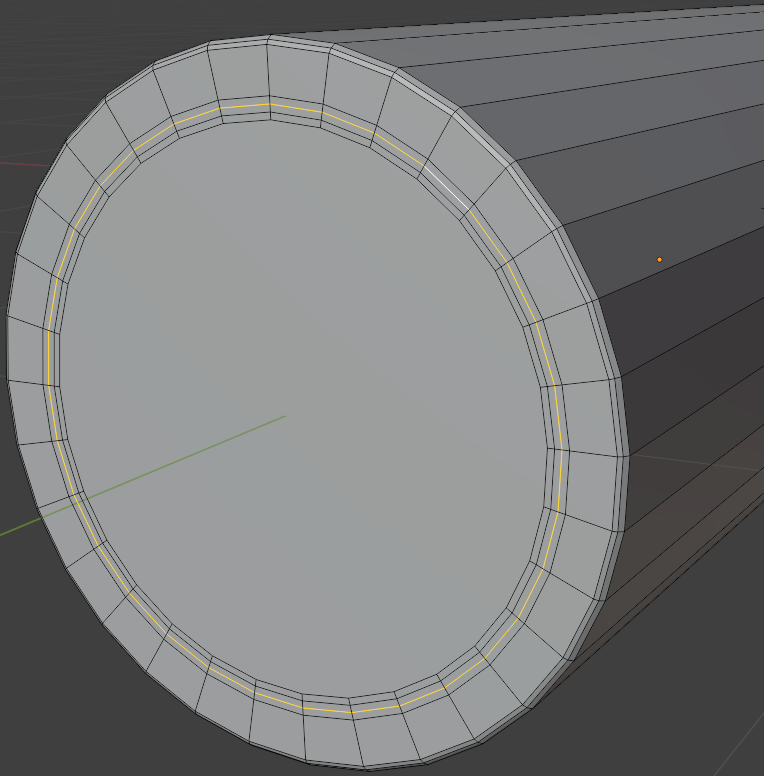
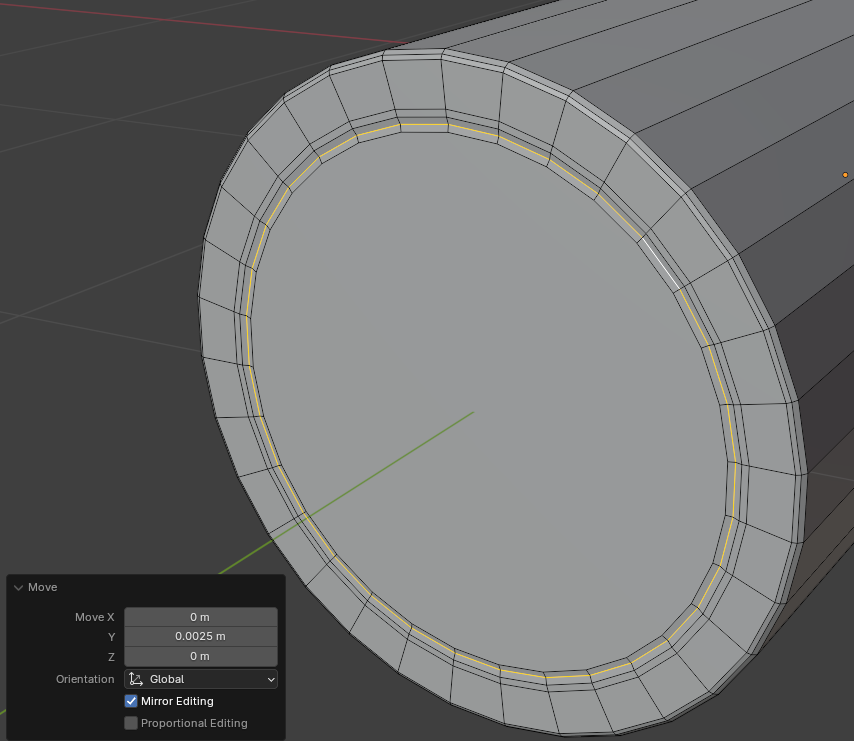
- Press G slightly and click
- In the Move window, change the values as follows:
Move: X: 0
       Y: 0.025
       Z: 0
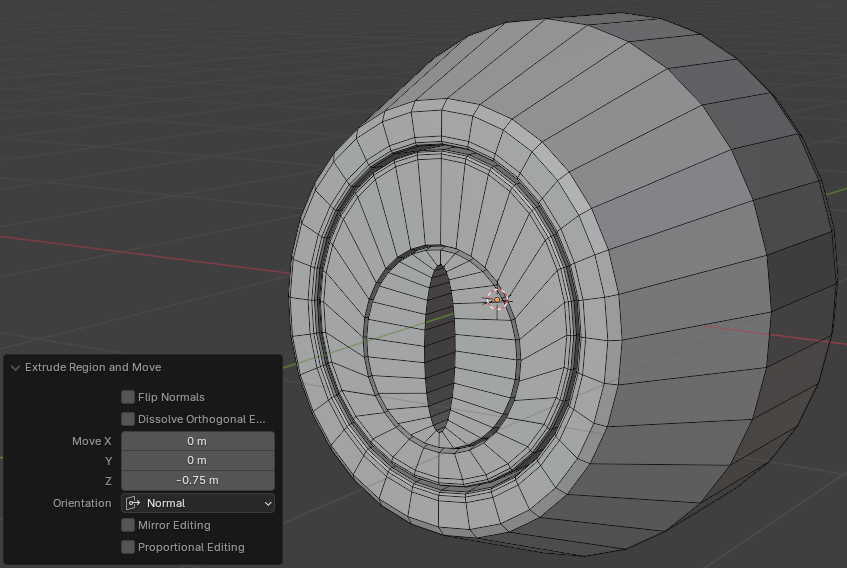
- On the top toolbar, click the Face button
- Click the large oval face on the lock to select it
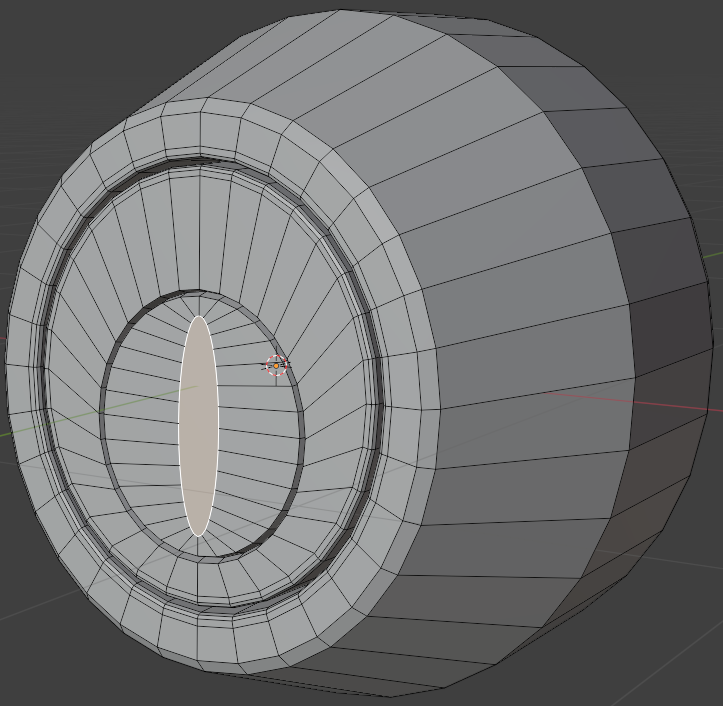
- Press E to extrude and press Enter
- In the Extrude Region and Move window, change the following values:
Move X:  0
     Y:  0
     Z: -0.75
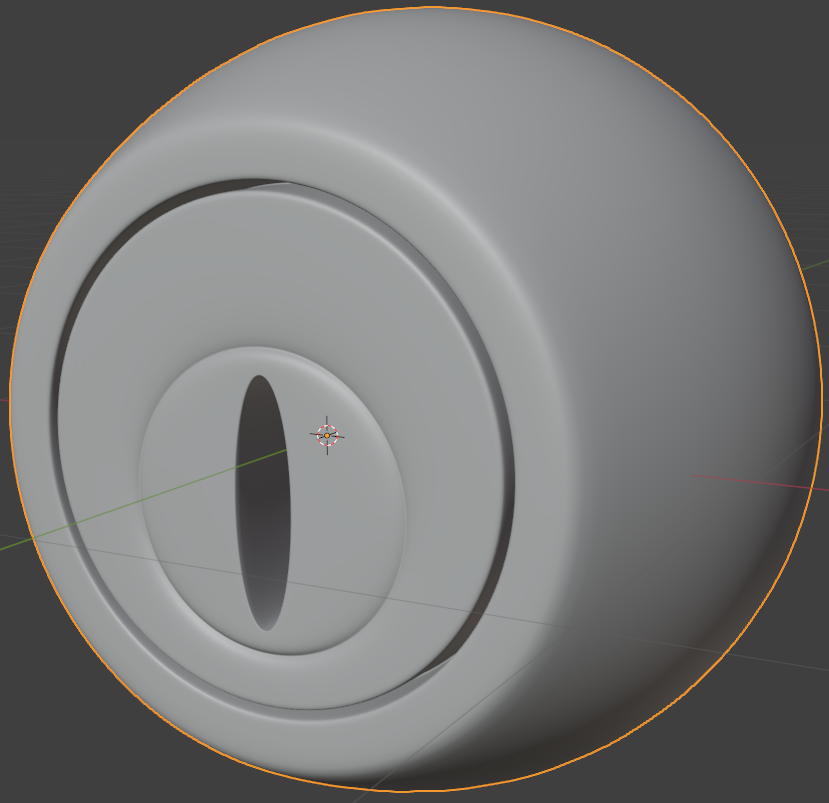
- To save the lock, on the main menu, click File -> Save
- Click Save
- While the lock is still selected, in the Properties window, click the Modifiers button

- In the Properties window, set the Levels Viewport to 2:
Levels Viewport: 2
- Right-click the lock and click Shade Smooth:
- To save, on the main menu, click File -> Save As...
- Set the document name Door-Lock-Simple-2
- Click Save As
Adding Windows
Obviously, a house should have walls and window. In this section, we will add them to the model.
Finalizing the Interior Door
Practical Learning: Finalizing the Interior Door
- Click the default cube to select it (it should be selected already)
- In the Properties window, click the Object button (it should be selected already) to access the primary properties of the cube
- To add a window, position the mouse on the top-right side of the window until the mouse cursor appears as +
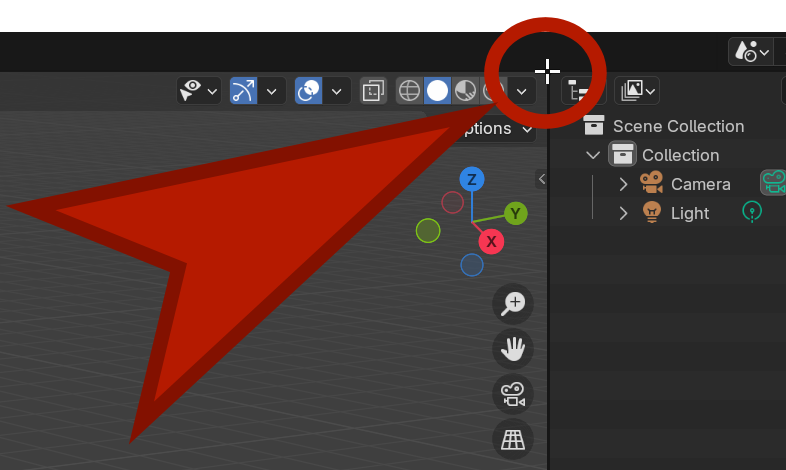
- Click and drag in the left direction and click
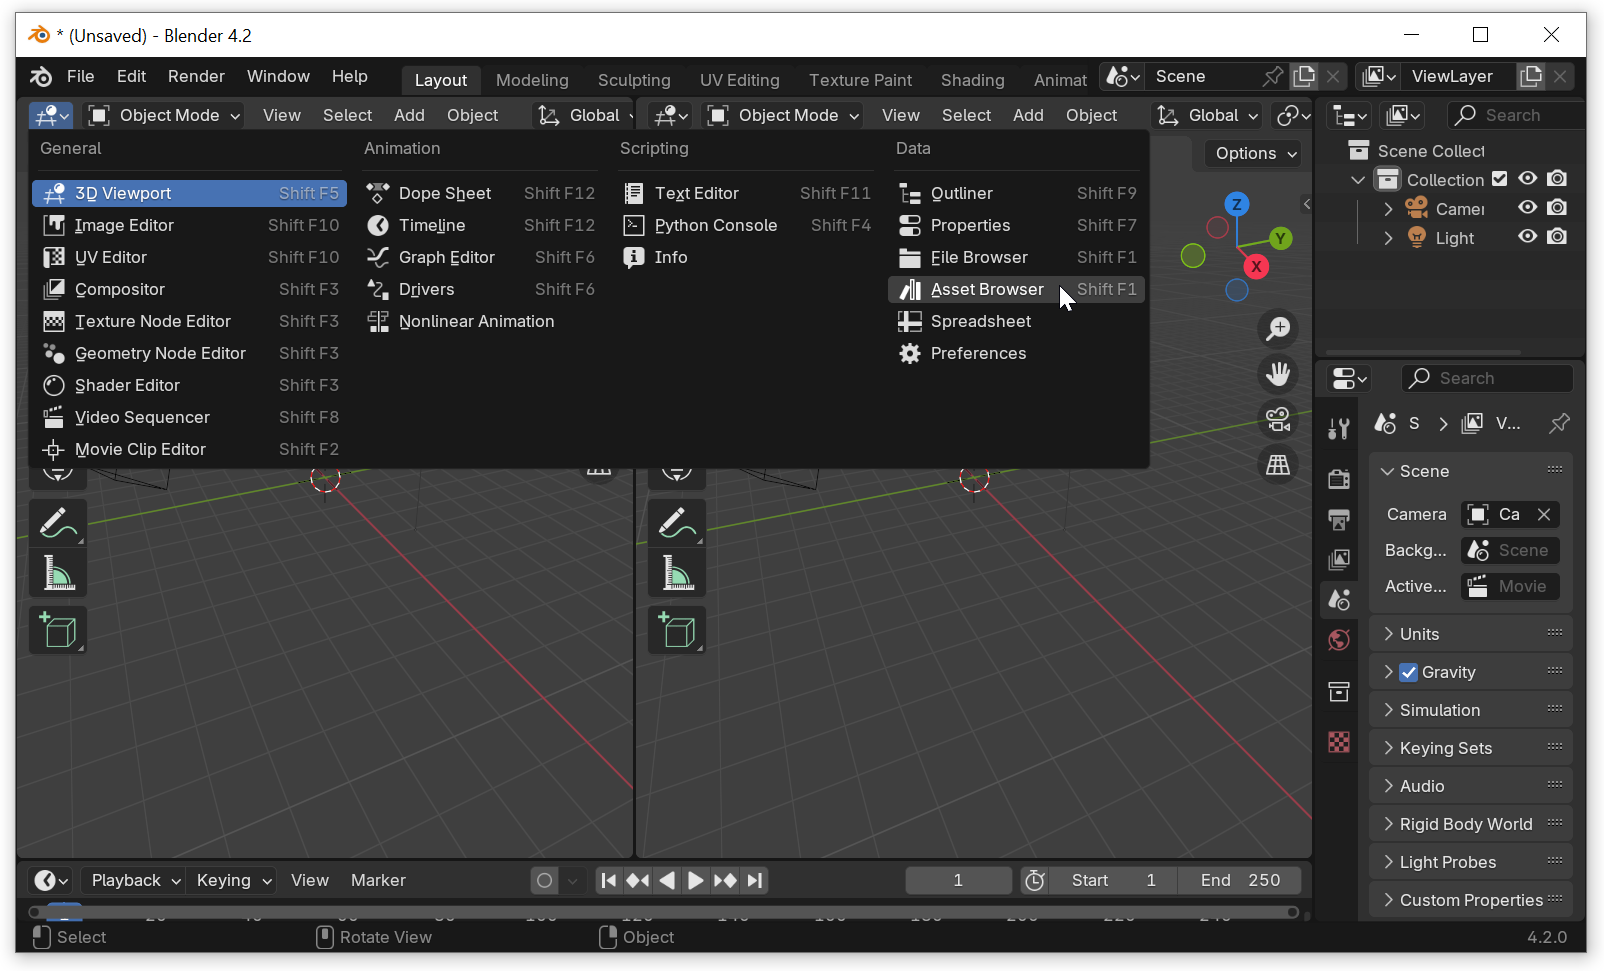
- Click the button in the top-left section of the right panel and select Asset Browser
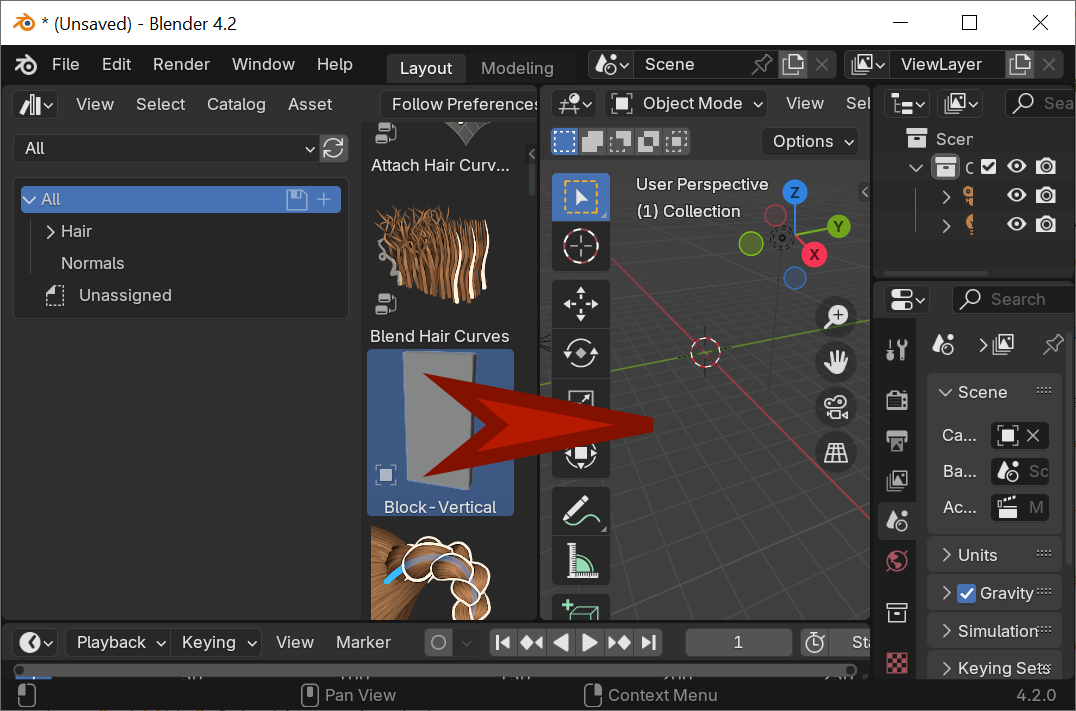
- From the Asset Library window, drag Door-Frame-Simple to the 3D Viewport. In the 3D Viewport, drop the object in an occupied area, not on a wall of the house
- On the left toolbar, click the Move button
- From the Asset Library window, drag Door-Leaf-Simple to the 3D Viewport. In the 3D Viewport, drop the object in an occupied area, not on a wall of the house
- In the Asset Library window, click Door-Leaf-Simple to add it to the selection
- Release Ctrl
- In the Asset Library window, drag the selected items and drop the group in the 3D Viewport
- Close Blender
- When asked whether you want to save, click Don't Save
- In a previous lesso method overloading, we saw that a method can get overloaded if you create more than one version in the same class. We also saw that the versions of the method must differ by their syntax or signature. Remember that the signature of a method doesn't include its return type. Based on this, you cannot overload a method based on the fact that one version returns a tuple and another does not.
- To overload a method that involves tuples, you will rely on the parameters. You can create a method that has different versions. Two or more versions of a method can take one tuple parameter each; each tuple-parameter can have the same number of elements but the elements can be different. Consider the following example:
This would produce:
Method Overloading and Tuples
On the other hand, you can overload a method by passing a mixture of primitive types and tuples.
Tuples and Properties
Introduction
You can create a property whose type is a tuple. To start, in the body of the class, you can declare a field variable that is a tuple type. Here is an example:
public class Member
{
}
To get the property, create a property that has a return type as a tuple. Here is an example:
A Read-Only Tuple Property
A read-only property is a a property with only a get clause. For a tuple property, make the get clause return a private field that has the same return type as the property. Here is an example:
    }
}
If you want to use the property outside its class, it must have a value, which it cannot get on its own because it is a read-only property. The most common way you can initialize this property is by using a constructor that uses a parameter of the same tuple type as the property. After initializing the property, you can get its value and use it. Here is an example:
mbr.WriteLine("===============================");.fee}");
This would produce:
A Fully-Implemented Tuple Property
As seen in our introduction to properties, if you want to control the details of processing a property, you can create a private field that is the same tuple type as the property. Then add either or both a get and a set clauses. Here is an example:
An Automatic Tuple Property
If you are not planning to validate, accept, or reject the values of the property, you can create the property as an automatic one. Here is an example:
    public (bool, string, PayFrequency, double) Salary { get; set; }
}
When creating the property, it is a good idea, although not a requirement, to name the elements of the tuple. It may also be a good idea to add comments that explain the roles of the elements of the tuple. Here is an example:
}
As mentioned in the previous lesson, if you don't name the elements of a tuple, the compiler gives them some default names as Item1, Item2, etc.
When using the property, you may need to access the elements of its type. You will access them by their names. From inside the class, such as in the body of a clause of another property or in the body of a method of the same name, type the name of the desired property, type a period, and select the element of your choice. Here is an example:
When using the property outside the class, if you have declared a variable of the class that owns the property, type the name of the object, a period, the name of the property, a period, and the desired element. Here is an example:

Once you have accessed the property or any of its elements, you can use it like any property as we have done in previous lessons.
If you create an automatic tuple property, you cannot individually initialize the elements of the tuple property. Still, you can access the elements to present to the user. Here is an example:
This would produce:
Topics on Tuples
Methods and Tuples
We saw how to involve tuples with functions. Everything we saw about passing a tuple as argument and returning a tuple can be applied exactly the same way to the methods of a class. Normally, methods deal with tuples exactly as we described for functions, with just minor adjustments. It is important to remember (as stated in our introductory lesson on functions) that a function is a section of code that behaves as if it written outside of a class. Otherwise, everything we studied about involving tuples and functions also applies to methods. This means that you can pass a tuple to a method and you can return a tuple from a method.As you know already, a method is a function created inside a class. As you know already, if you create a method, it has direct access to other members of the same class. In a method, you have direct access to the names of the tuples. To access an element of a tuple, type the name of the member, a period, and the desired member. That way, you can initialize a tuple. Here is an example:
An Object in a Tuple
All the elements we used so far in tuples were of regular types. In reality, each element is a placeholder for practically any type you want. Based on this, an element of a tuple can be an object of a structure or class type. Of course, you must have a class. You can create and use your own class. Here is an example of a class named Trapezoid created in a Windows Forms application named Geometry:
When creating the tuple, specify the desired element using the name of the class. Here is an example:
Trapezoid isosceles = new Circle();

(Trapezoid shape
When initializing the tuple or when specifying its value, you must define the object used as element. You have various options:
- You can first create an object and pass it in its placeholder of the tuple. Here is an example:
To access a member of the class, such as its property or methof, type the name of the tuple, a period, the name you gave to the element or the item_x default name, a period, and the name of the class member. Here is an example
using static System.Console;

Trapezoid trap = new Trapezoid();
trap.TopBase = 244.86;
trap.BottomBase = 384.92;
trap.Height = 175.74;
string msg = "An isosceles trapezoid is a quadrilateral with two opposing sidesl.";

(, string description) shape = (trap, msg);

WriteLine("Area: {0}",
}
- You can define the object in its placeholder of the value of the tuple. Here is an example:
}
Here is an example of running the program:
Top Base:    228.97
Bottom Base: 406.66
Height:      214.83
-------------------------
Area:        68276.19645
=========================

Press any key to close this window . . .
- You can create a function or method that returns an object of the class, then call that function in the placeholder in the tuple. Here is an example:
Here is an example of running the program:
Top Base:    228.68
Bottom Base: 369.37
Height:      273.69
-------------------------
Area:        81840.15225
=========================

Press any key to close this window . . .
In the above example, we used a tuple that has one element that is a class type. In the same way, you can create a tuple with more than one element that are of class or structure type. The elements can be of the same class (or structure) or different classes (or structures).
In the above example, we used our own class. On the other hand, we know that the .NET Framework provides a large collection of classes and structures. You can use any of most of the many classes of the .NET Framework for an element of a tuple.
The Name Involving a Tuple
We already know that, to help you identify something in your code, the C# language provides an operator named nameof. You can use this property on anything that involves a tuple, including a variable of a tuple type, a property of a tuple type, a function or method that returns a tuple, or a function or property that takes a tuple as argument. Here are examples:
using static System.Console;

(int nbr, string status, double salary) employee = (937_842, "Full Time", 22.48);

(string fname, string lname) Identify()
{
    return ("Frank", "Lanson");
}

House house = new House()
{
    PropertyNumber = 938_448,
    Rooms = (5, 3.5),
    MarketValue = 545_760
};

void Present(int nbr, (string title, House prop) listing)
{
    WriteLine(listing.title);
    WriteLine("----------------------------------");
    WriteLine("Listing #:   {0}", nbr);
    WriteLine("Property #:   {0}", listing.prop.PropertyNumber);
    WriteLine("Bedrooms:     {0}", listing.prop.Rooms.beds);
    WriteLine("Bathrooms:    {0}", listing.prop.Rooms.baths);
    WriteLine("Market Value: {0}", listing.prop.MarketValue);
}

WriteLine("Employee Record");
WriteLine("----------------------------------");
WriteLine("Employee #:    {0}", employee.nbr);
WriteLine("Employee Name: {0} {1}", Identify().fname, Identify().lname);
WriteLine("Employment Status: {0}", employee.status);
WriteLine("Hourly Salary: {0}", employee.salary);
WriteLine("==================================");

Present(1001, ("Property Listing", house));

WriteLine("==================================");
WriteLine("Name of Tuple Variable: {0}", nameof(employee));
WriteLine("Name of Tuple Function: {0}", nameof(Identify));
WriteLine("Name of Object:         {0}", nameof(house));
WriteLine("Name of Tuple Property: {0}", nameof(house.Rooms));
WriteLine("Name of Function:       {0}", nameof(Present));
WriteLine("==================================");

internal class House
{
    public int PropertyNumber { get; set; }
    public (int beds, double baths) Rooms { get; set; }
    public double MarketValue { get; set; }
}
Practical Learning: Ending the Lesson
- Close Microsoft Visual Studio